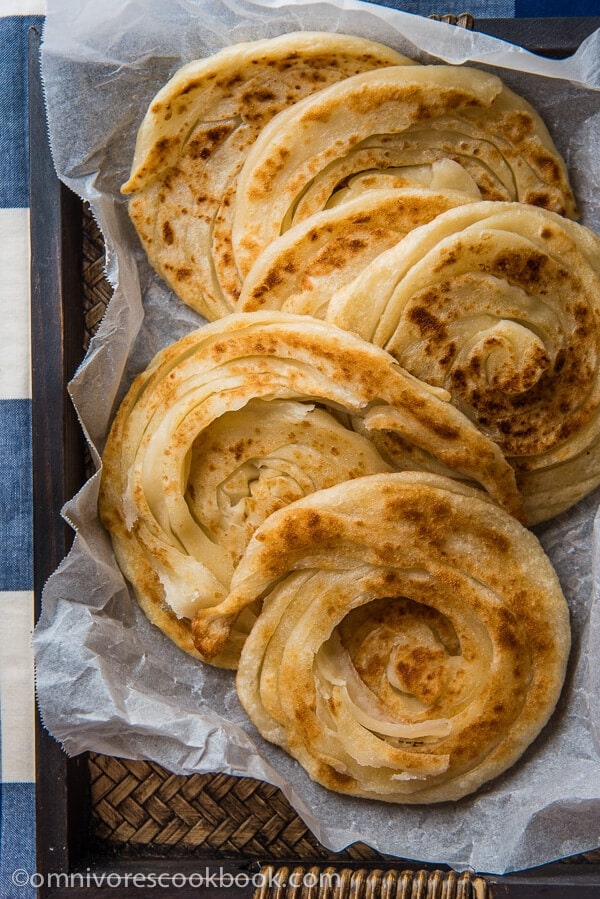
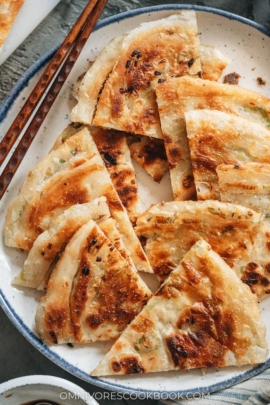
This bing bread is buttery-creamy in texture and crispy-crunchy on the surface. Simply seasoned with peanut oil and salt, it has such an addictive flavor that just makes you want more!
Chinese bing bread (家常饼, jia chang bing) should be known by more people around the world. It’s a humble food, of which you can easily get a dozen for less than two dollars at most small markets in Beijing. Its flavor is so simple and delicious that I consider it to be the best staple food.
To speak of stable foods in Chinese cuisine, there are countless varieties of them, including noodles, dumplings, rice, porridge, steamed buns, and so on. The bing bread is a bit more special than the rest. Although it doesn’t have any filling, it uses a technique to combine oil and salt to create a savory flavor and crispy, layered texture. It is delicious enough to serve by itself. If you have it at a restaurant or farmer’s house, the texture will be as light as puff pastry. Seriously!
However, the perfect bing bread is a bit challenging to make at home. To make a restaurant-style bing (like puff pastry), you need to make a super soft dough that you can barely lift by hand. You need to roll super wet dough out into a huge thin sheet and create layers from there. I tried it several times at home. Although I can still make it work (it tasted heavenly, by the way!), the cooking process can get quite messy.
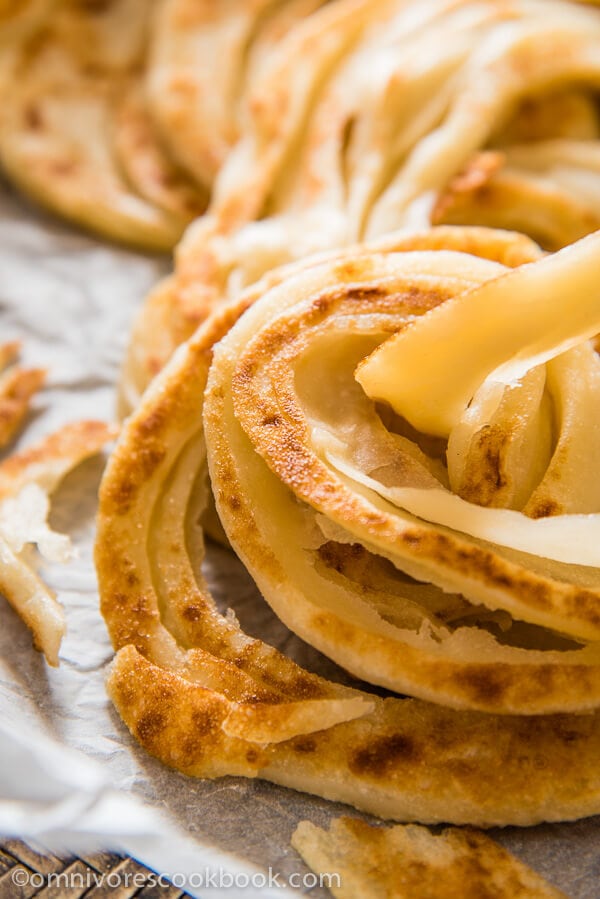
In this recipe, I altered the flour-water ratio to make a slightly drier dough, so you can easily cook it at home. It will still yield a super crispy bread with lots of layers and a creamy, nutty texture.
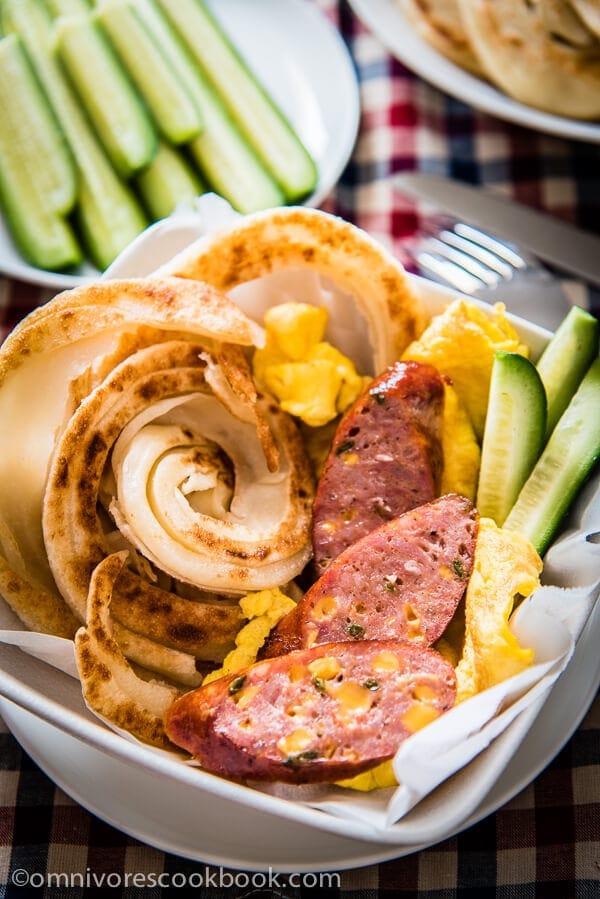
With this bread, you don’t really need anything else to serve it with. It tastes wonderful by itself. We usually serve simple porridge and stir-fried vegetables with it. However, if you want big flavor, you could top it with scrambled eggs and even sausage. Or, you could brush some sauce on the bread, such as fermented bean paste (dou ban jiang), but I rarely do that. The sauce is too strong and will cover the nice fragrance of the bread.
Menu Ideas
{Vegan} bing bread + millet porridge + 15-minute okra stir-fry (or bok choy stir-fry with crispy tofu)
{Feeling fancy} bing bread + hot and sour soup + braised chicken with mushrooms (can be prepared ahead)
{Healthy dinner} bing bread + Thai Brussels sprouts salad
If you make this bing bread, don’t forget to take a picture and tag it #omnivorescookbook on Instagram. I love seeing your photos!
Crispy Bing Bread (家常饼)
Ingredients
- 500 grams / 17 ounces all-purpose flour *see conversion to cups
- 1 cup boiling water
- 1/2 cup room temperature water *see footnote 1
- 4 tablespoons peanut oil or lard or chicken grease
- 1 and 1/2 teaspoons salt
Instructions
- Add flour into a large bowl.
- Slowly add boiling water and mix the flour with a pair of chopsticks (or a spatula), until water is fully absorbed.
- Slowly add room temperature water, continuing to mix, until water is fully absorbed and there is no dry flour on the bottom of the bowl.
- Dust both hands with flour and start to knead the mixture, until dough forms. The dough should be quite sticky and difficult to lift from the bowl.
- Dust a working surface (or a large cutting board) with flour. Transfer the dough to the working surface and knead for another 5 minutes.
- Dust the same big bowl with flour and transfer the dough to the bowl. Cover the dough with a wet clean kitchen towel and place a lid on the bowl. Let rest for 1 hour.
- Dust both hands and the working surface again with flour. Transfer the dough to the working surface.
- Knead the dough for another 3 minutes, until the texture becomes smooth.
- Divide the dough in half. Divide each half further into 4 equal pieces (*see footnote 2). Transfer half of the dough into the bowl and cover with the wet kitchen towel, to keep it from drying out.
- Work on the dough pieces one at a time. Use a rolling pin to roll the dough into a thin rectangular sheet, about the thickness of a dollar coin. Lift up the thin sheet once in the middle of rolling, to prevent the dough from sticking to the working surface.
- Brush a thin layer of oil on the dough. Evenly spread salt on top.
- Fold the dough accordion-style back and forth, until the dough becomes a long strip. Flip the dough to let it stand, oiled side up. Tug and roll the dough from one end like a swirl, until it’s shaped like a snail shell. Set aside.
- Continue to work on the rest of the dough pieces in the same way.
- Heat a tablespoon of oil in a nonstick skillet over medium heat until warm.
- Press the dough until it’s shaped like a disk, about 0.6mm (1/5 inch) thick.
- Place the dough in the skillet. Grill each side for about 2 minutes, until both sides turns golden brown. If the skillet starts to get too hot, turn to low heat. Transfer the bing bread to a plate. (*see footnote 3) Continue to press and cook the rest dough pieces.
- Serve warm as a side.
Storage and reheating
- Store leftovers in an airtight container in the fridge for up to 3 days, or in the freezer for up to a month.
- To reheat, heat a nonstick skillet over medium heat until warm. Place the bread inside. When the skillet is hot, flip the bread. Add 1 tablespoon water and cover the skillet immediately. Turn to low heat and cook until heated through.
Notes
2. In this recipe I made 8 small bing breads. The smaller dough is easier to work with. If you are confident in your skills, you could make bigger bread by dividing the dough into 4 or 6 pieces.
3. When you cook the bread, try to control the heat so that the skillet is neither too hot nor too cold. If it is too hot, the bread will easily burn. If too cold, the bread will lose moisture and dry out before cooked through.
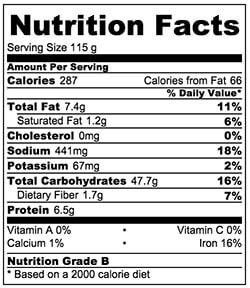
The nutrition facts are calculated based on 1 of the 8 breads generated by this recipe.



The words I would use to describe these are dense and heavy. If I knew what they were supposed to taste like, I might try again with less flour… but not at all motivated at this point.
Wow, I’m so glad I found this blog! I love how you provide so many recipes to authentic Chinese dishes (i.e. dishes that my relatives in China would recognize). I’m Chinese American and this is a wonderful way for me to connect to my Chinese heritage. Thank you so much! Can’t wait to start cooking!
Hello, where can I find the step by step pictures for the recipe? I see that other comments have mentioned them, but they don’t show up for me.
Hi Annie, I lost the pictures when I updated my website. Now I’m working on re-creating the step photos and I’ll publish them once finished.
Meanwhile you can refer to this post: http://omnivorescookbook.com/chinese-scallion-pancakes/
The shaping method is the same.
its funny to me as some measurements are in g/ and the rest in imperial make me crazy but it was really good this recipe