
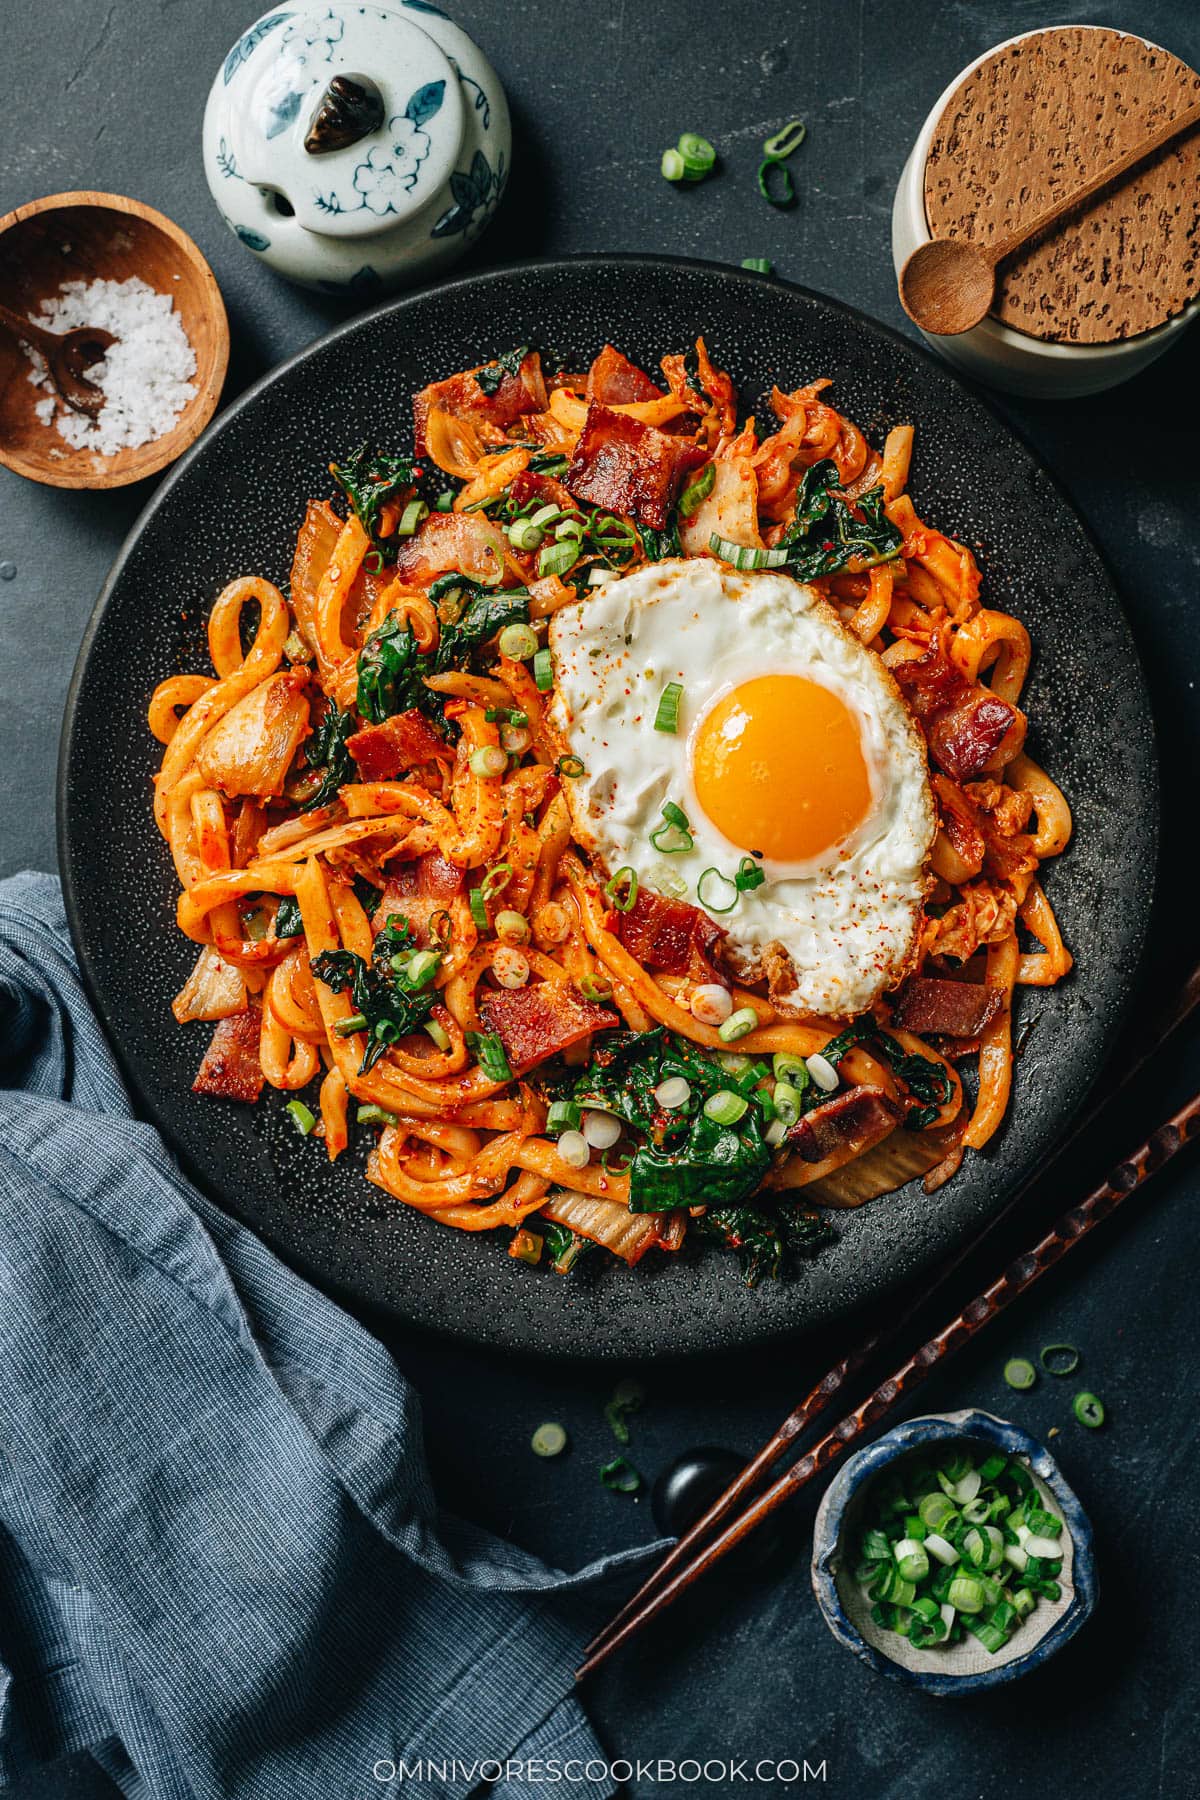
This Korean-Japanese fusion noodle dish is made with chewy udon tossed in a savory, spicy gochujang kimchi sauce. I adapted it from the cookbook That Noodle Life by Mike and Stephanie Le of I am Food Blog, with a few changes to suit my own taste. The kimchi does most of the work, so I do not need a long ingredient list to get real depth into the pan.
My husband and I keep a big jar of kimchi in the fridge at all times, so this is what I cook on the nights I want dinner ready before the rice cooker would even finish. The first time I ate Udon this chewy was at a Japanese noodle counter, and pairing it with kimchi and bacon was the change that made it a regular in my own kitchen. If you like the deep savory notes in a stew like Budae jjigae, this scratches the same itch in a fraction of the time.
I fry the bacon first to render out the fat, thaw the Udon in warm water so it stays springy, then cook the kimchi and kale and toss everything in the gochujang sauce at the end. The bacon goes back in with a splash of kimchi juice, and a raw egg yolk on top finishes it. I highly recommend you to make this the next time the fridge is down to kimchi and a package of noodles, my directions below take you from cold pan to hot bowl in 25 minutes. I mean, it doesn’t get any easier than this.
Ingredients
I use a few ingredients to make this Bacon Kimchi Fried Udon, and the two ingredients that decide the whole flavor in my opinion are the kimchi and the gochujang, so I do not skimp on either.
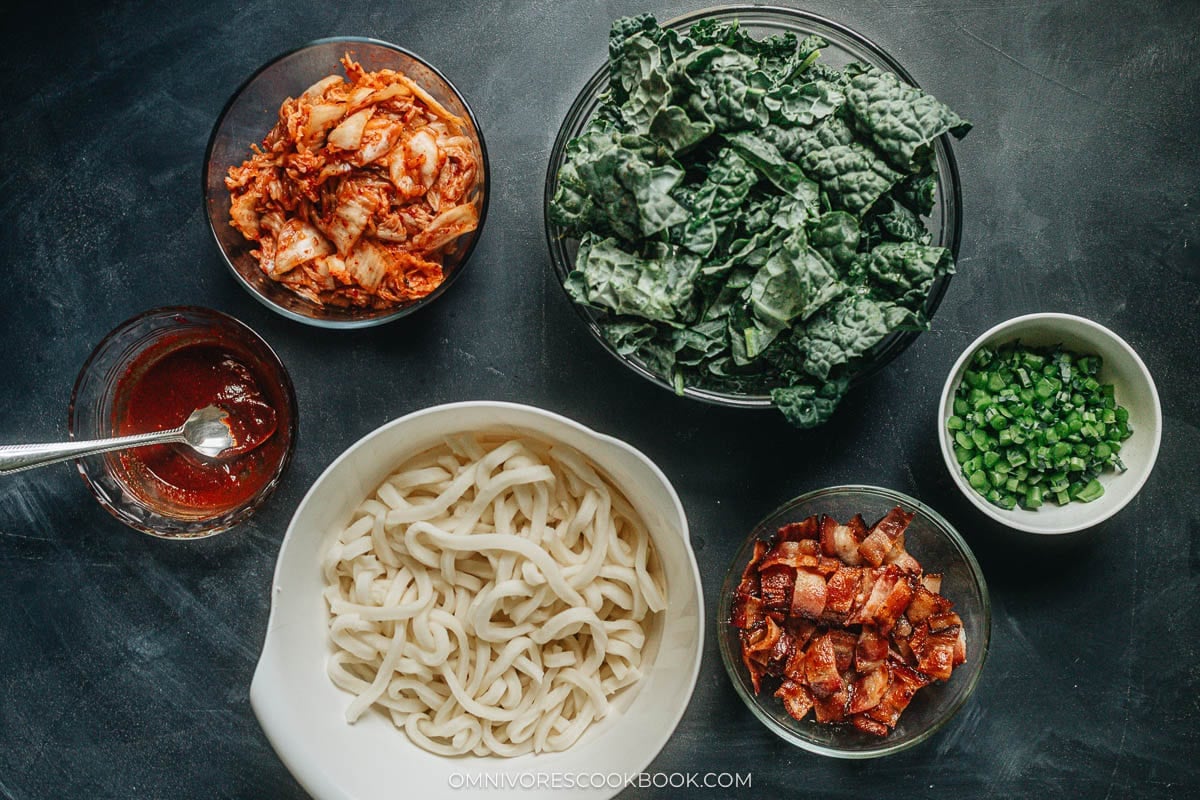
Bacon: I prefer thick-cut bacon for its meaty, chewy texture, but regular sliced bacon works well too. I cook the bacon first, then leave the rendered fat in the pan to add richness and flavor to the noodles. For a lighter dish, you can drain the bacon fat and use a little cooking oil instead.
Udon: I typically use frozen Sanuki style udon because it stays extra thick and chewy after a quick thaw. If frozen udon is not available, dried udon works well too. Cook it according to the package instructions until just tender, taking care not to overcook it since the noodles will cook briefly again in the pan.
Kimchi: I chop it and keep the juice, because both the cabbage and the brine season the dish.
Kale: I separate the stems from the leaves and slice the stems thin so they cook quick.
Gochujang and soy sauce: I stir gochujang and soy sauce together before I start cooking. I love how the gochujang provides a spicy, savory, and a touch of sweet, and the soy sauce rounds it out with salt.
Peanut oil: I cook in peanut oil for its high smoke point, or I use unsalted butter when I want a richer finish. Other neutral oil such as vegetable oil works as well.
Toppings: I finish with a raw egg yolk or a sunny side up egg, crispy nori, shichimi togarashi, and sliced green onions. Feel free to add anything you like best.
How to Make
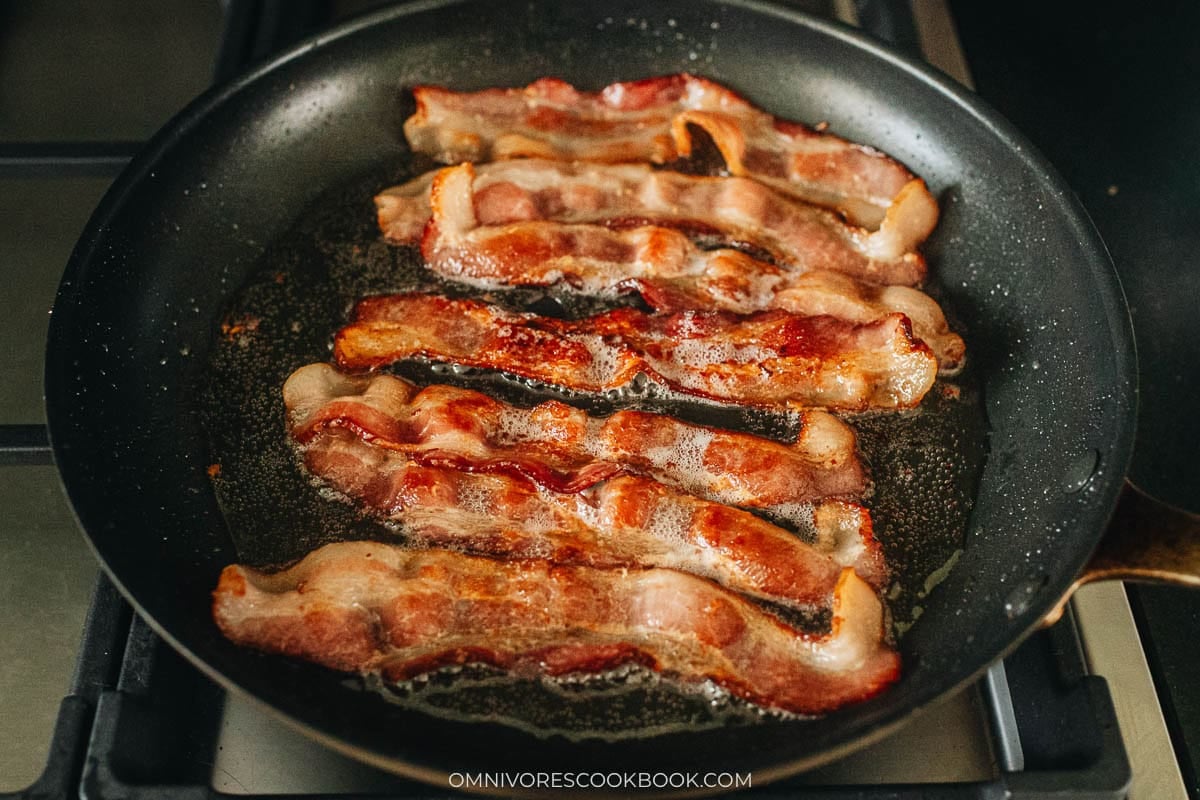
1. Cook the bacon: Lay the bacon in a large skillet in a single layer without overlapping. Heat over medium heat until sizzling, then lower to medium-low. Cook, flipping occasionally, until golden brown and crispy, 6 to 10 minutes.
2. Chop the bacon: Transfer the bacon to a paper towel lined plate. Once it is cool enough to handle, slice it into 1 inch pieces and set aside. Wipe the skillet clean with paper towels.
3. Thaw the udon: While the bacon cooks, fill a large bowl with warm tap water and add the frozen udon. As soon as the noodles are loosened and warmed, 2 to 3 minutes, drain well and set aside so they do not overcook.
4. Mix the sauce: Stir the gochujang and soy sauce together in a small bowl until well combined.
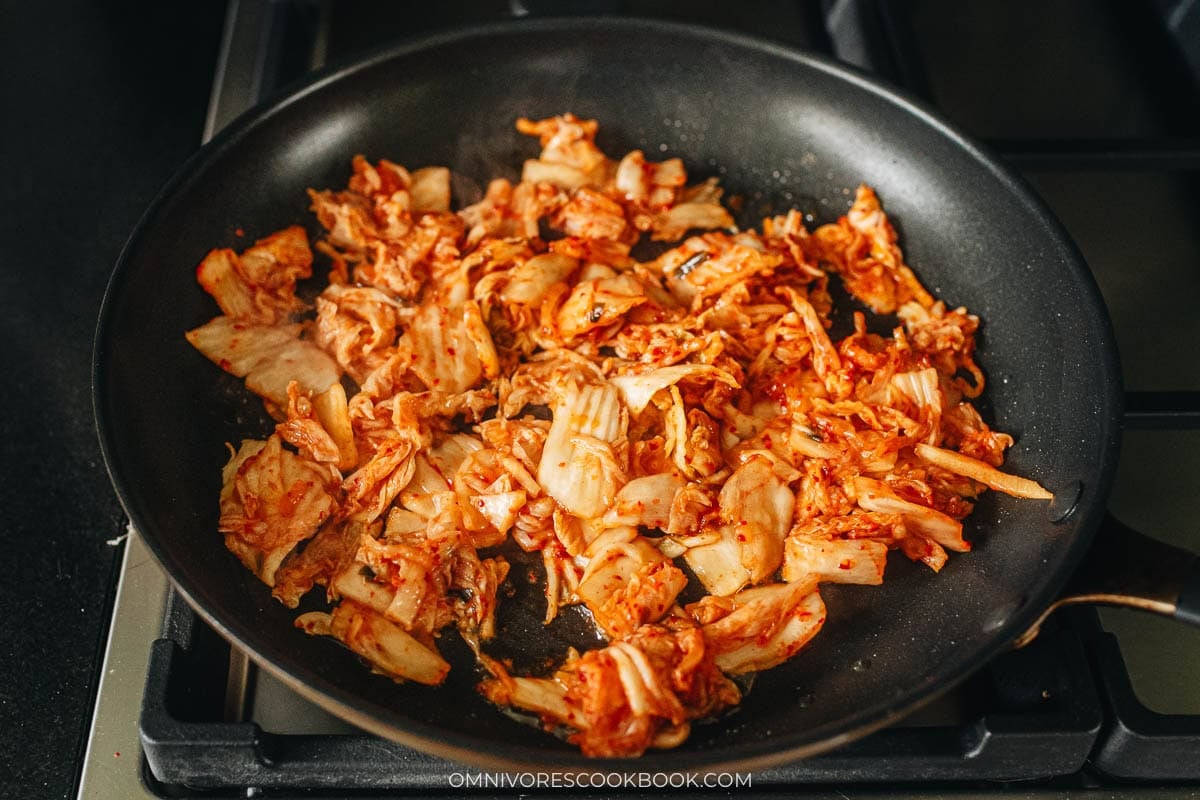
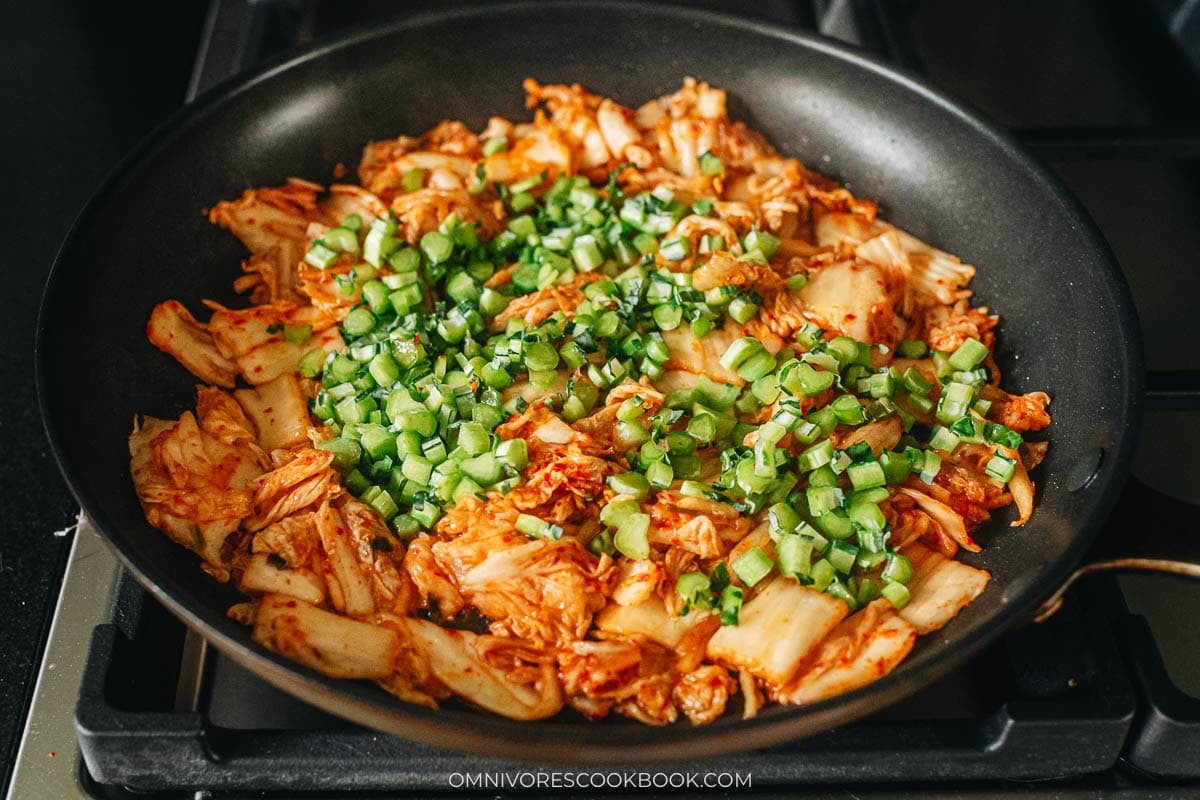
5. Cook the kimchi and kale stems: Return the pan to medium heat and add the peanut oil. Add the chopped kimchi and the kale stems. Stir and cook for 1 minute.
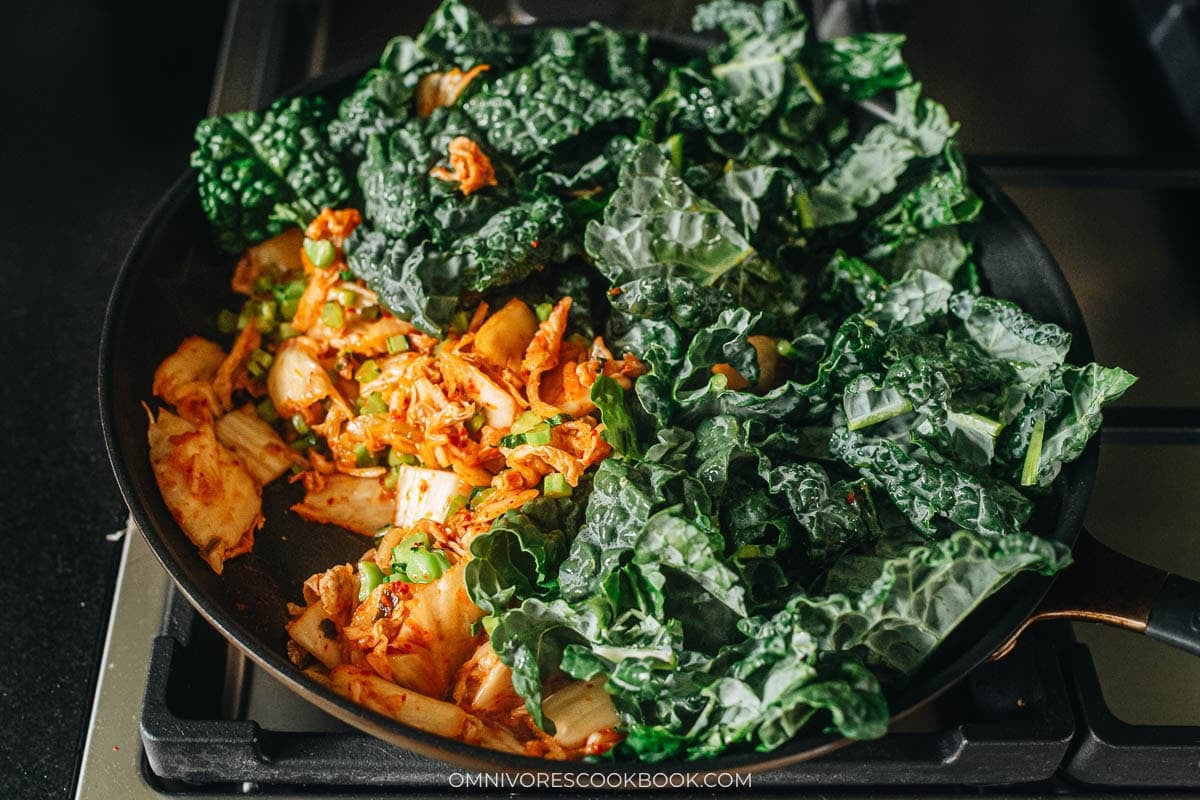
6. Wilt the kale leaves: Add the kale leaves. Cook for 1 to 2 minutes until the leaves are wilted.
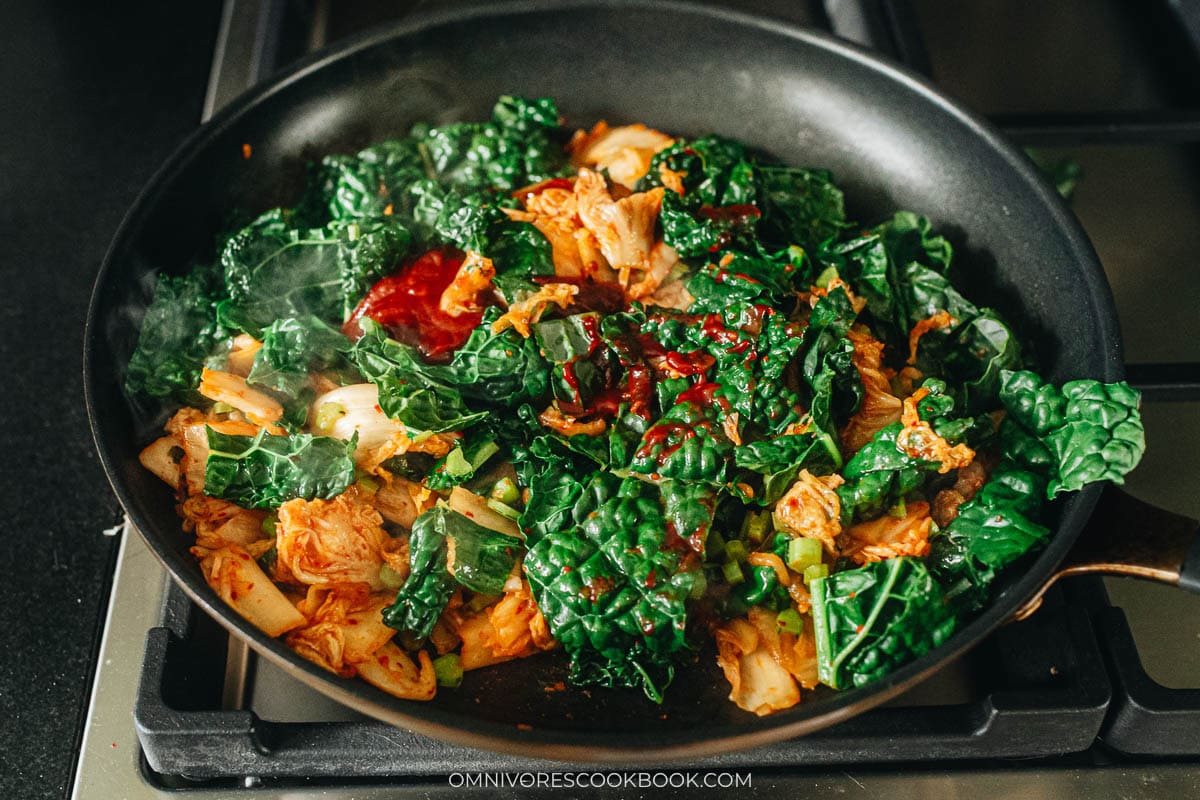
7. Add the sauce: Stir in the gochujang soy sauce mixture and toss to coat everything. Remove the pan from the heat.
8. Toss it together: Add the noodles, kimchi juice, and bacon. Cook over low heat and toss constantly until the noodles are coated, 1 to 2 minutes.
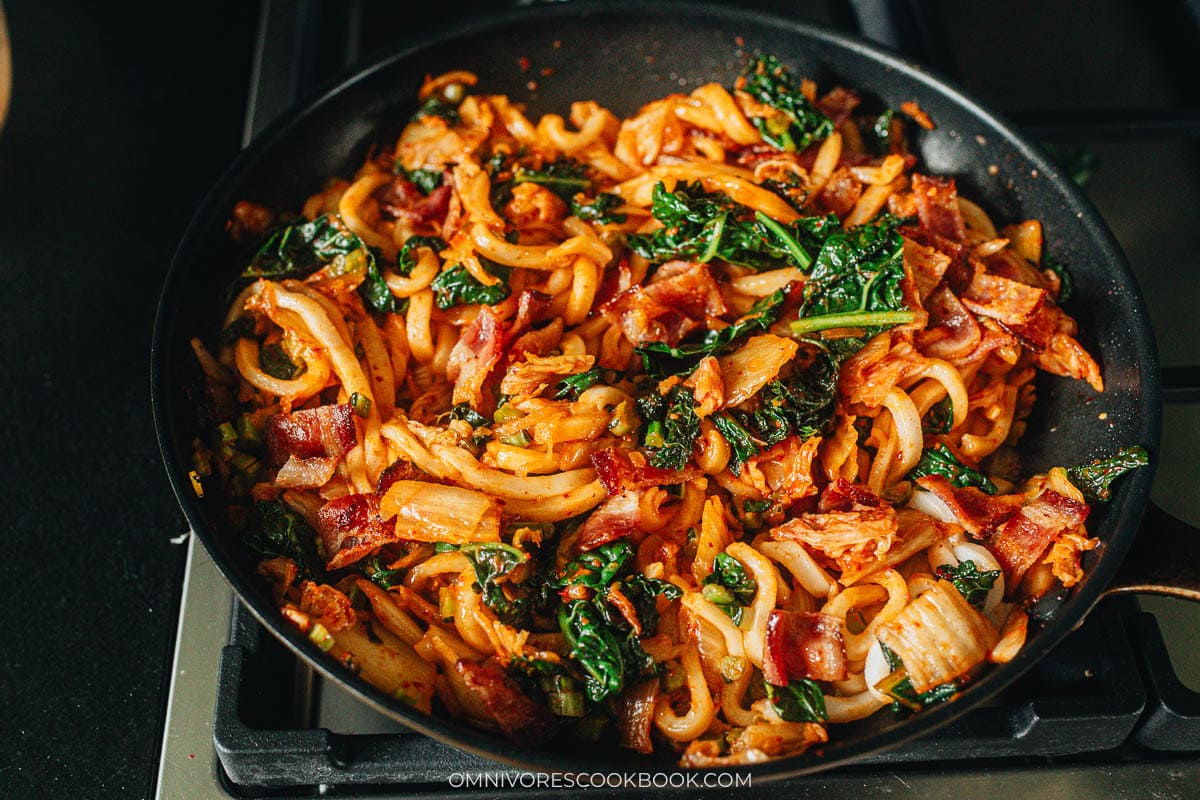
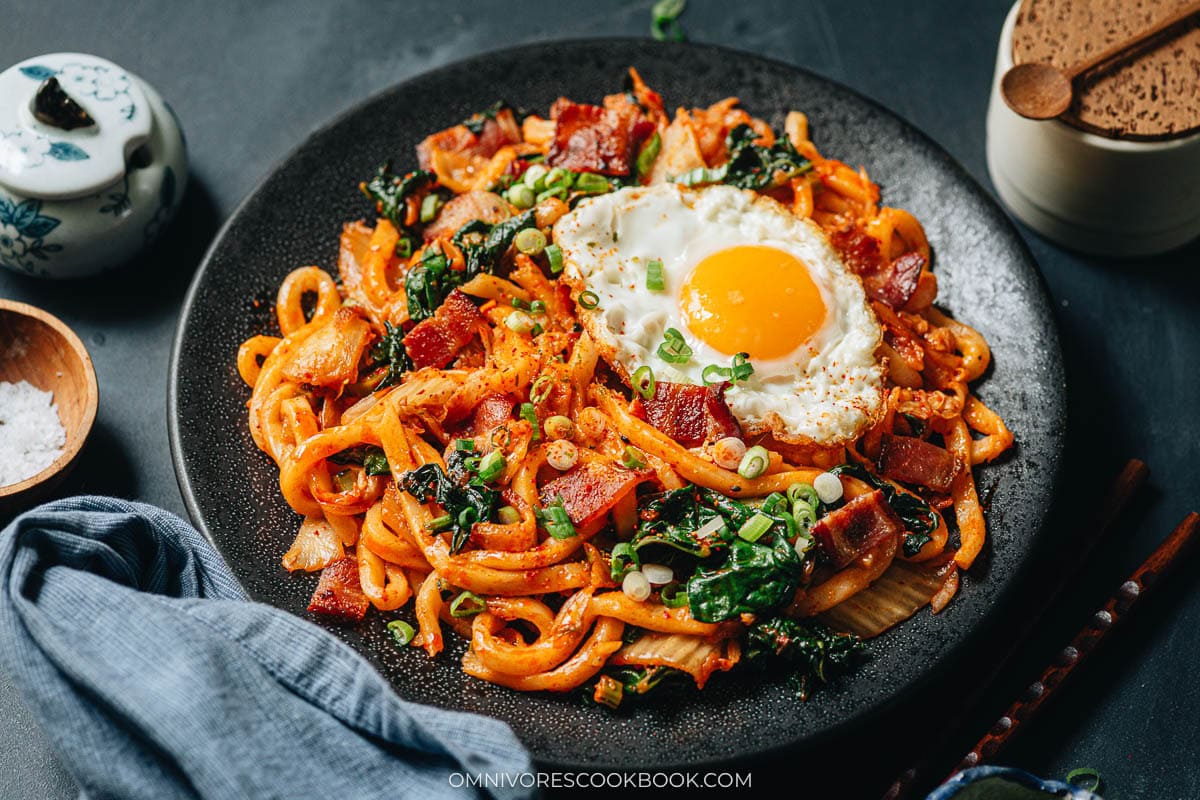
9. Top and serve: Divide the noodles into bowls and add your toppings. Serve hot as a main dish.
My Cooking Tips
Start the bacon before anything else: Frying bacon takes the longest of any step, so I get it going while I chop the kimchi and prep the kale. Medium-low heat renders more fat for a crispier result and splatters less.
Thaw the frozen udon, do not boil it: I ignore the package instructions because they usually push the noodles past their best texture. Warm tap water loosens frozen udon in a couple of minutes, and I drain the second they separate so they stay springy in the pan.
Cut the heat before the sauce goes in: I take the pan off the burner when I stir in the gochujang mixture. Gochujang scorches quick on a hot pan, and pulling it off the heat keeps the sauce savory instead of burnt.
Toss the noodles over low heat only: Frozen udon is already cooked, so it needs just enough time to warm through and grab the sauce. High heat past that point dries the noodles out and makes them gummy.
Pick sour kimchi for depth: Older, well fermented kimchi gives the dish its tang and umami. Fresh, barely fermented kimchi tastes thin here and misses the savory note the sauce needs.
How to Serve
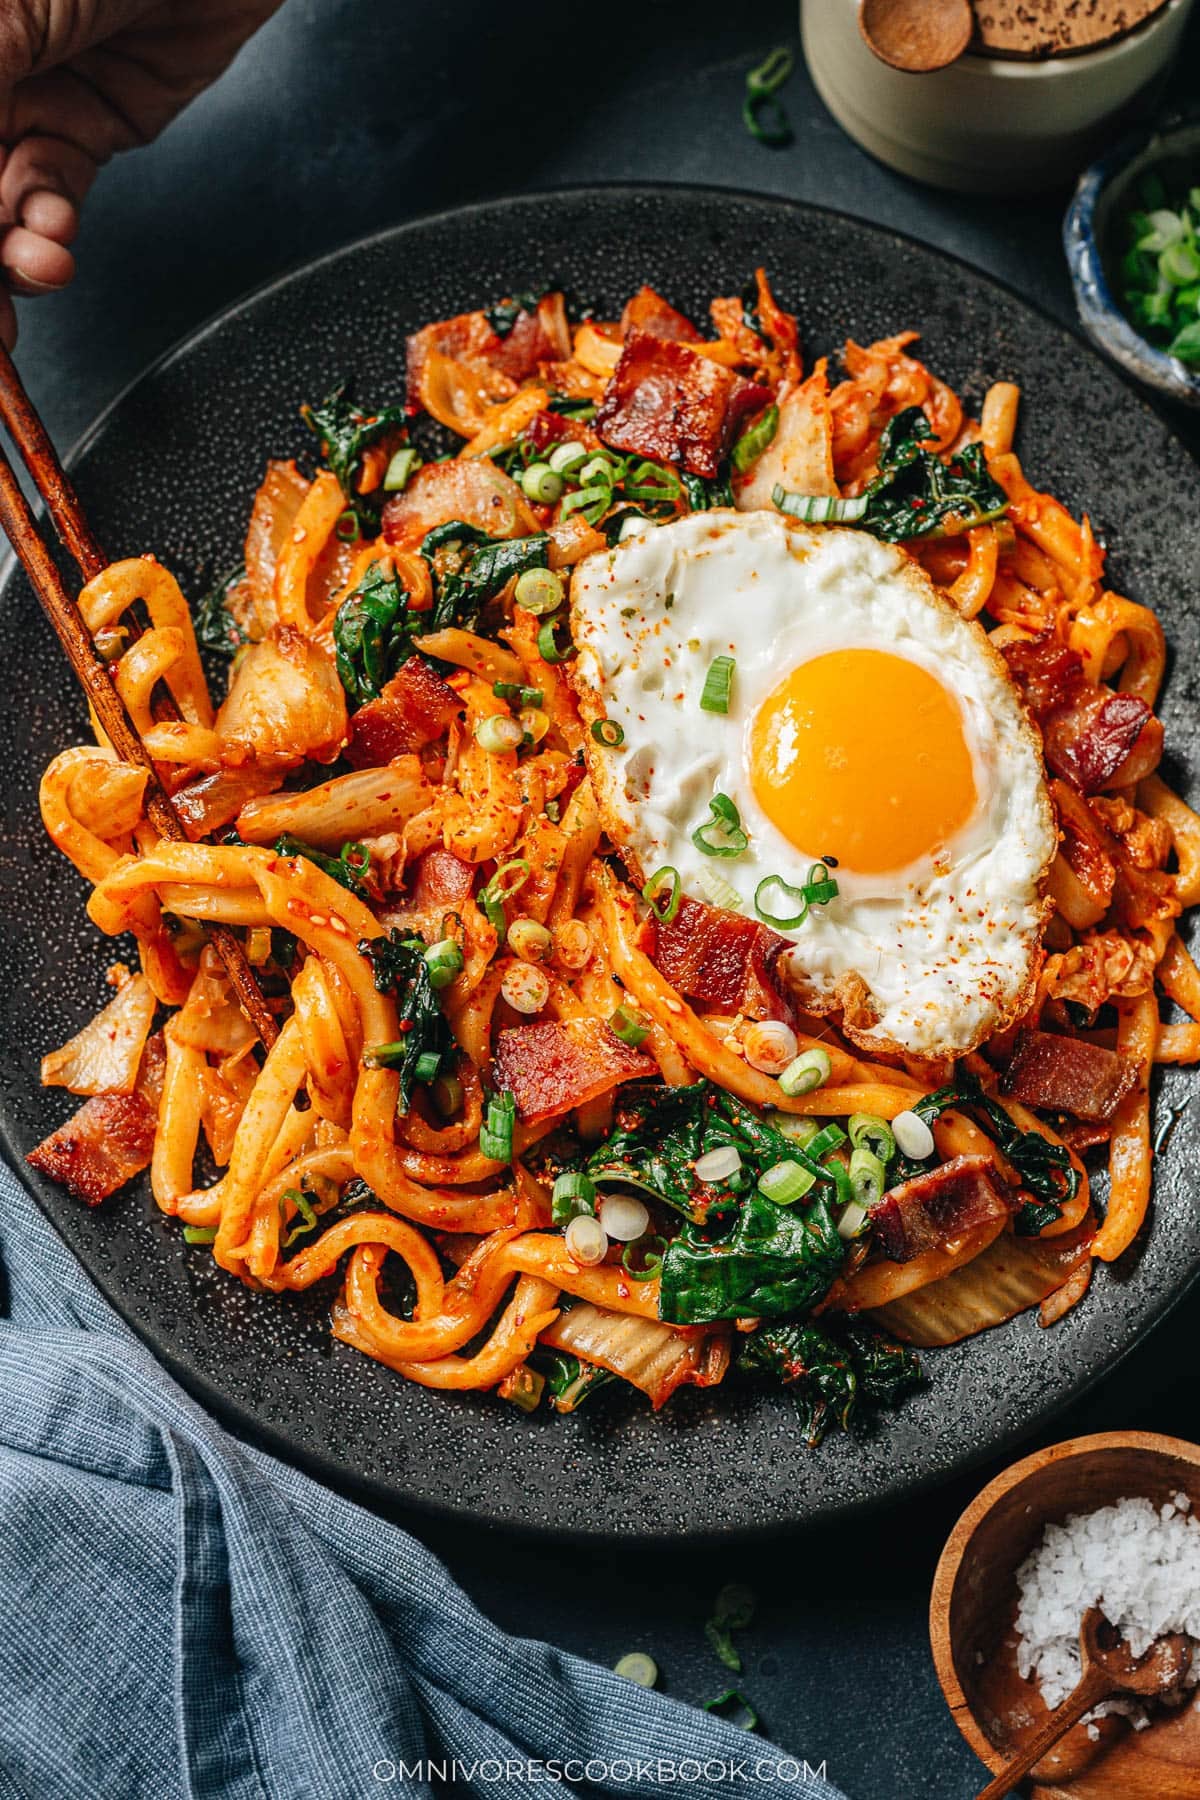
Bacon kimchi fried udon makes a satisfying one-bowl dinner. I like to top each bowl with a raw egg yolk or sunny side up egg, crispy nori, green onions, and a sprinkle of shichimi togarashi. The egg yolk is especially nice stirred into the hot noodles, making the sauce extra rich and creamy. My husband always breaks the yolk and mixes it in as soon as the bowl hits the table.
When I want to make this part of a fuller Korean-style meal, I serve it with a couple of dishes that bring different flavors and textures. A pot of sundubu jjigae adds a warm, comforting contrast, while Korean seafood pancake is crisp and savory and great for sharing. Vegetarian kimbap makes a lighter, veggie-packed side that balances the rich noodles. For a heartier meal, try Korean Instant Pot short ribs or galbi marinated steak for an extra protein.
Frequently Ask Questions
What can I use instead of frozen udon?
Vacuum-packed udon is a great substitute for frozen udon and is commonly available at regular grocery stores. Dried udon works well too. Prepare either according to the package instructions, taking care not to overcook the noodles since they will cook briefly again in the pan. The texture will be a little different from frozen Sanuki udon, but both options work well with the sauce.
Why did my noodles come out mushy?
The most common cause is overcooking the udon while thawing it. Frozen udon is already cooked, so it only needs warm water to loosen, and it should be drained the moment the strands separate. Tossing it too long in the pan afterward does the same damage, so I keep that final step short and over low heat.
How spicy is this dish?
The heat mainly comes from the gochujang and kimchi. For a milder dish, use less gochujang and choose a mild kimchi. For more heat, add extra gochujang or a small amount of Korean chili flakes (gochugaru). I like to finish the noodles with shichimi togarashi for its citrusy, aromatic flavor rather than for extra heat.
Want to Save This Recipe?
Enter your email below & we’ll send it to your inbox. Plus get great new recipes from us every week!
Bacon Kimchi Fried Udon
Ingredients
- 8 oz bacon (preferably thick cut)
- 2 blocks (8 oz. / 225 g each) frozen udon (or 6 oz. / 170 g dried udon, cooked until al dente)
- 1/2 bunch kale , stem thinly sliced and leaves cut into large bite-size pieces
- 2 cups kimchi , chopped (plus 2 tablespoons kimchi juice)
- 1 1/2 tablespoons gochujang
- 2 teaspoons soy sauce
- 2 tablespoons peanut oil (or unsalted butter)
Topping options
- Raw egg yolks (or sunny side-up eggs)
- Crispy nori sheets , cut into small pieces
- Shichimi Togarashi
- Sliced green onions
Instructions
- Cook the bacon: Prepare the other ingredients while cooking the bacon. Spread the bacon in a large skillet without overlapping. Heat over medium heat until sizzling. Turn to medium-low heat. Cook, flipping occasionally, until golden brown and crispy, 6 to 10 minutes. Once done, transfer the bacon to a plate lined with paper towels. When the bacon is cool enough to handle, slice it into 1” (2.5 cm) pieces and set aside. Wipe the skillet clean with paper towels.
- Thaw the udon: Meanwhile, fill a large bowl with warm tap water and add the frozen udon. Soak until the noodles are loosened and warmed through, 2 to 3 minutes. Drain well and set aside. If using dried udon, cook according to the package instructions until al dente. Drain, rinse with cold water to stop the cooking, and drain again.
- Mix the sauce: Add the gochujang and soy sauce in a small bowl. Stir until well combined.
- Cook the vegetables: Return the pan to medium heat and add the peanut oil. Add the chopped kimchi and kale stems. Stir and cook for 1 minute. Add the kale leaves. Cook for 1 to 2 minutes until the kale is wilted.
- Add the sauce: Add the oil and the gochujang soy sauce mixture. Stir to mix everything well and evenly coated. Remove the pan from the heat.
- Finish up: Add the noodles, kimchi juice and bacon. Cook over low heat and toss constantly, until the noodles are coated, 1 to 2 minutes.
- Serve: Top the noodles with your preferred toppings and serve hot as a main dish.
Nutrition

Did you make this recipe?
I’d love to hear how it turned out for you! Please take a moment to leave a 5-star rating ⭐️ and share your thoughts in the comments further down the page. It really helps others discover the recipe too.
J-Mom
Loved it!! With the hot weather I didn’t have much appetite but this went down nicely. Thank you for the recipe.
Sarah R
Easy and soooo flavorful!
Nick S.
This was fantastic! This is an absolute do again. I used baby bok choy instead of kale. I figure any greens would do. I didn’t find shichimi tagorashi, but I found nanami togarashi, which is also really great on Orange Chicken. This is a great recipe and a total do-again. Thank you for sharing!
Maggie Zhu
So happy to hear you liked this one! Yes, bok choy totally works and I think it might even tastes better in this recipe. Thank you for leaving a positive review 🙂