If you love dumplings, learning how to make dumpling wrappers from scratch is a game changer. These thin, round pieces of dough hold the filling together and give the dumplings their signature chewy bite.
Growing up in Beijing, dumplings were one of the most common staples we would make and eat at home. At home, we’d always make dumplings from scratch, meaning we make the dough and roll out the wrappers before filling them. Dumpling wrappers definitely take time and effort to make, but the result is so worth the work.
Homemade vs. Store-Bought
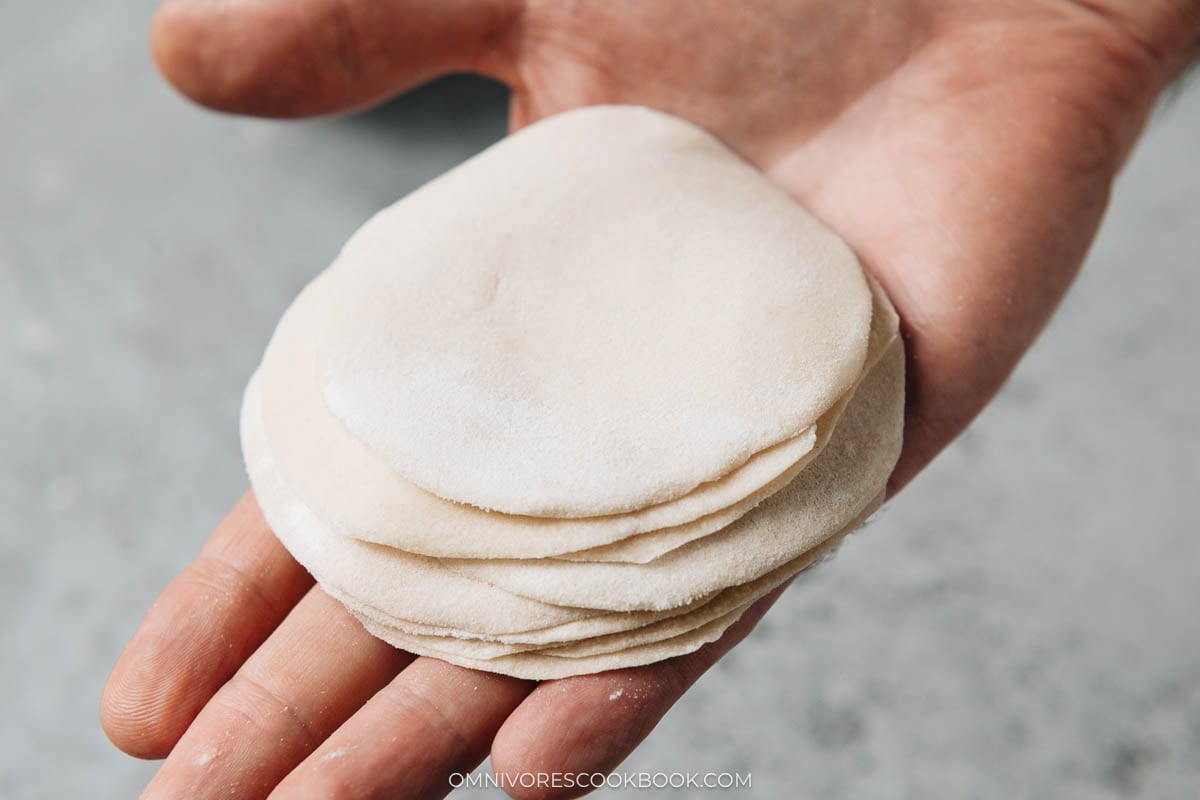
- Homemade wrappers: Soft, tender, thin and elastic, homemade wrappers offer the best flavor and texture. You can adjust the thickness to your liking, and they seal beautifully. The homemade wrappers also have thin edges with a slightly thicker center. So once you fold the dumplings, the wrapper has a consistent texture without too much dough in the folded area. The process takes more time, but it’s worth it if you want the most authentic dumplings.
- Store-Bought: Convenient and consistent in size. The wrappers are usually stiff and need extra water to seal. They don’t have the same chewiness as the homemade ones. Store-bought wrappers may also contain preservatives and additives.
Why this recipe
- Authentic northern style dumpling dough: this recipe uses a cold water dough to create dumpling wrappers for boiled dumplings. It’s the most popular way to make dumplings in northern China.
- Only two ingredients: you only need flour and water to make a beautiful dough.
- Detailed method to guarantee success: Dumpling wrappers take time and effort to make. This recipe walks you through the process in great detail, with photos and a video so you see exactly how it’s done.
One word about the type of flour you use
All-purpose flour is often the type of flour we use in China to make dumpling wrappers. But after moving to the US, I realized that the flour here is very different from all-purpose flour in China. In the US, 30 g all-purpose flour contains 3 g, and sometimes 4 g protein. Versus in China, 30 g all-purpose flour only contains 2 g protein.
Flour that has a higher protein content requires more water to work with. It also doesn’t need as much kneading to develop gluten for a chewy texture.
This recipe was developed using all-purpose flour containing 3 g protein (Gold Medal). If you use a different type of flour, you may need to adjust the water amount and kneading time.
Other types of dumpling wrappers
This recipe only covers cold water dough, which is used to make boiled dumplings. For steamed dumplings or postickers, we prefer to use hot water dough. Hot water dough uses boiling water to partially cook the flour, to reduce the gluten and increase the moisture, which creates a tender texture.
Check out my steamed dumplings recipe for a hot water dough method.
How to make
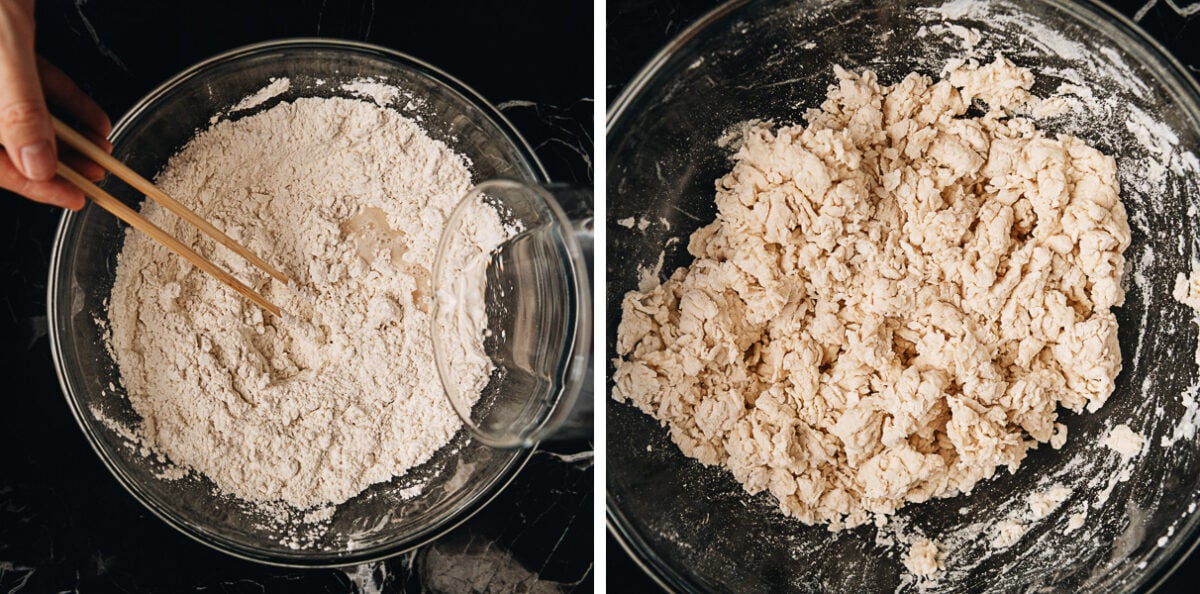
- Slowly add the water to the dry flour and mix to form dough flakes. Try to mix in as much dry flour as you can until dough flakes form.
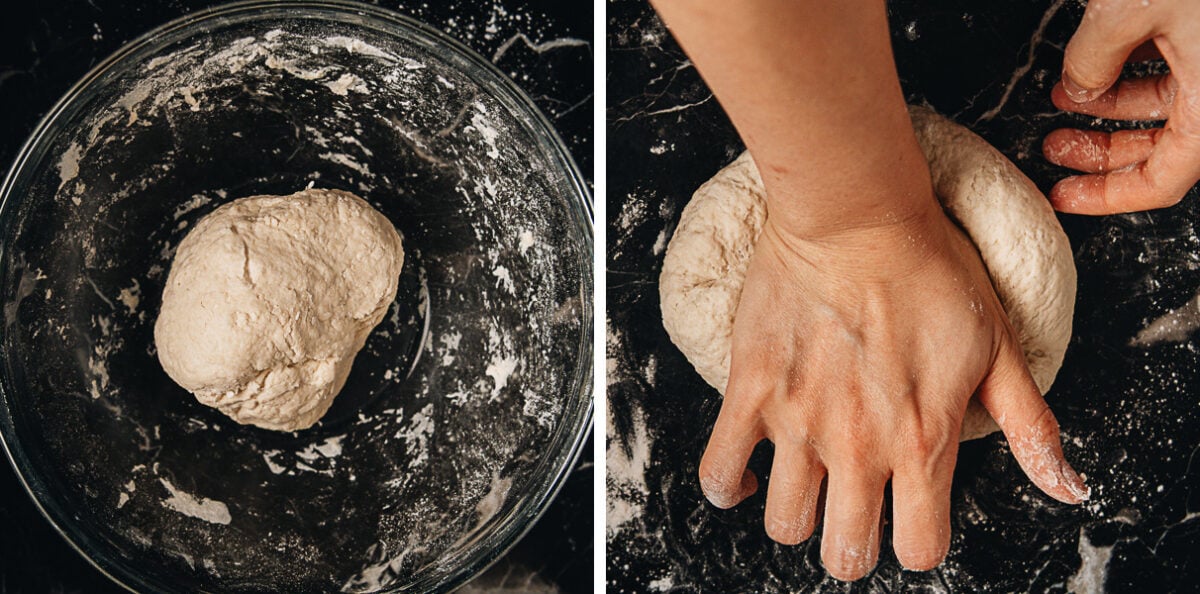
- Press the dough flakes into a dough ball, then transfer it onto a clean work surface to knead.
- Once the dough has been kneaded, it won’t be very smooth but that is OK. Rest the dough for 30 minutes so it hydrates evenly. Then knead it again. This time the dough should become smooth very quickly.
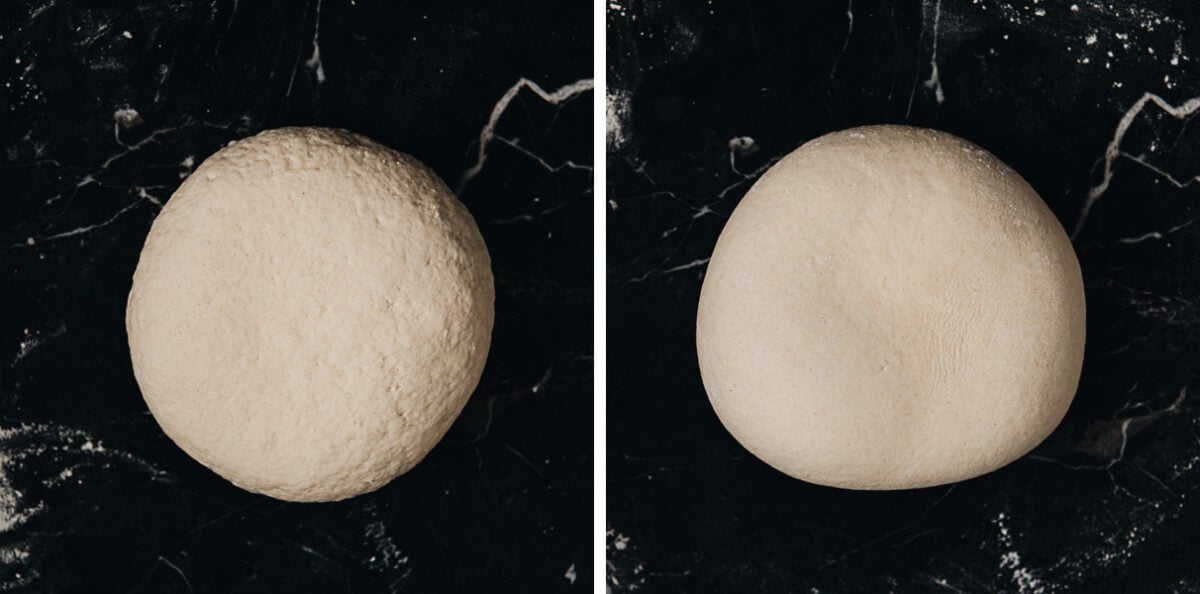
- Let the dough rest until fully relaxed, 2 hours or so. You can also let the dough rest for a longer time, or even overnight in the fridge. The dough will become soft and very smooth.

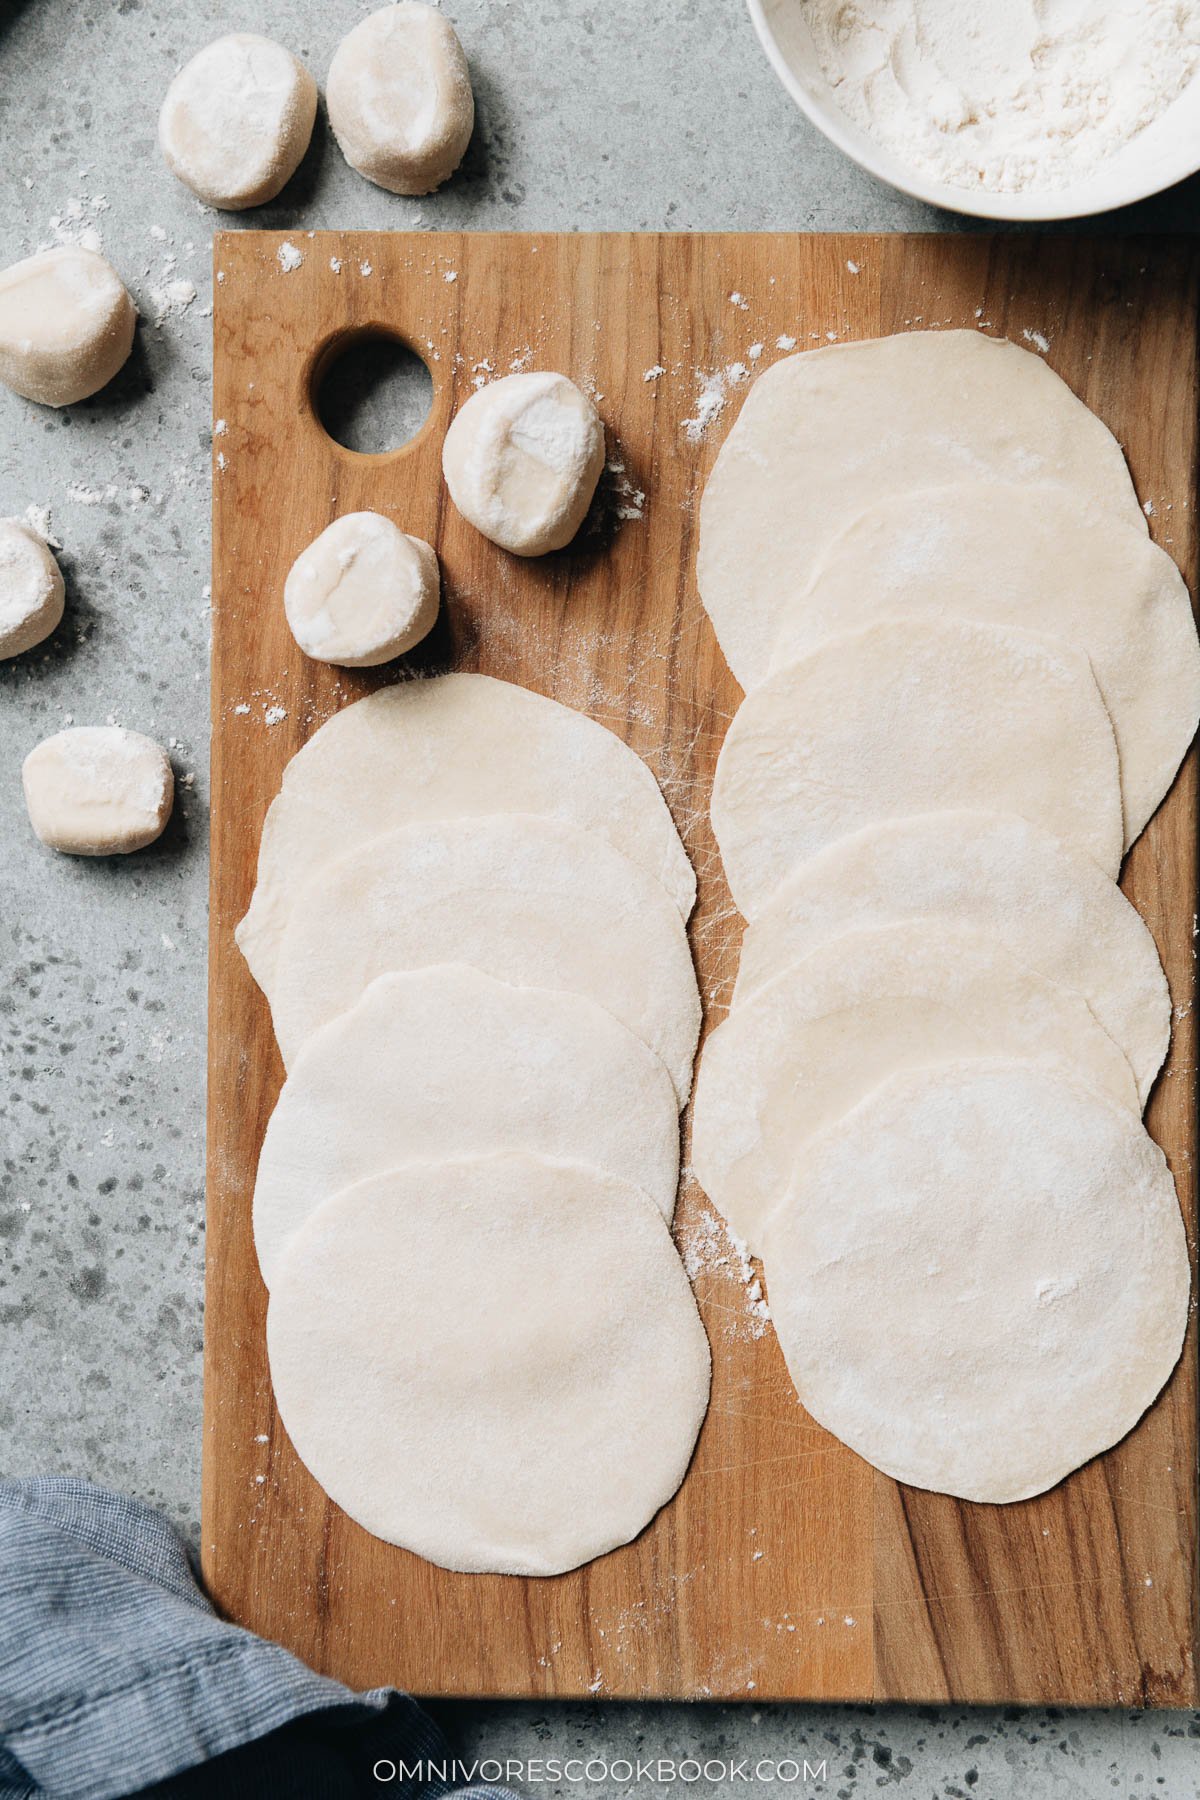
- Divide the dough into two pieces and work on one piece at a time. Roll it into a long log, then cut it into 16 small pieces (12 g per piece).

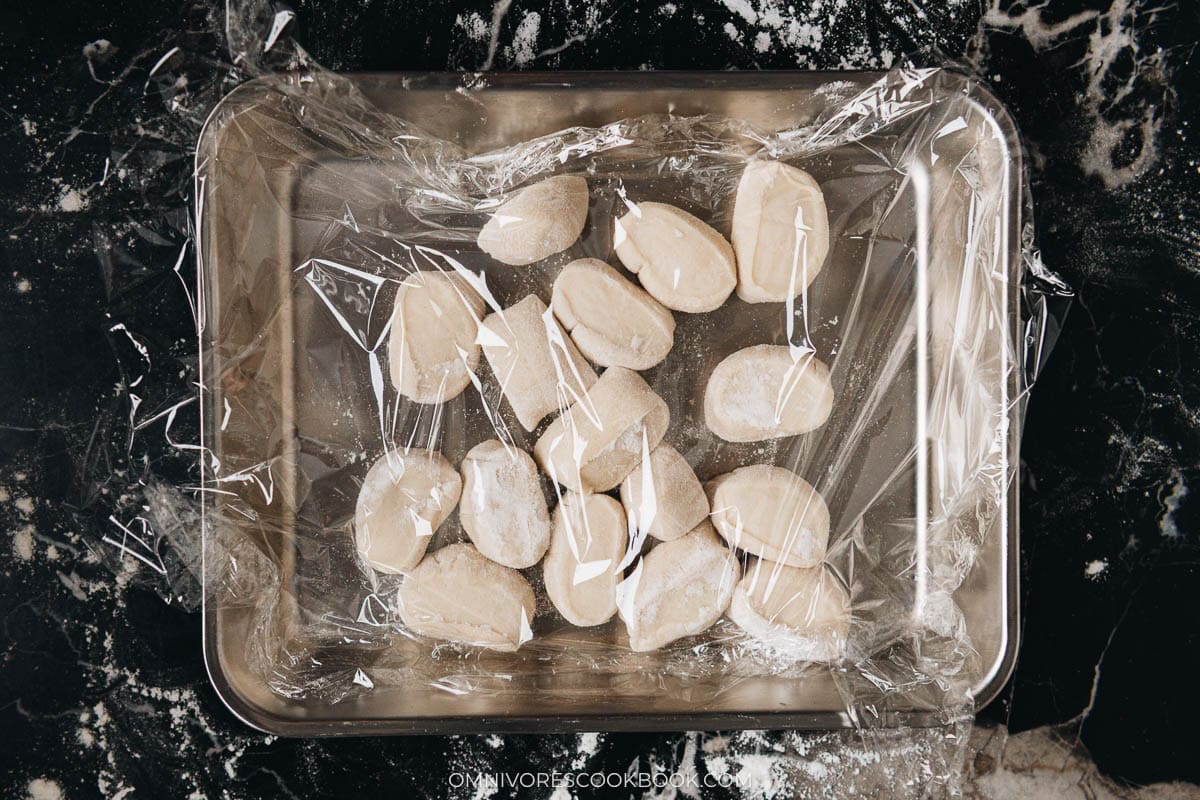
- Dust both cut sides with flour and cover the dough pieces. (very important to prevent drying out)
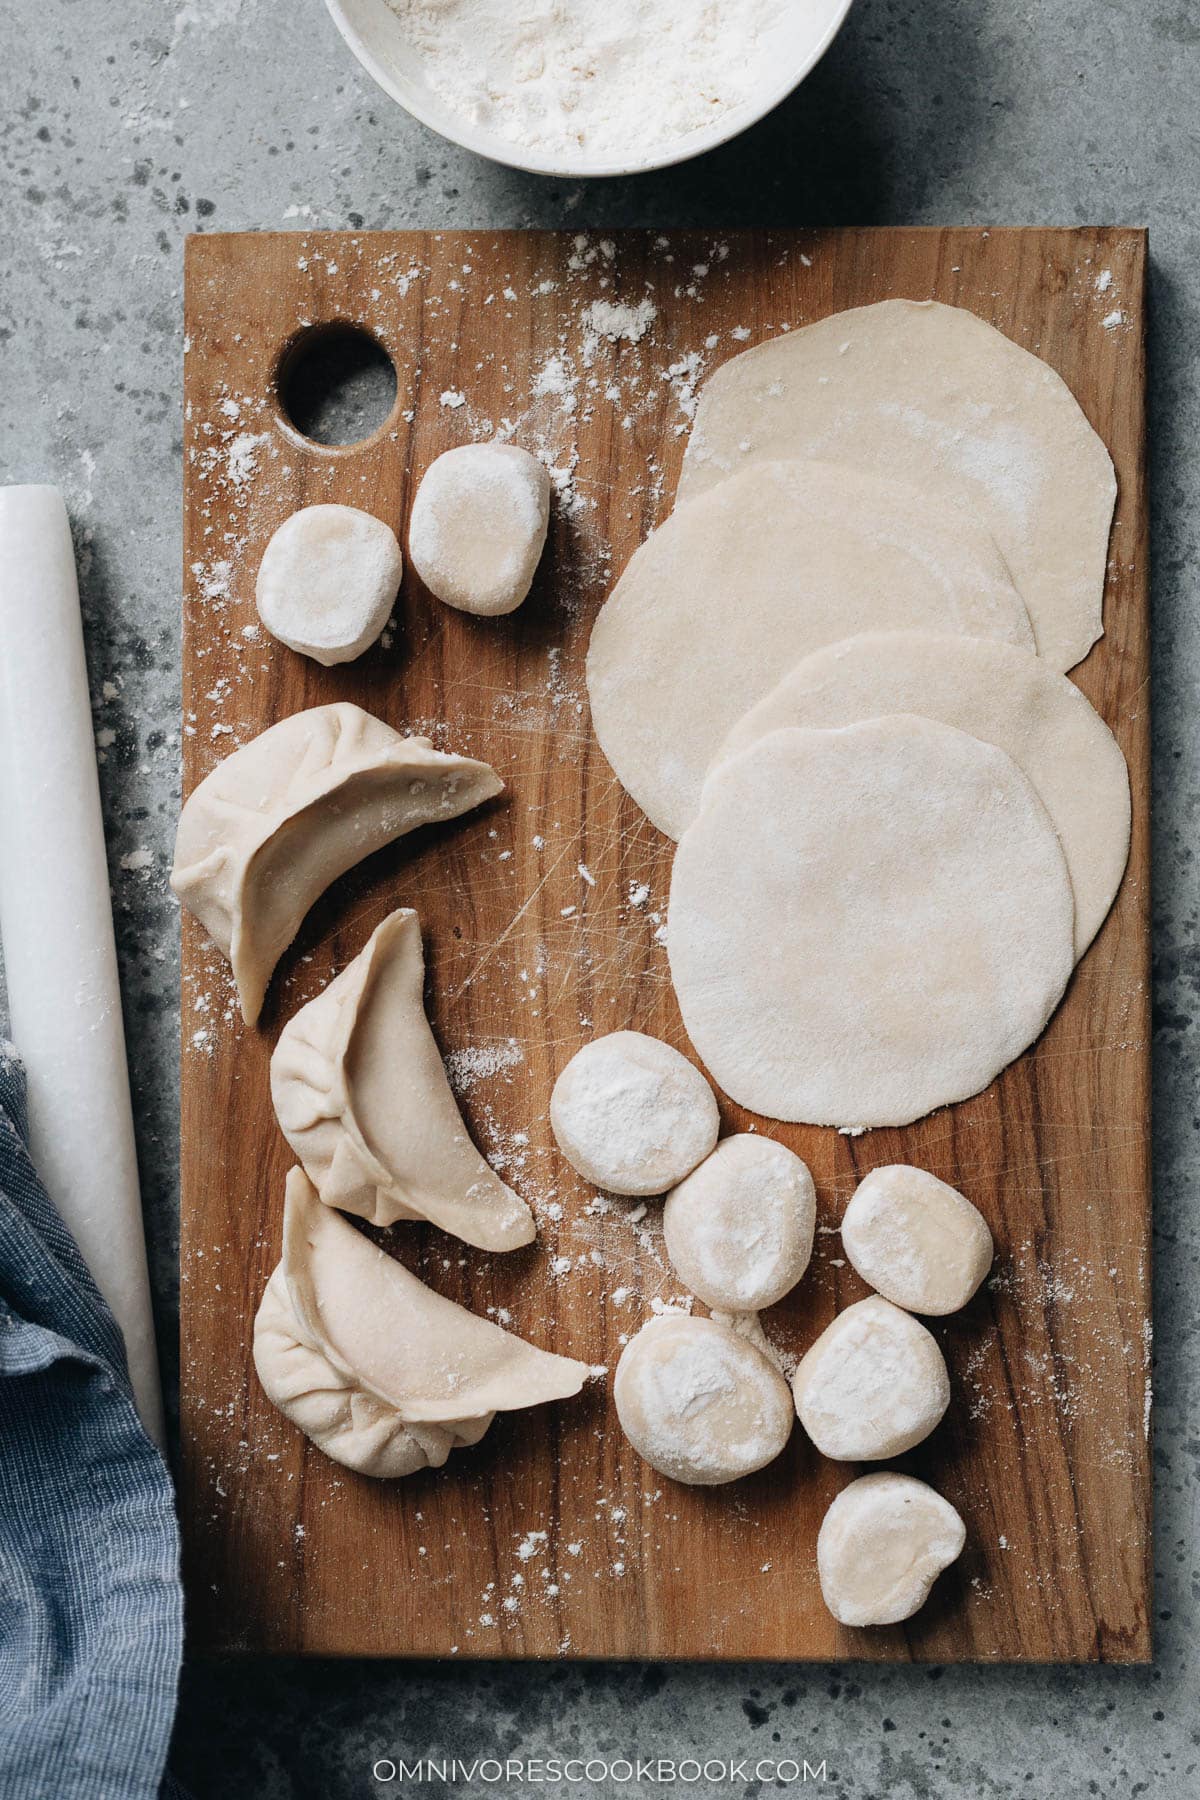
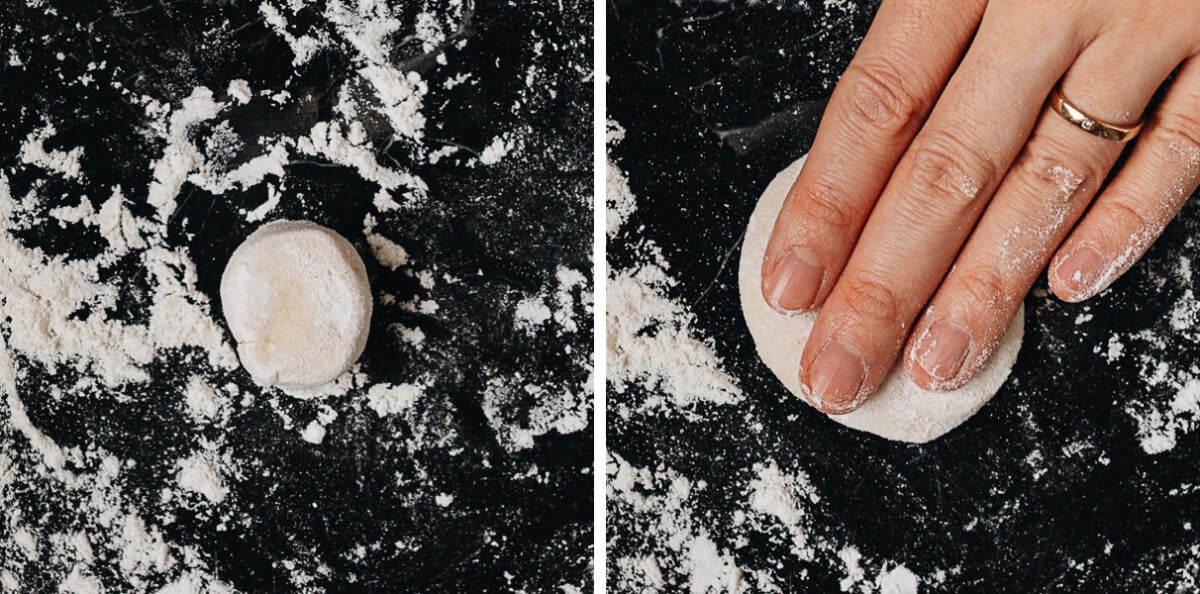
- Round out the dough piece, then press down on it.
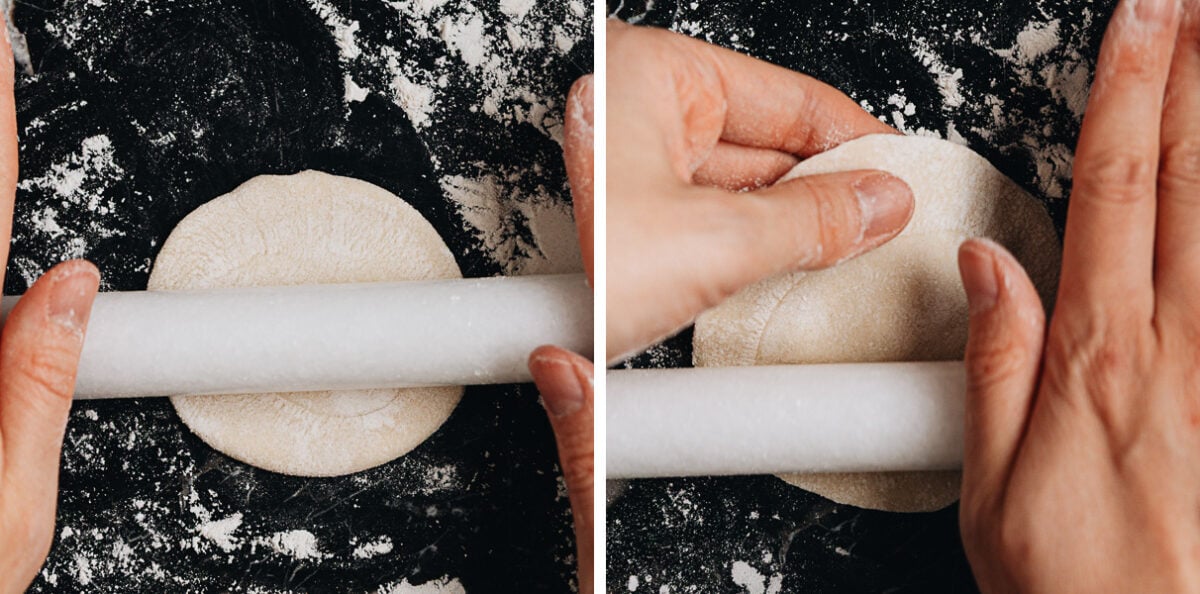
- Dust both sides again. First, roll it into a round, even disk. Then pick it up by the edge and start rolling and rotating the wrapper, so it forms thin edges. In China, we like to rotate and roll from the beginning, but that is a more advanced method that takes time to master. I found this way much faster and easier for home cooks.
Always keep your dough covered
Homemade dumpling wrappers are more delicate and a little softer than store-bought. When you work on the wrappers, always keep any unused dough, wrappers, and formed uncooked dumplings covered with a wet paper towel or kitchen towel to prevent them from drying out. If the dough dries out, the wrappers will become brittle and hard to seal.
How to use dumpling wrappers
Once you’ve made the wrappers, you’ll want to use them as soon as possible. This is because:
- The wrappers are softer than store-bought, and they will start to stick together very quickly.
- If left out unused, the wrappers will slowly dry out and become hard to seal.
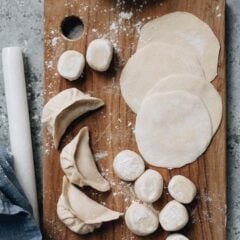
Based on my experience, this is the best way to set up your dumpling workflow:
- Make the dumpling dough.
- Make dumpling filling while resting the dough.
- Start rolling the wrappers.
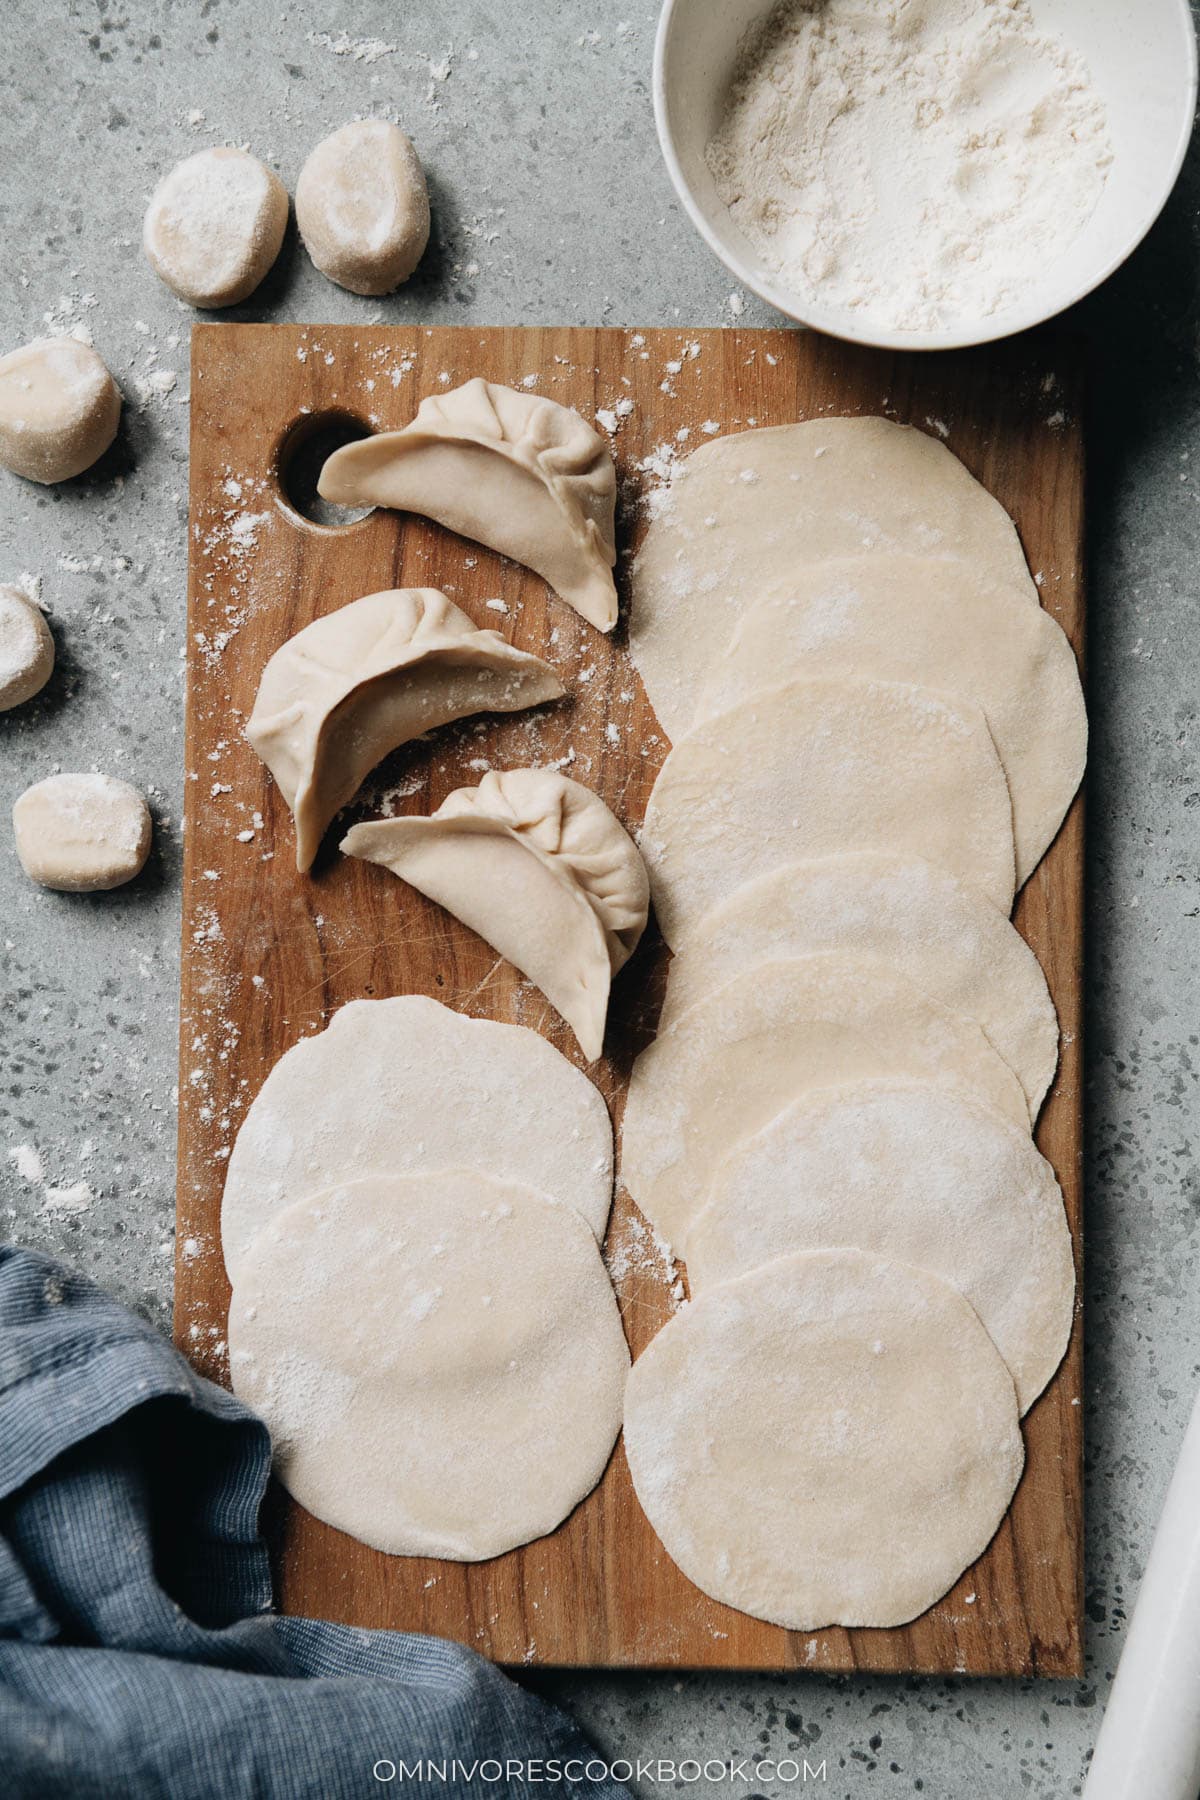
- Ideally, you’ll have another person who wraps the dumplings immediately once the wrappers are made. If you’re working alone, make a small batch of the wrappers at a time (10 to 12), then wrap them into dumplings before making more wrappers.
- Boil the dumplings immediately or freeze them.
Dumpling filling recipes
- Pork and chive dumplings
- Pork and napa cabbage dumplings
- Beef dumplings
- Lamb dumplings
- Chicken dumplings
- Egg and pepper dumplings
- Pork and sauerkraut dumplings
- Turkey dumplings
- Vegan dumplings
- Carrot dumplings
How to store
In China, we always prefer to use freshly made wrappers immediately to achieve the best texture. That being said, you can store your dumpling wrappers for later use.
To store them, dust a thin layer of cornstarch between each wrapper as you stack them. Place the wrappers in a ziplock bag, squeeze out as much air as possible, and freeze them immediately.
Thaw the wrappers in the fridge before using.
Afterthoughts
Growing up in China, making dumplings on the weekend was a ritual that my parents had, at least once a month. Nothing beats homemade dumplings made from scratch. You can use more filling and the filling is extra juicy, and the dumpling wrappers are thin and chewy. I can easily eat more than 20 dumplings in one sitting.
I’ve rarely made homemade wrappers after moving to the US, but I started to do it more often after having James. When I saw him devouring homemade dumplings (he’s almost 2 at the time of this writing), I felt like it was worth the effort.
Making dumpling wrappers takes some effort and it works much easier if you have a team. So get your friends and family to help, and host your own dumpling party!
Frequently asked questions
What if my wrappers dry out?
Always keep the wrappers covered when not using them. If the wrappers dry out, you can use a little water to wet the edges to make sealing easier.
Can I use other types of flour?
Yes, you can. If using cake flour, you will need to use less water and knead the dough a little longer, to develop the gluten to achieve a chewy texture. If using bread flour, use more water and knead the dough less.
How do I stop the dough from shrinking when rolling?
As long as you don’t knead the dough after the second rest, the dough should be quite easy to roll out. But if you have trouble with it, you can cut the dough log into small pieces (recipe step 6), cover them up and let them rest for 15 to 20 minutes before rolling.
How far in advance can I make dumpling wrappers?
They’re best used immediately after rolling. If you want to store them for a few hours, dust cornstarch (not flour) between the wrappers, seal them in a bag and store it in the fridge. If storing for more than a day, always freeze the wrappers and thaw them right before using.
Chinese Cooking Made Easy
Are you new to this website? This free email series is a great place to start. I’ll walk you through a few of my most popular recipes and show you how and why they work. You’ll quickly start to cook better Chinese food in your own kitchen.
Dumpling Wrappers Recipe (饺子皮)
Ingredients
- 240 g (2 cups) all-purpose flour (*Footnote 1)
- 150 ml (about 2/3 cup) water (*Footnote 2)
Instructions
- Add flour into a large bowl. Slowly pour the water into the bowl, about 2 tablespoons at a time, onto the dry flour, mixing them together with a pair of chopsticks to form dough flakes. Once all the water is added and mixed in, there should be little flour left. The dough flakes should feel a little tacky and soft, but not too sticky. If there’s too much dry flour left, you can very slowly add more water, 1 tablespoon at a time, and keep mixing. The dough can be adjusted if it’s a little too soft, but it’s hard to change it if you didn’t add enough water at the beginning.
- When the water is mixed with the flour, dust both hands with flour and start kneading to form a dough. Transfer the dough onto a clean surface and keep kneading for 10 to 15 minutes, until quite smooth. The dough will be semi-soft and should easily be lifted from the bowl without sticking to the bottom. Cover the bowl and let the dough rest for 30 minutes.
- Dust the working surface with flour and dust your hands again. Transfer the dough to the working surface and continue to knead it until its surface becomes smooth, 5 minutes or so.
- Transfer the dough into the same bowl, cover, and let the dough rest for 2 hours. You can let the dough rest longer, 4 to 5 hours, or in the fridge overnight. After resting, the dough will have softened and have a very smooth texture.
- Dust the working surface again and transfer the dough onto it. Divide the dough into 2 even pieces. Leave one piece of dough on the table and place the rest back in the big bowl and cover it.
- Roll the dough into a long stick, 1” (2.5 cm) in diameter. Use a dough cutter or knife to cut the dough stick into about 16 small doughs, each weighing about 12 grams (Footnote 3). Place the dough pieces cut side down. Slightly dust both sides of each small dough with flour. Work on them one at a time while covering the rest with a wet paper towel.
- Dust the working surface again. Take one dough and press it to a round disk. Roll it with a rolling pin into a round sheet, one direction a few times, then rotate it 45 degrees and roll again. Once the dough forms a thin round disk, about 2.5” (6 to 7 cm) in diameter, start rolling by rolling the dough edges with one hand, using the other hand to rotate the dough. This way, you create a wrapper with thin edges and a thicker center (*Footnote 4). The wrapper should be about 1/16” (2 mm) thick in the center, and the diameter should be about 3” (7 to 8 cm). It is ok if the wrapper is not perfectly round. If the wrapper keeps sticking to the surface you’re working on, dust it with more flour.
- Use the fresh wrappers immediately or store them in the freezer.
- To freeze dumpling wrappers, sprinkle a thin layer of cornstarch (*Footnote 5) between each wrapper. Stack them up, place them into a Ziplock bag, squeeze out as much air as possible, and freeze. Defrost in the fridge before using.
Video
Notes
- If possible, use weight (grams) instead of volume (cups) measurements. When measuring by cups, you usually get at least 140 grams per cup using the spoon and leveling method. It should be closer to 120 grams per cup in this recipe. So if you use cups, you will probably end up using more water.
- 150 ml water is 1/2 cup plus 2 tablespoons, which is slightly less than 2/3 cup (160 ml). But if you’re already using cup measurements, chances are that you’re also using more flour than this recipe calls for. So the extra water should work well.
- The dough might look small, but it makes a pretty decent size dumpling if rolled out thinly. It’s OK if the dough pieces weigh up to 13 to 14 grams. But the dumplings will be too large if the dough is over 15 grams.
- When a wrapper has a thicker center, it will hold the filling better without breaking. The thin edges make the folding easier, and the dumpling edges remain thin after wrapping and forming pleats.
- If you dust flour between the wrappers, the moisture from the dough will slowly work its way into the flour and the wrappers will stick together after storing and thawing. If you dust with too much flour, the wrapper will become dry. Cornstarch doesn’t bind with the moisture and will let you separate the wrappers more effectively after storing.
Nutrition
Have a question or feedback? Add a Comment
Did you make this? I want to see! Tag @OmnivoresCookbook on Instagram, and rate the recipe below.