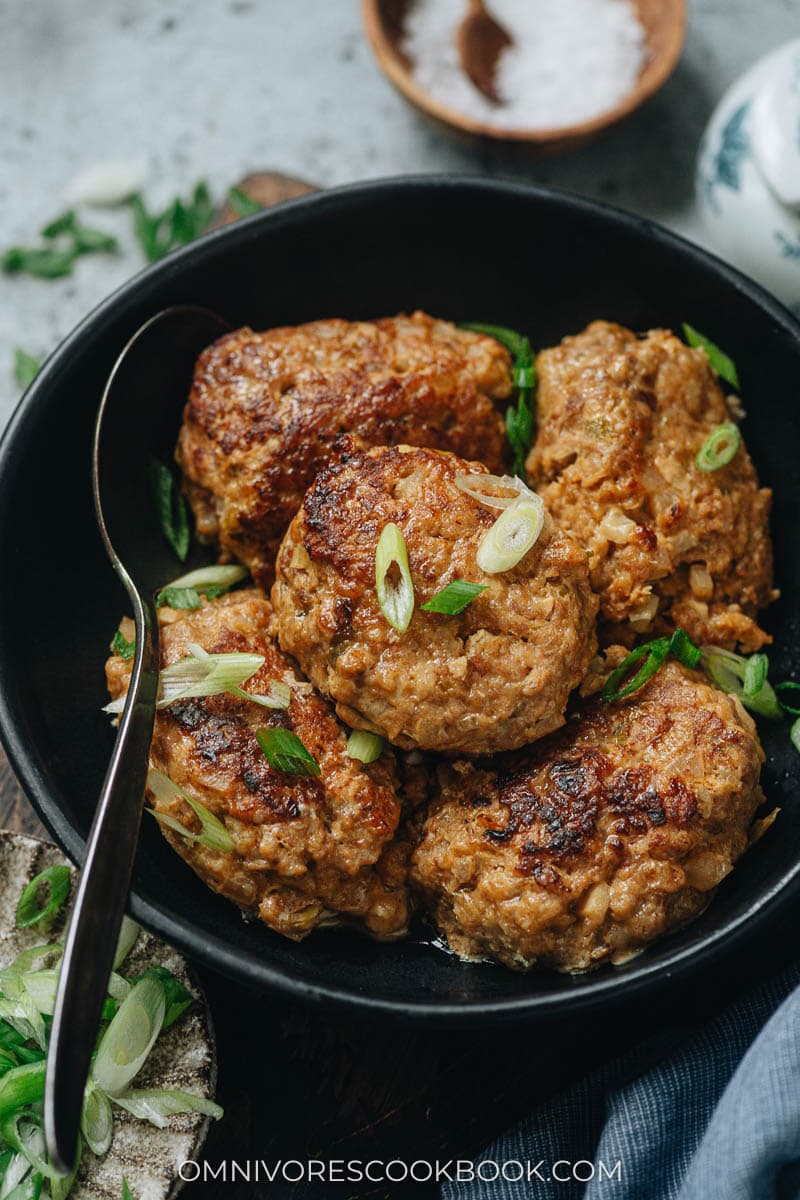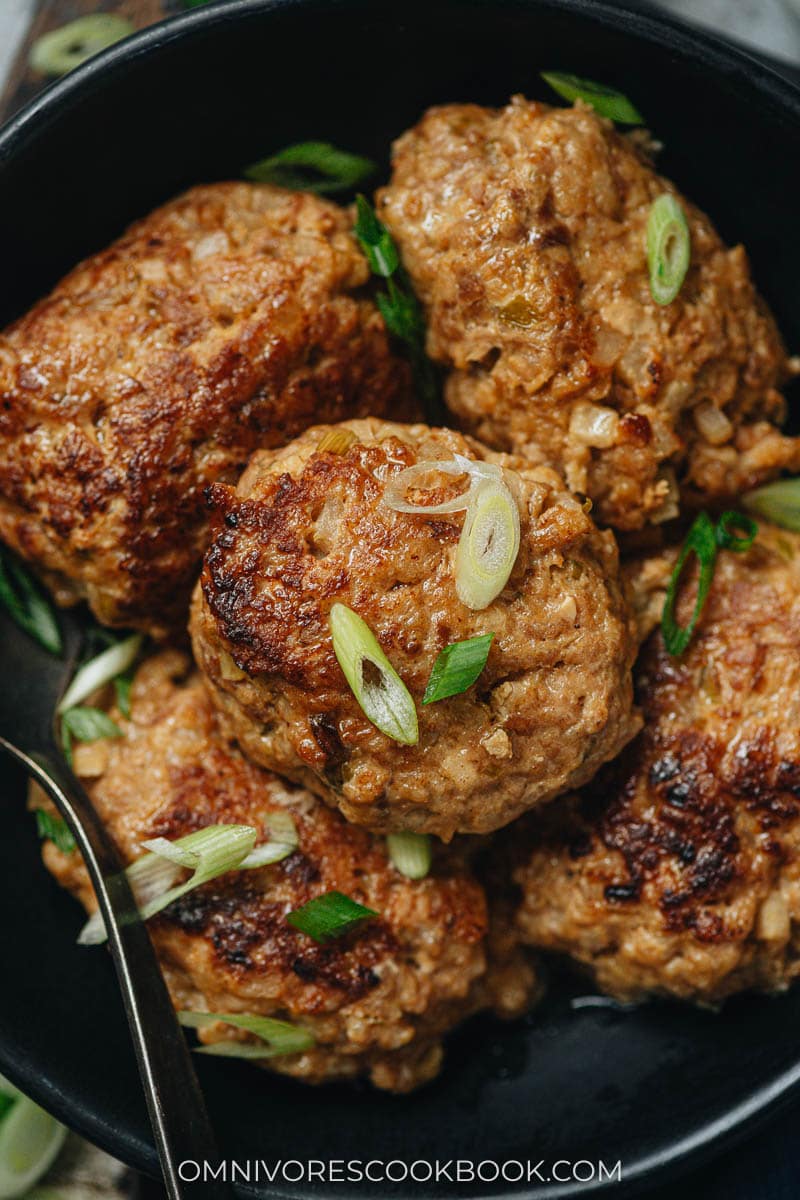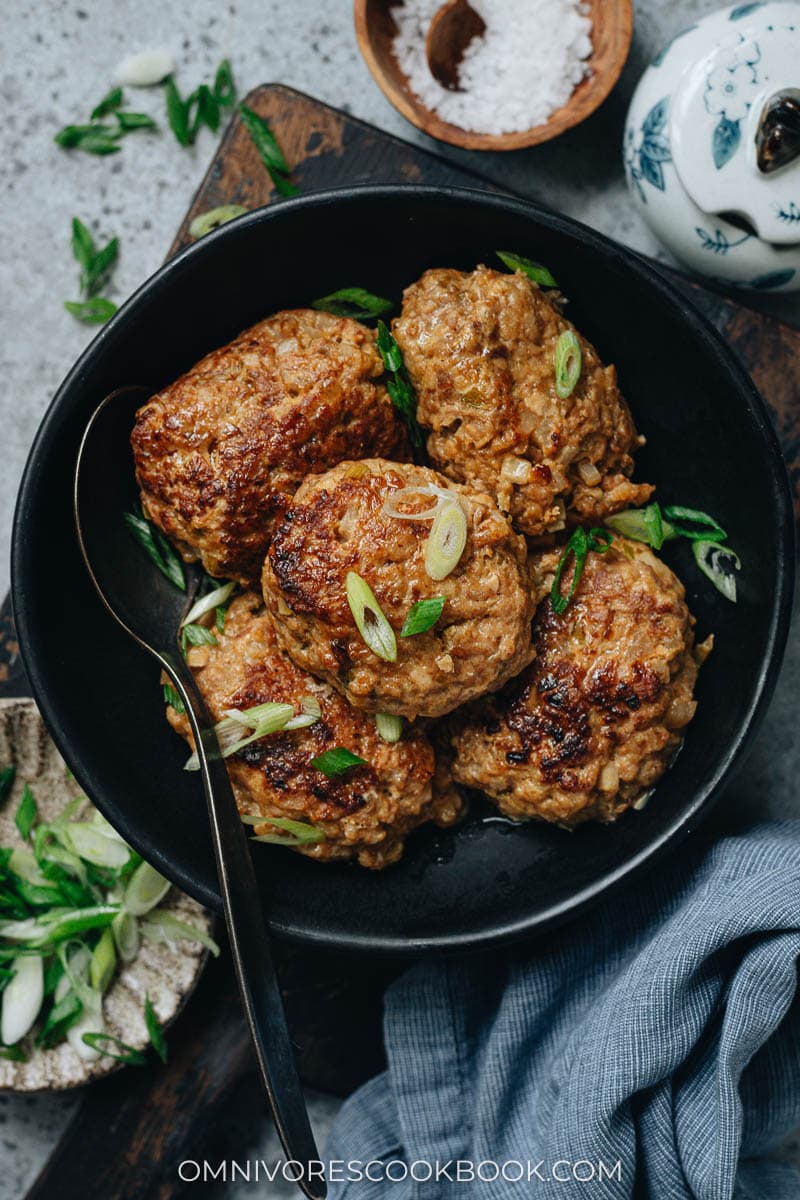
Chinese pork meatballs are also called lion’s head (狮子头, shi zi tou). They feature tender, moist, and light meatballs with a savory taste. This dish is a staple food for my family, because it’s quite easy to cook in big batches and is so comforting to enjoy at any time. Eating savory meatballs with rice is as addictive as eating a burger. Juicy and flavorful meat and starch are the best combo in the world.
You’ll find quite a few versions of Lion’s Head in China. One popular rendition in northern China is braised meatballs. The cooking method for those is quite close to the one in this recipe. But instead of steaming, those meatballs are braised in a soy-sauce-based liquid after browning. Another type is meatballs cooked in chicken broth, from Shanghai cuisine. They’re usually served by themselves instead of over rice.
Today I’ll introduce a third type – a steamed lion’s head meatball. This recipe was passed down from my grandma. She used to make a huge batch of these every two weeks. After cooking them, she’d reserve a small amount to serve to guests who might be visiting her house. She would freeze the rest and give them away to family members, including my parents. These meatballs are my favorite and are even better than the ones from the restaurant. They are extremely fluffy and moist and are as tender as the pork in a slow-cooked Bolognese sauce.

How to make pork meatballs extra light
The secrets to creating super fluffy Lion’s head meatballs are:
- Mix water into the meat to make a very tender and moist patty
- Add plenty of breadcrumbs
- Add plenty of water chestnuts
The breadcrumbs create an airy texture. The water chestnuts add a really refreshing and crisp mouthfeel, so the meatballs will taste extra light.
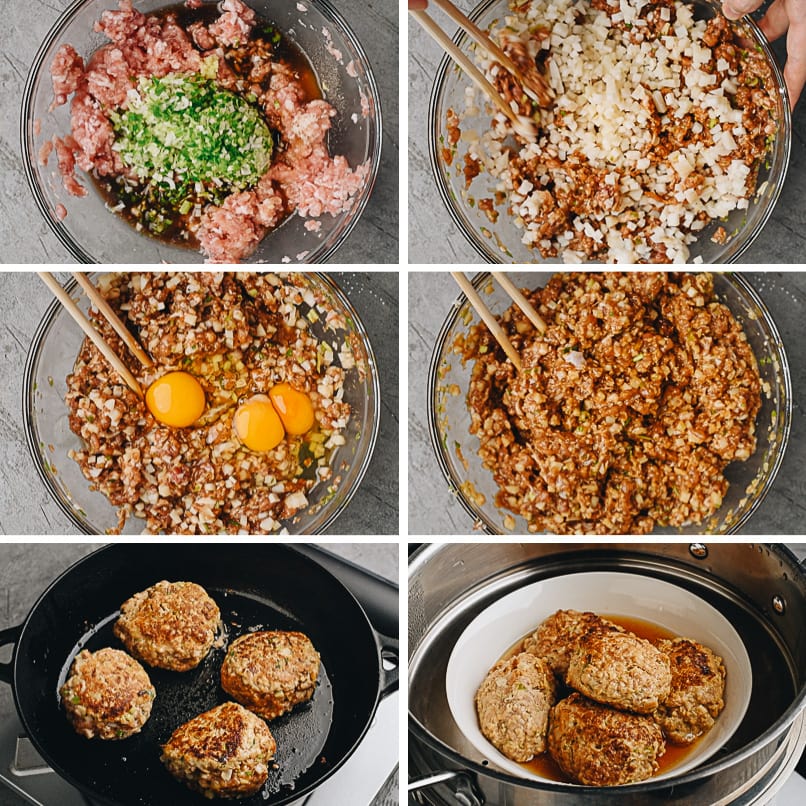
How to make lion’s head meatballs
- Add water, seasonings and aromatics to the ground pork
- Mix in the water chestnuts
- Add eggs and breadcrumbs
- Mix in sesame oil
- Pan fry the meatballs
- Steam the pan fried meatballs

Mix the filling in order
It’s important to add all the liquid seasonings and water at the beginning, and mix until the liquid is fully absorbed. This will give the meatballs a moist texture and proper seasoning.
My mom always told me to add the sesame oil at the end, to seal the flavor and prevent the liquid from seeping out of the pork, if you’re not cooking the meatballs immediately.
One word about frying the meatballs
Once you shape the meatballs, you need to brown them to create the heavenly crust and seal the juiciness inside. It also helps the meatballs to keep their shape.
Since this is a very moist patty, it can be a bit tricky to pan fry while keeping them in an intact round shape. I wouldn’t worry if the meatballs are not perfectly shaped. And if you have trouble keeping them from falling apart, you can slightly press the meatballs so they have a slightly flat shape (but not as flat as a burger patty), so they’re easier to brown.
Steaming the meatballs
Once you steam the meatballs, some fat will be rendered out. The finished meatballs will be flavorful, tender, juicy yet not greasy.
How to serve lion’s meatballs
A lot of my American friends are not used to having meatballs without a sauce. But trust me, these Lion’s head meatballs are so well seasoned that they taste really good by themselves. I love to serve the meatballs as a main dish over steamed rice. And it’s always great to accompany them with some light and refreshing side dishes such as cucumber salad, okra stir-fry, or spinach salad.
The meatballs are one of my favorite lunch items, too. They freeze well and taste great after reheating. Stuff one of these into your lunchbox with steamed rice and some stir fried greens, and you’ll make all of your colleagues jealous when you heat it up in the office microwave.

Afterthought
My mom once told me, making the meatballs tender was not the original intention of adding so many other ingredients to the pork. It’s because pork was in short supply when she was a kid, so her parents needed to find a way to make these meatballs more filling with limited ingredients. Thus, the moist and tender texture of the meatballs was just a nice side effect of living poor. Even now, my family still enjoys cooking with this recipe. It tastes like home.
Other delicious pork recipes
- Chinese Braised Pork Trotters (红烧猪蹄)
- Pork Liver Stir Fry (炒猪肝)
- Pork and Chive Dumplings (猪肉韭菜水饺)
- Pork Chop Suey
- Sweet and Sour Ribs (糖醋小排)
- Jing Jiang Rou Si (Peking Shredded Pork, 京酱肉丝)
Chinese Cooking Made Easy
Are you new to this website? This free email series is a great place to start. I’ll walk you through a few of my most popular recipes and show you how and why they work. You’ll quickly start to cook better Chinese food in your own kitchen.
Watch video

Lion’s Head Meatballs (狮子头, Shi Zi Tou)
Ingredients
- 1 lb ground pork
- 4 tablespoons Shaoxing wine (or dry sherry)
- 3 tablespoons light soy sauce (or soy sauce)
- 1 teaspoon dark soy sauce
- 1 1/4 teaspoons salt (*Footnote 1)
- 2 teaspoons sugar
- 2 teaspoons grated ginger
- 4 green onions , minced
- 1 tablespoon cornstarch
- 12 water chestnuts (one 8-oz / 227-g can) , finely chopped
- 3 eggs
- 1 cup panko (Japanese breadcrumbs)
- 2 tablespoons sesame oil
- 1 tablespoon peanut oil (or vegetable oil)
Instructions
Prepare the meatballs
- Add ground pork into a large bowl. Add 4 tablespoons of water. Mix well with a spatula until water is fully incorporated.
- Add Shaoxing wine, light soy sauce, dark soy sauce, salt, sugar, grated ginger, cornstarch, and scallion. Mix well.
- Add water chestnuts and eggs. Mix a few times. Then add panko. Mix well.
- At the end, add sesame oil. Mix until it forms a soft paste.
Cook the meatballs
- Heat the oil in a medium-sized skillet over medium-high heat until hot. Turn to medium heat.
- Brown the meatballs in batches. Scoop 1/3 cup of the ground meat mixture and shape it into a meatball. The meatball will be quite soft, barely able to hold its shape (so the finished meatballs will be tender and juicy). If the meatballs are too hard to handle and cannot hold their shape, add a bit more panko and mix again.
- Carefully place 3 to 4 meatballs in the skillet and make sure to leave enough space to flip them. When the bottom side turns golden brown, carefully roll the ball with a spatula to cook the other sides. Continue to do this until at least two sides are set and browned (*see footnote 2). Transfer to a deep plate or a bowl that can fit into your steamer rack. Continue to brown the rest of the meatballs.
- Steam the browned meatballs in batches. Heat water in a steamer until boiling. Place the plate of meatballs on the steaming rack and place the steaming rack onto the steamer. Cook covered until the meatballs are cooked through, 30 minutes or so.
- Cook the rest of the batches using the same method. After cooking the first batch, check the water level and add more if it runs too low. Serve hot as a main.
Storage and reheat
- Store the meatballs in an airtight container in the fridge for 3 days or in the freezer for up to 2 months. After steaming, the meatballs will render some fat and liquid. Drizzle it onto the meatballs before storage, to keep them tender and moist.
- The best way to reheat the meatballs is by steaming, the same method used to cook them. The meatballs will be heated evenly and still be moist inside. Alternatively, you can use the microwave. Make sure the container has some liquid (leftover grease or 1 teaspoon water) in it. Place a loose lid on top and heat it up in the microwave.
Notes
- I reduced the salt from my original recipe, since I received some feedback stating the meatballs were too salty. I think the current salt level (1 1/4 teaspoons) is great if you serve the meatballs as a main dish with greens. If you want to serve it with rice, consider using 1 1/2 teaspoons of salt.
- It can be difficult to keep the meatballs round shaped, because the meat mixture is quite runny. You need to handle them gently, so the balls won’t break apart. You can cook the top and bottom sides first, like cooking a very thick burger patty. Then you can use two spatulas to let the meatball stand, to cook the edges. The meatballs won’t look very pretty, but will still taste great.
Nutrition

Did you make this recipe?
I’d love to hear how it turned out for you! Please take a moment to leave a 5-star rating ⭐️ and share your thoughts in the comments further down the page. It really helps others discover the recipe too.

Deems
Hello Maggie.
Your recipe looks great.
What do you think of baking the meatballs at 400F (with convection) instead of frying and steaming them?
Thank you.
Maggie Zhu
I think it’s possible but the meatballs might not have a nice shape. Since I blended a lot of liquid into the meat, the patty will be quite runny. Pan frying does help with the shape but they don’t really stay round. If you decide to bake them, I think it’s best to skip the 4 tablespoons water. This will make the meatballs a little firmer and stay in better shape in the oven.
If you do decided to bake them, let me know how they turn out 🙂 Happy cooking!
Whitney
This is a particularly delightful recipe. I used ground chicken breast and was a little concerned that the meatballs would be dry because ground chicken breast can be like wallpaper paste. My concerns were well unfounded. These are exceptionally fragrant, juicy, soft but not mushy and so very good. Thank you for sharing this wonderful family recipe, Mrs. Zhu!
D. Wang
Hi! Thank you so much for this absolutely amazing recipe!
My husband loved it. (So did I!🩷)
He said it took him back to his childhood, when his grandmother came from China to stay with them in New York.
Thank you again for all of your hard work and time invested into this wonderful site. I have consulted your recipes for a long time!
Most kind regards, Dawn
Marie
Just turned these into a meatloaf! Well, I like the recipe but had organic beef only, and didn’t have water chestnuts so let’s just say that I was strongly inspired by the recipe but obviously made a lot of adjustments. Personally, I liked the flavor profile and the softness but my husband got stuck on the fact that I started by adding water to the meat and he thought it was making it too soft. He also said it was bland but that’s because I didn’t add any salt. Salting on my plate solved it though but next time, I will add some salt even with the low sodium soy sauce. In the oven at 375, it took 20 minutes.
Maggie Zhu
Hi Marie, thanks for the sharing your cooking experience! I think it’s definitely possible to turn this dish into meatloaf. But I agree, maybe you don’t need the extra water in this case. The water does add a lot of softness. And I do highly recommend adding the salt according to the recipe. I think the meatballs will taste way better because salt draws the flavors out of the ingredient.
Marie
Thank you for the recommendation. I will skip the water next time and for sure add the salt! (I had added a little MSG to bring up the flavors but it wasn’t enough without the salt).
Darcy
I made these tonight for dinner, and they came out perfectly. I did have to add some extra panko, but they were still very tender and so very flavorful. I will definitely make these again and again.
Kate
My family LOVED these. Even my kid who barely eats meat couldn’t get enough! We have to be gluten free, so I subbed 1/2 cup of cooked rice for the panko. This did cause them to be even looser and more patty-like, but who cares? Delicious. We are a big family and I made a triple recipe, so I fried the patties, and tranferred to a rack on a baking sheet. I added boiling water to the pan, covered the whole thing with foil and baked for 25-30 minutes at 400 to steam. We had them with stir fried rice noodles with veggies, and some pickled cucumbers.
Maggie Zhu
Hi kate, thanks so much for leaving a positive review and sharing your experience. It’s so interesting to learn that it’s possible to use rice to replace the panko, and it’s possible to steam them in the oven. I think the oven method is great for anyone who wants to make bigger batches. Happy to hear that your family enjoyed these 🙂
Trudy
Best meatball recipe yet. Making it for the second time this week.
I make them about half the size indicated, and after frying them on both sides, put a lid on the pan, and turn off the heat. The residual heat steams them perfectly. We eat them in soups, noodle bowls, and as appetizers with our favourite dipping sauces.
Amanda Jones
My second time making these Lionshead Meatballs were definitely more successful. The first time I used a mini food processor to chop the water chestnuts and the spring onions, I had to substitute the shaoxing wine with white port as I had neither shaoxing nor dry sherry, and since I was having a kitchen renovation I used experience rather than science to measure some of the wet ingredients. I loved this version, although I found it a little salty for my taste despite the steamed Jasmine rice as per your note at the end, however my husband was not a fan, it was too soft, too salty, too ‘challenging’.
The second version was so much better, the flavours were more balanced and I finely chopped the water chestnuts and spring onions and carefully measured al the ‘correct’ ingredients but did only add 1 tsp of salt. Since I was giving my husband a 2nd chance to like them (aka desperate for him to like them since I want to eat a LOT of them) I cooked a mixture of steamed Jasmine rice and salt and chilli chips (done in the air fryer with minimal oil), which was a winning combination for him and I am very happy to report that he also loves them and will happily have them again, which was music to my ears. Thank you for sharing this recipe, I have not come across this here in the UK before, but have since found some British Chinese versions that are very similar. I made with gluten free breadcrumbs, which may have changed the texture slightly but what a wonderful dish and pretty healthy too. I look forward to trying more of your recipes.
Maggie Zhu
Hi Amanda, I’m so glad to hear you liked the dish and was willing to give it another try after the first time!
The recipe is different from many restaurant version since it’s a family recipe. It contains more liquid so it yields a very tender result.
The salt part is tricky because the other ingredients affects the quantity. I used panko breadcrumbs in this recipe, which is very mild. Some breadcrumbs can be quite salty, so reducing salt might be needed.
Anyway, so happy that you ended up liking the dish and thanks for leaving a positive review 🙂
SueK
I am giving you 5 stars even though I have not made them yet because I know they are going to be excellent as all the other recipes of yours that I have tried. Question: I want to make them smaller as we prefer our meatballs to be smaller. I feel I would need to shorten the steaming time frame but how much would you think?
Maggie Zhu
I think it really depends on how small the meatballs are, but you probably only need 15 to 20 minutes if the meatballs are half of the size.
Edit: I forgot to mention, it also depends on how you stack the meatballs. If you steam a lot at a time and pile them up, the meatballs will take longer to cook. I think the safest way is to set a timer at 15 or 20 minutes and check the doneness. It’s the best not to overcook the meatballs so they will remain very juicy.
SueK
That was my thought regarding time and not drying them out. Well I am off to get everything cut up for sweet and sour chicken and clean up some dishes. Have a great day and take care of Dozer!!
Linda
Very tasty tender meatballs which I ate with steamed rice. Just delicious. Best meatballs I’ve made in a long time. Thank you.
Eileen
Excited to try this for Chinese New Year party. Thank you for sharing your Grandma’s recipe. What ground pork fat content does recipe call for (lean, regular, etc.).? Thanks in advance for your reply!
Maggie Zhu
You should use the regular fatty pork for a more tender result. Happy cooking and hope you enjoy the dish 🙂
Peter T.
I followed your recipe in every way except that I used less water chestnuts (about half). We all loved them and we all agreed that I should make them again! This is the third recipe by you that I have tried, and they have all been excellent. Thank you!