If you’ve been following my blog for a while, you know that fried rice is one of my favorite dishes to cook. Most of the time, I try to use minimal ingredients to make a quick meal. For example, 5-Ingredient Egg Fried Rice, Vegetable Fried Rice, and Ground Pork Fried Rice. But when I make fried rice for Sunday dinner or a gathering, I like to make a slightly more involved fried rice, like this Thai pineapple fried rice.
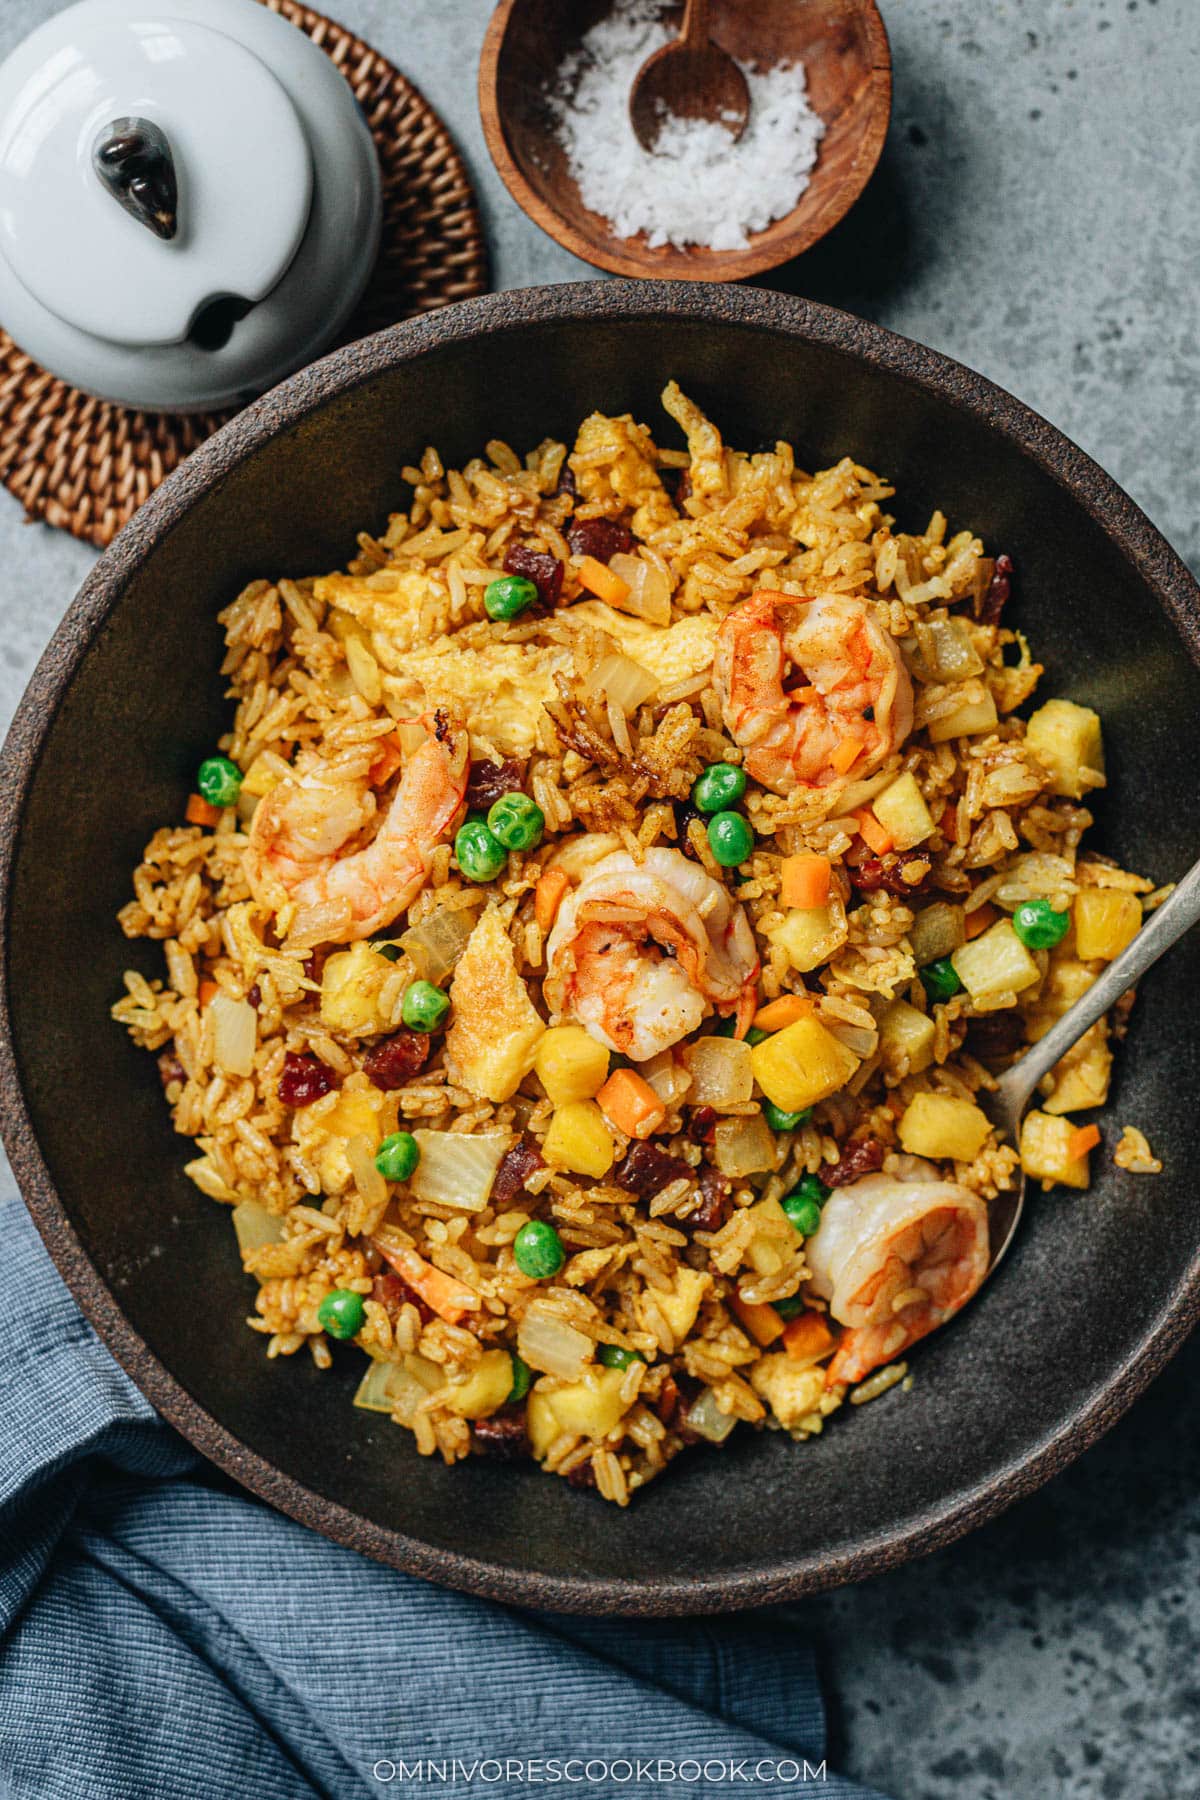
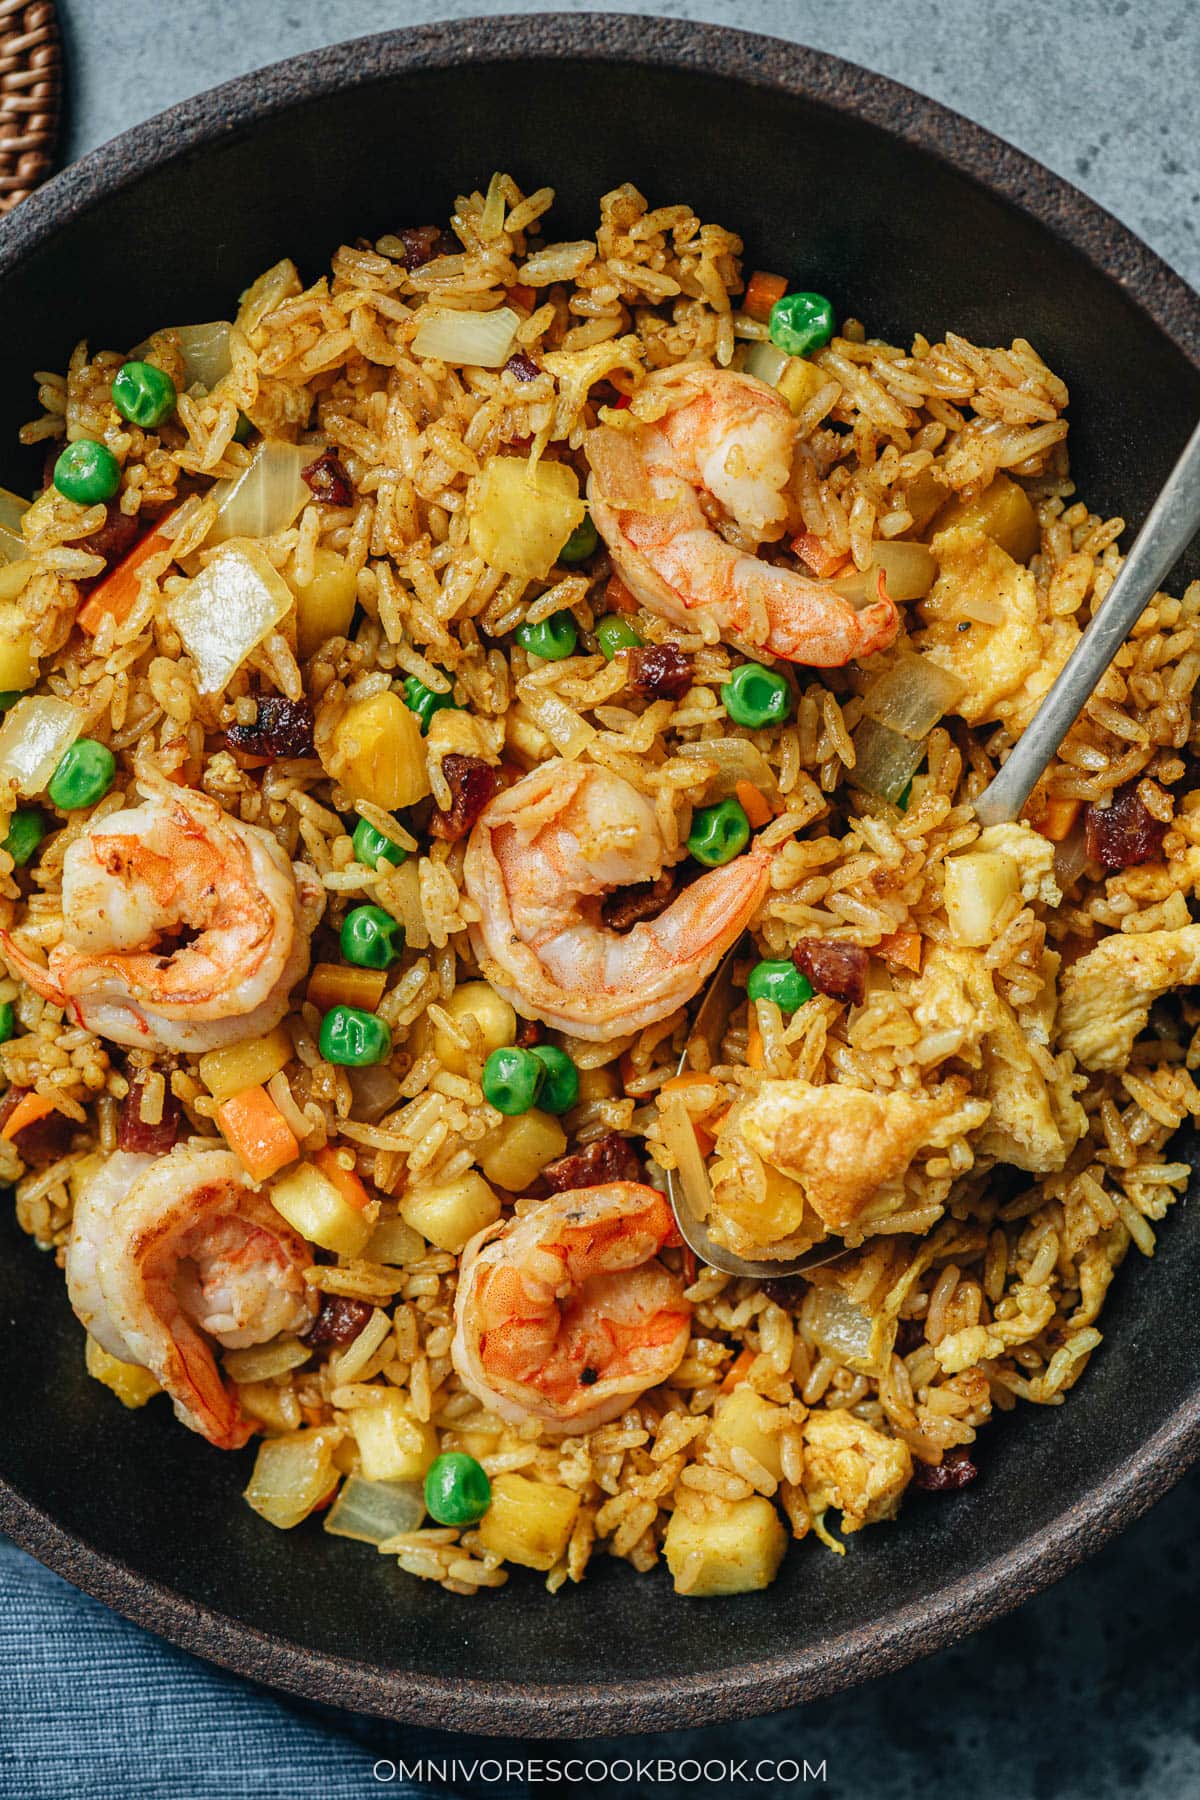
There’s something irresistibly joyful about a plate of colorful fried rice, especially when it comes packed with sweet, savory, and aromatic flavors. What makes this dish truly special is its beautiful balance – the salty richness of the oyster sauce and soy sauce paired with the gentle warmth of curry powder and the juicy burst of sweet pineapple. Each bite brings out a bit of everything – crispy rice, plump shrimp, fragrant lap cheung (Chinese sausage), and tender veggies. It’s colorful, comforting, and ready in under 30 minutes!
Ingredients
There are a few ways to cook Thai pineapple fried rice. This recipe was based on my favorite version when I was back in China, whenever we’d go out for Thai food. The recipe uses a small amount of Chinese sausage to boost the flavor and curry powder to add a special aroma. In the restaurant, the dish was usually presented in a hollowed-out pineapple. But I used cut pineapple to simplify the prep process for this homestyle version.
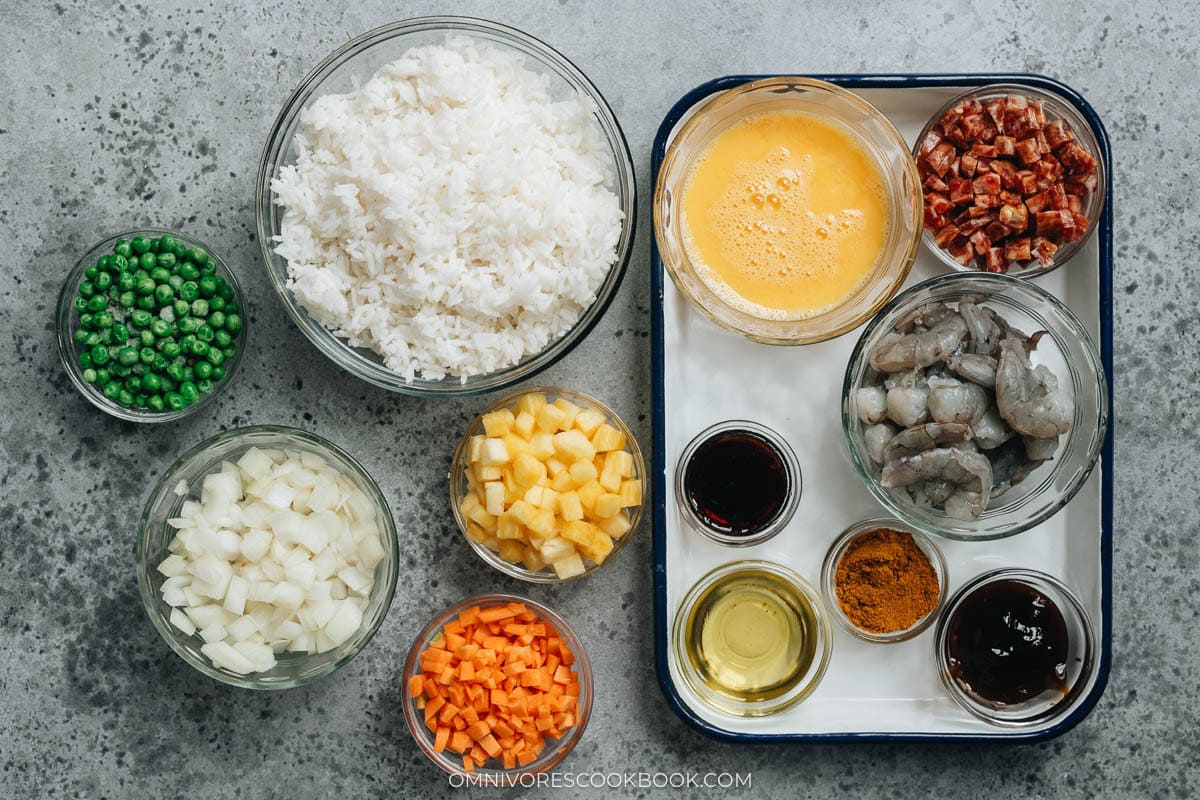
- Day-old rice: Overnight rice is ideal as it’s drier and easier to separate. It crisps up much better than fresh rice, creating separate grains instead of clumping together during the stir fry. My favorite type for this dish is jasmine rice.
- Shrimp and Lap Cheung: A classic combo for a bold flavor base and texture. However, you can skip the Lap Cheung if you do not have it on hand.
- Vegetables: Frozen peas and carrots add texture and color.
- Pineapple: Fresh pineapple adds bright acidity and a golden color. I highly recommend using fresh instead of canned, which is usually too sweet.
- Flavor base: Soy sauce and oyster sauce for a rich umami, and mild Madras curry powder for aroma and color.
Pro tip for crispy fluffy rice
Fluff the rice when you’re measuring the rice, and do NOT pack it down into your measuring cup. You want plenty of air between the grains, so they separate easily during cooking and create a better texture. Packing the rice results in a clumpy texture that won’t sear properly.
How to make
Make sure you have everything prepped before starting the stir fry, since you will need to move fast once the cooking starts.
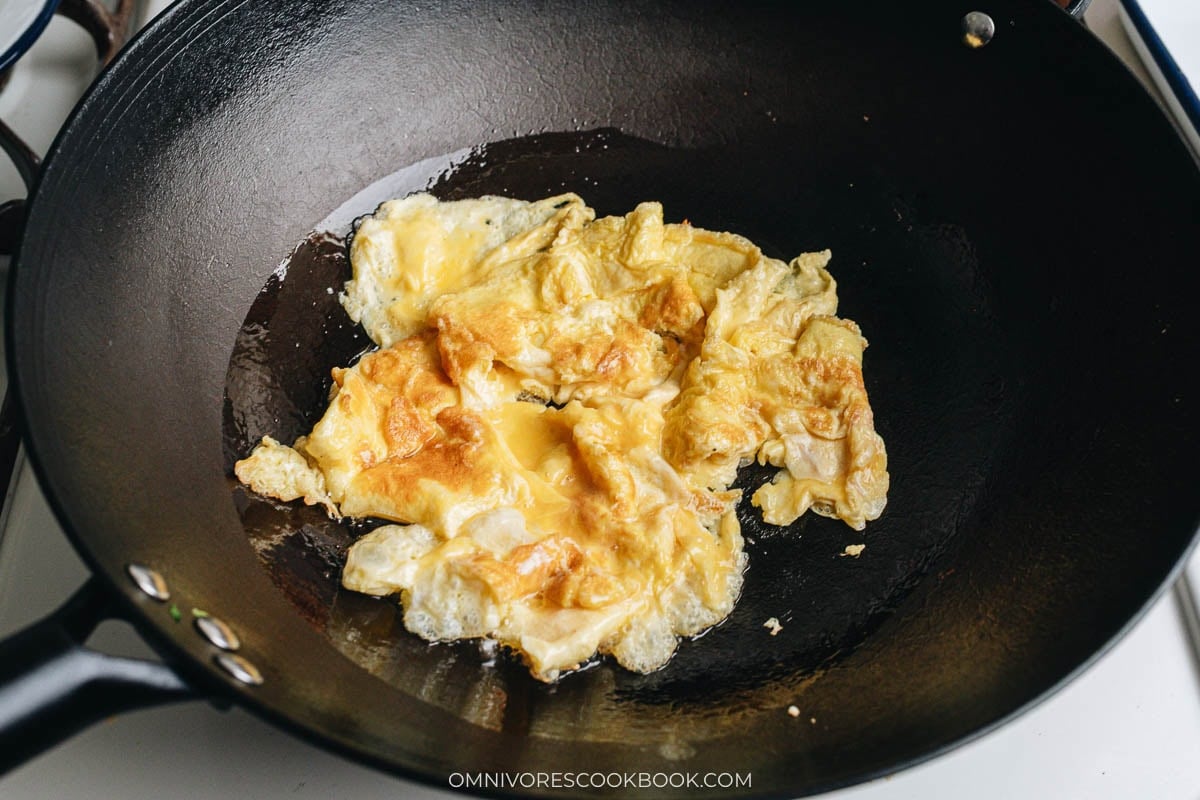
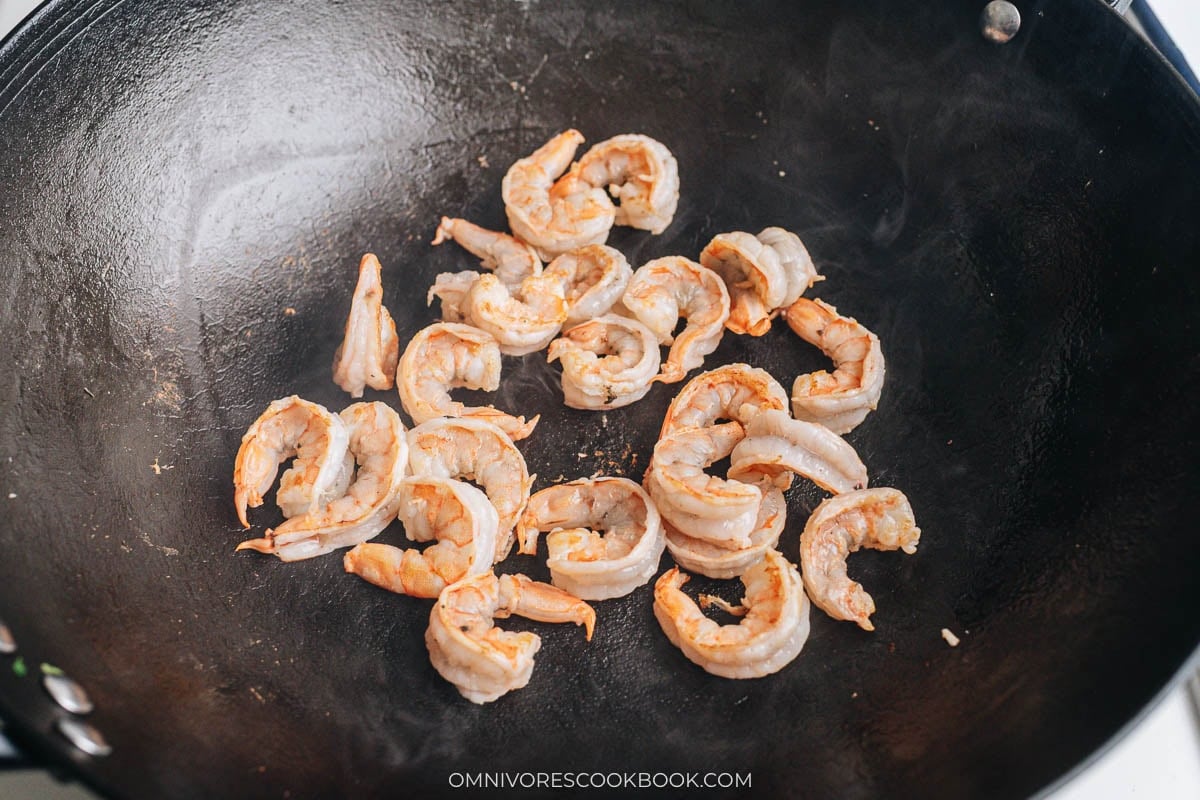
My recipe cooks the eggs and shrimp separately, which ensures the wok remains hot without overcooking the ingredients. It’s a step that takes a little extra time but creates an amazing result.
1. Scramble the eggs. I like to heat up the wok very hot, then cook the eggs until the surface is golden brown but the inside is still not completely cooked. So I get a nice crispy texture, and the rice will soak up some uncooked egg later.
2. Sear the shrimp. By using a very hot wok and taking the shrimp out as soon as it’s cooked, it prevents the shrimp from overcooking and yields a nice tender texture.
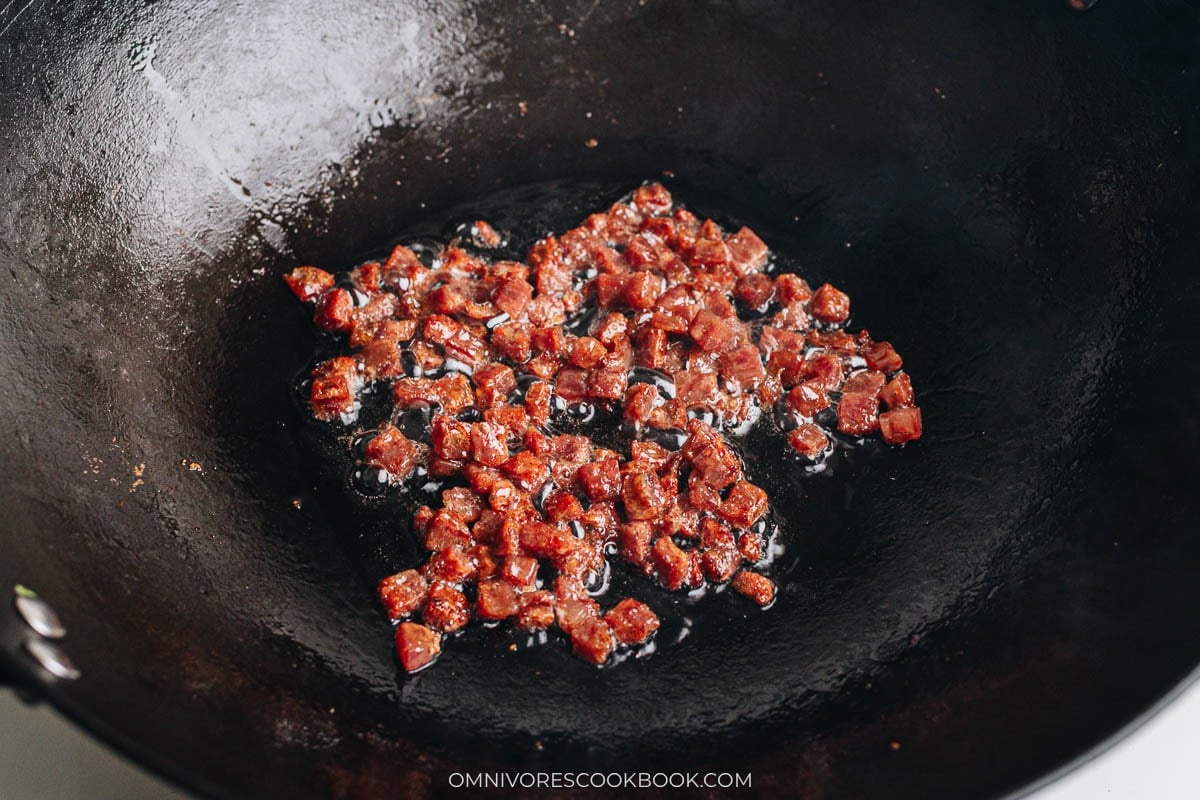
3. Fry the Chinese sausage until crispy. This step is important because you want the fat to render out of the sausage to season the rice. The sausage will also have a chewy texture without tasting greasy after frying.
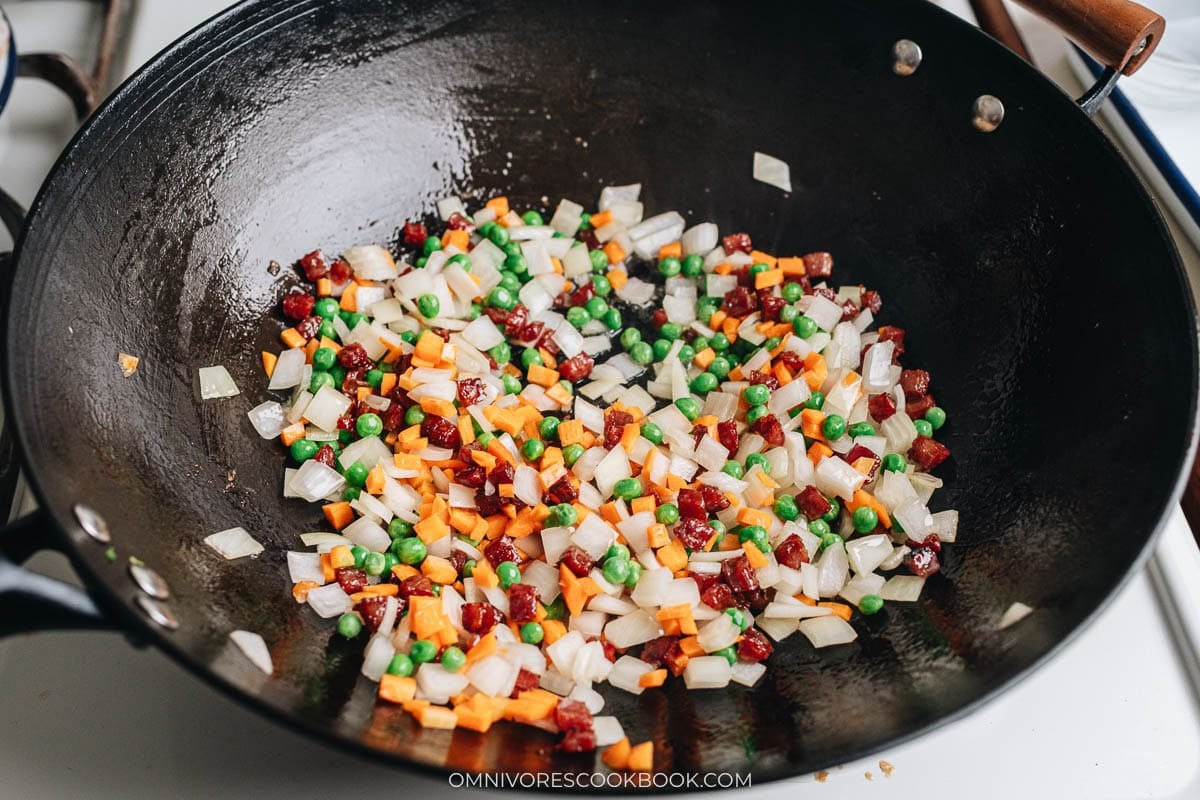
4. Stir fry the vegetables, but only briefly, so they retain a crisp texture at the end without turning soggy.
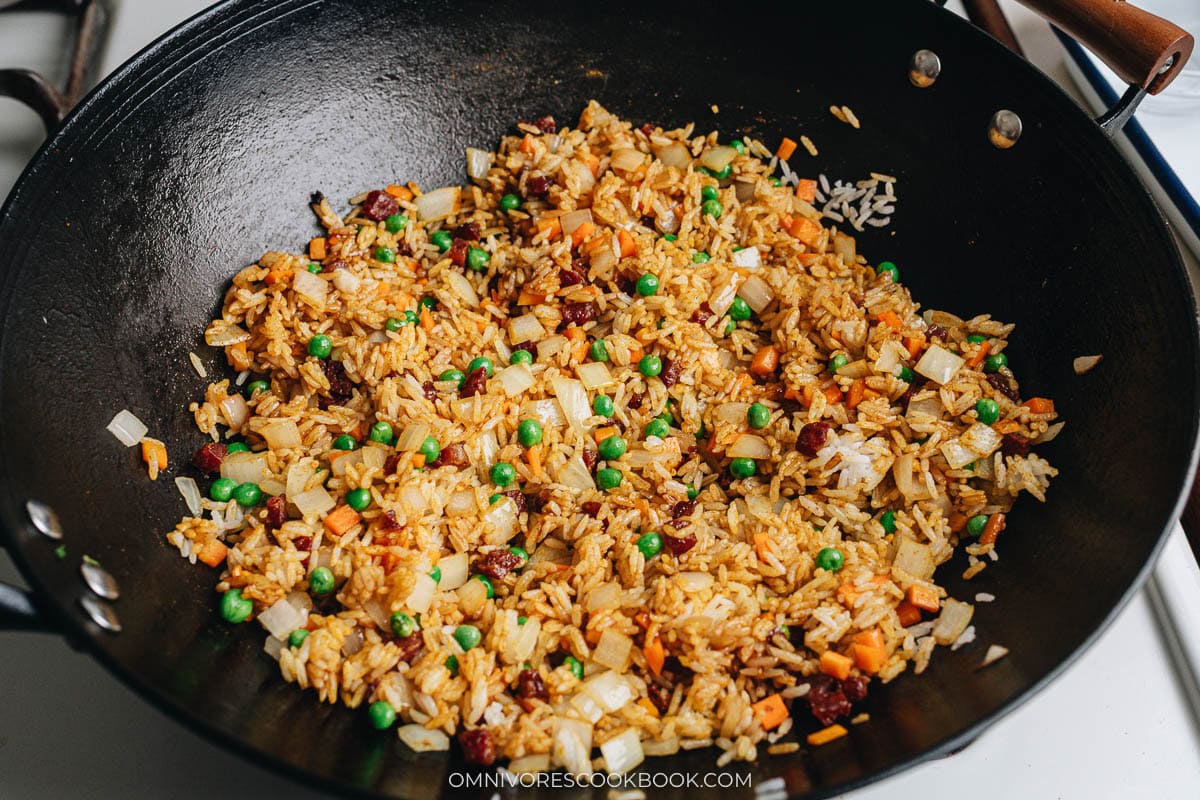
5. Toss the rice with the vegetables until heated through and the grains separate, then mix in the sauce. Make sure to toss the rice for long enough, so the grains crisp up. Once you add the seasonings, the rice will be harder to separate. And if you cook the spices in the hot pan too long, they will start sticking to the pan and burn.
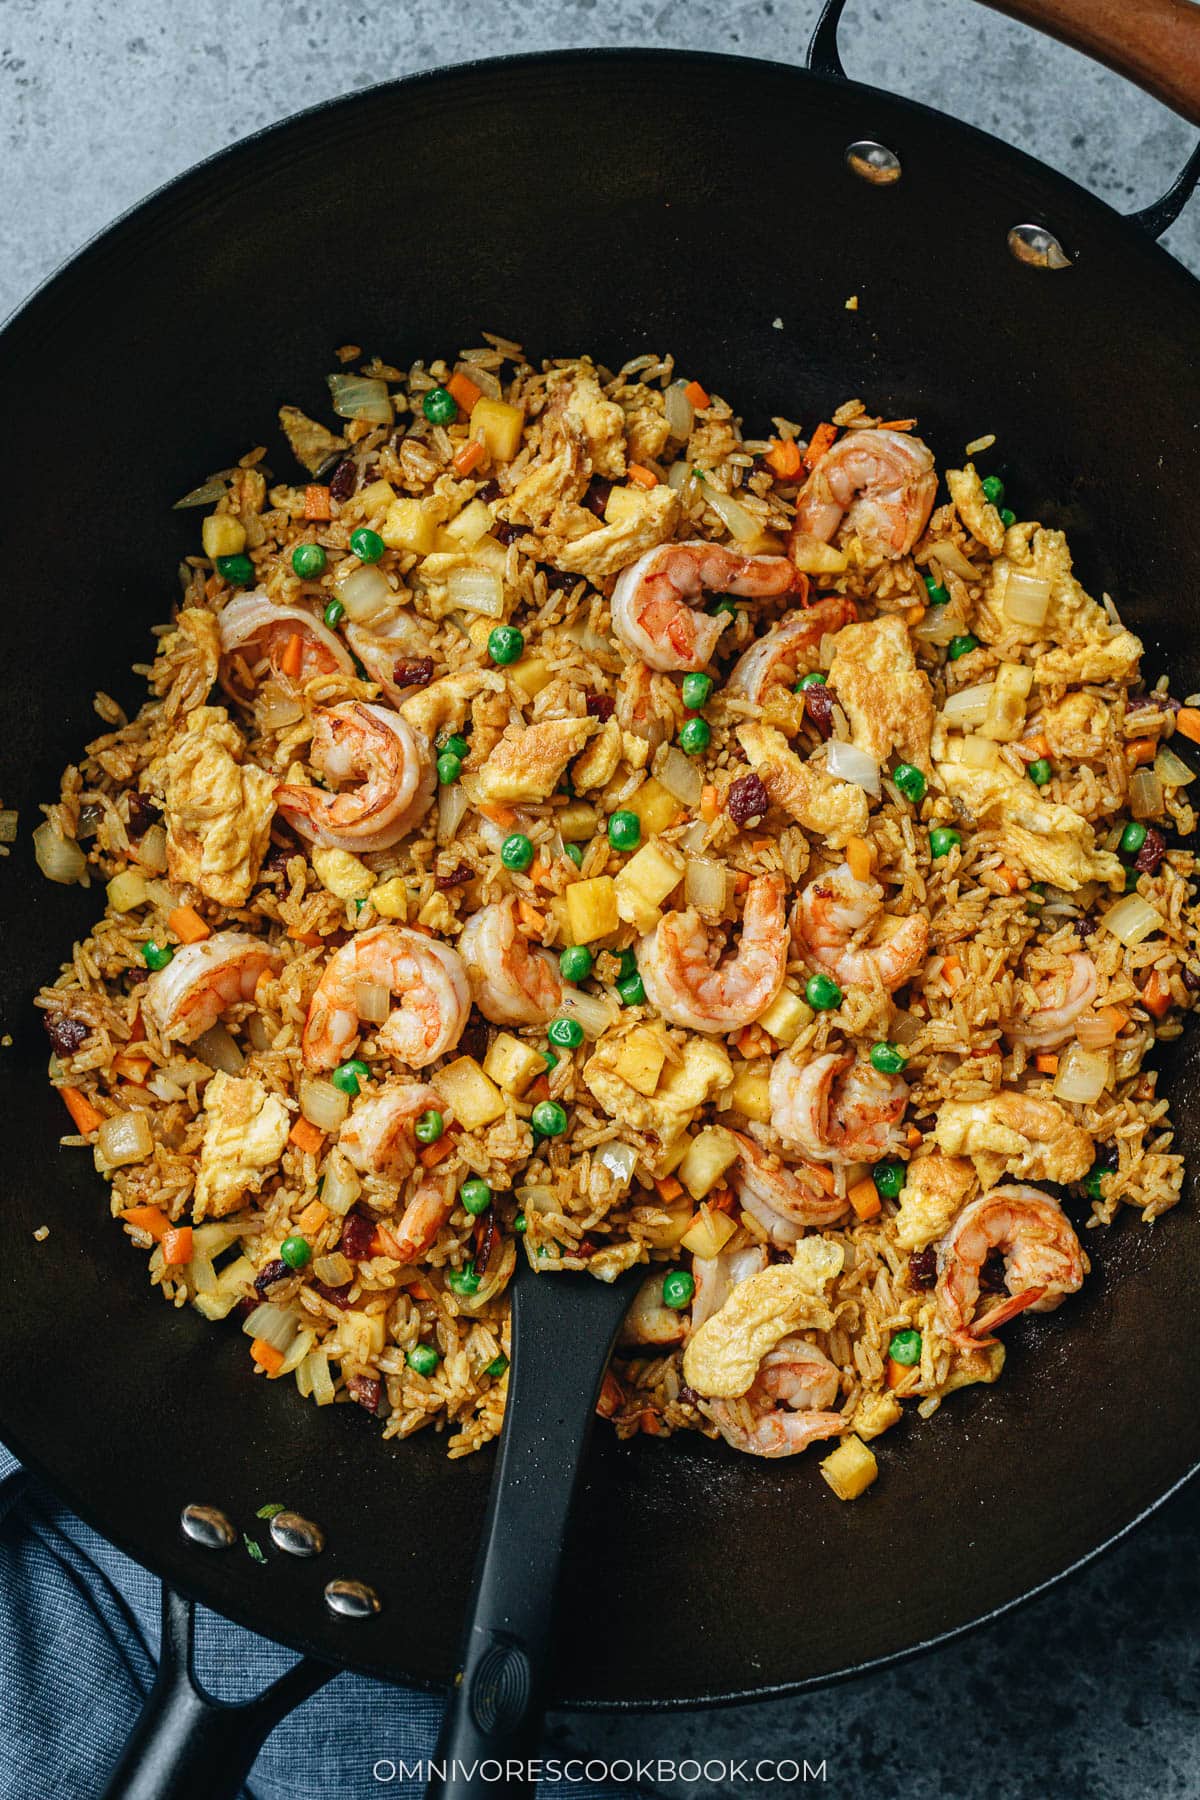
6. Lastly, add back the cooked eggs and shrimp, and toss everything together.

Pro tip for wok cooking
Although you can cook Thai pineapple fried rice in a large skillet, a wok is a much easier utensil for this recipe, since it allows you to toss all the ingredients without them flying all over the place. My recipe also cooks several ingredients separately, which helps the wok to maintain a high temperature so you get some wok hei for a smoky taste.
Make sure you heat up the wok until it just starts to smoke. Use a generous amount of oil at the beginning of cooking, and swirl the wok to coat a large area to prevent sticking. Using day-old rice also reduces the starch from the grains, making the rice stick less.
One tip to remember is, once you add an ingredient, give it time to sear before moving it. This helps the wok to regain temperature and sear the ingredients. And only start to toss and stir after the ingredients have seared and the wok is piping hot (you can hear the sizzling and see the smoke coming up).
How to serve
This Thai pineapple fried rice is best served hot and fresh from the pan. Enjoy it as a hearty main or pair it with:
- Pad Thai, Thai Salmon Curry, Thai Basil Chicken or Drunken Noodles for a Thai-inspired meal. Serve Mango Sticky Rice for dessert.
- Blanched Gai Lan or Sautéed Broccoli for some extra greens.
- Or a refreshing Spicy Cucumber Salad to balance the richness.
Leftovers are great for lunch the next day, just reheat them gently in the microwave or on the stove with a splash of oil.
Frequently asked questions
Do I need to use day-old rice?
Yes! Day-old or leftover rice works best because the grains are firmer and drier, which prevents the fried rice from turning mushy. If you don’t have overnight rice, you can use freshly cooked rice by spreading it out on a tray to let it cool off, then store it in the fridge for at least an hour to dry out. Note, the rice will still be more moist, and you should try to fluff the rice as much as possible before making it into fried rice.
Can I use canned pineapple instead of fresh?
Absolutely. Fresh pineapple adds the best flavor and texture, but canned pineapple chunks work well too. Just make sure to drain the juice and pat the pineapple dry before adding it to the rice.
What can I use instead of lap cheung (Chinese sausage)?
If you can’t find lap cheung, you can use diced bacon, ham, or regular sausage. The small amount of salty meat adds a lot of flavor to the rice.
What type of curry powder should I use?
Mild Madras curry powder is preferred in this recipe, because it adds warm, earthy notes without being too spicy. You can substitute regular yellow curry powder or Japanese curry powder if you like.
Want to Save This Recipe?
Enter your email below & we’ll send it to your inbox. Plus get great new recipes from us every week!

Thai Pineapple Fried Rice (菠萝炒饭)
Ingredients
- 2 tablespoons oyster sauce
- 1 tablespoon light soy sauce
- 1 teaspoon curry powder (I prefer mild Madras curry powder)
- 3 tablespoons vegetable oil
- 3 eggs , beaten with a pinch of salt
- 2 lap cheung sausages , finely diced (or ham, diced)
- 1/2 yellow onion , diced
- 1/2 cup peas , frozen
- 1/2 cup carrot , diced
- 1/2 lb shrimp , peeled and deveined
- 4 cups overnight rice overnight rice works best, separated by hand (*Footnote)
- 1 cup chopped fresh pineapple , diced
Instructions
- Combine the oyster sauce, light soy sauce and curry powder in a small bowl.
- Heat 1 tablespoon of oil over medium-high heat in a large skillet until smoking. Add the eggs. Scramble the eggs and transfer to a plate.
- Add 1/2 tablespoon oil and the shrimp. Sprinkle with a pinch of salt. Cook, stirring occasionally, until the shrimp are just cooked through, 2 to 3 minutes. Transfer to the plate with the eggs.
- Add 1 tablespoon oil and lap cheung. Cook over medium heat until the surface turns golden brown.
- Add the onion, peas and carrot. Cook over medium-high heat until the vegetables just soften, 2 to 3 minutes.
- Add the rice and pour in the remaining 1/2 tablespoon oil. Stir and chop to separate the rice. Cook until the rice is heated, 2 to 3 minutes. If you’re using a wok or a carbon steel skillet, the rice might stick to the pan. You can add a bit more oil and use your spatula to release the rice.
- Pour in the sauce. Stir to coat the rice evenly with the sauce. Add back the cooked eggs and shrimp. Stir to mix well.
- Add the pineapple and toss to mix again. Taste the rice and sprinkle salt if needed. Transfer everything to a big plate. Serve hot as a main dish or side dish.
Notes
- To make this dish gluten-free, use a gluten-free oyster sauce, and use tamari to replace soy sauce.
Nutrition

Did you make this recipe?
I’d love to hear how it turned out for you! Please take a moment to leave a 5-star rating ⭐️ and share your thoughts in the comments further down the page. It really helps others discover the recipe too.
Herman Gersten
Another delicious recipe, Maggie. Not wanting to take another trip to my favorite Chinese market this week, I went ahead with this dish, subbing a few ingredients which were on hand. 1. Your Char Siu , chopped, for the chicken. 2. Pine nuts (from China) for the cashews. 3. Dried parsley for the cilantro. 4. Freshly cooked rice for the day old. (I read recently that there is no difference. I tried the fresh hot rice and it was fine. No sticking at all). A great tasty meal for the socially distanced.
Thank you very much. Xie xie.
James Ng
Hi Ms.Maggie,
Tried this recipe yesterday. Turned out very good. Delicious too! Instead of chicken, I substituted with minced pork. Am going to try out another recipe today. Salt and Pepper Chicken without deep frying.
Thank you very much.
James
Linda
I’ve been following you for a while and trying out all your recipes. I think I bought every sauce and ingredient on your must have list (with the exception of the spicy ones – we don’t care too much for spice in our house). Can I share with you that every single recipe I’ve tried so far has been delicious, easy, and probably my husband’s favourite dish of all time. You’re now on my list of absolute favourites. Thank you.
Mauro Rabinovitch
Thank You very much, Maggie!
I am a 64 yrs old recently retired Ophthalmologist, living in Sao Paulo, Brazil.
I have discovered in cooking a source of joy!
My wife stopped eating red meat 30yrs ago, and my youngest daughter, that is still living with us, is turning vegetarian.
I have adapted your recipe using smoked tofu instead chicken to please my daugther, and……
It went very welll!
My next challenge will be the veggie tonkatsu ramen!
where can I watch your videos?
Kindest regards
Mauro
Maggie
Hi Mauro, thanks so much for the kind words! I have a Youtube channel but I haven’t updated it for a long time: https://www.youtube.com/user/omnivorescookbook/videos I do plan to upload more videos later this year, once I found the resource to help me shoot it.
Re veggie tonkatsu ramen, my husband Thomas has a very good one here: https://gastroplant.com/vegan-tonkotsu-ramen/
It’s one of our favorites of all time 🙂