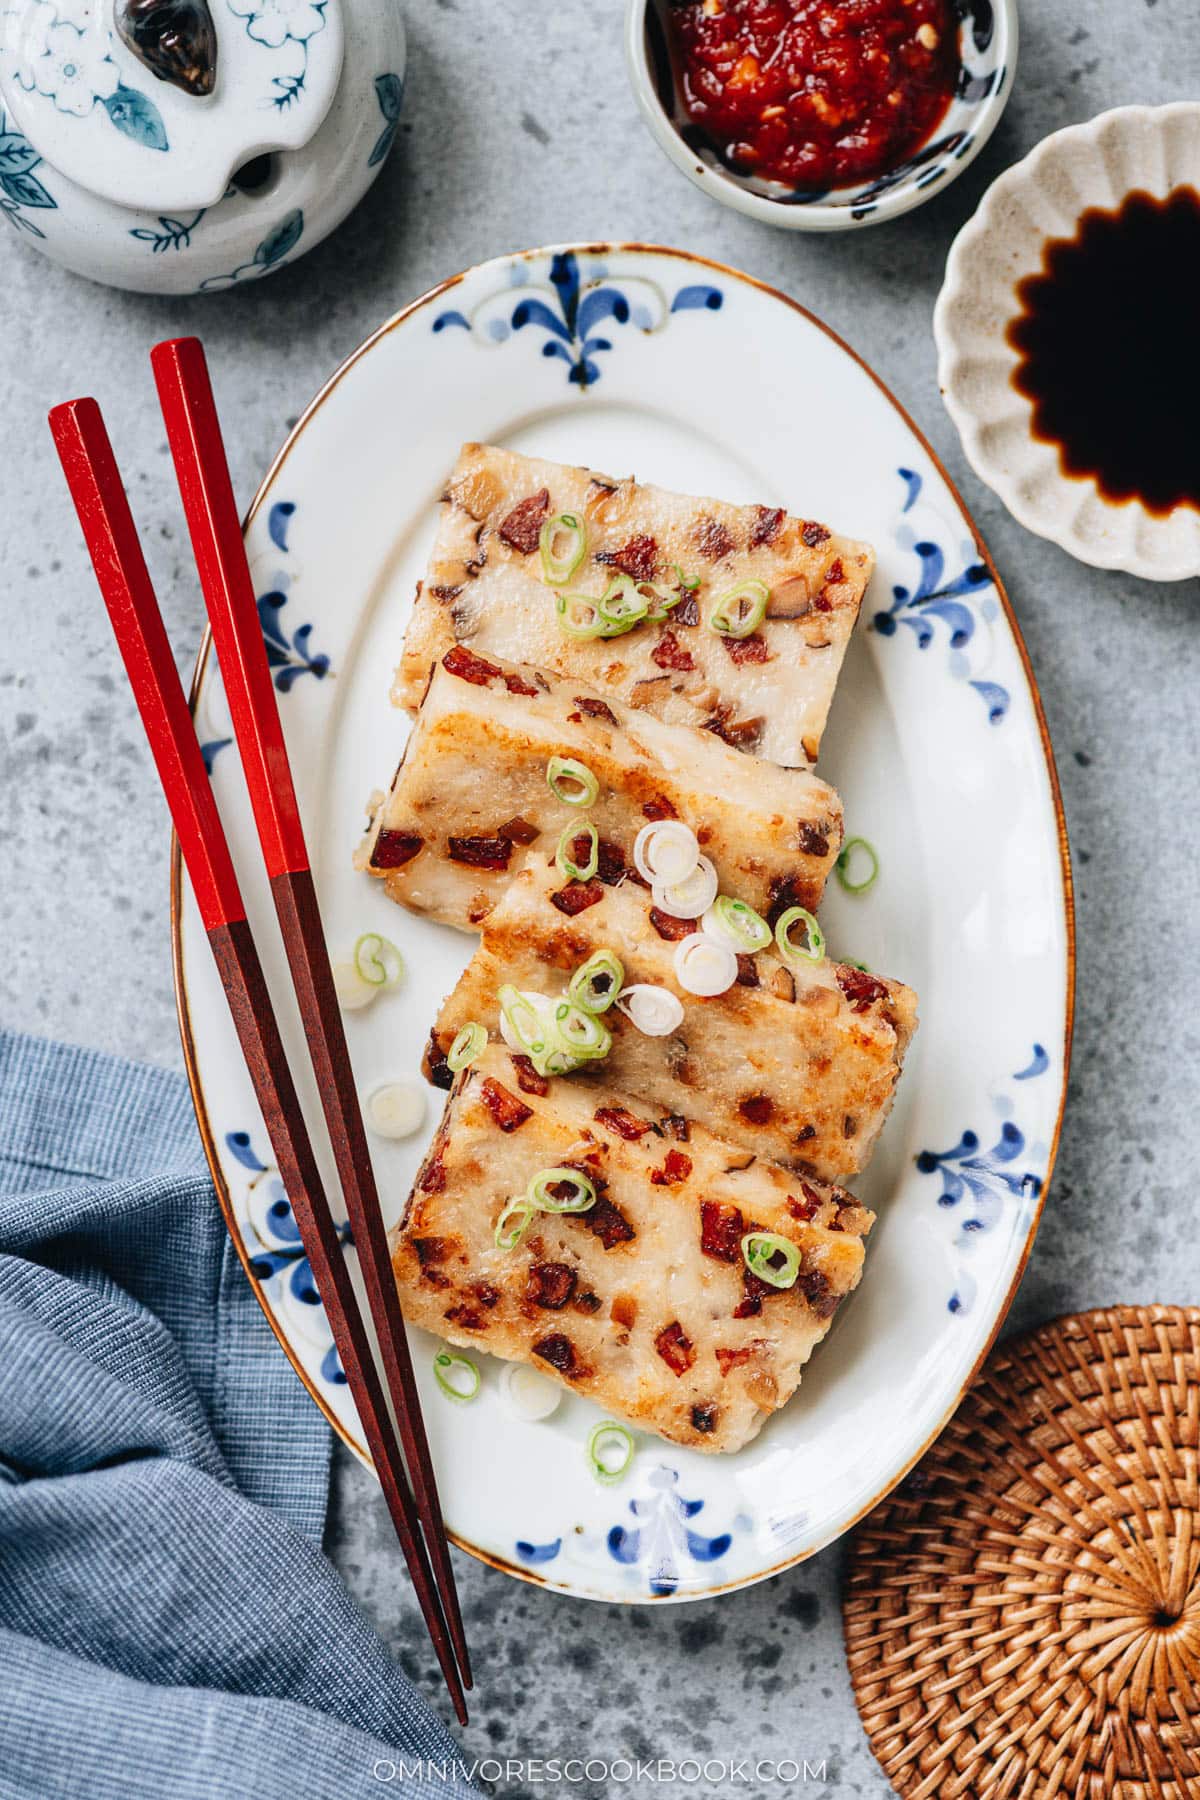
Lo bak go (萝卜糕) is a traditional Cantonese dim sum made from rice flour and daikon radish, steamed until set and then pan fried until golden and crispy. It is a must have during Chinese New Year celebrations and Lunar New Year feasts, symbolizing good fortune for the year ahead.
I grew up eating turnip cake at dim sum restaurants, but I was never impressed until I tried the homemade version loaded with delicious filling. For my recipe, I grate the daikon, cook it with a savory filling of Chinese sausage and dried shrimp, steam the batter for about an hour, then rest it overnight and pan fry slices until crispy. So good!
I know this recipe takes time and effort, but the results are worth it when my family gathers around the table during the holidays. My husband loves the crispy edges and my friends always ask to take some home, so I make extra for them since it stores so well. I hope you give this recipe a try at home and make it a tradition in your kitchen too.
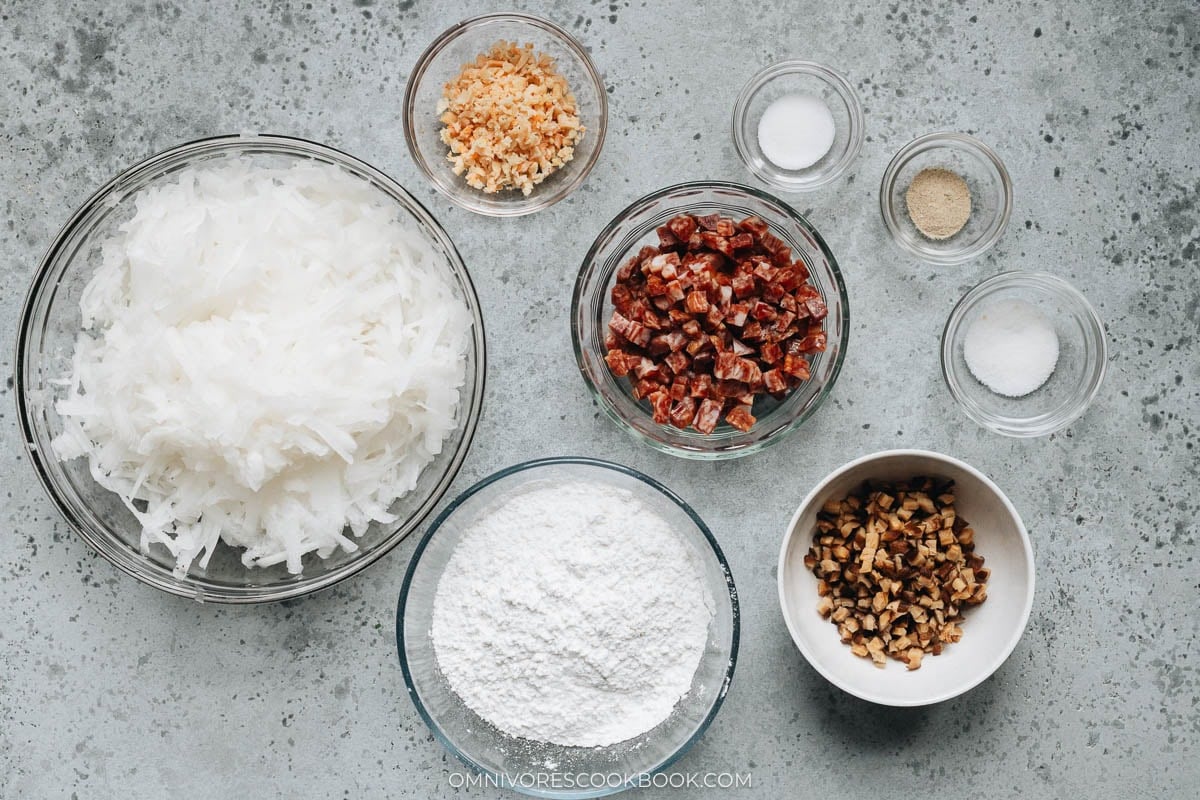
Ingredients
I grouped the ingredients by dried goods that need soaking, the main vegetable, the filling, and the seasonings for the batter.
Dried Goods
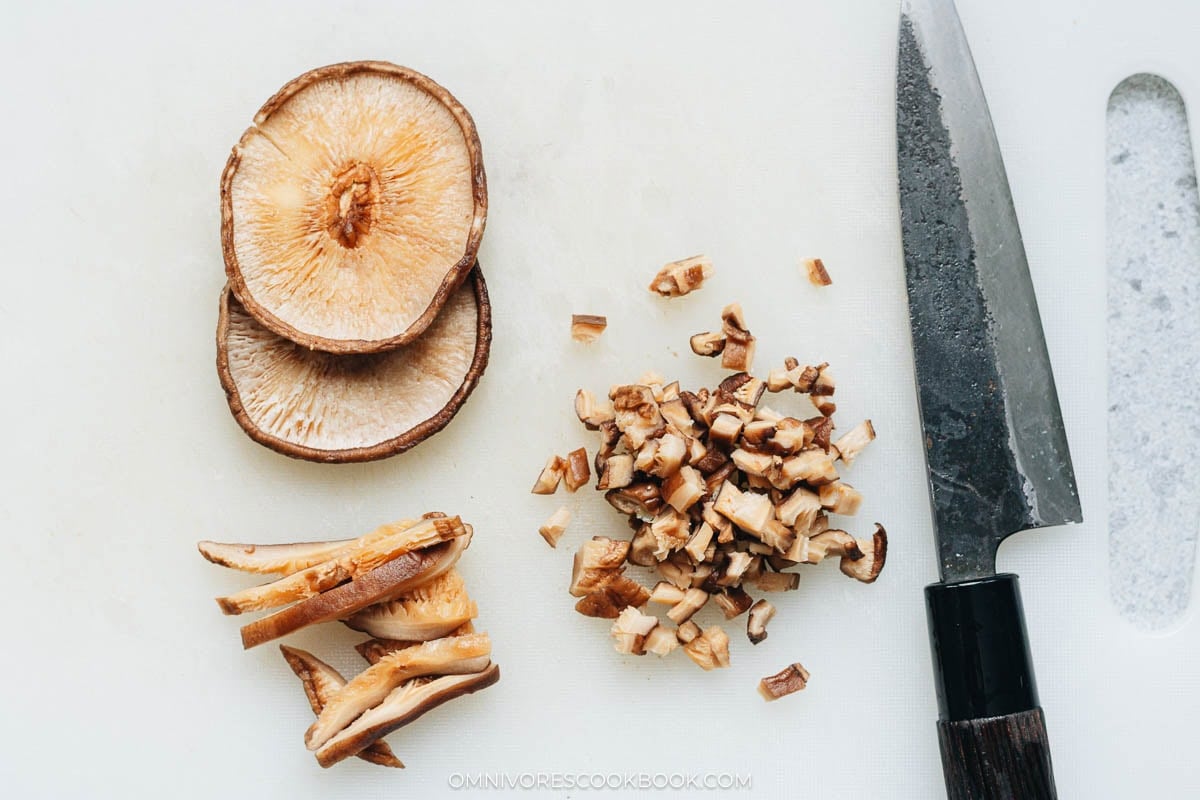
Dried shiitake mushrooms: These add deep umami flavor to the filling. I soak them in warm water until soft and dice the caps into small pieces.
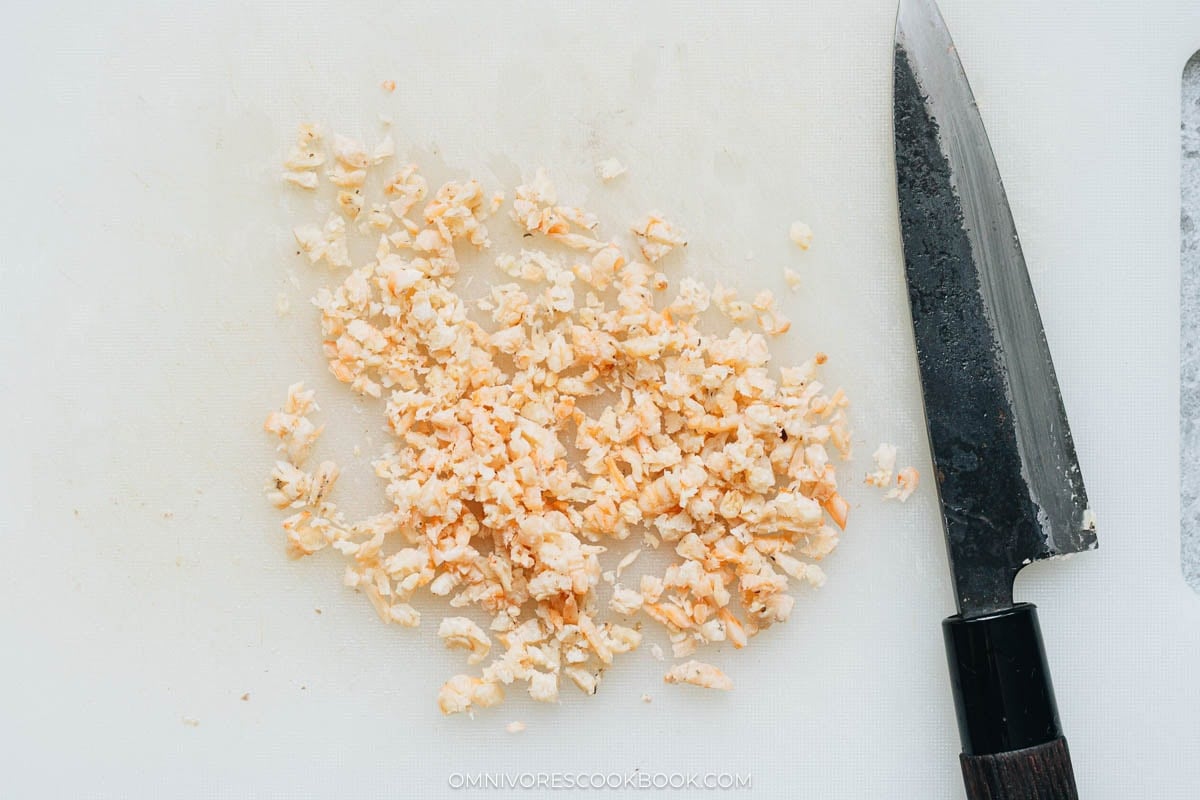
Dried shrimp: These tiny sun dried shrimp bring an intense savory taste. I mince them after soaking so they distribute evenly throughout the cake.
Main Ingredient
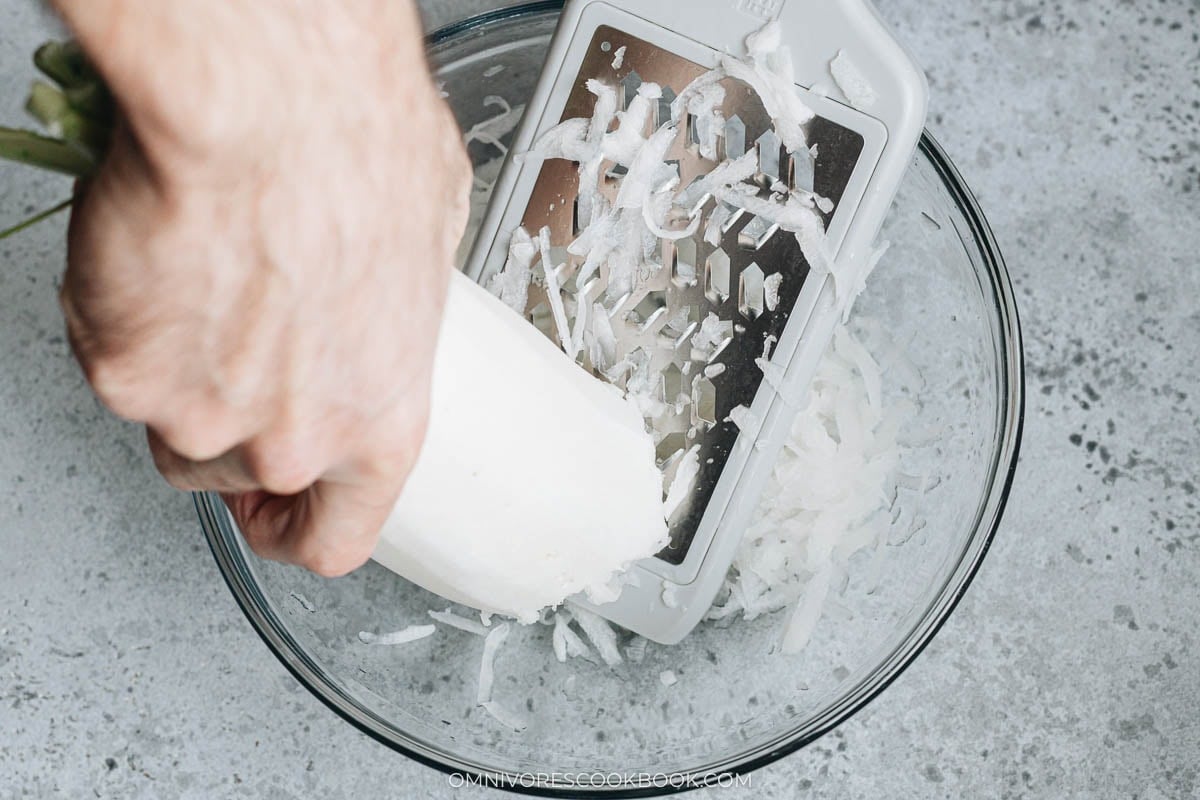
Daikon radish: This is the star of the dish, grated coarsely and cooked until soft. You will need about 2 lbs before peeling, which yields around 1 lb 4 oz grated. Do not use turnip in this recipe, or else the finished dish could be off.
Filling
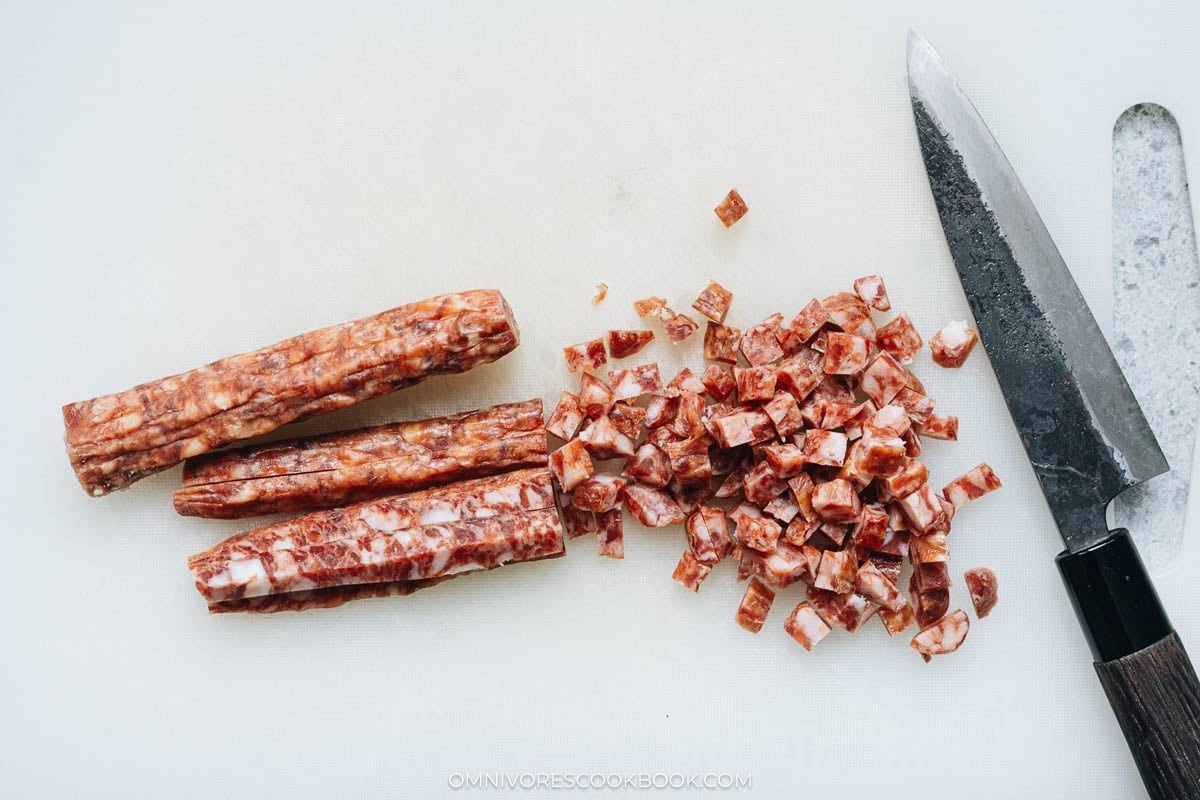
Chinese sausage: I use 3 sausages, slice it in half, cut each half into thin strips, and then chop everything into small pieces.
Note: I left the pieces a little larger in my version, but you can mince further if you prefer the dim sum restaurant style.
Batter and Seasonings
Rice flour: I use 1 1/4 cups to create a batter that sets into a tender cake. The ratio of flour to liquid is the trickiest part of this recipe.
Sugar, salt, white pepper: These simple seasonings balance the savory filling.
Different filling variations
Every family has their own preferred filling for turnip cake. Here are some of the most popular options:
Dried scallop: It is also called conpoy (干贝). You can use it to replace the dried shrimp, or add about 2 tablespoons dried scallop and reduce the Chinese sausage into 2 links. Soak in warm water thoroughly then use your hands to break them into thin threads before using.
Cured pork belly (腊肉): It adds a savory taste and amazing texture. You can use a 1/4 cup small diced dried ham to replace 1 to 2 links of Chinese sausage.
Scallions: You can thinly slice 1 to 2 scallion and add to the turnip cake. You don’t need to cook them before adding. Scallion adds freshness, a subtle sweetness, and bright color.
How to Make
Soak the mushrooms: Rinse the shiitake mushrooms with tap water and rub them to remove any dirt. Place in a bowl and add warm water to cover. Soak for 15 minutes, or until soft. Drain thoroughly and dice the caps into 1/4 inch pieces.

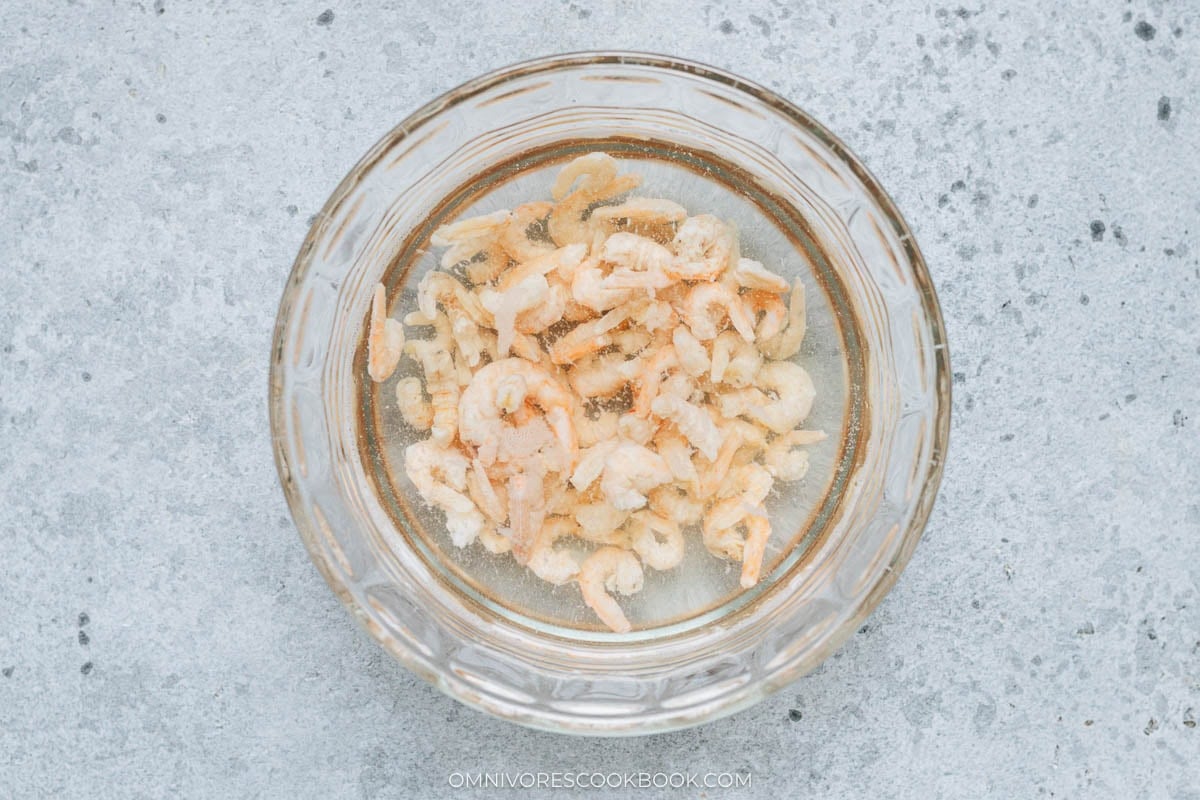
Soak the shrimp: Rinse the dried shrimp with tap water and rub to remove any dirt. Place in a separate bowl and add warm water to cover. Soak for 15 minutes, or until soft. Drain thoroughly and mince.
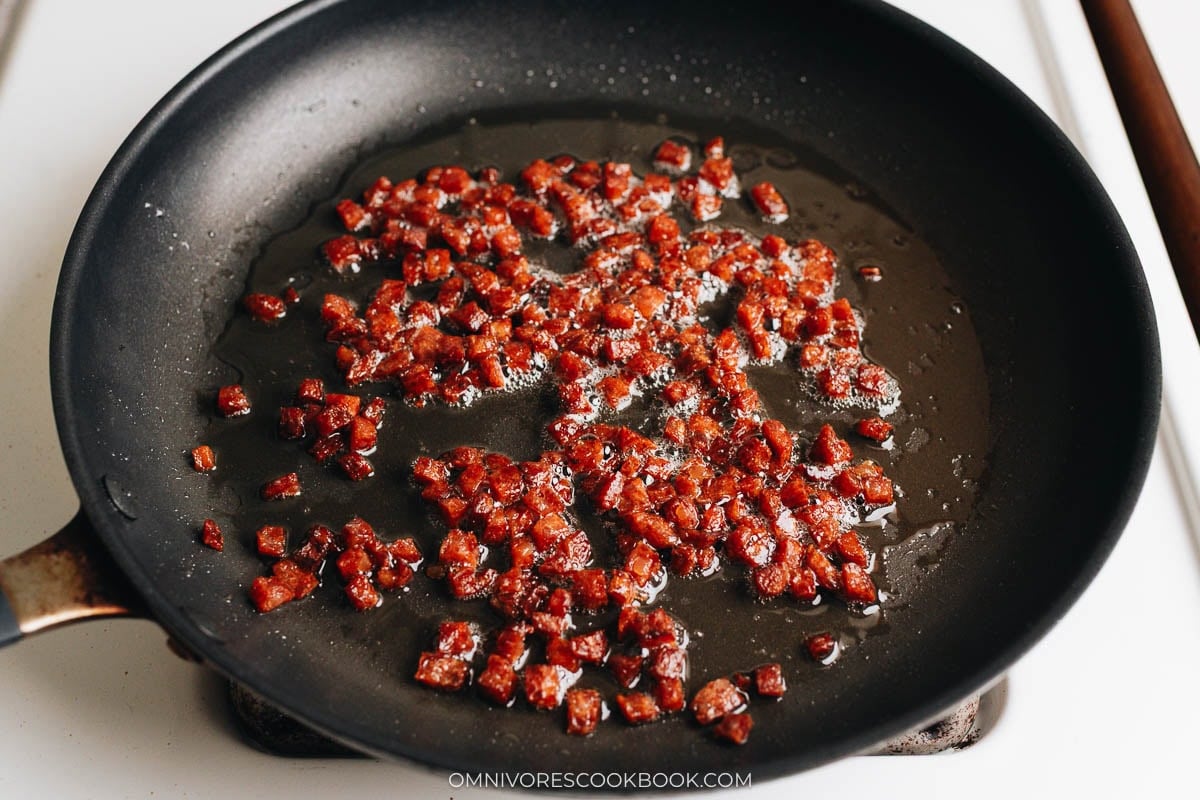
Cook the sausage: Add the Chinese sausage to a large nonstick skillet and heat over medium. Turn to medium low once it starts to sizzle and cook until lightly browned and some fat has rendered, about 5 minutes. Transfer to a bowl and reserve the rendered fat in the pan.
If you use minced Chinese sausage, stir and cook for 1 minute or so, until they are just lightly seared.
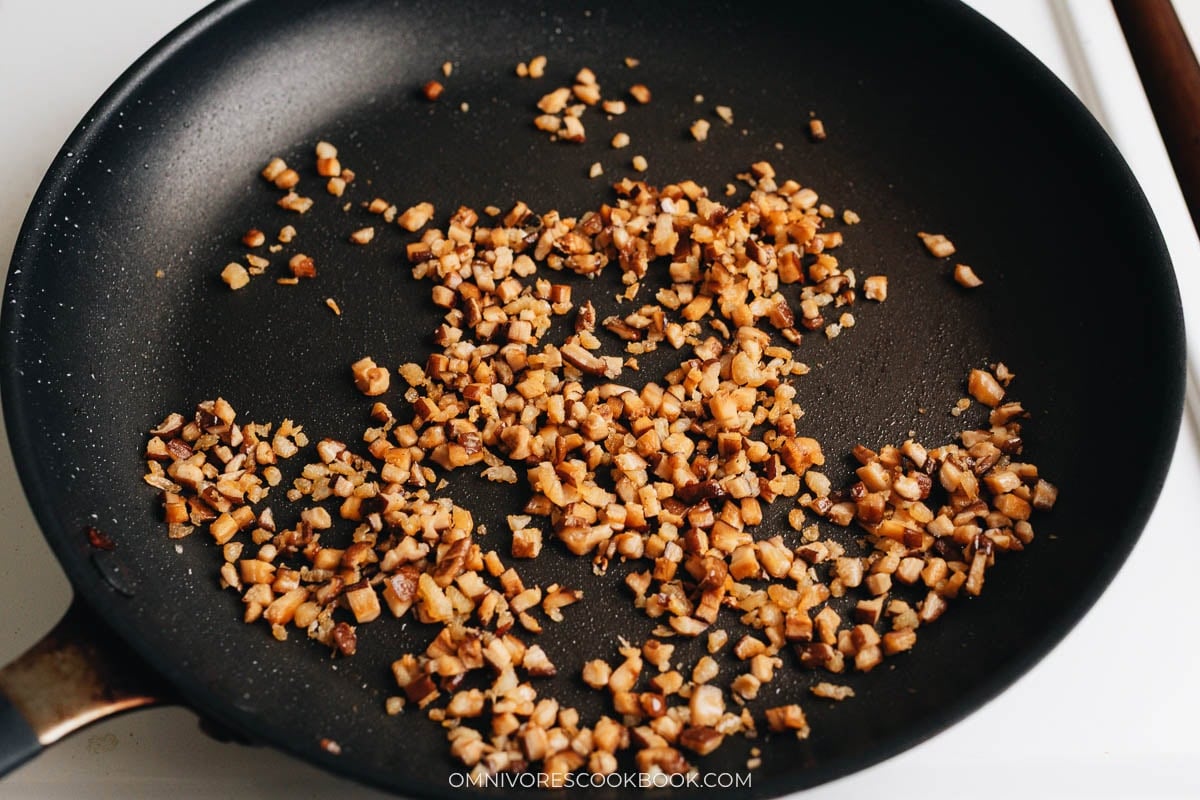
Cook the mushrooms and shrimp: Add the mushrooms and shrimp to the pan. Cook until lightly charred, then transfer to the same bowl with the sausage.
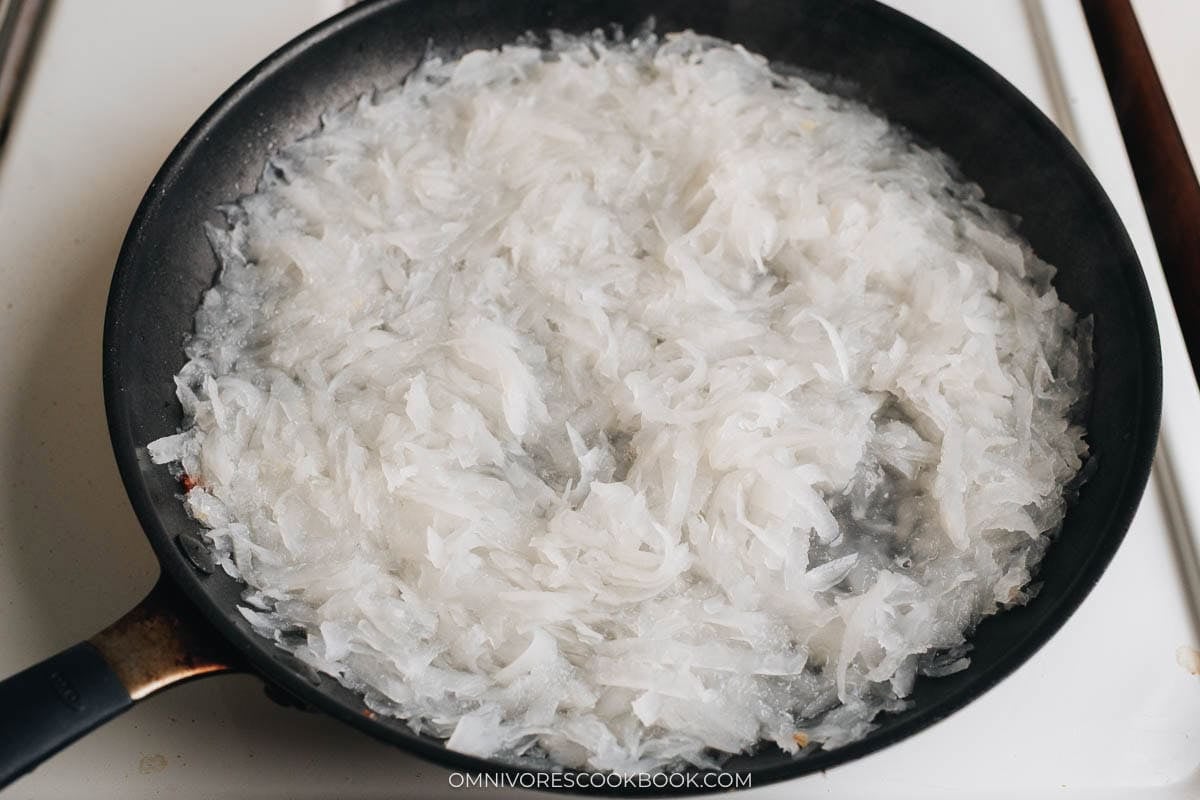
Braise the daikon: Add the daikon radish and 1 cup of water into the same skillet. Cook over medium high heat until simmering. Cover and simmer over medium low heat until the daikon is soft and translucent, 8 to 10 minutes.
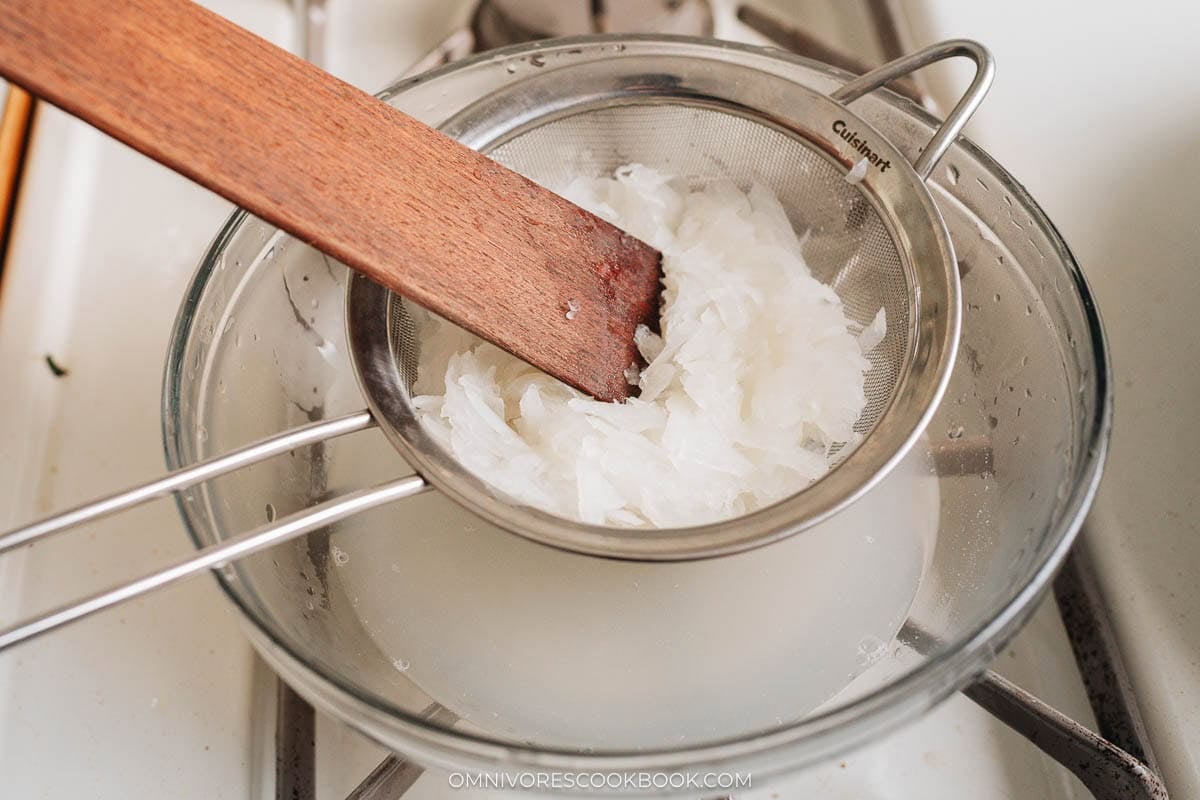
Strain the daikon: Strain the cooked daikon over a colander, pressing out as much liquid as you can into a measuring cup.
Create the batter: Measure out 1 cup of liquid and pour it into a large bowl. Add rice flour, sugar, salt, and white pepper. Stir well until a very runny batter forms.
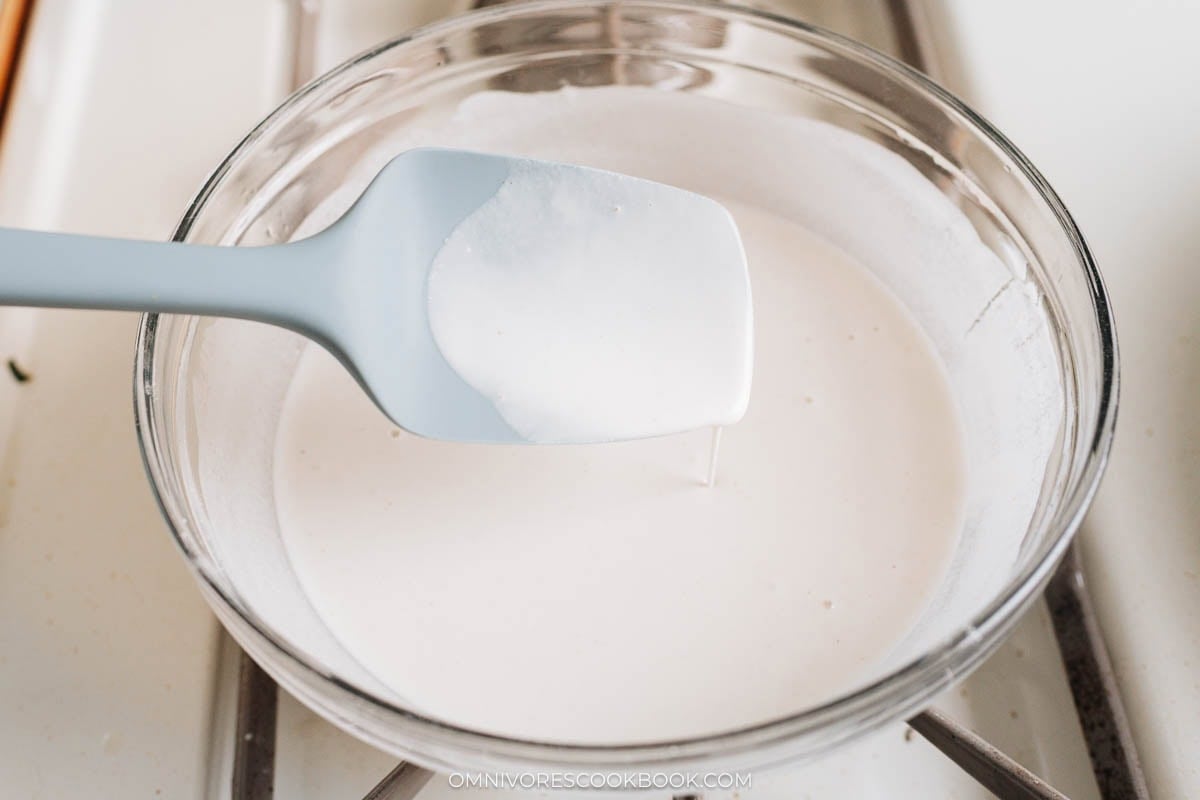
Add the daikon: Add back the daikon and mix again.
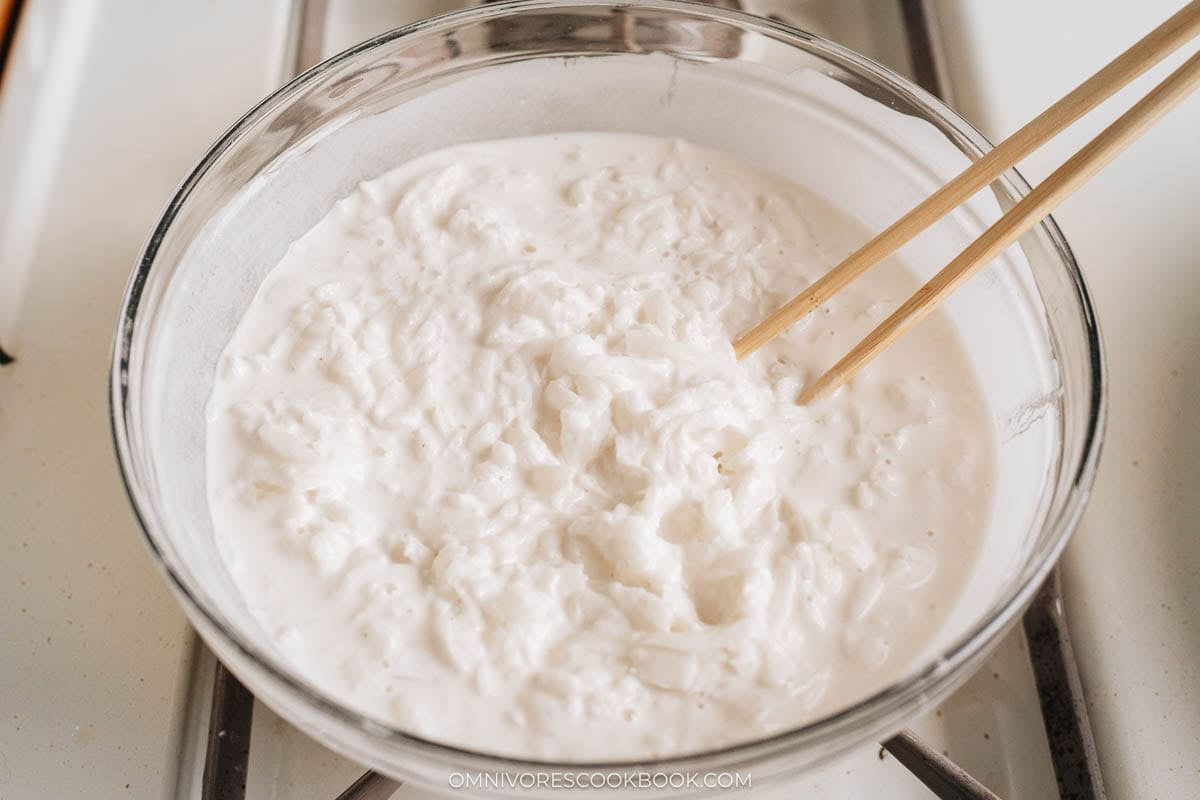
Thicken the batter: Transfer the mixture to a clean nonstick skillet. Cook over medium low heat, stirring constantly, until the mixture has thickened enough to form a clump when stirred, about 1 to 2 minutes.
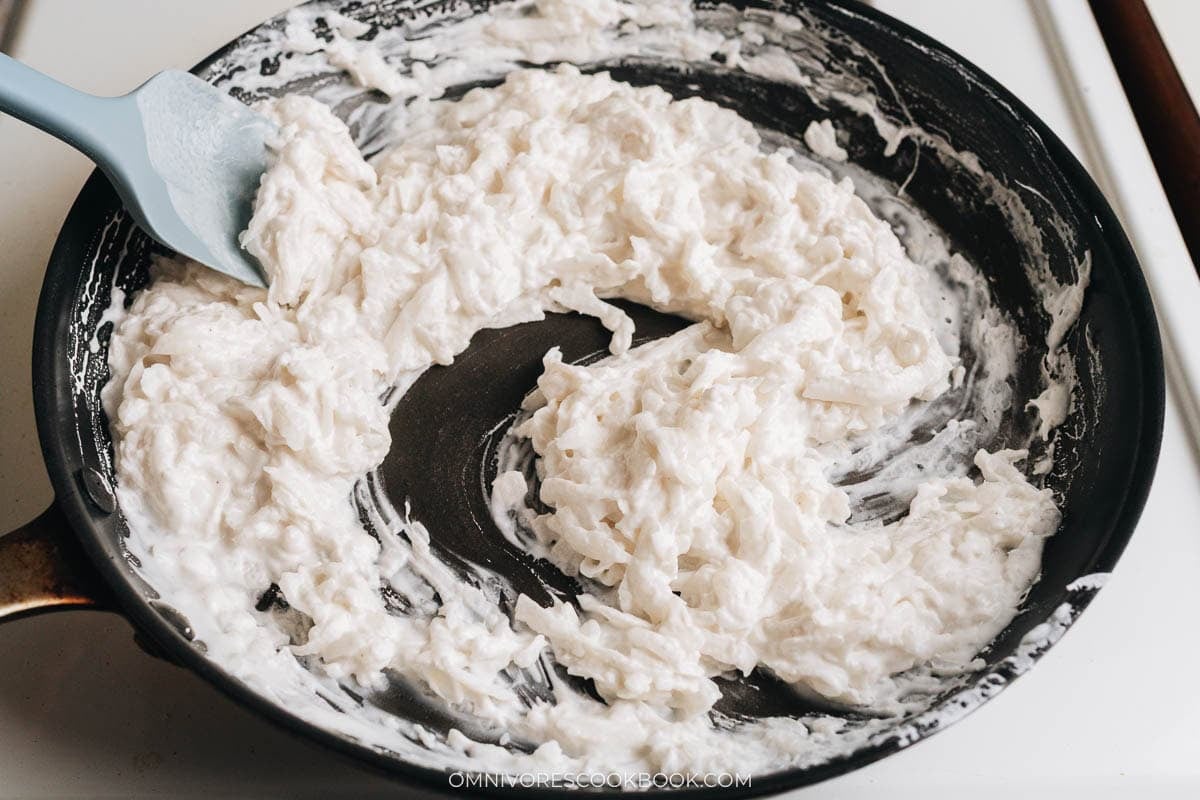
Add the filling: Stir in the cooked filling.
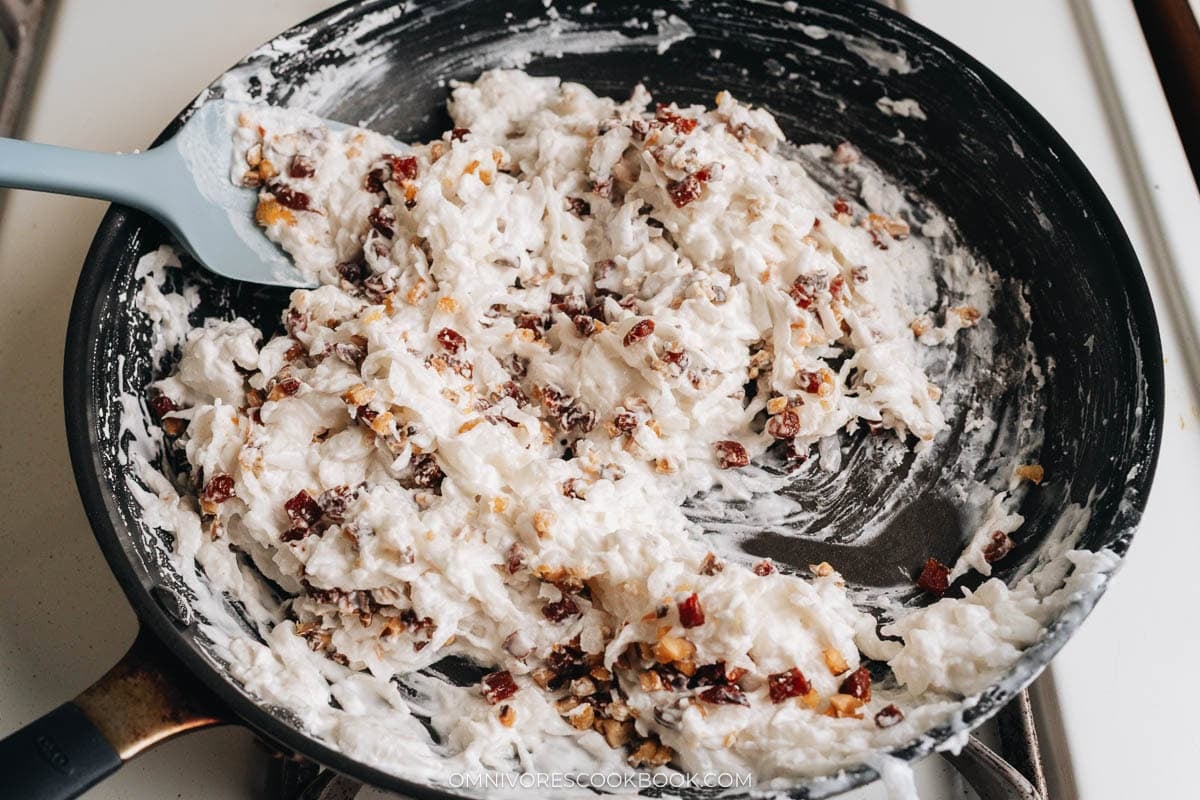
Assemble: Grease a glass container or baking dish that fits your steamer with oil. Transfer the mixture into the container.
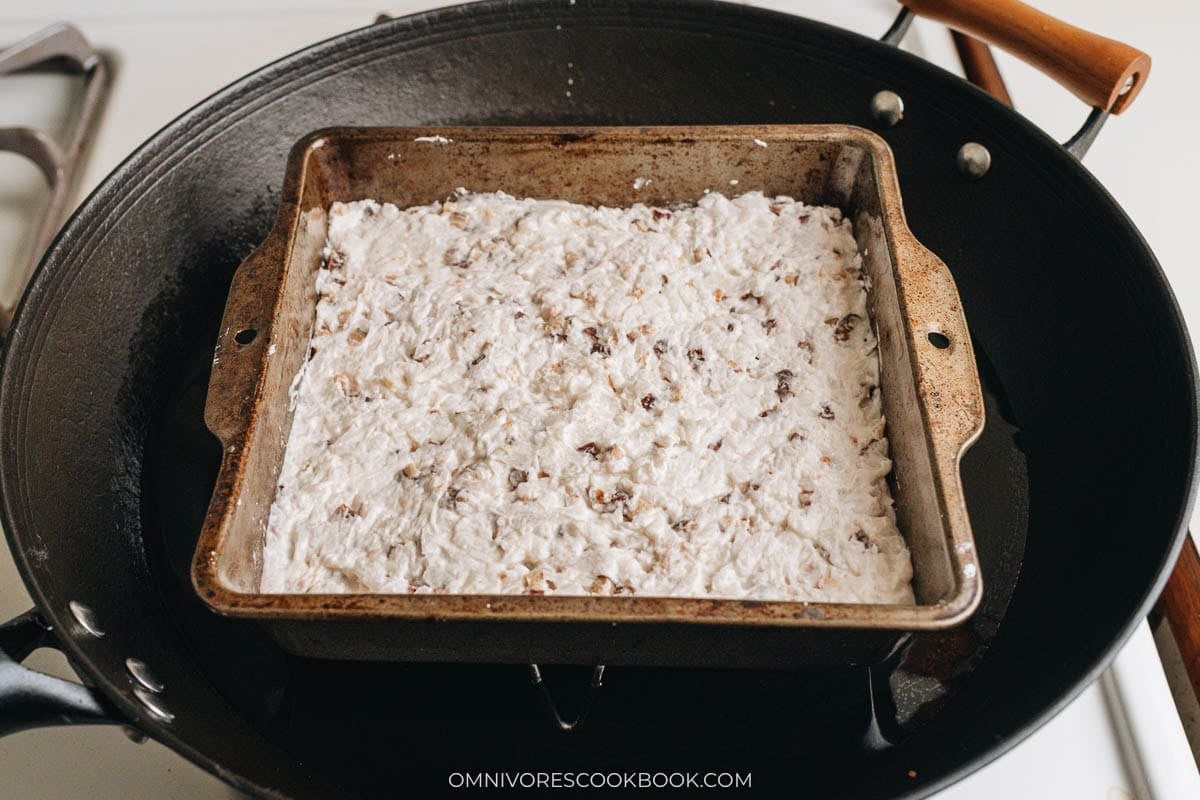
Steam: Set up your steamer with plenty of water and bring to a boil. Place the container on a steaming rack and steam over medium high heat for 50 to 60 minutes.
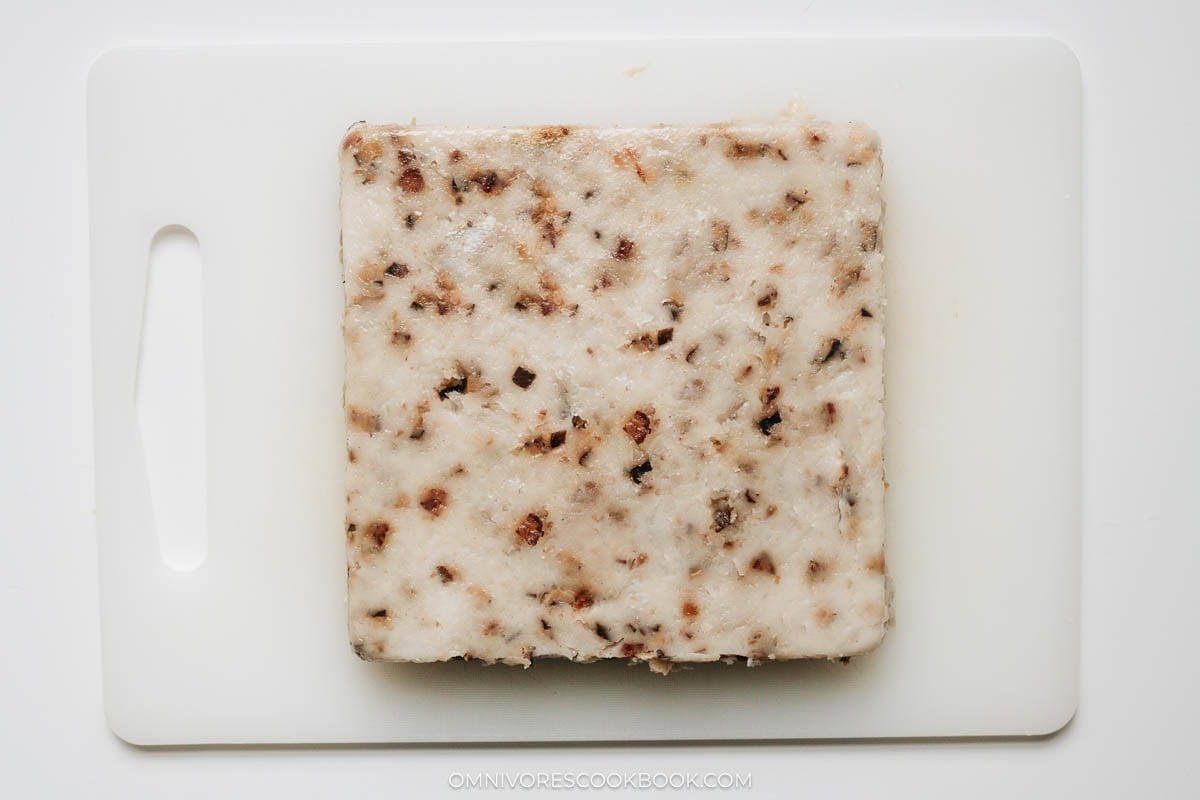
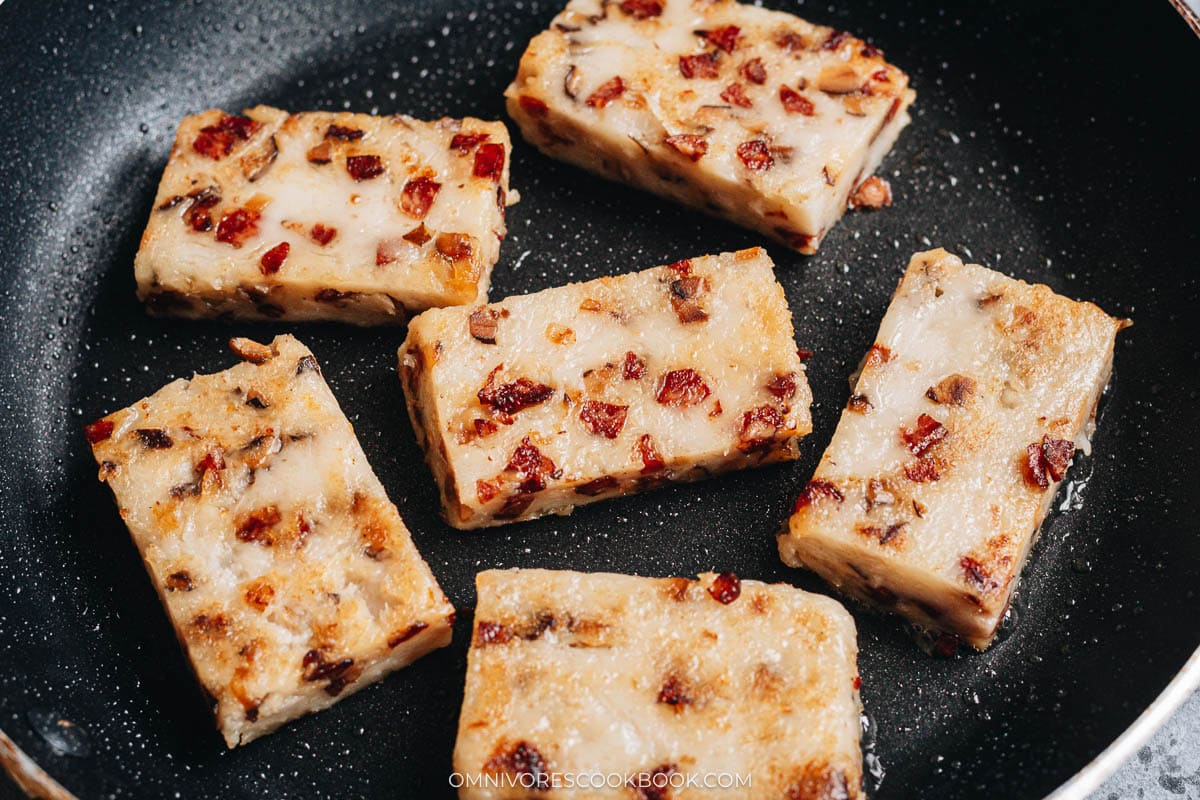
Rest and fry: Let the turnip cake cool completely, then refrigerate overnight until fully set. Turn the cake out of the container and cut into 1/4 inch thick slices using a sawing motion for clean edges. Pan fry in a thin layer of oil over medium heat until golden on both sides.
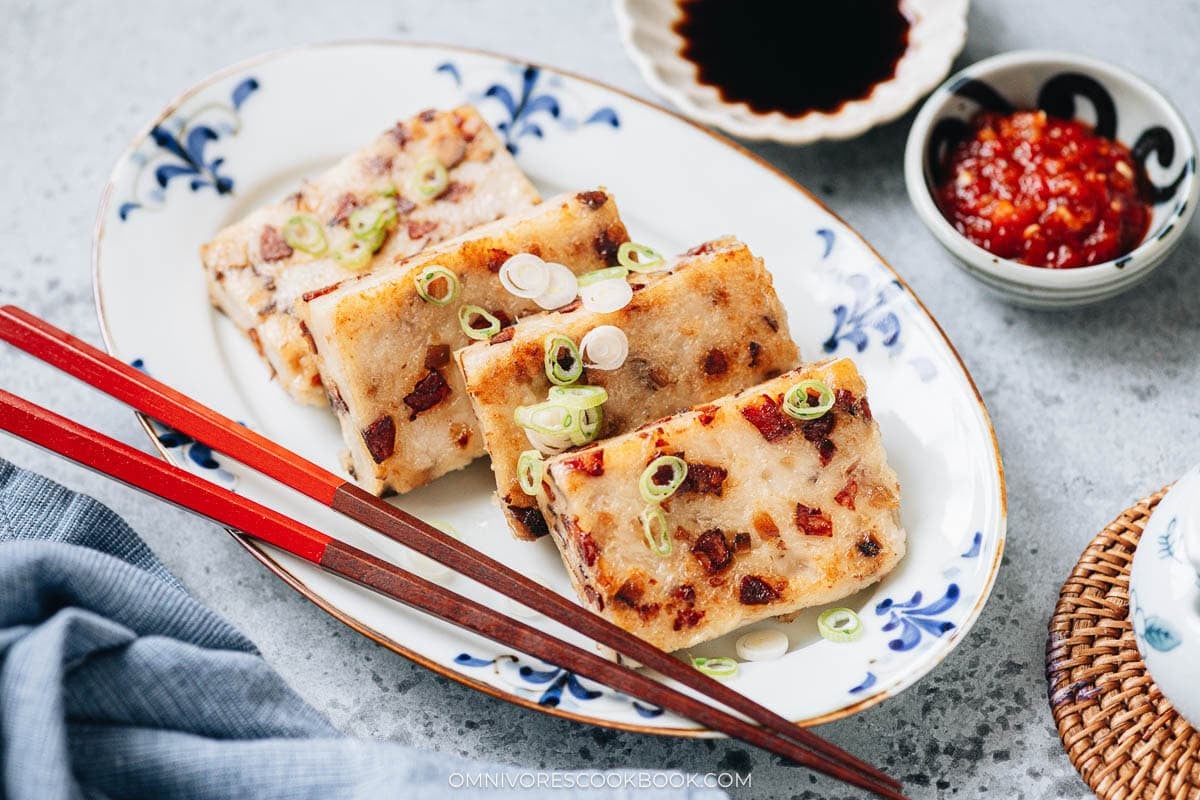
Serve: Enjoy with soy sauce and sliced green onions. Check my Serving Suggestions section for more details on how I like to serve.
Expert Tips
Get the daikon to flour ratio right: If you use too much flour, the cake turns tough. Too little and it will not hold together. I like to use the ratio of 2 pounds daikon with 1 1/4 cups rice flour. I press the cooked daikon well and measure exactly 1 cup of liquid to mix with the flour for a tender result.
Cook the batter before steaming: The batter looks runny at first, but cooking it briefly in the pan thickens it just enough to holds its shape. This technique is the only way I have found to add more moisture while still getting a cake that sets properly.
Cut with a sawing motion: This recipe creates such a tender cake that cutting straight down crushes it. I use a back and forth sawing motion for smooth, clean edges that brown evenly when pan frying. The cake becomes much easier to slice if you let it set in the fridge overnight.
Rest the cake overnight: You can eat the rice cake the same day once it cools off. But the turnip cake will have a stickier texture and it’s hard to get a clean cut. The cake also has a softer texture during pan frying, so you need to handle them carefully. Overnight in the fridge gives the best texture.
Customize the filling: Every family has different preferences. Dry scallop and Chinese preserved pork belly are popular additions. I add them by reducing the amount of dried shrimp and Chinese sausage.
Serving Suggestions
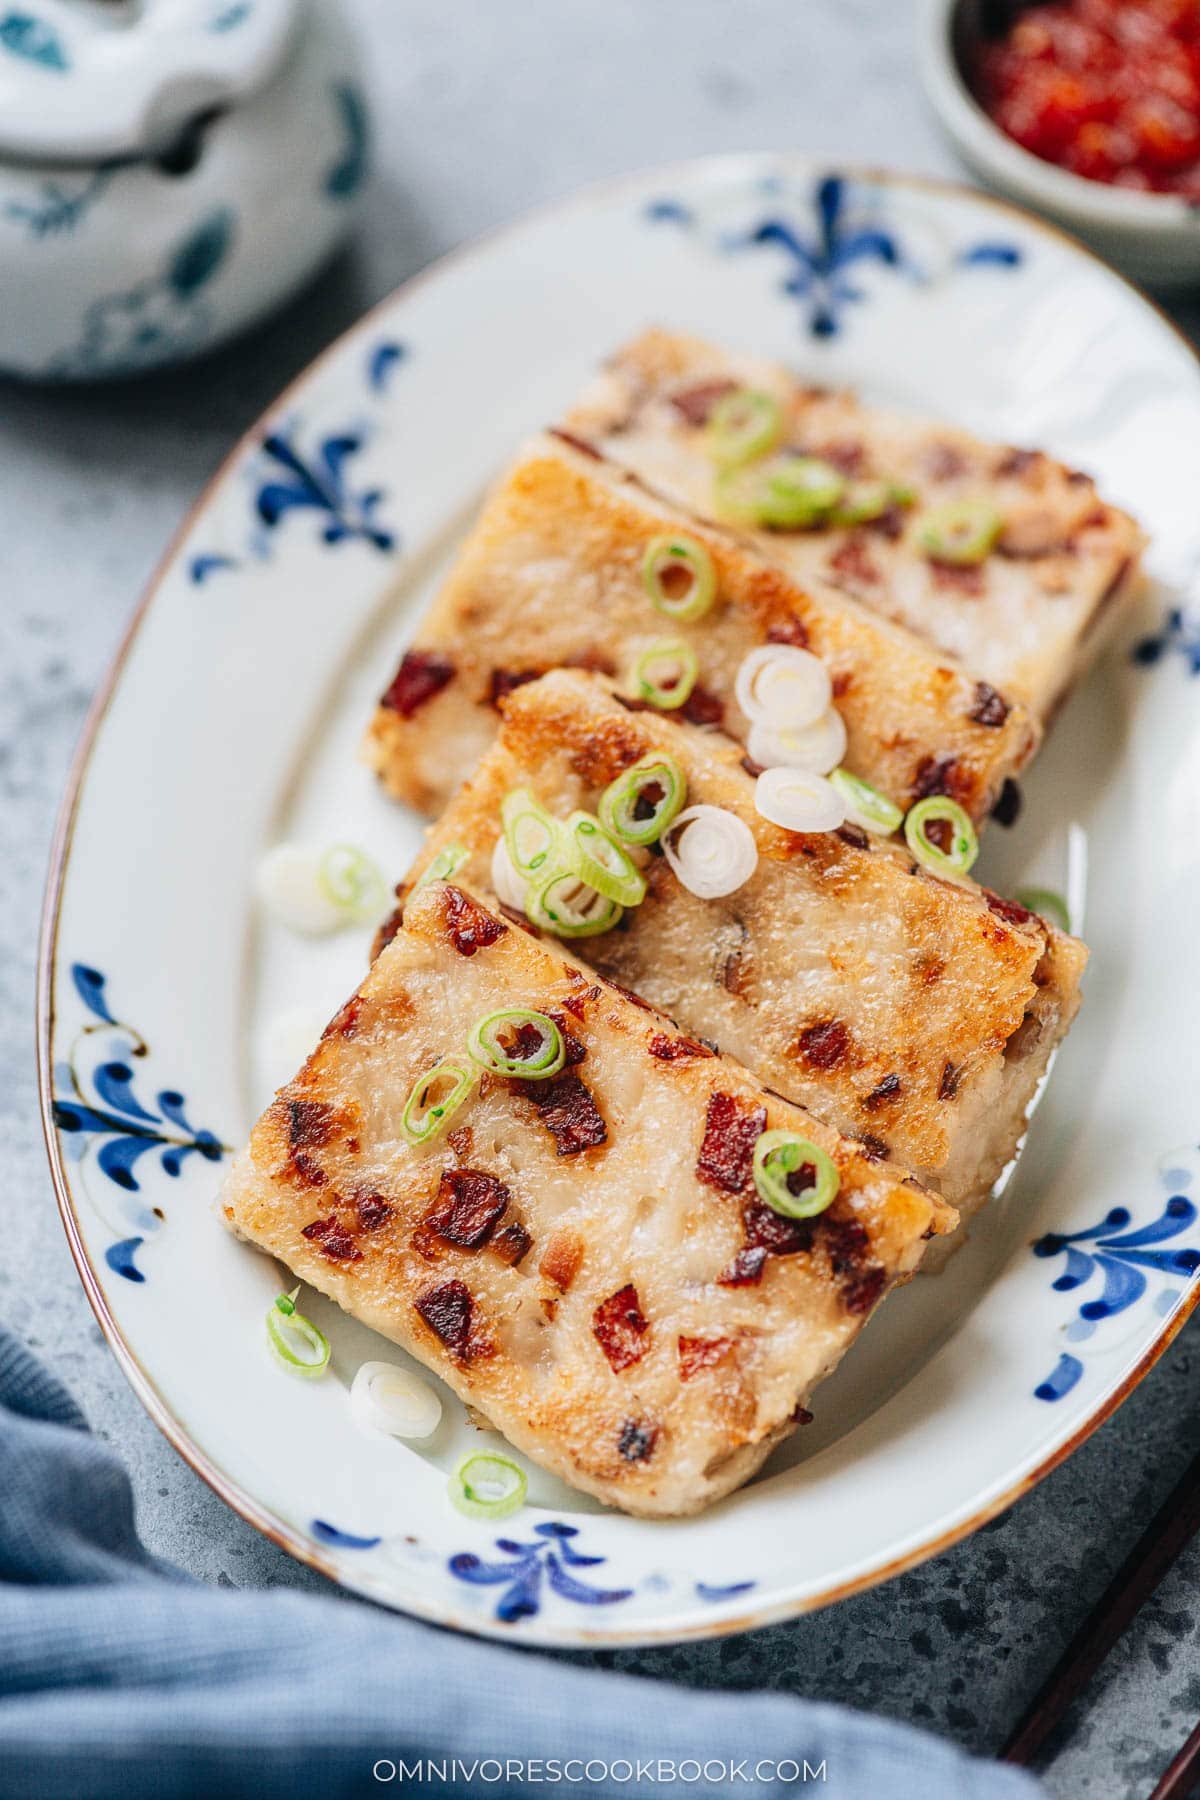
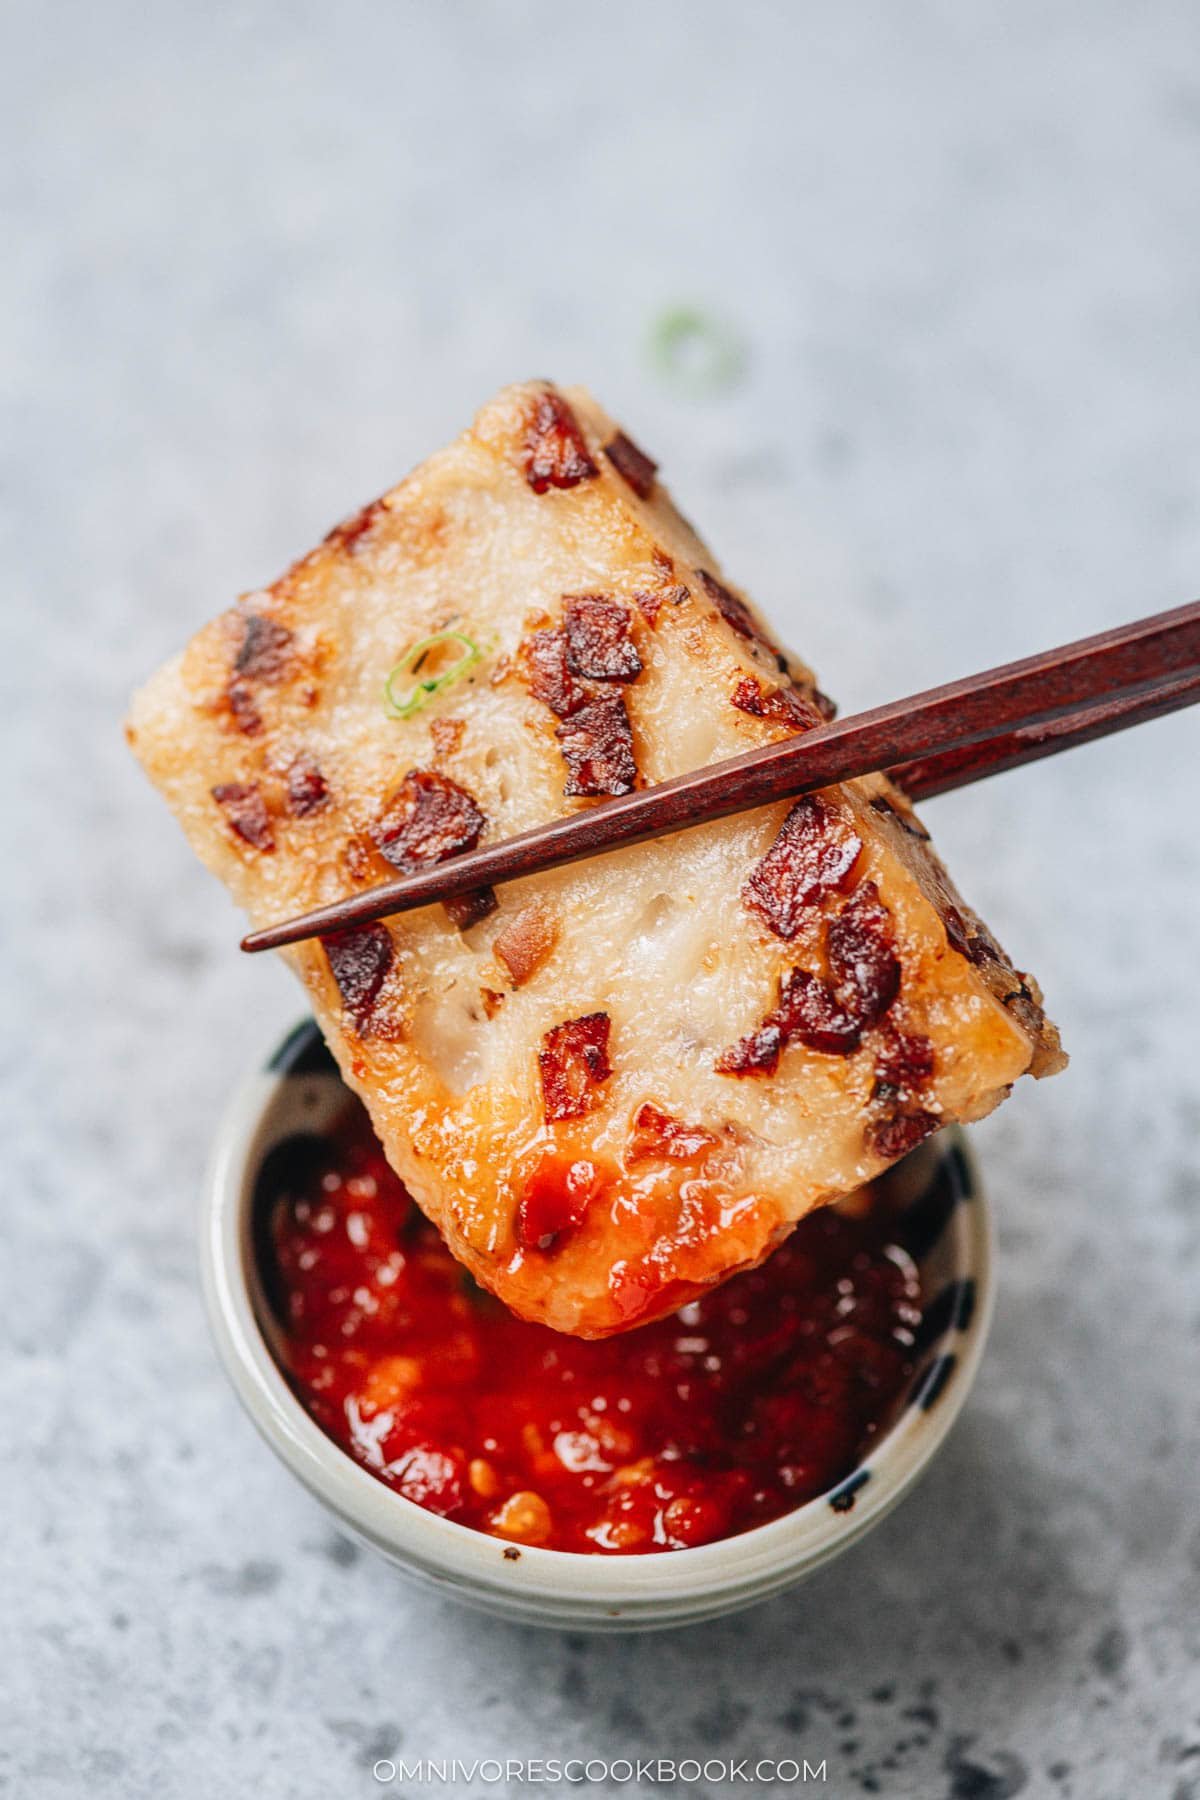
I serve turnip cake straight from the pan while the edges are still crispy. Add a drizzle of soy sauce if you want more saltiness. My favorite way is to serve it with chili garlic sauce. Other times I set out my homemade chili oil as well to let everyone add their own heat.
When I make this for Chinese New Year gatherings, I steam the full batch ahead of time and keep it in the fridge. Then I slice and pan fry portions as guests arrive so everyone gets hot, crispy slices throughout the meal. Turnip cake pairs well with other dim sum favorites like char siu bao, Chinese egg rolls, and steamed custard buns. For a full holiday spread, check out my Chinese New Year recipes roundup for more ideas.
Frequently ask questions
Why is my turnip cake tough?
The most common reason is using too much rice flour. I measure my ingredients carefully and make sure to press out the daikon liquid before measuring. The ratio I use creates a tender, moist cake.
How do I know when the turnip cake is done steaming?
I insert a knife into the center of the cake. It should come out clean with no wet batter sticking to it. The steaming time is about 50 to 60 minutes depending on the thickness.
How do I store and reheat turnip cake?
I store the steamed cake in an airtight container in the fridge for 2 to 3 days, or freeze for up to 1 month. Before using it, thaw frozen cake overnight in the fridge before pan frying. I always pan fry to reheat to create the best texture.
Chinese Cooking Made Easy
Are you new to this website? This free email series is a great place to start. I’ll walk you through a few of my most popular recipes and show you how and why they work. You’ll quickly start to cook better Chinese food in your own kitchen.

Chinese Turnip Cake (Lo Bak Go, 萝卜糕)
Ingredients
- 4 shiitake mushrooms
- 2 tablespoons dried shrimp (or dried scallops)
- 2 lbs daikon radish , peeled and grated coarsely, yields 1 lb 4 oz (560 g) grated (*Footnote 1)
- 3 Chinese sausages , small diced into 1/3” pieces (*Footnote 2)
- 1 teaspoon sugar
- 3/4 teaspoon salt
- 1/2 teaspoon white pepper
- 1 1/4 cups rice flour
- Sliced scallion for garnish (Optional)
- Soy sauce , for serving (Optional)
- Chili garlic sauce (or Chinese chili crisp), for serving (Optional)
Instructions
- Soak dried ingredients: Rinse the shiitake mushrooms and dried shrimp separately with tap water and gently rub them to remove any dirt. Place each ingredient into a different bowl. Add warm water to cover. Soak for 15 minutes, or until the ingredients turn soft. Drain thoroughly. Dice mushroom cap into 1/4” pieces and mince the shrimp.
- Cook the filling: Add the Chinese sausage into a large nonstick skillet and heat it over medium heat. Cook from a cold pan and turn to medium-low heat once the sausage starts to sizzle. Cook until the sausage is lightly browned and some oil is rendered off, 5 minutes or so. Transfer the sausage to a bowl and reserve the rendered fat. Add the shiitake mushrooms and dried shrimp. Cook and stir until lightly charred. Transfer to the same bowl with the sausage.
- Cook the daikon: Add the daikon radish and 1 cup of water into the same skillet. Cook over medium-high heat until simmering. Cover, simmer over medium-low heat until the daikon is soft and translucent, 8 to 10 minutes.
- Create the batter: Strain the cooked radish over a colander, pressing out as much liquid as you can into a big bowl or measuring cup. Measure out 1 cup of liquid, pour into a large bowl. Add rice flour, sugar, salt and white pepper. Stir to mix well until forming a very runny batter. Add back the radish and mix again.
- Cook the batter: Transfer the radish mixture to a large, clean nonstick skillet. Cook over medium-low heat and stir constantly, until the mixture has slightly thickened. When you stir the mixture, the radish should be able to form a clump without looking too runny. This will only take 1 or 2 minutes. Stir in the cooked filling.
- Assemble: Prepare 1 to 2 glass tupperware or baking dishes that can fit into your steamer. You can use two 4.5” x 4.5” (11cm x 11 cm) tupperware dishes to cook two batches. If you have a large wok or steamer, you might be able to fit a 5” x 9” (13cm x 23cm) loaf pan or 7”x7” (20cm x 20cm) baking pan (*Footnote 3). You’ll only need to cook one batch in this case. If you’ll be cooking in two batches, cover the uncooked batter with plastic wrap to prevent it from drying out. Grease the glass tupperware with oil. Transfer the mixture into the tupperware.
- Steam: Set up your steamer by adding plenty of water and bringing it to a boil (*Footnote 4). Add the steaming rack with the turnip cake container. Steam over medium-high heat for 50 to 60 minutes until the turnip cake is cooked through. Test the doneness by inserting a knife into the cake and it should come out clean.
- Rest: Remove the steamed turnip cake and set it aside to cool. Once the container is no longer hot, transfer it to the fridge. Let the turnip cake set until it has cooled completely. (*Footnote 5)
- Release: Use a knife to loosen the edges from the container, then turn the container upside down. The turnip cake should come out in one piece.
- Serve: Cut the turnip cake into 1/4” (1 cm) thick pieces. Heat a skillet coated with a thin layer of oil, cook both sides over medium or medium low heat until heated through and the surface turns golden. Garnish with sliced green onion if using. Serve with soy sauce and chili garlic sauce, if desired.
- Store: Transfer the steamed turnip cakes (without pan-frying) into an airtight container and store them in the fridge for 2 to 3 days, or in the freezer for up to 1 month. To reheat, thaw the frozen turnip cakes first, and pan fry them before serving.
Notes
- I used a radish that was just under 2-lb (900 g). After peeling and grating, I had 1 lb 4 oz of grated radish to use in the cooking. You will lose quite some daikon by peeling and grating, so it’s better to purchase extra.
- I like to keep the sausage pieces slightly larger for a chewy texture. To slice the sausage, divide it into 3 pieces lengthwise, then divide each piece into 3 strips lengthwise. Then slice across into a small dice that’s just slightly larger than minced. If you prefer the dim sum restaurant style, mince the sausages and cook them less.
- A 8” round pan works too and it will fit into a steamer easier than a square container. The cuts you get from it will be less perfect looking but it won’t affect the taste.
- It’s very important to add plenty of water to your steamer, because it takes a long time to cook and the water might boil completely off if you don’t add enough.
- You can slice the turnip cake when it’s still warm, but the texture will be a little sticky and you won’t get a clean cut.
Nutrition

Did you make this recipe?
I’d love to hear how it turned out for you! Please take a moment to leave a 5-star rating ⭐️ and share your thoughts in the comments further down the page. It really helps others discover the recipe too.
Lilja Walter is a part of the Omnivore’s Cookbook team and worked closely with Maggie to develop and test this recipe.

Elly
I bought the wrong daikon. I did not realize there is a photo of daikon that comes with the recipe. Mine is a little green, and it turned out bitter. I bought it from Ranch99, I thought that would be the right one. Next time, I’ll pay more attention.
Andrea C.
Hello! Has anyone had success with making the batter ahead of time and then steaming the next day? Maybe best to re-warm the batter before going into the steamer? Thanks for any insight!
Ling
I tried the recipe but radish cakes turned out mushy and gooey, falls apart when I get them. Should I increase the rice flour and reduce water then? Any way of rescuing them? The flavour was amazing though. Thank you for sharing.
Maggie Zhu
I think it’s probably caused by the radish not being cooked enough to release enough liquid. The cake batter in this recipe is boardline too thin, so it will yield a super tender texture, but it does cause issues if the radish is not cooked enough. I think next time you can cook the radish a bit more, to make sure all the liquid evaporate complete. I’m afraid it’s very hard to save the batch you’ve made…
MeiMei
Better than the restaurant version, according to my husband, haha! I’ve made this twice now — the first time it was too soft, second time was perfect. SO GOOD! It is somewhat labor intensive but it’s worth it.
Erika
the first time I made this it turned out great (even though I had no shitake or shrimp haha) and I used turnip instead of real daikon but it’s a kind of turnip that has the same flavour and texture as daikon. I’ve just made it again using real daikon and the batter turned out much thicker, yet now it’s been steaming for ages and it still isn’t set. I do have shrimp this time so it smells even more delicious than last time so I really hope that with more time steaming it will set up. I’ve reread your answers to the comments here and I think the brand of rice flour and the daikon might be causing the variance. Anyway, I will persevere as it is so delicious that it’s worth keeping on experimenting to get it right.
Shirley
I have no access to the sausage or fried shrimp. What would you suggest for a substitute or could I just use the mushrooms?
Maggie Zhu
Here is a vegetarian recipe that might help: https://okonomikitchen.com/vegan-turnip-cakes-lo-bak-go/
Lin Self
Hi Maggie I just want to say your recipe is great and the lo bak go was as authentic as I remember in my childhood days. I used preserve Tai Tau Choi as well . So far the only complaint was they were given too little! Thanks very much I have also tried ma po tofu and hot and sour soup with resounding success. Thanks very much
Mike B
Thanks for updating your recipe. What was your previous ratio for rice flour to water?
Julie
The taste was perfect but I think I’d prefer it to be firmer. I steamed one pan maybe 15 minutes longer than the other and it seemed to do the trick or can I add a little more rice flour or add less liquid to achieve a firmer consistency?
Maggie Zhu
Hi Julie, thanks for leaving a positive review and I’m glad to hear you like the recipe!
I’m pretty sure you can add a big more rice flour (and / or less liquid) to achieve a firmer texture.
When developing this recipe, we decided to keep the cake very soft so it’s very similar to the ones you buy from Chinatown. But depending on how the rice flour is cooked down, the cake might end up a bit too soft.
Julie
It was very labor intensive but worth the trouble, I hope. Mine came out very mushy although I followed the recipe meticulously. Hope that increasing the steaming time will reduce the mushiness. Will refrigerate overnight and try tomorrow. Can’t wait because it looks delicious.
Elizabeth
I’ve never been a huge fan of turnip cake at dim sum, but I made this recipe as part of my Lunar New Year spread and it was SO so good. Will definitely make again. Thank you!
Elizabeth H
Where in the instructions does it have you add the mixture of sausage/mushrooms/scallions back into the daikon batter?
Maggie Zhu
Sorry for the confusion! Just added the step. You should add the cooked sausage etc to the pan with the batter and daikon after you cook it down.
Craig Zimmerman
This was fun to make and not that hard, but I found the batter a little lacking in flavor and also thought there was way about twice the sausage necessary. I’ll probably try again with more seasoning, maybe more mushroom too, sometime and cut back the sausage.
Jasmine
Just a heads up that the link you have posted for the rice flour leads to a cookie stamp for mooncakes. Otherwise, great recipe!
Emma
This recipe does not work. It comes out mushy. I left it in the fridge overnight too
Maggie
Hi Emma, I’m sorry to hear the recipe didn’t work out for you.
The turnip cake I made was on the super soft side. Depending on individual radish and how you cook it down, it might affect the result and the texture.
Chris B
yes, ours came out too mushy too. I don’t know what we did wrong….
Maggie Zhu
Hi Chris, I’m sorry to hear that your turnip cakes didn’t turn out as expected. I think it might be because the step when you cook the daikon and batter mixture, you didn’t reduce it enough. I did add a lot of liquid to the recipe, just so it creates a very tender turnip cake at the end. But the cooking part can be a bit tricky to get the consistency right.
I’ll retest the recipe soon and troubleshoot this.
happy cyclist
Yours came out beautiful. I used papery dried shrimp because that is what I had on in my fridge. I only used 1 Tbsp because I don’t like a fishy taste – just a tad bit. Mine is sitting in the fridge right now, so I hope it will come out nice tomorrow. Thanks for the recipe!
Mary
Hi Maggie,
I made your Chinese Turnip Cake today and it’s delicious! Thank you so much for your recipe. I like this version as the amount of the ingredients are not skimpy. I enjoy receiving your recipes and emails.
Sache
SACHE
March 11, 2020 at 6:44 pm
Your comment is awaiting moderation.
Thank you for such clear directions and beautiful photographs and for making “Chinese Cooking” so approachable. I appreciate the ingredient photographs in particular. We have a wonderful Chinese market and restaurant near us and I’ve felt more comfortable shopping there knowing what the ingredient I am looking for “looks like”—a picture IS worth a thousand words, particularly when I can’t read the language they are written in. Kudos to you. I continue to enjoy your posts!
(I may have posted this comment twice—the first time in the wrong place—I hope this remedies that. If I’ve muddled everything and posted twice, I will be more careful next time!)
susan
can I use chickpea flour or brown rice flour?
Sache
Thank you for such clear directions and beautiful photographs and for making “Chinese Cooking” so approachable. I appreciate the ingredient photographs in particular. We have a wonderful Chinese market and restaurant near us and I’ve felt more comfortable shopping there knowing what the ingredient I am looking for “looks like”—a picture IS worth a thousand words, particularly when I can’t read the language they are written in. Kudos to you. I continue to enjoy your posts!
Woody
Why doesn’t the recipe include turnips? I love turnips. Can you substitue turnips for daikon?
Susan Li
Daikon radish is also known as Chinese turnip, hence turnip cake. Creates a bit of confusion in English but daikon is the correct vegetable to use for this.