
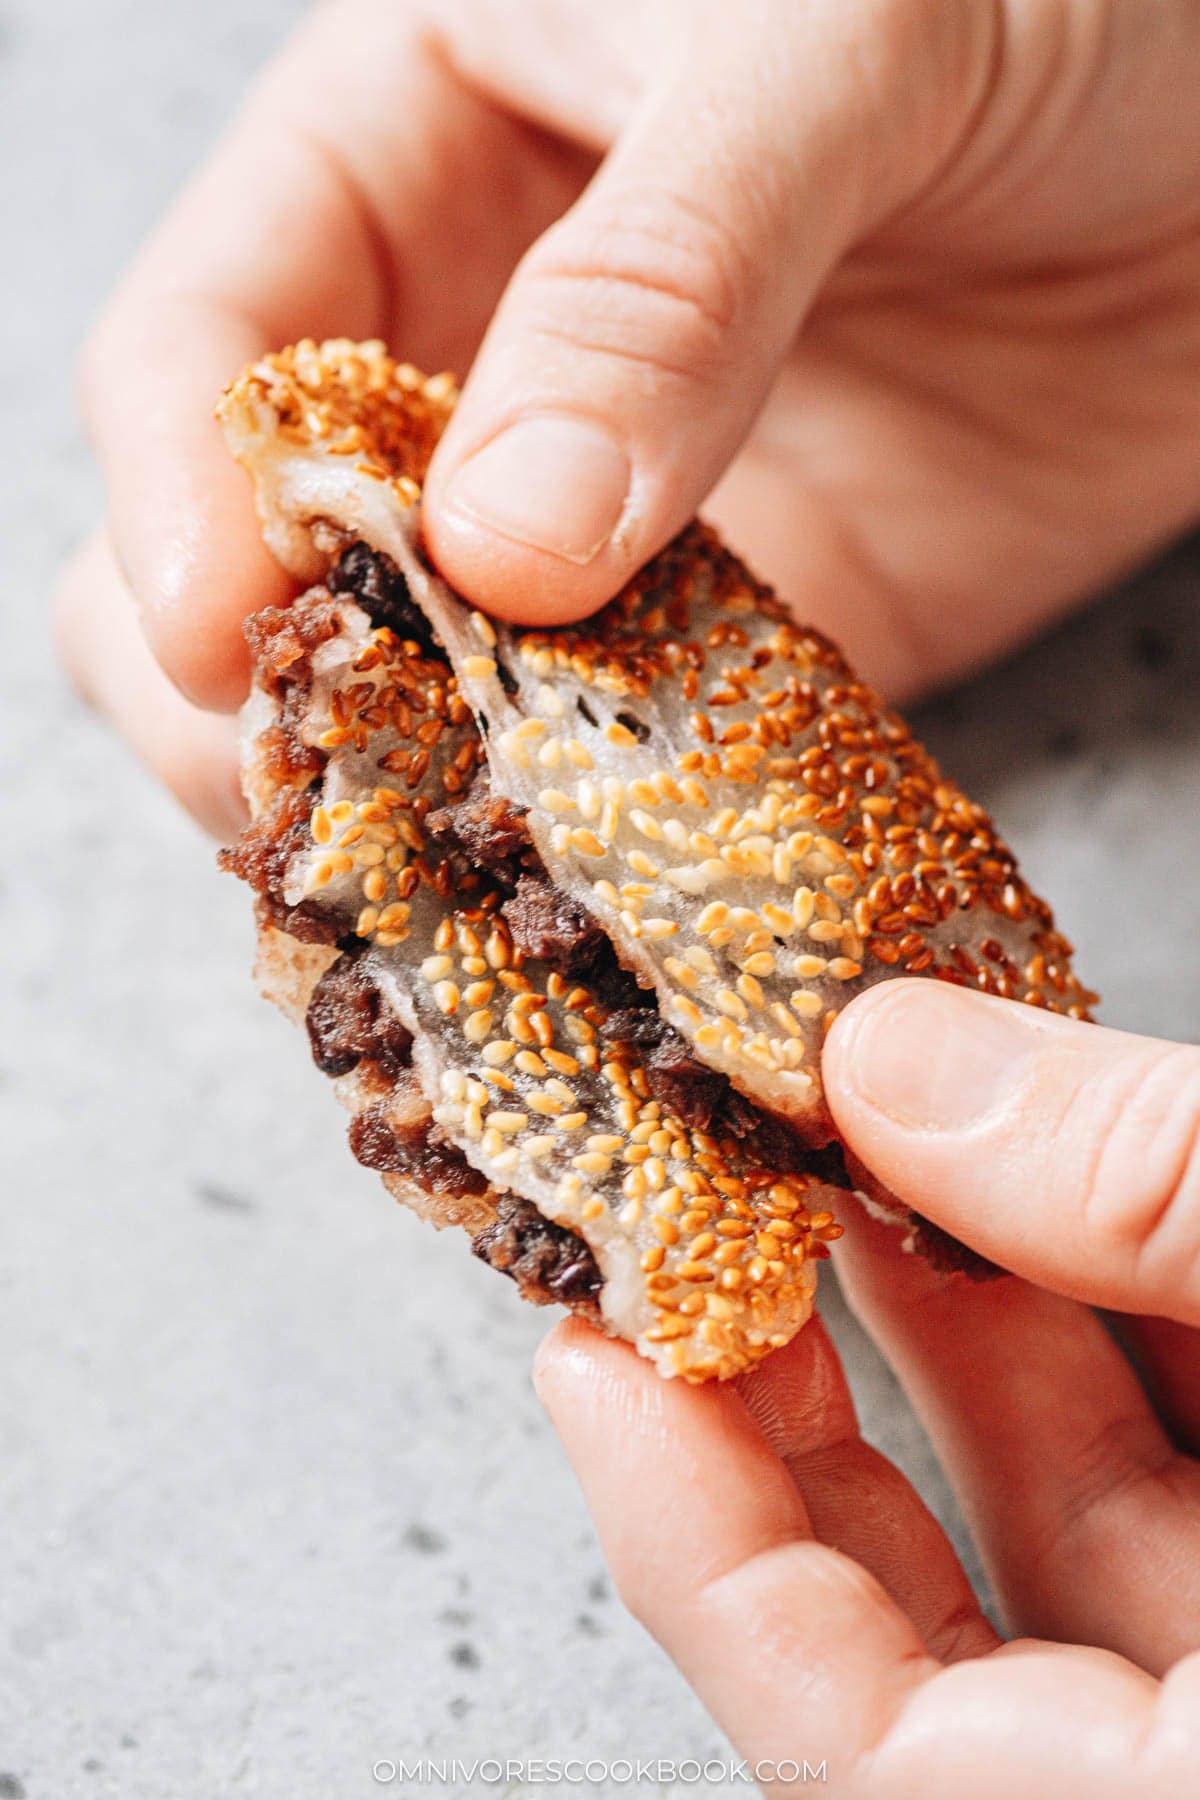
Sticky rice cake with red bean paste belongs to the same texture family as Japanese daifuku mochi and Chinese coconut mochi, where a chewy rice-flour dough wraps around a sweet filling. The difference is that mochi is steamed first and then shaped, which takes more skill, while this cake is shaped first before being pan-fried, making it much easier for beginners. The sesame-coated crust and the pan-fried texture set it apart from the pumpkin dough version I make in my Chinese pumpkin cake, which uses the same wrapping technique with a different dough.
This is one of my favorite childhood snacks. My mom made these often when I was growing up, and I would stand next to her at the counter with a small piece of dough in my hands, learning how to press a well in the middle and pinch the edges closed around the red bean paste. My son is old enough to do the same thing at my counter now, and rolling the sticky dough balls and pressing them into a bowl of sesame seeds is a job he takes very seriously.
Preparing these is actually pretty easy, I simply portion the red bean paste into balls, mix the glutinous rice flour dough by hand until it comes together like soft clay, then wrap and pan-fry the cakes in a thin film of oil. The dough is much friendlier than any bun or dumpling dough because there is no gluten to worry about, no rest time, and no rolling pin. So, I can’t wait for you to try them and let me know if they become your new favorite dessert.
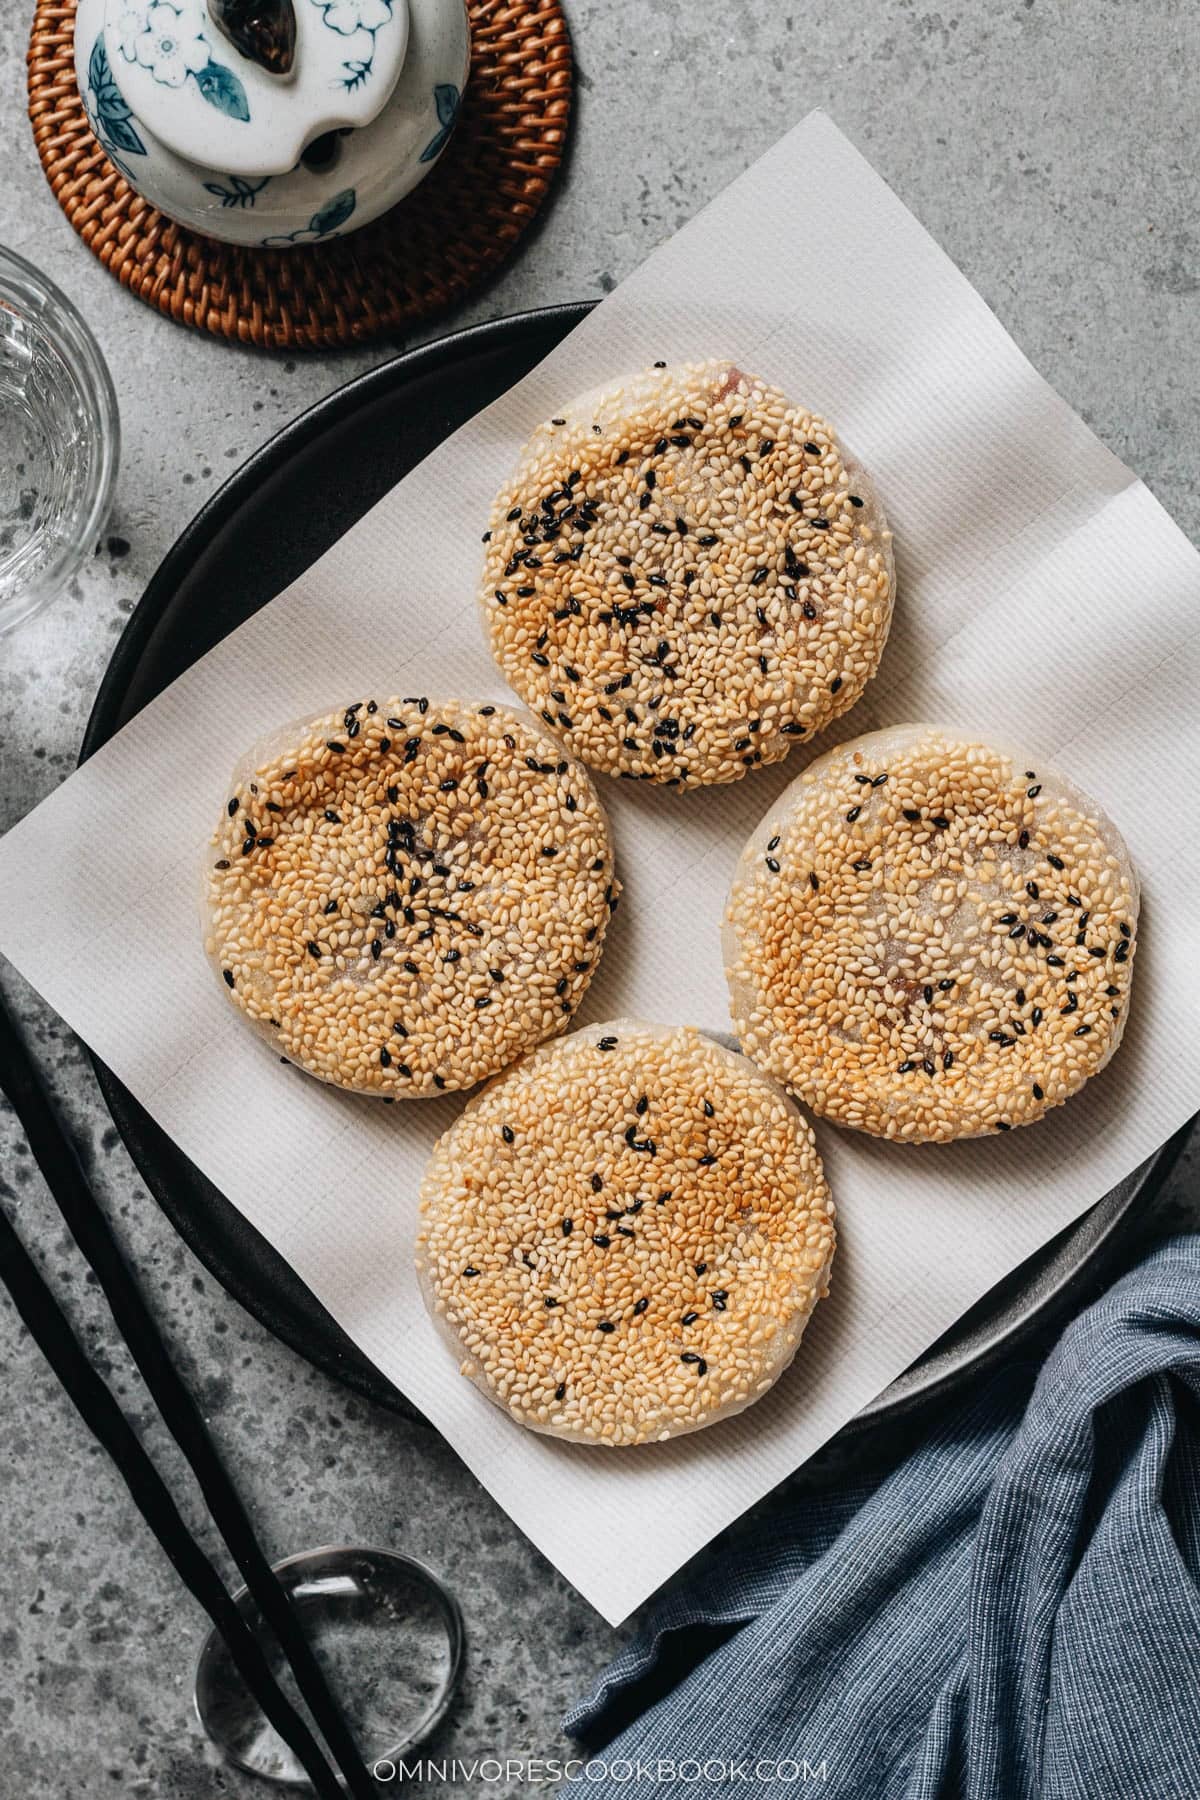
Ingredients
These are all the ingredients I use to make this decadent sticky rice cake with red bean paste recipe:
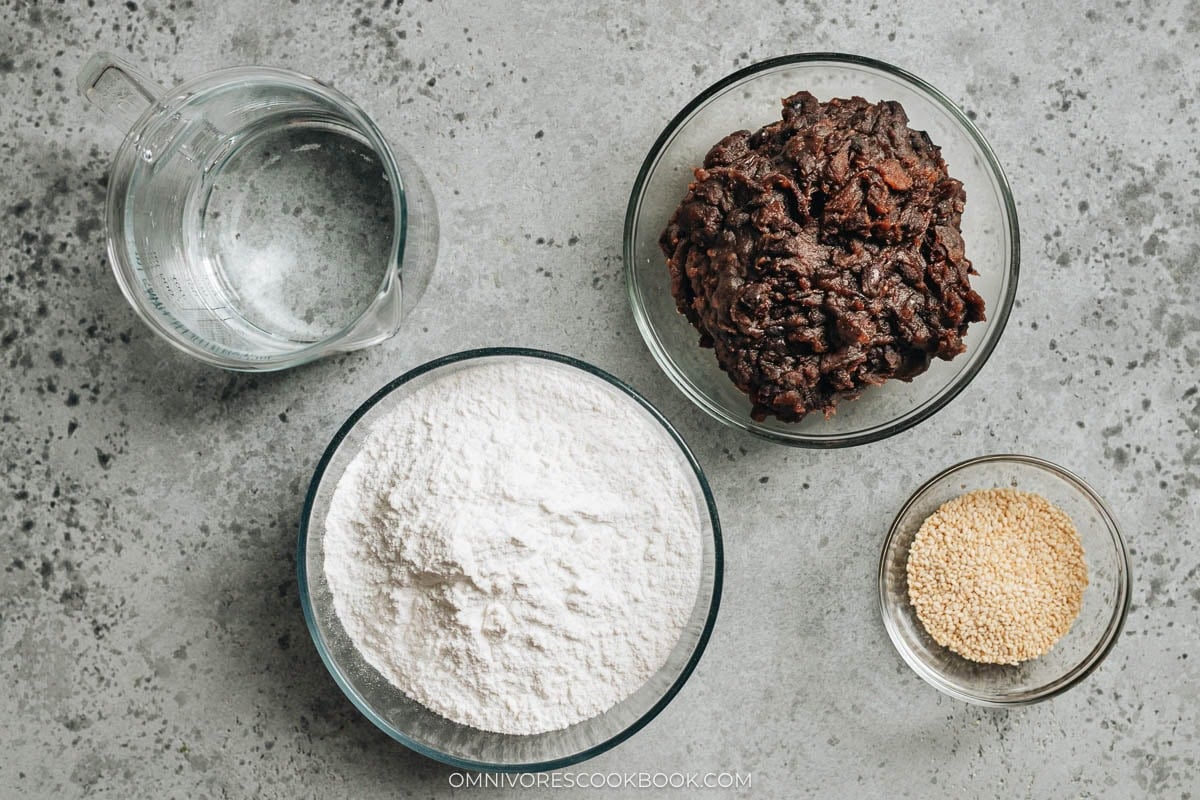
Glutinous rice flour: I use Erawan glutinous rice flour, a Thai brand that is easy to find at Asian markets. Erawan is milled from long-grain glutinous rice, which gives the cakes a firmer chewier texture and a crisper pan-fried surface. If I use a Japanese brand instead, the flour is usually milled from short-grain glutinous rice (sometimes labeled mochiko) and needs slightly less water to reach the same soft-clay texture.
Water: I add the water gradually rather than dumping it in at once so I can judge the dough by hand as it comes together.
Red bean paste: I use my homemade red bean paste for the filling because the sugar level and the coarse bean texture are calibrated for pastries like this one. Store-bought red bean paste from a Chinese or Japanese market also works, though it tends to be sweeter than the homemade version.
White roasted sesame seeds: I coat one side of each cake in sesame seeds before pan-frying. The sesame layer keeps the dough from sticking to the pan and adds a nutty flavor to the crust.
Vegetable oil: I shallow-fry the cakes in just enough oil to coat the bottom of a nonstick skillet. Traditionally these are deep-fried, but the shallow-fry version is lighter and just as good.
How to Make
1. Portion the red bean paste: Use a medium cookie scoop to portion out 12 scoops of red bean paste, about 2 tablespoons per scoop. Roll each portion into a ball and set them aside on a plate.
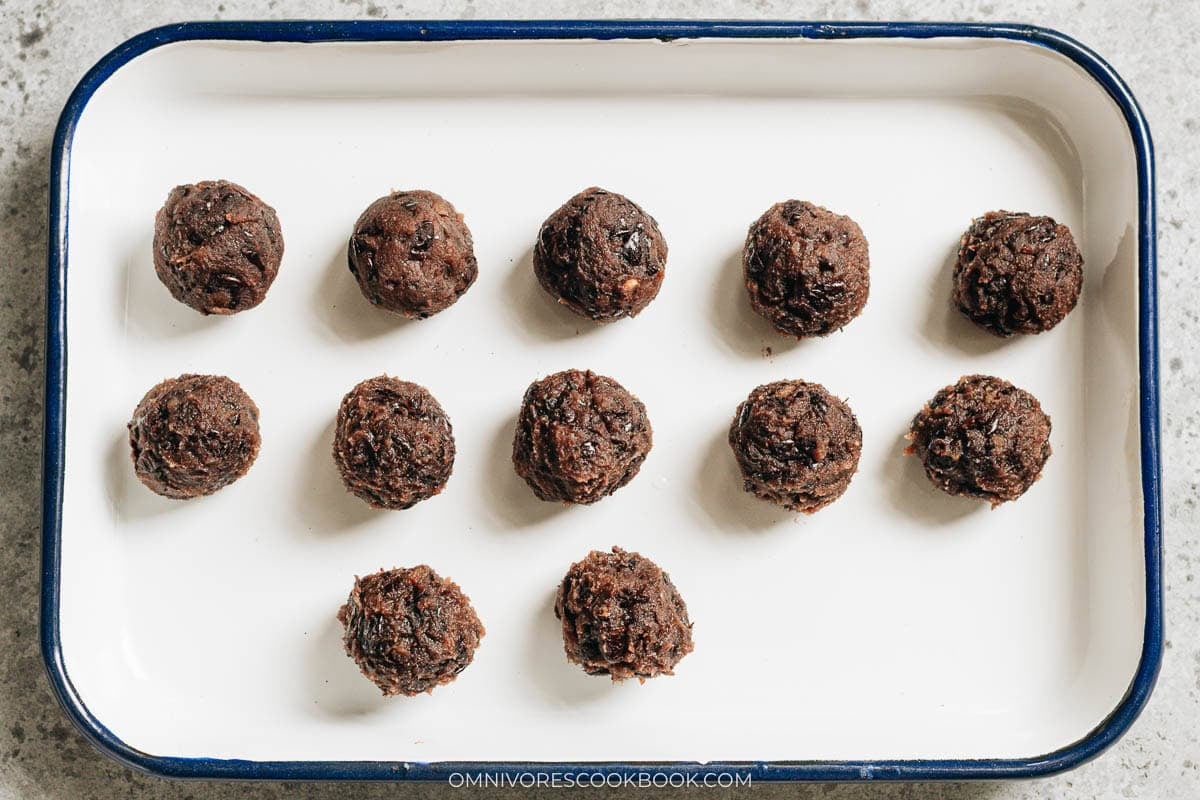
2. Mix the dough: Add the glutinous rice flour to a large bowl. Gradually pour in the water in 4 to 5 additions, stirring with a fork after each addition until the water is fully absorbed. The dough should come together with no dry flour remaining and no runny wet spots.
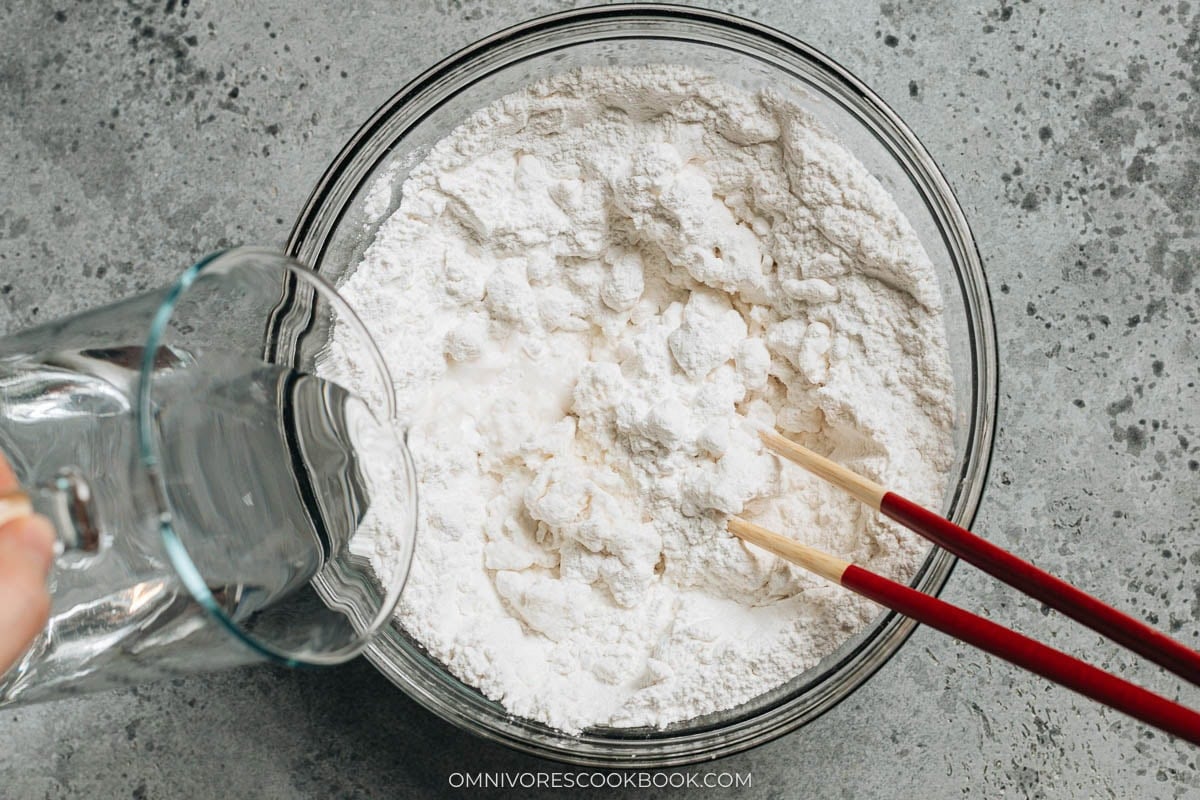
3. Adjust: If the dough is too soft to handle, mix in more glutinous rice flour, 1 tablespoon at a time.
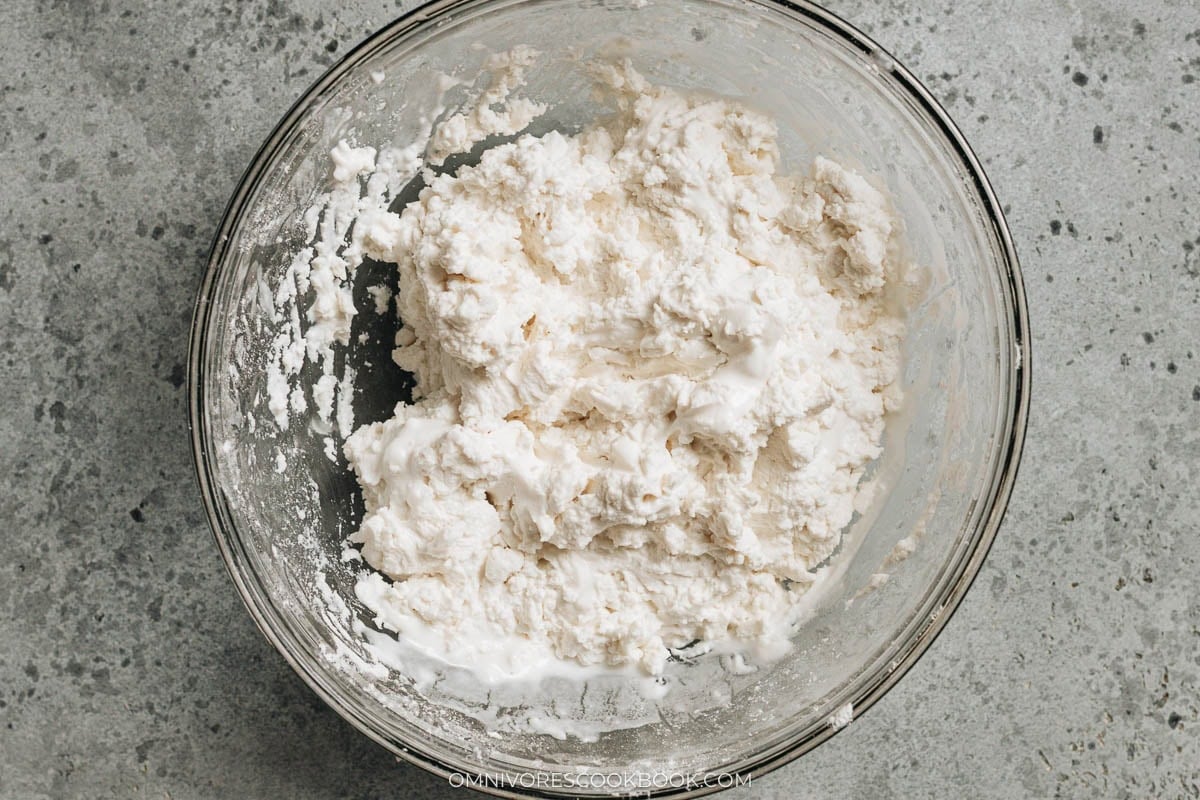
4. Knead: Shape the dough in the bowl for 1 to 2 minutes, until it is smooth and hydrated throughout.
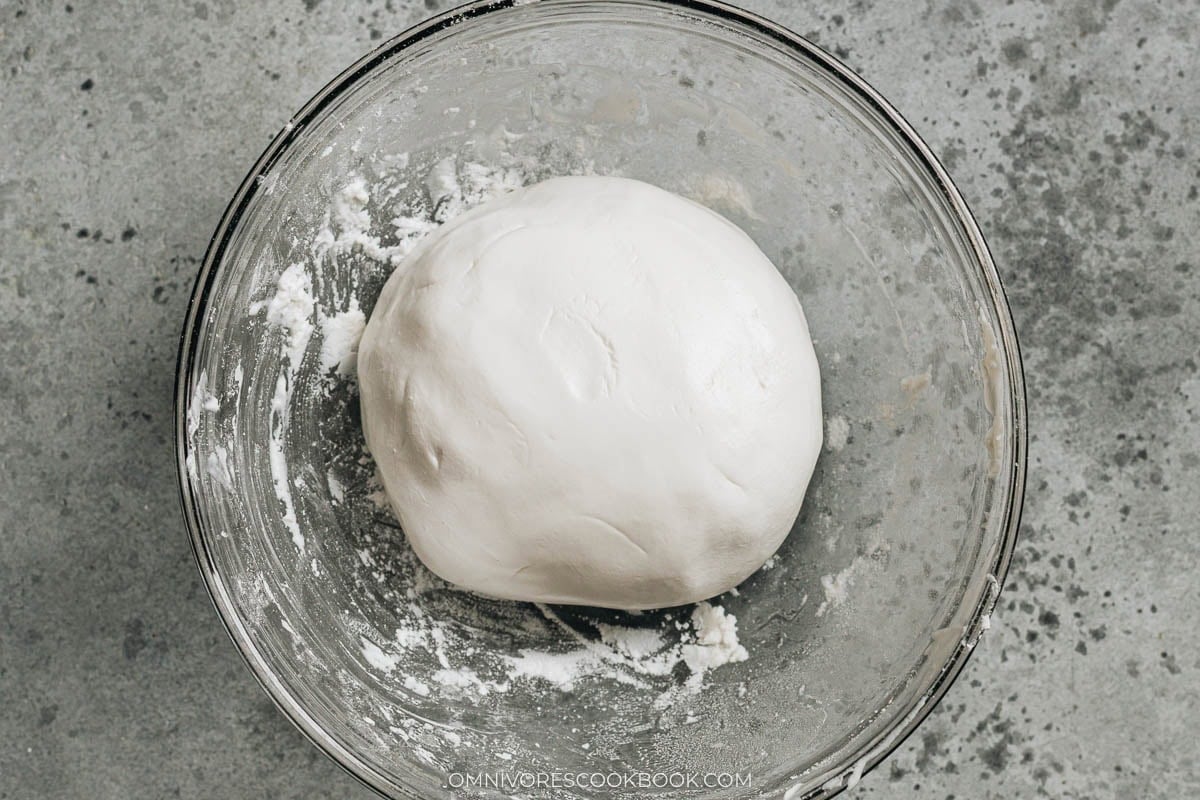
5. Divide the dough: Lightly dust the work surface with glutinous rice flour and transfer the dough onto it. Divide the dough in half, roll each half into an even log, then cut each log into 6 equal pieces of about 42 grams each. Roll each piece into a smooth ball and cover with a damp towel while I shape the rest.
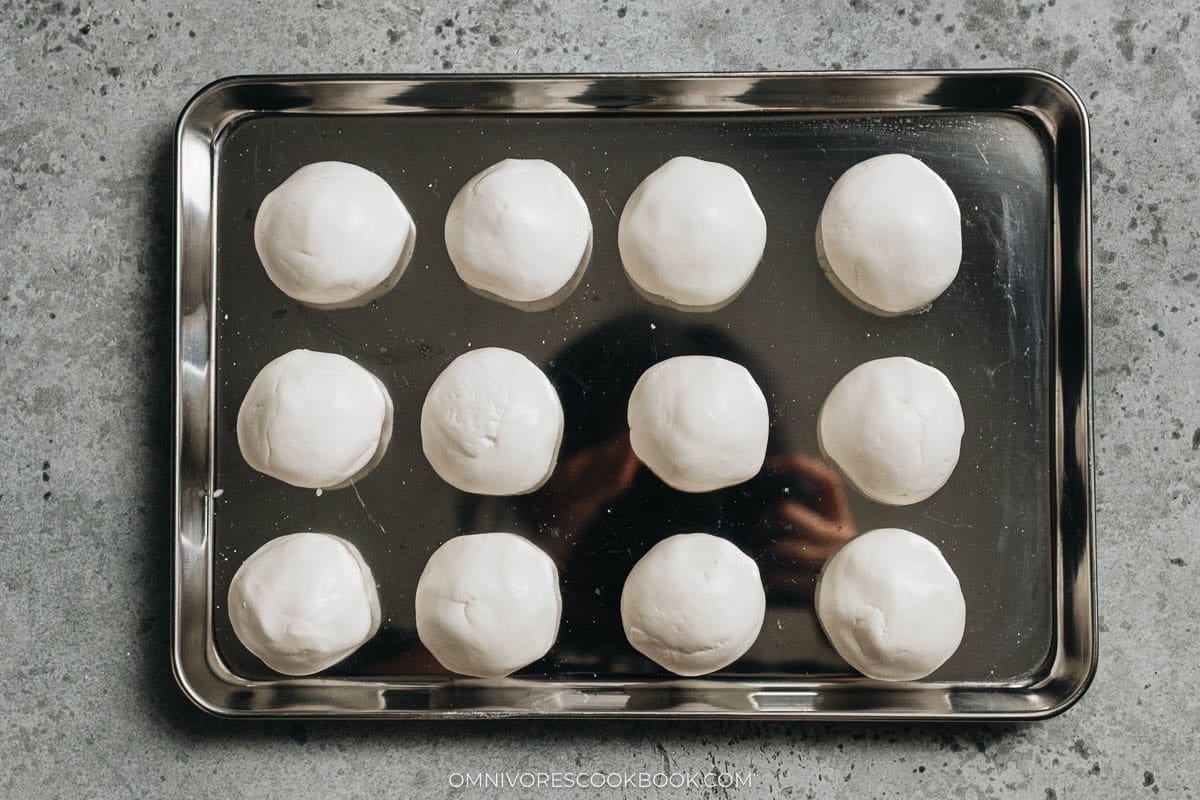
6. Prep the sesame seeds: Spread the sesame seeds in a medium-sized bowl and keep it next to the work surface.
7. Wrap the cakes: Place one dough ball in my palm and flatten it into a round disk about 2 1/2 inches wide and 1/4 inch thick. Place one portion of red bean paste in the center.
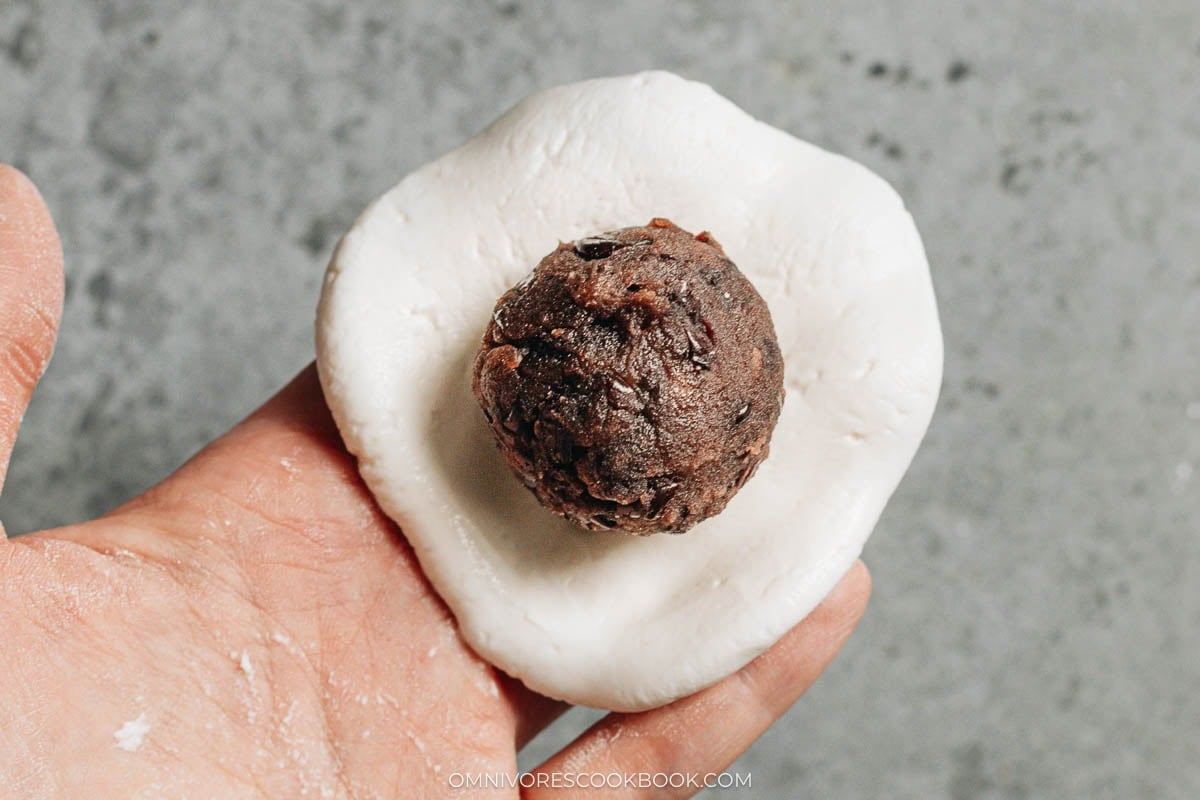
8. Gather and pinch the edges of the dough up and over the filling to enclose it completely, then roll the sealed cake into a smooth ball.
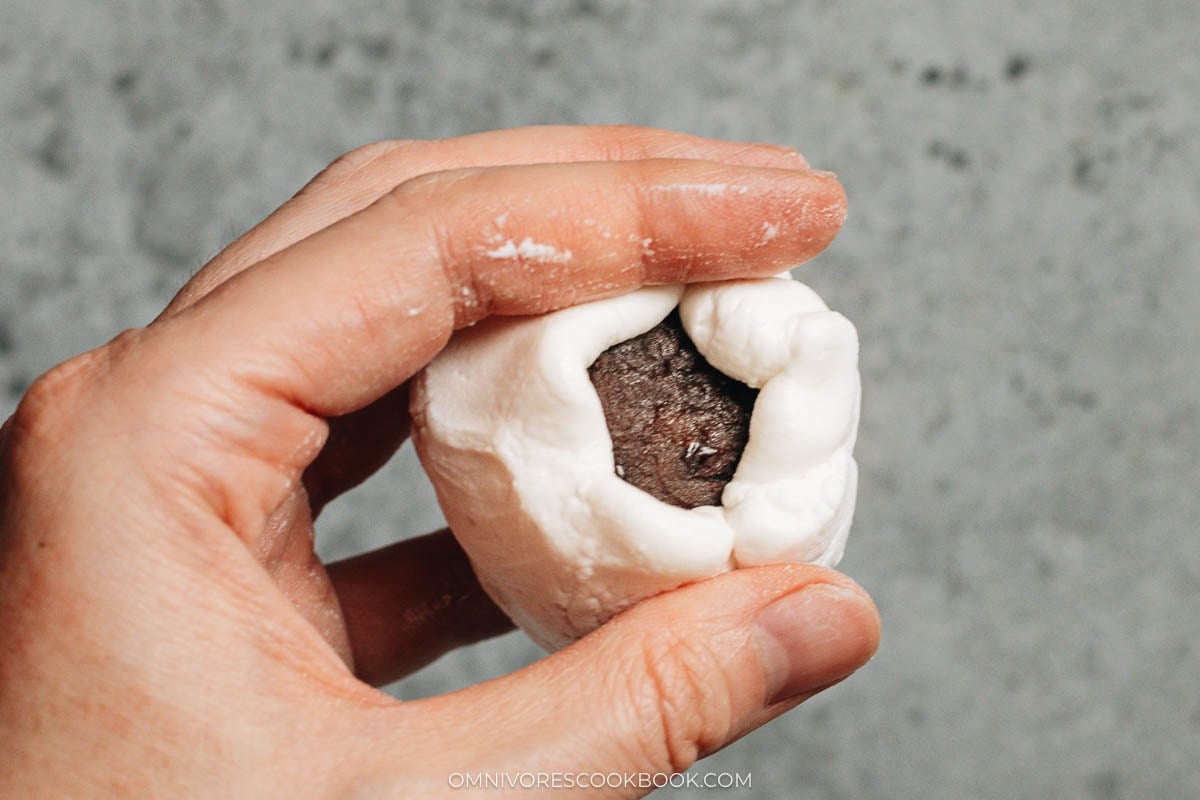
9. Coat with sesame: Flatten the ball with my palm into a disk about 3 inches wide and 1/2 inch thick. Press one side of the disk into the sesame seeds to coat and shake off the excess.
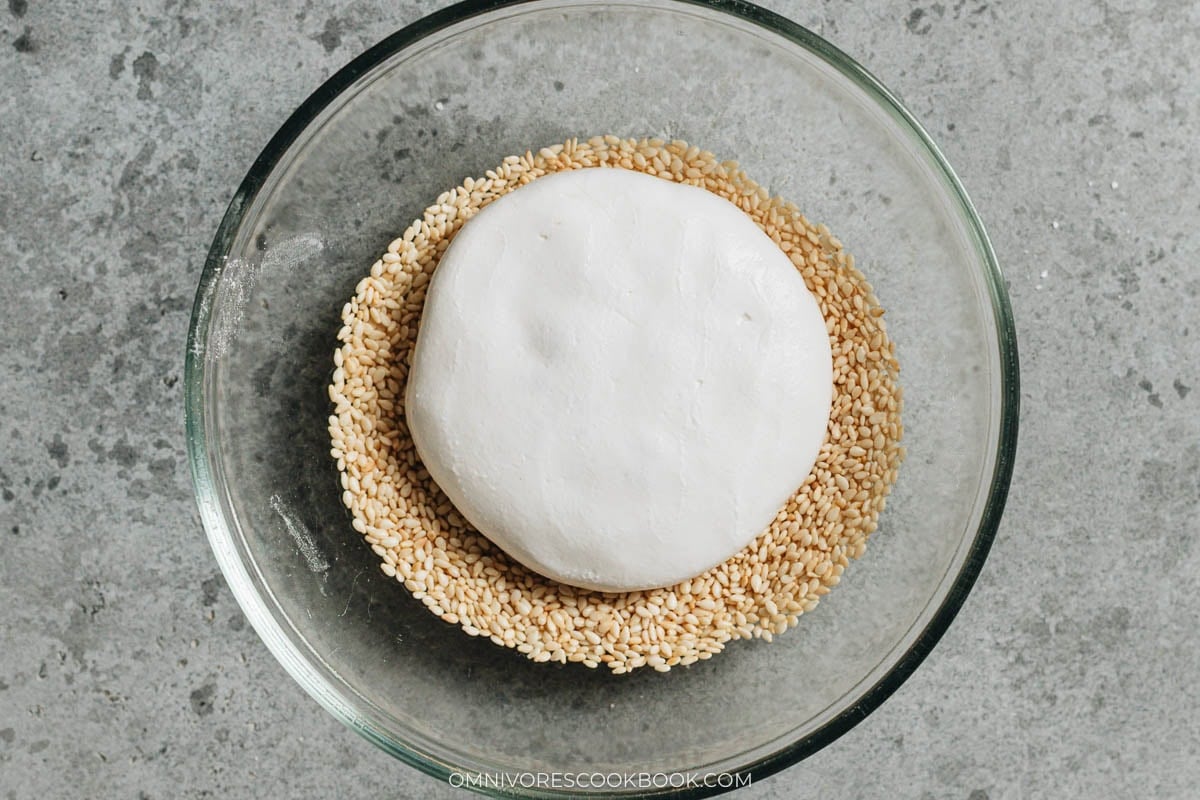
10. Get them ready: Transfer to a baking sheet and repeat with the remaining dough and filling.
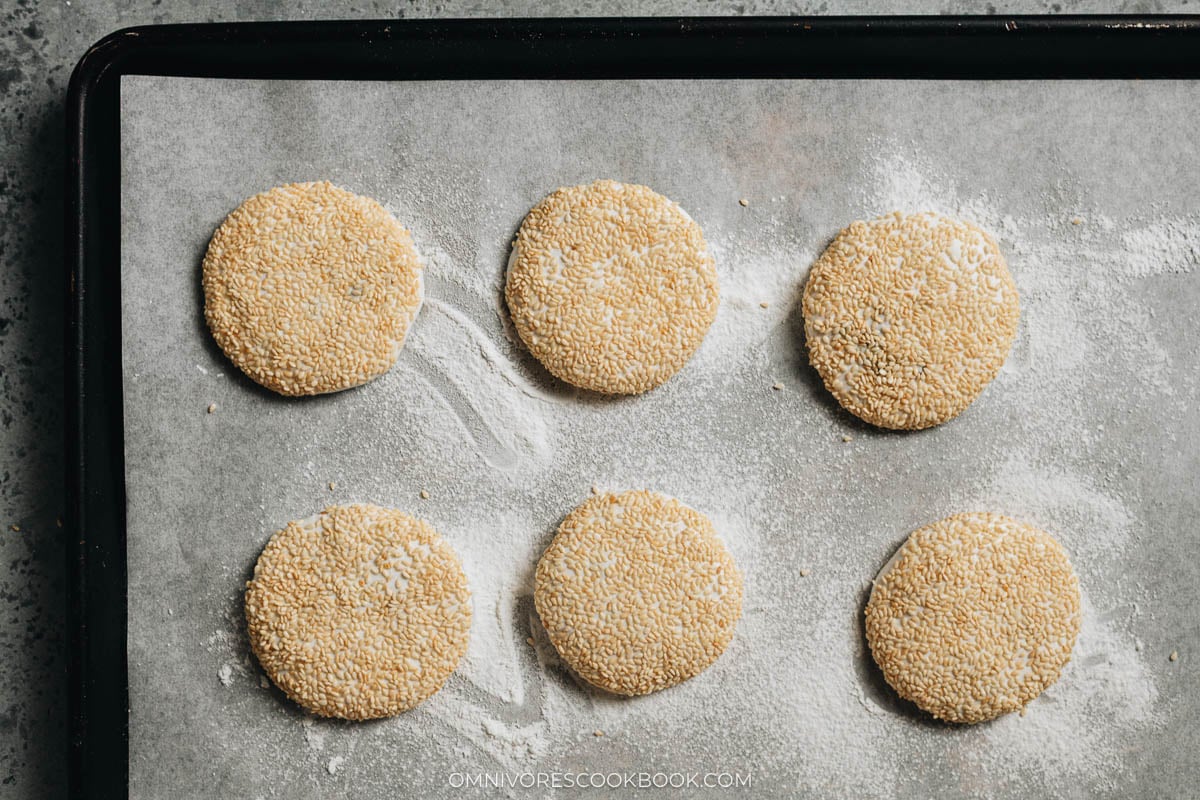
11. Pan-fry the rice cakes: Pour enough oil into a medium nonstick skillet to lightly coat the bottom, and heat over medium heat until shimmering. Working in batches, add the rice cakes with the sesame-seed side facing up. Cook until the bottom is lightly golden, about 2 minutes. Flip the cakes and reduce the heat to medium-low. Cook until the sesame seeds are lightly golden, about 1 minute. Flip once more and cook until the first side is golden and crisp, 1 to 2 minutes more.
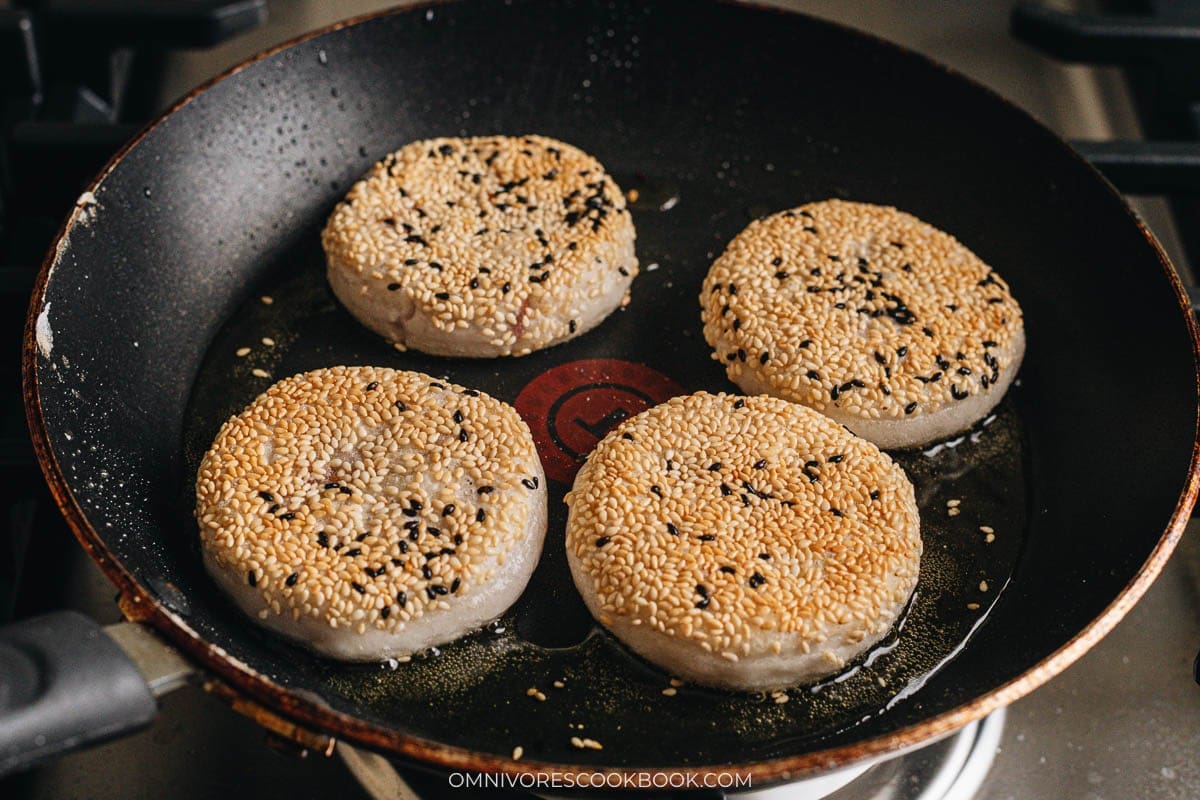
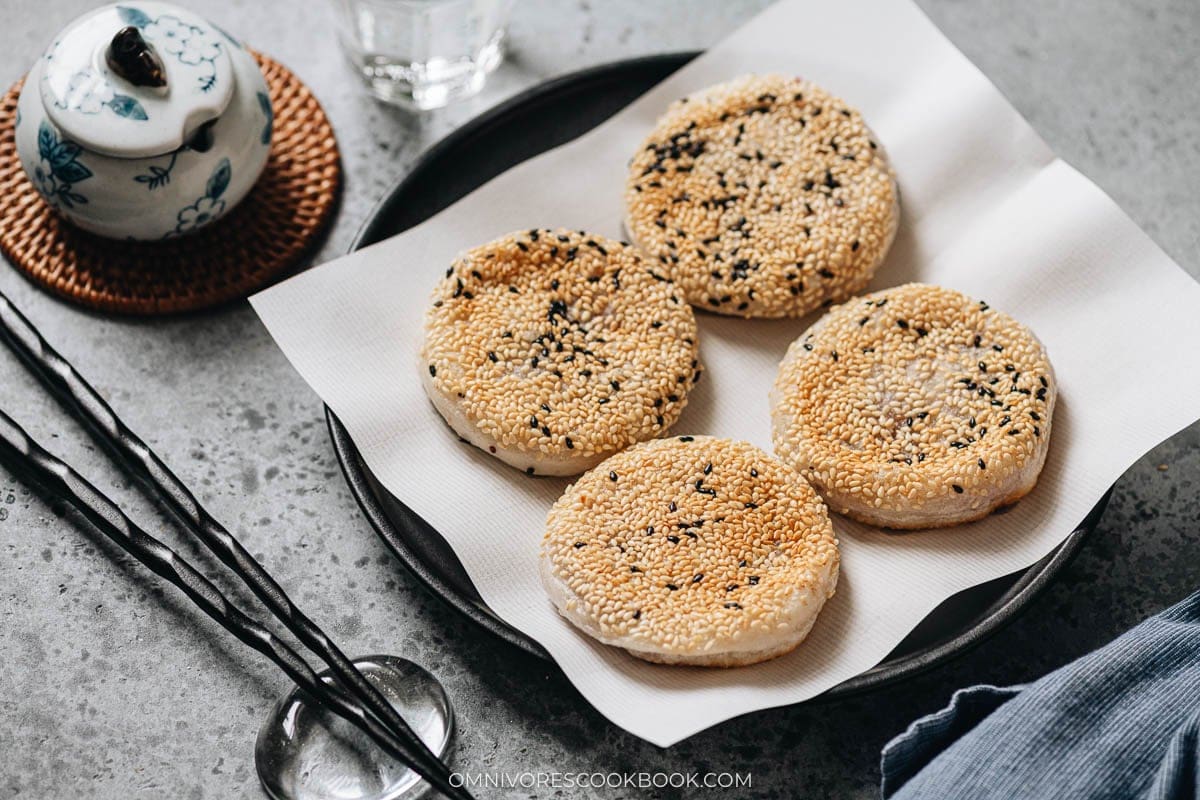
13. Finish and serve: Transfer to a plate lined with paper towels to soak up excess oil and repeat with the remaining rice cakes. Serve warm.
My Cooking Tips
Keep the shaped cakes covered: Rice dough dries out quickly on the counter and it will cracks when you try to flatten it. I keep the dough balls under a damp towel while I shape the cakes to prevent them from drying.
Add the water gradually, not all at once: Glutinous rice flour hydrates differently depending on the brand and the humidity in the kitchen. Pouring in 4 to 5 small additions and stirring after each one gives me control over the dough texture, and I stop as soon as the flour comes together into a soft-clay consistency, even if I have not used all the water.
Test the dough by lifting it: The right consistency lightly sticks to the bottom of the bowl when I pull the dough up, but it does not stick to my hands.
Do not worry about a perfect seal: If the dough does not quite cover the filling when I pinch the edges together, I stretch the thinner spots with my fingertips until they meet. It is fine if some areas are thinner than others or if the red bean paste is faintly visible through the dough.
Watch the sesame-coated side carefully during cooking, as the sesame seeds can burn quickly. I like to cook the uncoated side first until the rice cake is nearly cooked through, then reduce the heat before flipping it to cook the sesame-coated side. This gives the center time to finish cooking without scorching the sesame seeds. Cook the sesame seeds until just lightly golden for a mild, nutty flavor, or let them brown a bit more if you prefer a deeper, toastier taste.
Serving Suggestions
I serve these rice cakes warm off the pan, either with a pot of tea in the afternoon or as a dessert after a Chinese dinner. For Mid-Autumn Festival I love serving these alongside a plate of my black sesame filled Cantonese mooncake and a round of snow skin mooncake with custard filling so the dessert board has three shapes and three textures without a full baking project. My favorite pairing is a warm pot of Chinese jujube tea, which cuts the sweetness of the red bean paste and sets the mood for an afternoon tea.
Frequently Ask Questions
My dough is too sticky, what do I do?
Sticky dough usually means too much water or a flour that hydrates faster than expected. I mix in more glutinous rice flour a tablespoon at a time and knead briefly between each addition until the dough releases from my hands but still lightly sticks to the bottom of the bowl. Once it reaches the soft-clay texture, it wraps the filling easily and does not tear.
Why did my sesame seeds burn?
Sesame seeds burn easily in a hot pan and they toast much faster than the dough cooks through. Starting sesame-side up in the pan lets the plain side pick up color and the cake cook through, and the sesame side gets a short, low-heat toast at the end. I also reduce the heat to medium-low when I flip to the sesame side, which gives me more room for error.
How long do the cakes keep in the fridge and freezer?
I store leftover cakes in an airtight container in the refrigerator for up to 3 days or in the freezer for up to 1 month. Reheating is important because the dough turns tough when chilled and does not taste right straight from the fridge. I warm the cakes in a nonstick skillet over medium-low heat until heated through, which softens the chewy interior and crisps the surface again.
Want to Save This Recipe?
Enter your email below & we’ll send it to your inbox. Plus get great new recipes from us every week!
Watch video

Sticky Rice Cake with Red Bean Paste
Ingredients
- 420 g (1 1/2 cups) red bean paste
- 250 g (2 1/4 cups) glutinous rice flour , and extra flour to dust working surface
- 225 ml (1 cup minus 1 tablespoon) water
- 1/4 cup white roasted sesame seeds
- Vegetable oil for cooking (*Footnote 1)
Instructions
Prepare the filling
- Use a medium cookie scoop to portion out 12 scoops of red bean paste, 30 grams (2 tablespoons) per scoop. Use your hands to round them into balls.
Make the dough
- Add the glutinous rice flour to a large bowl. Gradually add the water in 4 to 5 additions, stirring with a fork after each addition until the water is fully absorbed. Once all the water has been added, there should be no dry flour remaining and the mixture should come together into a soft, pliable dough that is not sticky or runny.
- If the dough feels too soft to handle, mix in more glutinous rice flour, 1 tablespoon at a time. Knead the dough in the bowl for 1 to 2 minutes, until smooth and evenly hydrated. The finished dough should be soft and easy to shape like soft caly. It may lightly stick to the bottom of the bowl when lifted, but it should not stick to your hands.
Assemble
- Lightly dust a work surface with glutinous rice flour and transfer the dough onto it. Divide the dough in half. Roll each half into an even log, then cut each log into 6 equal pieces (about 42 g each). Roll each piece into a smooth ball and cover with a wet towel while you shape the cakes.
- Spread the sesame seeds in a medium sized bowl.
- To make the cake, Place one dough ball in your palm and gently flatten it into a round disk about 2 1/2” (6 cm) wide and 1/4” (5 mm) thick. The dough is very pliable, so you can easily shape it with your hands without using a rolling pin.
- Place one portion of the red bean paste in the center. Gather and pinch the edges of the dough together to completely enclose the filling (*Footnote 3), then gently roll it into a smooth ball.
- Flatten the ball with your palm into a disk about 3” (8 cm) wide and 1/2” (1 cm) thick. Press one side gently into the sesame seeds to coat, shaking off any excess. Transfer to a baking sheet or large plate and repeat with the remaining dough and filling.
Cook
- Pour enough oil into a medium nonstick skillet to lightly coat the bottom. Heat over medium heat until shimmering.
- Working in batches, add the rice cakes sesame seed-side up. Cook until the bottom is lightly golden, about 2 minutes. Flip and reduce the heat to medium-low. Cook until the sesame seeds are lightly golden, about 1 minute. Flip once more and cook until the first side is evenly golden and crisp, 1 to 2 minutes more.
- Transfer to a plate lined with paper towels and repeat with the remaining rice cakes. Serve warm.
Store and reheat
- Store the rice cake in the refrigerator for 3 days or in the freezer for 1 month. Thaw before reheating. Warm the rice cakes in a nonstick skillet over medium-low heat until heated through. This restores their soft, chewy interior while crisping the surface again.
Notes
- Traditionally, these rice cakes are deep-fried until crisp. At home, I prefer shallow-frying them with just enough oil to coat the pan. The cakes are slightly softer than the traditional version, but they’re lighter and just as delicious.
- Sesame seeds brown much faster than the dough, so it’s important to cook the uncoated side first. This allows the cakes to puff slightly and cook through before the sesame seeds begin to toast. I like to cook the sesame-coated side until it’s just lightly golden, which gives the seeds a delicate nutty flavor. For a deeper roasted flavor, continue cooking until the sesame seeds are golden brown.
- If the dough doesn’t completely cover the filling, gently stretch and nudge the edges with your fingertips until they meet. It’s perfectly fine if some areas of the dough are thinner than others or if the red bean paste is faintly visible through the dough. Once flattened into a cake, it will cook up just fine.
Nutrition

Did you make this recipe?
I’d love to hear how it turned out for you! Please take a moment to leave a 5-star rating ⭐️ and share your thoughts in the comments further down the page. It really helps others discover the recipe too.
The nutrition facts are calculated based on 1 of the 12 cakes generated from this recipe.
Shanna Hattaway
daifuku, my favorite! I can’t leave my local produce stand without buying one. The addiction is real.
Linda @ Roti n Rice
These look so good. Perfect for tea time!
Nikky
I absolutely love these … so excited to try these out at home .
Being nigerian we also eat red bean paste but with coconut milk sweet and with chillies .
Maggie
I’m so glad to hear you like the recipe Nikky!
Wow, I didn’t know you cooking with red bean paste too. Adding coconut milk and chillies into it sounds so delicious! Is that a cake filling too? I really want to try it out 🙂
Nikky
We dont do it within a cake but i tried it and its absolutely amazing .
With your original recipe after frying it
Maggie
That sounds amazing! Do you have a recipe? I’d love to try it out 🙂
Marion
I want to bring these to a dinner party. Can I/should I cook them at home and bring them precooked? If so, should I simply serve them at room temperature, or reheat them in my host’s kitchen? To reheat, would I microwave them or put them in the oven (on a low temperature)? If I shouldn’t cook them ahead, how would I transport uncooked rice cakes? Would they be okay in layers on wax paper, for example?
Thanks so much for your help!
Marion
Maggie
Hi Marion, you can cook them at home and reheat the cakes at the party. To serve the cakes warm, the best way will be cooking them on stove top. You can place them in a non-stick skillet and cook over medium heat. When the skillet turns hot, flip the cakes, add a few tablespoons water and cover immediately. Turn to medium low heat and cook until the cakes are heated through. The cake will be crispy outside and gooey in texture. Alternatively, you can use microwave. The cakes will be gooey, but the surface won’t be crispy. I haven’t tried to reheat them in the oven. I think it’s possible, but you need to wrap the baking tray with aluminum foil and add a few drops water onto the tray, to prevent the cakes from drying out.
I hope this is helpful, and your dish will be a hit at the party! 🙂
Marion
So, I made these yesterday at home, brought them to my sister-in-law’s, rewarmed them as you suggested — and they were pronounced a success, including by my (knowledgeable) Japanese-American relatives! Yay!! (And I like them cold, too.) My only complaint is that I found it impossible to completely enclose the red bean paste filling. Before I started that step, they looked just like your picture of the ball of red bean paste on top of the cake — but in your picture it looks impossible to get that little bit of cake around that big ball of red bean paste, and that proved to be the case in real life. I started putting less filling in each one, but I still never managed one that didn’t show some red filling on the outside. Fortunately, unlike some pastries I’ve made, it didn’t really matter: The filling didn’t ooze out, and the sesame seeds mostly covered up the messy look. Also, I found it easier when I wet my hands and added a little more water to the dough, so maybe I should’ve had
more water in the dough to begin with; maybe that would’ve helped.
Anyway, thanks for the recipe and for the help!! It was fun making, serving, and eating these — and I doubled the recipe, so I still have some!
Maggie
Hi Marion, I’m SO glad to hear the cakes received good review! You just made my day 🙂
Yeah, the wrapping part can be tricky, because the dough won’t hold together like wheat flour (no gluten inside). Yes, adding a bit more water to make a tenderer dough will be helpful. The dough is quite forgiving, and you can adjust its texture even after kneading. The dough will be easy to wrap, when it’s tender and able to spread with hand, without breaking it apart. It will become sticky if it turns too soft. On the other hand, just as you said, it won’t cause a problem even the filling is not completely enclosed.
I’m so glad to hear you enjoy the cooking too! And thanks for leaving a thorough feedback to let me know 🙂 You’re so kind.
Enjoy the rest of the weekend Marion!
Shiho
Maggie, This is fantastic. My favourite!! Very similar to a sweets called OYak in Japanese. Thank you for sharing the great recipe.
Sokehah Cheah
Made this recently, yummy. Thanks for sharing.
http://www.nofrillsrecipes.com/2015/10/sticky-rice-cake-with-red-bean-paste.html#.VhtV1_mqqko
Freya
Can i steam these instead?
Maggie
Hi Freya, I never tried to steam these cakes. I’m afraid they won’t hold the shape so well. The surface will turn crispy and adds a nice texture. If you steam the whole thing, it will be quite gooey and sticky. I won’t recommend to steam them.
Bam’s Kitchen
I can’t believe it! I have read this recipe a million times before, but did not comment!! This recipe rocks and have made it a few times before and your directions are spot on. Well we need to make that at least 9K repins so on my way to share, pin and send smoke signals… Wishing you and awesome weekend!
Kathleen | HapaNom
Oh Maggie! This looks fantastic! I absolutely love desserts like this (American desserts tend to be too sweet for my liking). While I haven’t had this exact dessert before, I imagine it would taste much like toasted mochi – would that be about right?
Tweety
Hi Maggie,
I have been looking for this kind of great recipe! Wow. your recipe is like a GOD-sent!
I love this pastry and it’s hard to find in everywhere, it seems!
Thank you so much.
I will continue to follow your recipes and support you to come out with more and more inspiring recipes.
Regards,
Happy Beginner to baking
Maggie
Thanks for the comment and all the kind words! So glad to hear you like the recipe, and the type of pastry. Dessert that made from sticky rice is very common here, but it’s probably not a standard dessert item outside of Asia. It’s great to hear someone out there cares about it 🙂
Also, please feel free to drop me a message if there’s a recipe you can’t find.
Have a wonderful day and happy cooking!
Saskia
The glutinous rice flour I can get gives me no indication of what type of rice was used! If I use the wrong sort will it be a complete disaster or will it just have a different texture to what it is supposed to?
Saskia
The rice I have in my cupboard is the same brand as on this website: http://www.templeofthai.com/food/flour_sugar/sticky-1220111107.php
Maggie
Hi Saskia, I just checked the rice flour on the website you told me, it’s the same brand as the one I used, so it should be the right one. Even if you used the wrong type, it won’t cause a huge problem (the finished cake will has a less crispy surface, but still tasty). Hope is helpful and happy cooking!
Linus
Hey Maggie,
Great blog! I only recently discovered it and the recipes are really excellent.
This take on the sticky rice cake really reminds me of the Korean street food Hotteok, the construction and cooking method are very similar, although the dough and filling are a bit different. I’ll be sure to try it soon!
Maggie
Hi Linus, thanks so much for the kind words and so glad to hear you like my recipes!
I just googled Hotteok, and yep, it really looks like the Chinese rice cake! I saw sometimes they use a filling with brown sugar and some nuts, and it sounds so delicious! Thanks for sharing this and I’d like to try out the Korean version filling with the rice cake too.
Happy cooking and let me know how it goes 🙂
Susan
I’m excited to see this recipe. It takes me back about 40 years to when I took a Chinese cooking class with some ladies I worked with. I really enjoyed this dessert and am delighted that I can now make it if want to (but I’m not sure my husband would like it). Thank you for posting this recipe.
Maggie
Hi Susan, thanks for leaving a comment and I’m glad to hear you like this dessert! It’s interesting to learn that Chinese cooking class choose this one to teach, because I thought it’s not so well known outside of China. Hope you have a nice weekend and happy cooking! 🙂
Susan
Actually, Maggie, I think that one of my co-workers, a Japanese lady brought them to class. I don’t remember them being fried, but I do remember that they tasted really good.
Maggie
I know the Japanese one and you’re right, it’s not fried. The Japanese rice cake uses the other type of glutinous flour (the one that is milled from short grain sweet rice), and the dough is steamed before wrapping with the red bean fillings. The recipe here uses the glutinous flour that is milled from long grain sweet rice. The surface of dough will turn crispy after heated, while the texture inside is still gooey. (Sorry this might sound confusing)
If by any chance you want to make the Japanese rice cake, you can get the recipe here => http://www.justonecookbook.com/recipes/daifuku/
I guess it’s close to the one you mentioned. I cooked a lot of Japanese food from Nami’s site and she has amazing Japanese recipes. Hope this is helpful 🙂
Michelle @ The Complete Savorist
I have not had these in years…and by years, I mean at least two decades. They actually look easy enough for me to make at home. Pinning!!!
Maggie
Yes, the rice flour is even easier to deal with than wheat flour. The dish was intimidating to me at first, but then I was so surprised how easy it is when I made it! Thanks for sharing 🙂
Bonnie Eng
You are an artist Maggie! The video and photos are outstanding–so informative, and so clear. Bravo, the cakes look scrumptious and you are awesome! 🙂
Maggie
Thanks very much Bonnie! I like this one too and tried very hard to make the photos as good as it tastes 😉
Nami | Just One Cookbook
I had way too much fun watching your video for this sticky rice cakes and I have to say I’d need like 5 of them at one sitting… Looks so good. I love red bean sweets. Japanese mochi we don’t really fry it, so it’s very fun seeing how you guys make this. Oh and I love the sticky mochi shot! Brilliant!!!!
Maggie
Isn’t it interesting that Chinese and Japanese dishes share so many similar ingredients, but they also have slight differences? I love eating mochi while I was living in Japan, but never thought it uses different type of rice flour (short grain vs. long grain). Took me some time to figure that out!
Watching your Daifuku video was great fun for me too! I’d never imagine you need to steam the dough first!
Lokness @ The Missing Lokness
I hate frying at home too. Grease flying everywhere in the kitchen. What a smart idea to coat the rice cake with sesame seeds. Add more flavors and great crispy texture. I love red bean and rice cake. This is totally a must try. Your pictures are gorgeous as always, Maggie!
Maggie
Thanks Lokness! I use whatever way I can to avoiding frying!
Annie
Love these! My mom sometimes makes something like this, but it’s a full cake with red bean paste in various places (because she mixes it slightly). It has the exact same texture…..I was wondering if you could make that, along with some history? I need some background information on it for school…..you don’t need to, please don’t feel like I’m commenting just to get information, these are truly awesome!
Thalia @ butter and brioche
Wow these red bean rice cakes definitely take me back to my childhood! My Chinese grandfather used to always make something similar for me to devour. Thanks for reminding me how awesome and delicious they are.. definitely need to recreate the recipe asap!
Maggie
Hi Thalia, I didn’t know you have a Chinese grandfather! Really glad to hear that there is quite some people like the taste of red bean paste, I was afraid the flavor is too unfamiliar to non-Chinese readers. Besides the sticky rice version, I think the paste goes great in a baked crispy pastry. Do you think so?
lily
So excited 2 find what I’ve been searching for since mom past away. But she made a “sieu bang ” which had no filling & was sweetened which we wrapped a pc of crispy roast pork in it. It was baked & hot water used to mix w/the glut flour. So I have not yet accomplished my search. Any idea?
Alice @ Hip Foodie Mom
oh my gawd, I love these!!! Koreans have a similar dessert as well using the red bean paste! Love this and pinned!
Maggie
Interesting, I didn’t know there is a Korean version of red bean paste dessert too! I’d like to try it if I ever come across them! Thanks for sharing 🙂
Min
Wow! Thank you so so much for sharing, Maggie! This is seriously one of my favs and I never dared to make this at home bc like you, I don’t like to fry anything in my kitchen! Brilliant! Pinned.
Maggie
Hi Min, thanks for sharing! Yeah, I totally understand your feeling towards fried food, and I didn’t expect this dish is so easy to cook at home. Glad you like it 🙂