Table of Contents
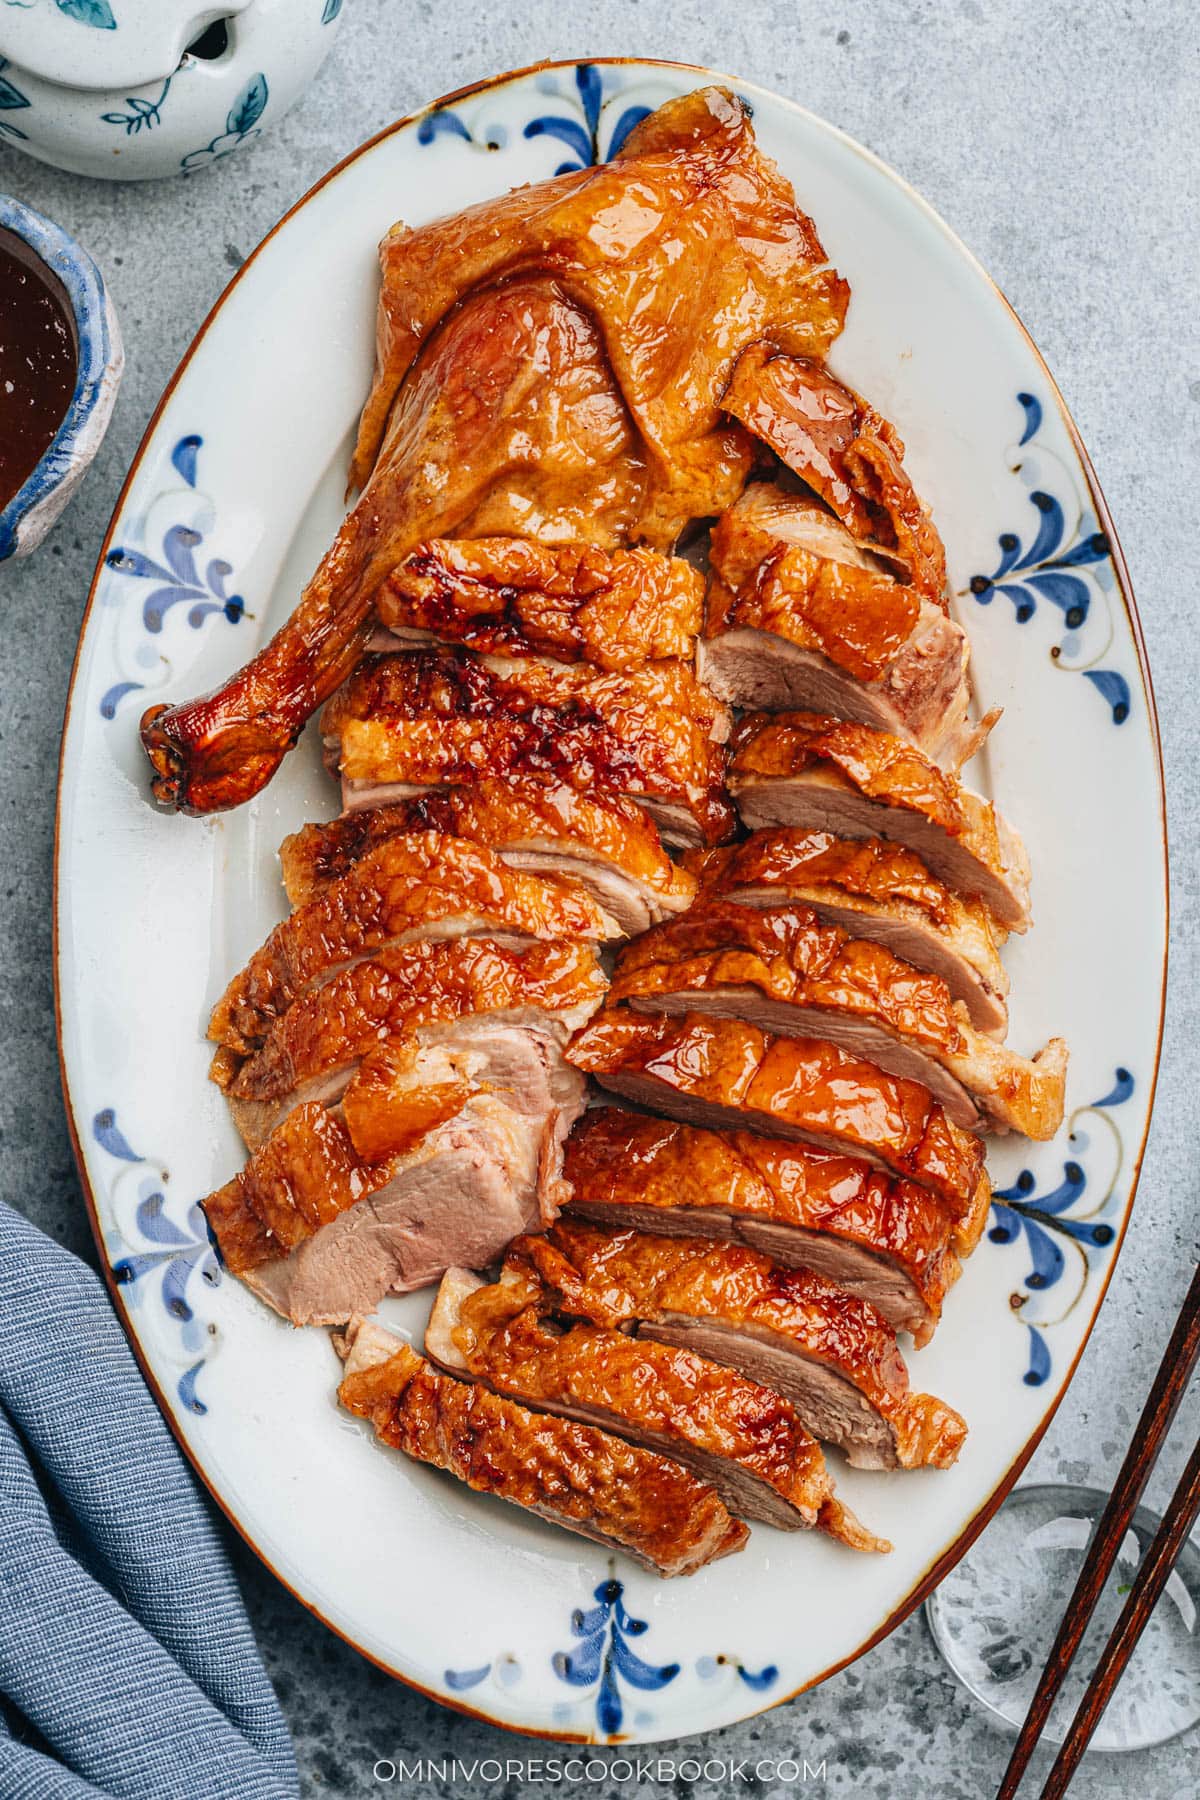
A plate of carved up roast duck with perfect crispy skin is the ultimate centerpiece of a banquet, no matter whether you’re celebrating Chinese New Year or hosting a dinner party. Growing up in Beijing, my childhood memories are filled with the joy of delicious duck dishes with friends and family. From Peking duck to Cantonese roast duck, it’s one of my favorite things to eat at a restaurant and I was fortunate enough to eat duck often. I have very high expectations for a duck dish. And that’s why it took me years to finally develop a Chinese roast duck recipe that I’m proud of sharing also as part of one of favorite Asian Thanksgiving recipes.
Peking vs. Cantonese duck
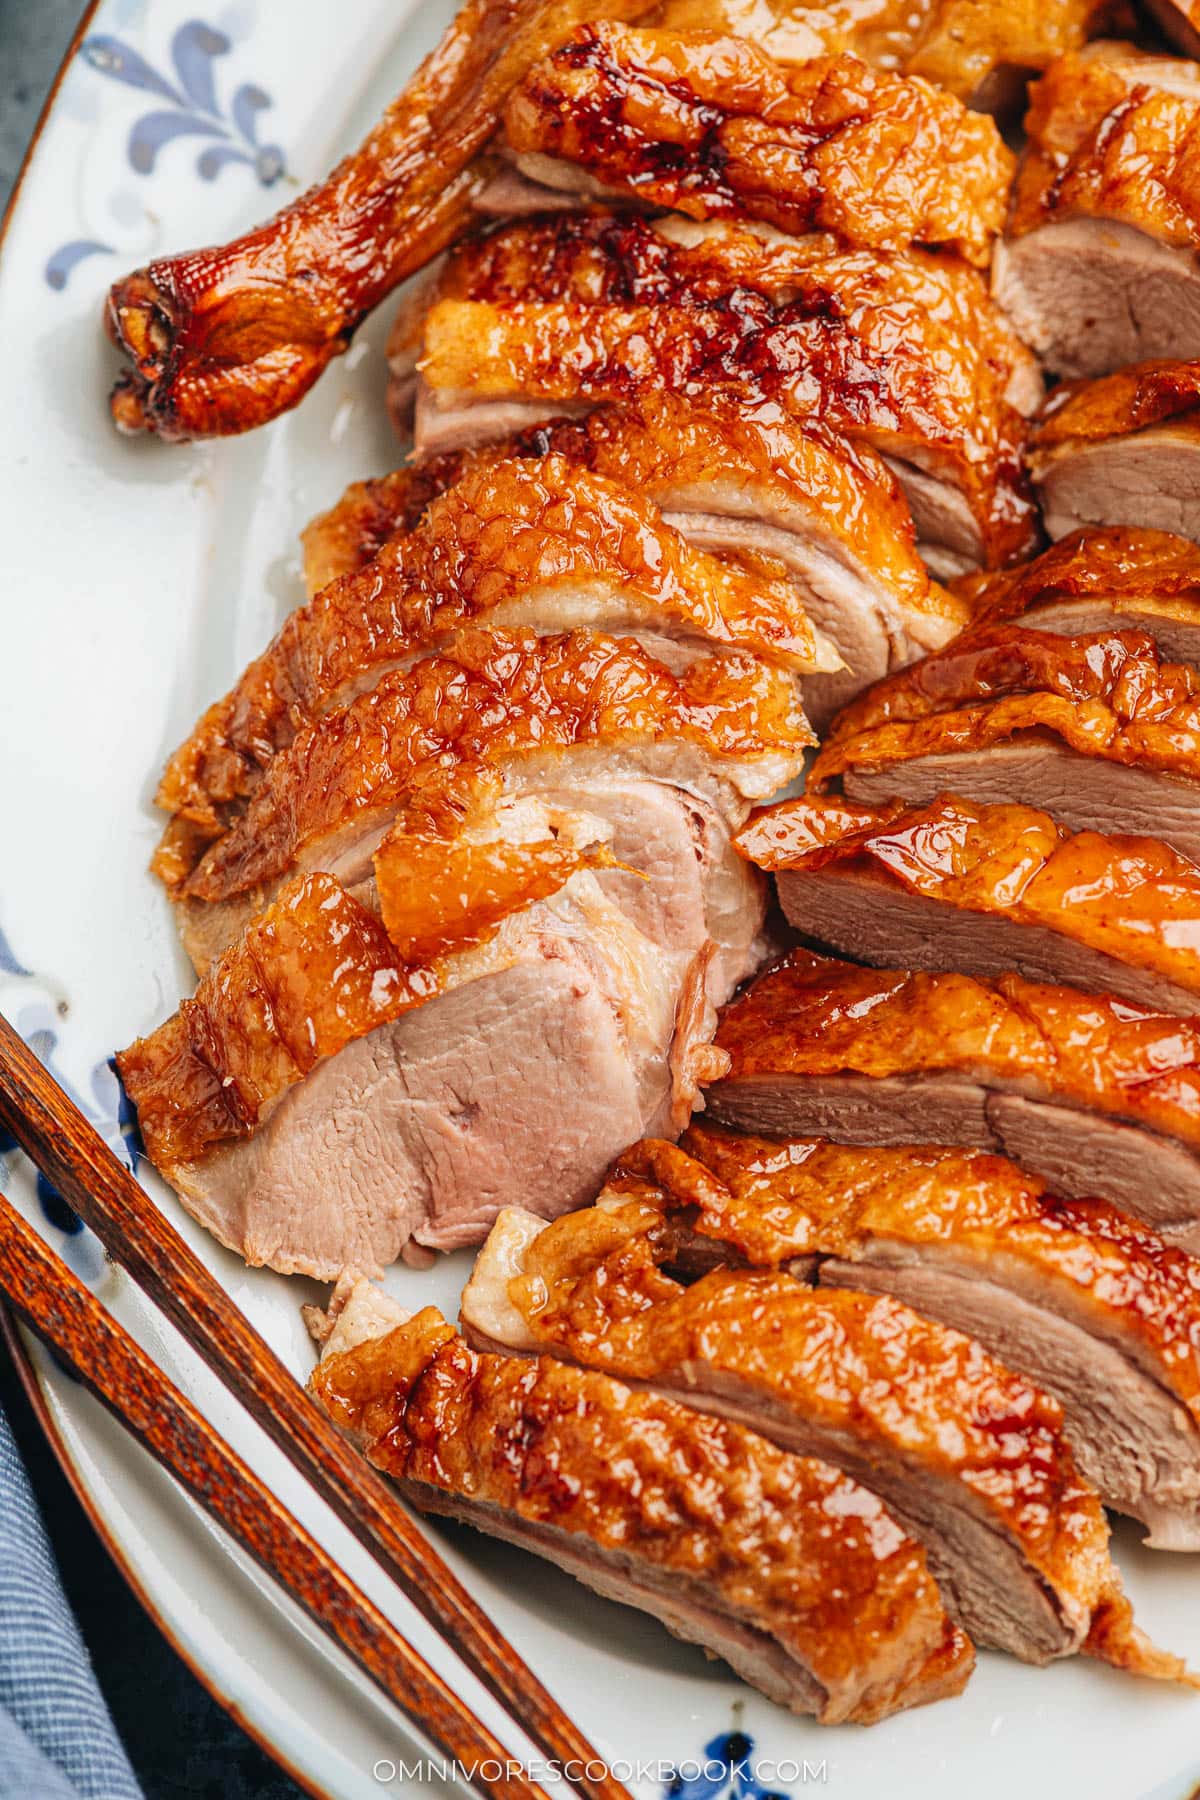
This recipe makes a Cantonese style roast duck. The meat is juicy and flavorful, with crispy skin. However, I’ve also included information below, if you prefer to serve it Peking duck style.
Similarities
Peking duck (北京烤鸭) and Cantonese roast duck (广式烧鸭) are from different regions of China. They share some similarities in terms of their preparation process. For example:
- Both require young Pekin ducks that are small and have thin skin.
- They both require a blanching in syrup process to develop color and sanitize the duck.
- They both require a long marinating and air drying process.
- Air pumping to separate the skin and the meat is key and essential to creating the perfect crispy skin.
- Both require a professional oven to hang the duck and cook it at a high temperature.
However, many different elements also come in play that make them completely different dishes:
Peking duck
It uses more simplified seasoning. The meat doesn’t have a particularly intense flavor because it’s meant to be served with Tian Mian Jiang, which is a very rich sauce that’s salty and slightly sweet. Peking duck requires a very different carving technique that is impossible without professional training. Only a very small portion (the best part) of the duck is carved and served boneless when it’s piping hot. The skin is puffier and crispier than with Cantonese duck. Sometimes the best pieces of the skin are served on their own. The rest of the duck is made into soup and served with your meal. Peking duck is commonly served with mandarin pancakes or steamed buns, cucumber and scallion slices, along with the Tian Mian Jiang. It’s often a meal by itself.
P.S. Growing up in Beijing and having eaten countless good Peking ducks, I refuse to call any homemade duck a Peking duck. Without the professional oven and carving techniques, whatever you produce will not be a Peking duck.
Cantonese duck
Cantonese duck requires more aromatics and sauces to season the meat, which yields a delicate and delicious taste, even enjoyed by itself. The roasting technique is different from the one for Peking duck, and is slightly easier to replicate at home. The duck is carved when it’s warm, with the bones in. The skin is less crispy than with Peking duck, but still very nice. It’s often served as an appetizer with other Cantonese roast meats such as char siu pork, or over rice or noodles as a main dish. Depending on the region (Guangzhou style, Hong Kong style), the duck can be served with plum sauce, ginger scallion sauce, or a salty gravy made with the seasonings you marinated the duck with.
Why this recipe
This recipe was developed with my team member Jean-Luc, who used to live in Hong Kong and has worked in Cantonese restaurants. He was trained and had experience working at the roast duck station, understanding the techniques and how restaurants prepare this dish, in and out.
We developed this recipe considering the typical home kitchen setup and the available ingredients in the US. Our goal was to recreate the results of a Cantonese restaurant without using too many specialized ingredients or techniques.
- This recipe works with Pekin/Mallard hybrids and Mallard ducks if you cannot source a pure bred Pekin duck.
- It uses minimal specialty ingredients and equipment. You don’t need to buy a dozen items that you’ll only use once.
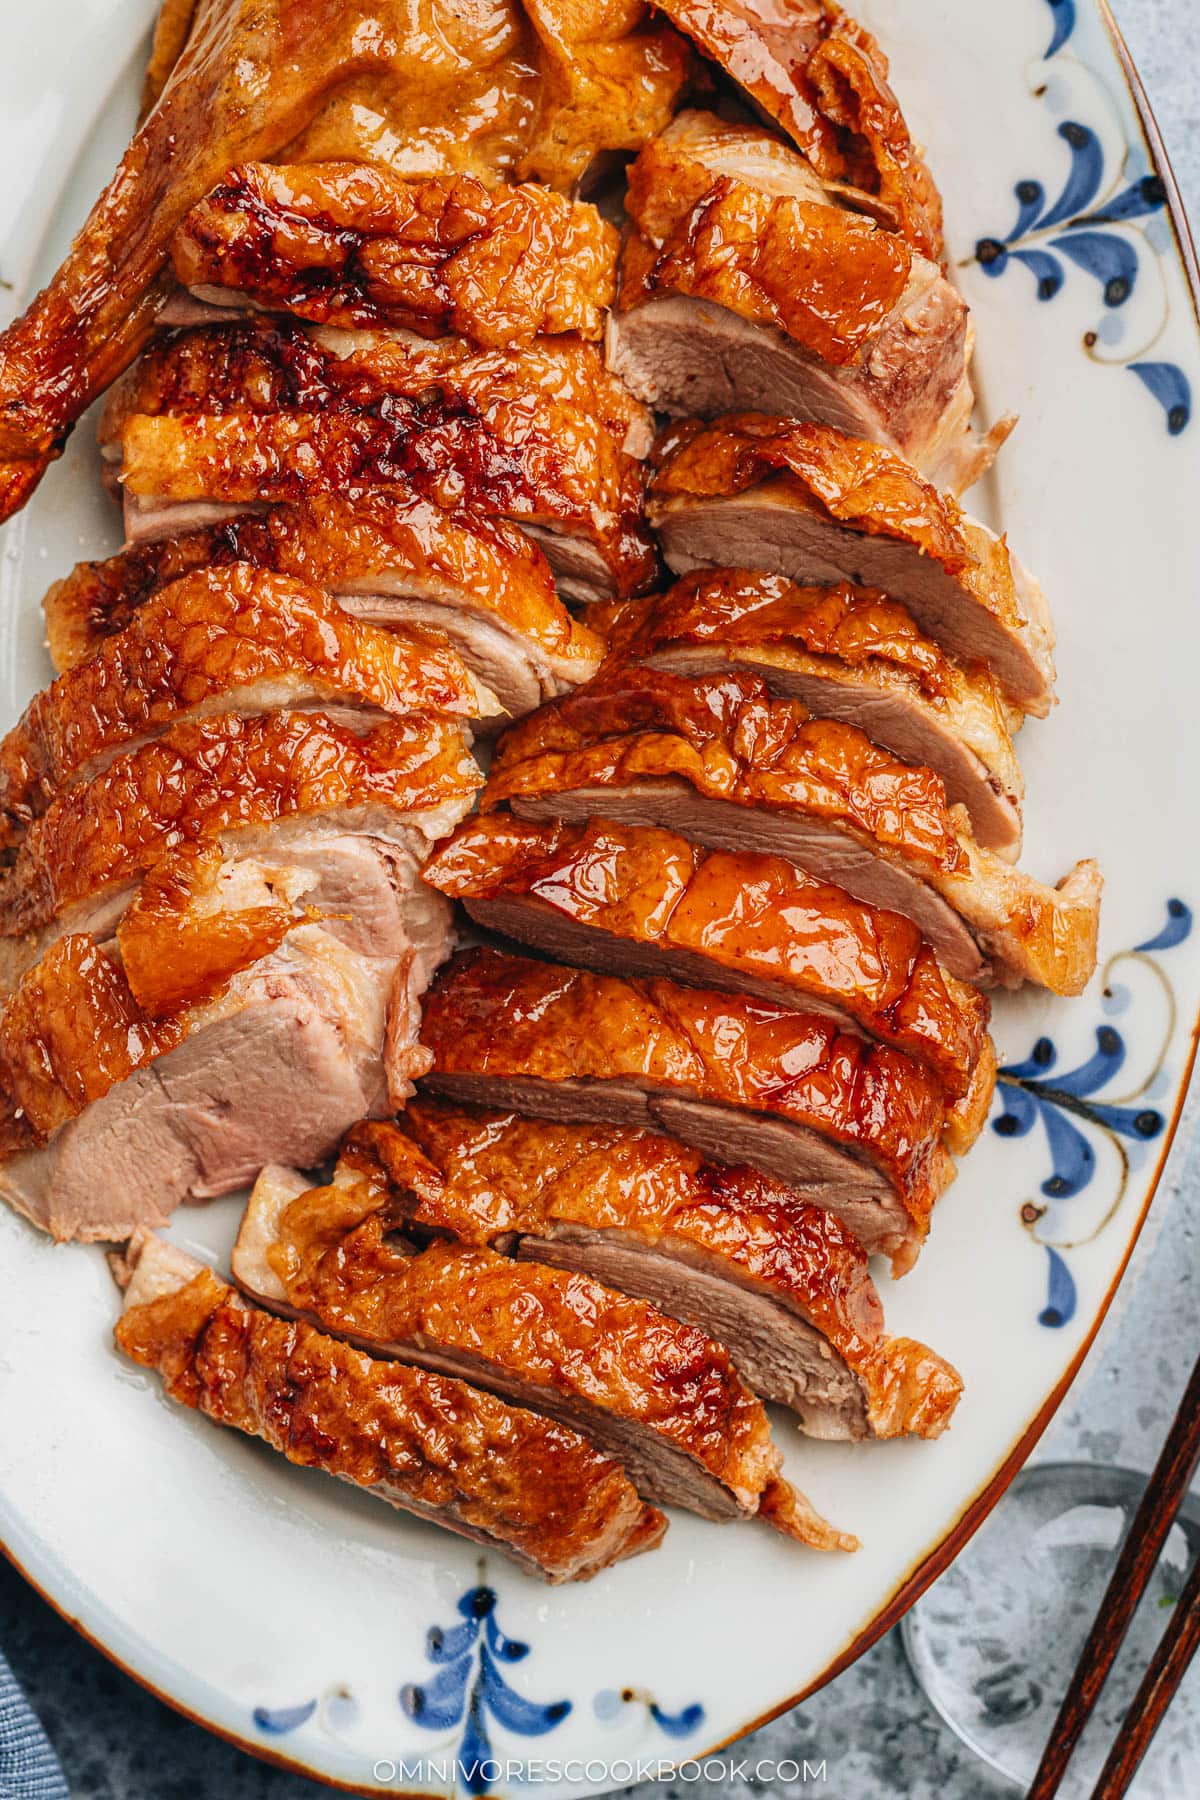
- The recipe produces a very juicy duck that is full of flavor and crispy skin just like the one from a Cantonese roast duck restaurant.
- I made a video and have step-by-step photos to walk you through the process. You’ll find the process much more approachable than you thought.
What type of duck to use
The best duck for Chinese roast duck is a pure bred young Pekin duck that weighs 3.5-4.5 lbs (1.6-2 kg). This duck yields a very crispy skin because the skin is much thinner than the typical Mallard ducks you often find in the US. Ideally, you should use a head-on duck so it will be easier to keep the marinade from leaking out of the cavity.
In reality, it’s quite hard to source a high-quality Pekin duck. I’ve tried the Chinatowns in both Manhattan and Brooklyn. Very few shops had Pekin duck and the ones I found didn’t look great.
When testing the recipe, we tried cooking with both Mallard and Pekin Mallard hybrids (it was a Pekin duck sold by D’Artagnan, but it was a hybrid duck). Both produced great results. So I’m happy to share that it’s totally possible to use a regular duck you can find at your local market to cook Chinese roast duck.
The only thing to be careful of, is to try to use a small duck if you can, especially if you use a Mallard. The mallard we used was about 5lbs and the Mallard Pekin hybrid was 6 lbs. Both produced satisfactory results but you will get an even better result if the duck is smaller.
Special equipment
There are three special tools you will need:
An air pump with a needle
This is a crucial tool to inflate the duck skin and detach it from the meat. This way, the duck skin will render fat properly and become crispy after roasting.
When testing the recipe, we actually used a bicycle pump. It got the job done nicely.
Alternatively, you can also use an electric pump, which works even better.
When getting a pump, make sure that it comes with a needle. You will insert the needle underneath the duck skin before pumping.
Skewers
You will need two skewers to seal the both ends of the duck (one skewer if you use a head-on duck). Small round metal skewers such as these 5.9” skewers are perfect for this job.
Kitchen twine
Once the duck is sealed with skewers, you will need this butcher twine to tie up the skewers, to further secure the marinade inside of the cavity.
Special ingredients
Red fermented tofu
Fermented Tofu (酱豆腐, 腐乳, jiang dou fu, fu ru) is also known as fermented bean curd or preserved tofu. There is white fermented tofu (白腐乳) and red fermented tofu (红腐乳). And we will be using the red type in this recipe. Fermented tofu has a soft and spreadable texture, and a salty and savory taste resembling that of certain cheeses.
You can find this ingredient in Chinese grocery stores or on Amazon. It’s a key ingredient and cannot be replaced.
A word about vinegar, wine and syrup
Traditionally, Chinese red vinegar, maltose, and rose wine are used in roast duck. The vinegar and maltose are ingredients in the blanching liquid, and their purpose is to add color to the duck skin. The wine is for marinating. I replaced them with apple cider vinegar, brown sugar syrup, and Shaoxing wine, because I prefer not to include ingredients that I use only very occasionally.
However, if you do have these specialty ingredients at home, feel free to use them!
Plum sauce
Plum sauce, or 苏梅酱, is a sweet and sour sauce that is often served with roast duck in the Cantonese region of China. For me, this is my favorite sauce to serve with Cantonese roast duck because the sour sweet flavor balances and adds a great touch to the crispy skin and savory meat. You can find it at regular grocery stores these days and in most Asian markets. I really like the Koon Chun brand, which has more aromatics in it and tastes lightly spicy.
If you don’t have this sauce, you can also serve the roast duck with hoisin sauce as an alternative.
How to cook Cantonese roast duck
Trim and clean the duck
Cut off the wings, so the duck is much easier to maneuver during blanching and roasting. The wings can be saved for later and made into a stock with the leftover duck bones.
Cut off the skin attached to the neck area if using a headless duck. And remove the fat pieces by ripping them off from the cavity.
Use your hands or a pair of fish tweezers to pluck any obvious feathers from the skin.

Add the marinade and seal the duck
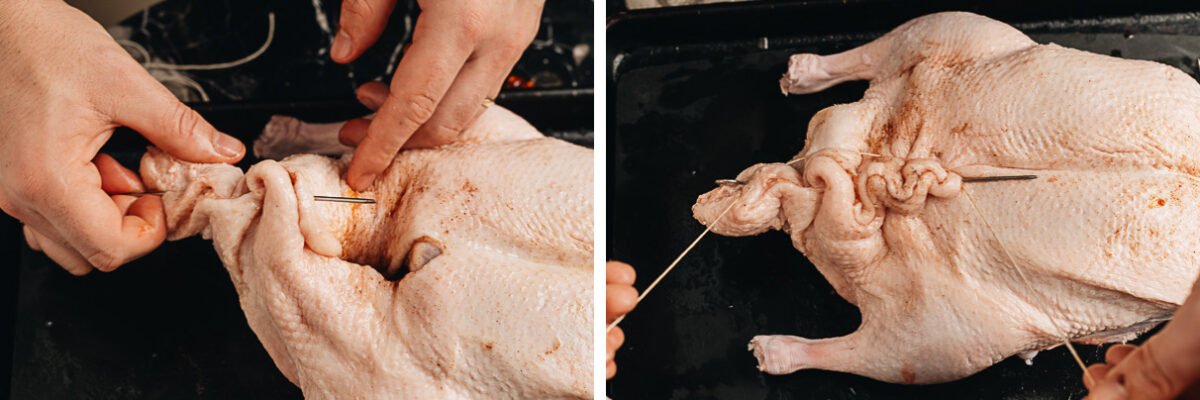
First, seal the neck area of the duck by using a skewer to thread the skin. Then use kitchen twine to tie up the skewer, so the cavity is fully enclosed to hold the marinade.

Then prepare the dry and wet seasonings, and aromatics for the marinade. Add them in this order: dried seasonings, aromatics, then wet seasonings.
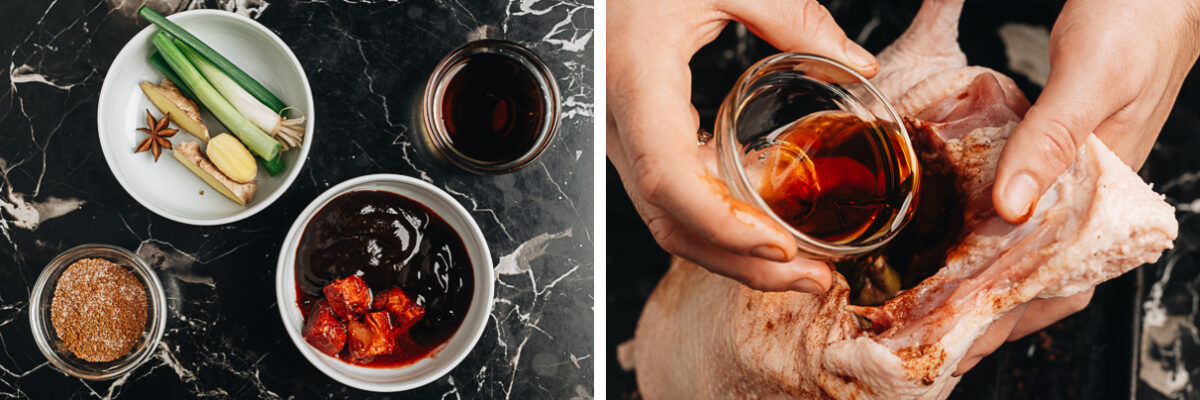
Once the marinade is added, seal the tail end of the duck by threading the skin using a metal skewer. Then tie up the skewer using kitchen twine.
Air pump the duck
This is the crucial step for creating crispy skin.
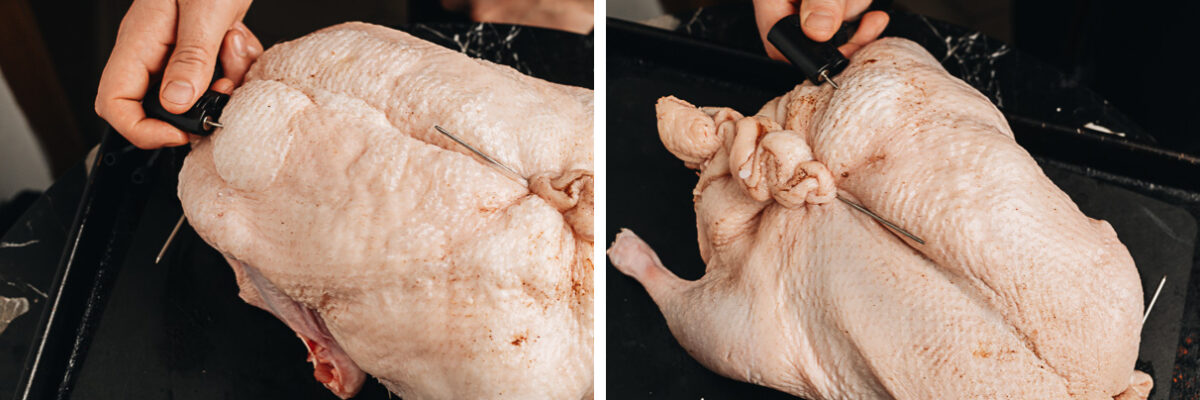
Insert the pump needle under four areas of the duck skin one by one – both sides of the legs where it meets the breast, and both sides of the top breast part. When you pump air into the duck, you can clearly see the skin being lifted up. Aim to lift as much skin as possible, because any skin that’s still attached to the meat won’t crisp up properly. If needed, you can definitely insert the needle into other parts of the duck and pump again.
Blanch the duck
This is a key step to render fat from the skin. The vinegar and the syrup in the bath will also help the duck skin to develop a beautiful golden brown color once roasted.
Use a large wok or a pot that can fit the duck. Add the water, wine, vinegar and syrup to make a bath and bring it to a boil. Very carefully lower the duck into the wok. And use a ladle to pour the liquid over the duck. You will see the skin tightening and becoming smooth. Fat will be rendered out in this process as well.
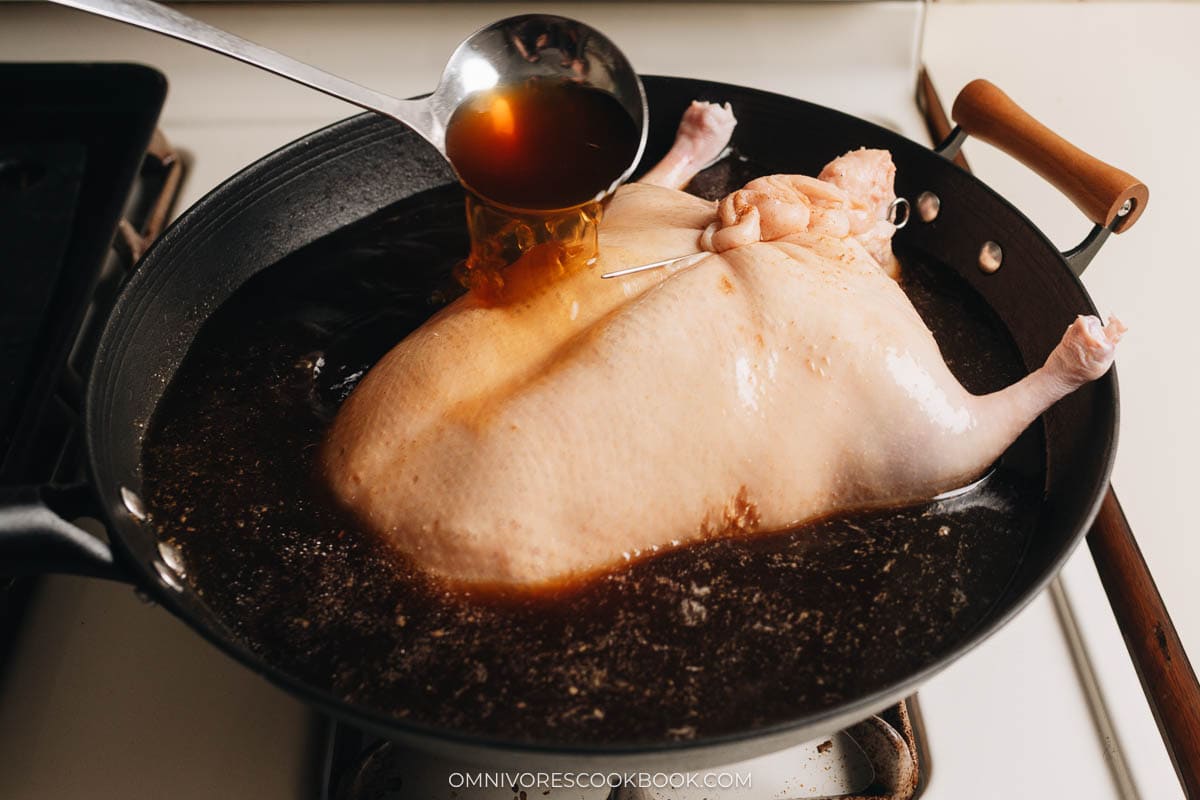
This step only takes 30 seconds or so. Because the goal is to prepare the skin, not to cook the duck.
Once done, transfer the duck to a tray lined with a wire rack. I found it possible to lift the duck using a spider strainer if it’s a small duck. You can also use a spatula to lift the duck tail, then use your hands to hold both tips of the duck legs to lift it up.
Marinate and air dry the duck
Once the duck has cooled off, store it uncovered in the fridge. You need to air dry the duck for at least 24 hours. Most Chinese restaurants air dry their ducks for a few days before cooking. Blanching helps to sanitize the skin, so you can safely age the duck.
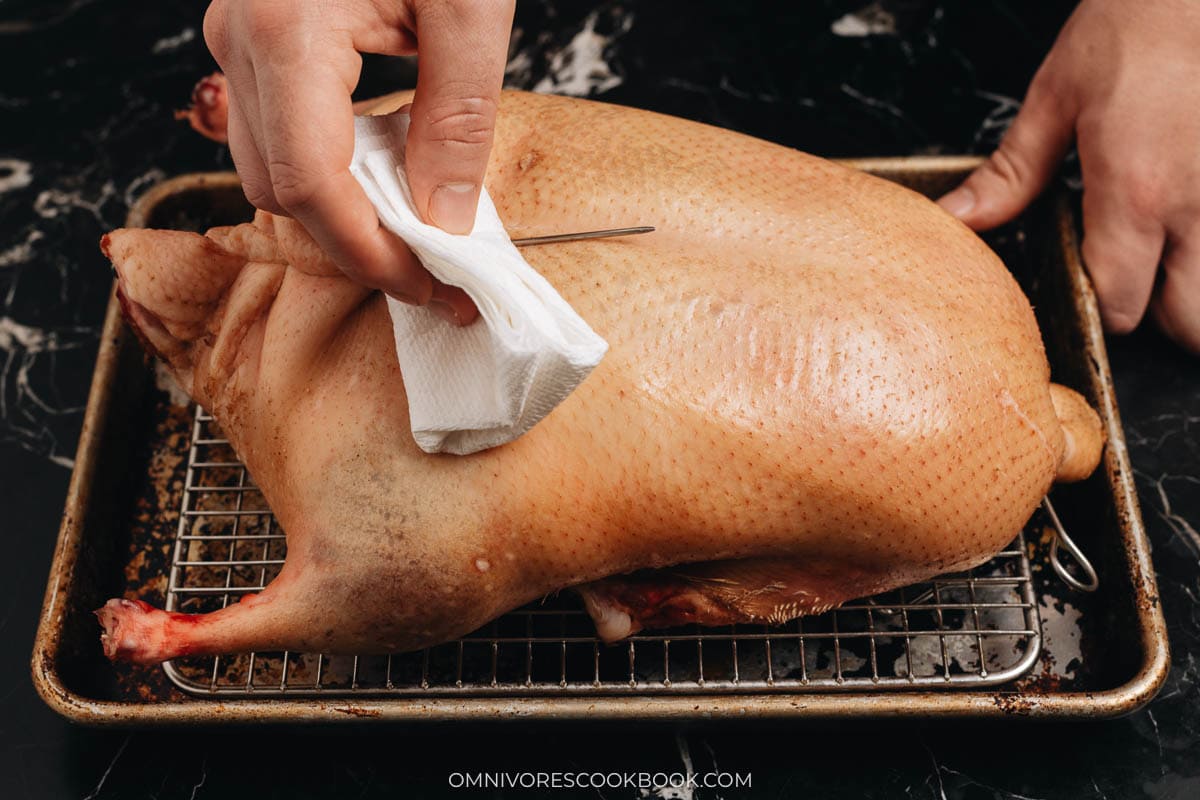
Once air dried, the duck skin will become a bit darker. You will also see more fat seep out of the skin. Use paper towels to wipe the duck skin before roasting to remove any oil or moisture.
Roast the duck
Roast the duck at 450°F (232°C) for a total of 20 minutes, and at 350°F (176°C) for another 30 to 50 minutes depending on the size of your duck. If you use a small duck, a total of 50 minutes roasting will cook it through. On the other hand, you will need to roast the duck longer at 350°F (176°C) if your duck is on the larger side (more details in the recipe below).
The high temperature roasting develops the color of the duck. The low temperature roasting further develops the skin color and cooks the meat through. Remember to rotate the duck every 10 to 15 minutes, so both sides will brown evenly (the rear section of the oven is usually hotter than the area near the door).
If your oven has a convection function, use it and lower the temperature by 25°F. This further dries the duck skin and roasts it more evenly. Unfortunately I don’t have convection so my duck ended up with some uneven spots.
Test doneness
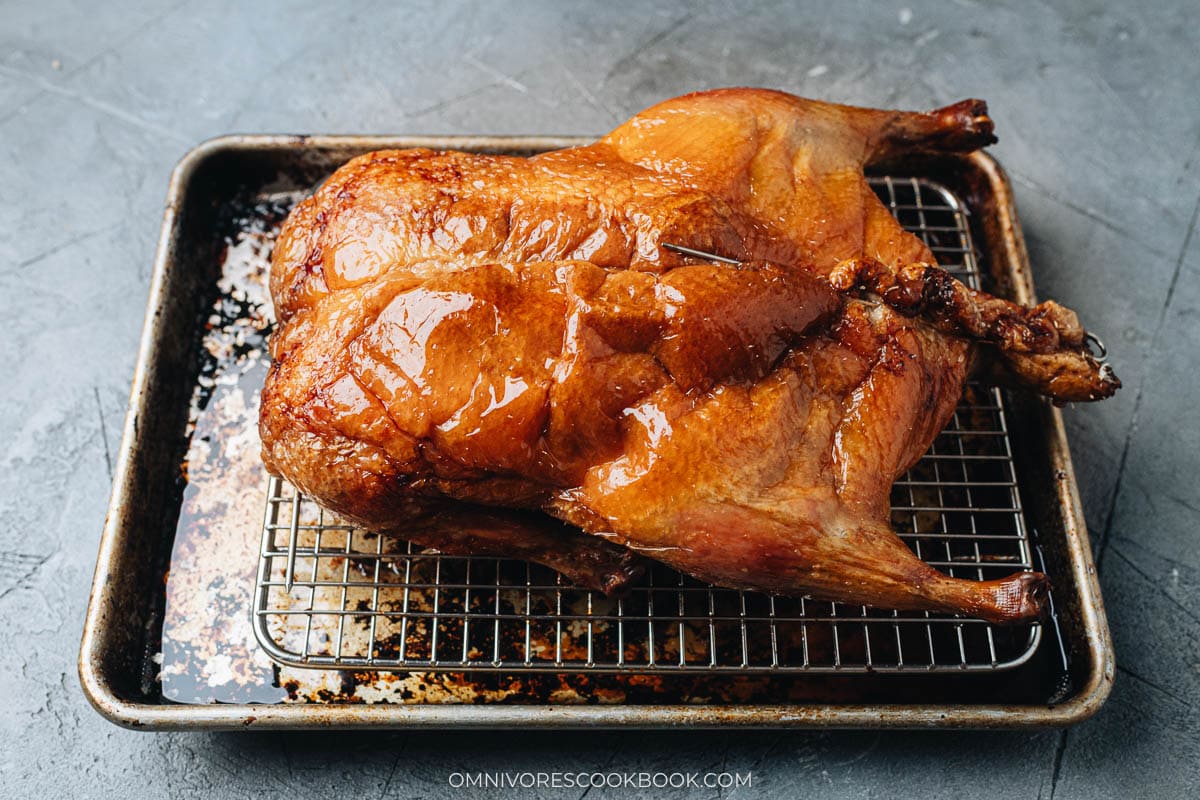
Once done, the duck skin should have a nice golden brown color. I used apple cider vinegar instead of Chinese red vinegar, so the skin was slightly lighter than the restaurant duck.
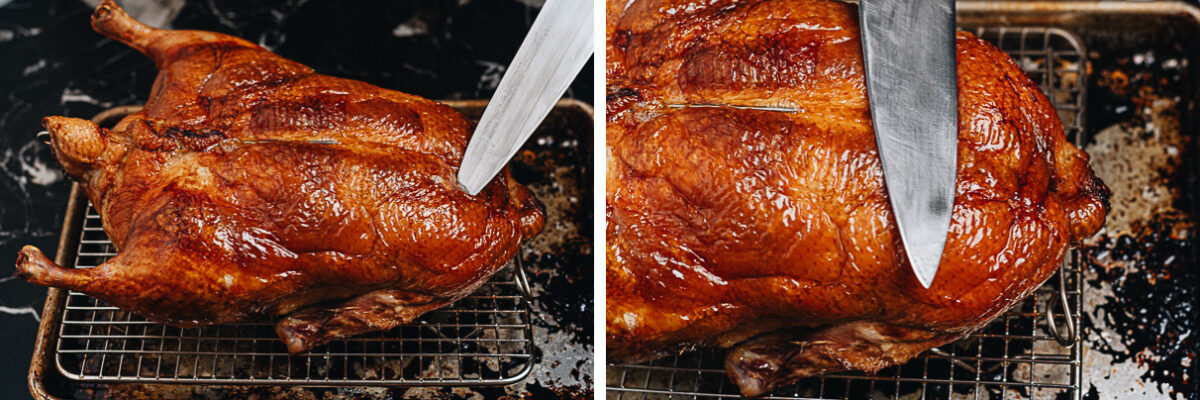
To test the doneness, insert a paring knife into the thickest part of the duck breast then press the knife against the skin. If the juice runs clear, the duck is cooked. If red or pink juice runs out, you need to keep roasting the duck.
At this point, the duck meat will be very moist and the part attached to the bone may still be a bit pink. Once you fully rest the duck, the residual heat will cook the duck a bit more.
Note: this method produces a duck that has very juicy meat, but it does not meet the internationally recommended internal temperature of 165°F (74°C). If you’re concerned about undercooked duck meat, use a thermometer to check the temperature and determine the doneness.
Rest the duck
Rest the duck for at least 40 minutes, up to 1 hour, once roasted.
This resting step is super important and cannot be skipped. When the duck is just roasted, the inside is piping hot and it will be impossible to carve it without risking burning your hands. Resting also helps to seal the juice within the meat, which creates a better texture.
Carve the duck
First, you need to remove the twine and the skewer from the tail of the duck. It’s best to rest the duck tail on a tray so it’s tilted upwards, because the marinade from the cavity will drip out. Then very carefully stand the duck up and drain the marinade into a big bowl. Handle the duck very carefully because the marinade will still be hot even after the duck is rested.
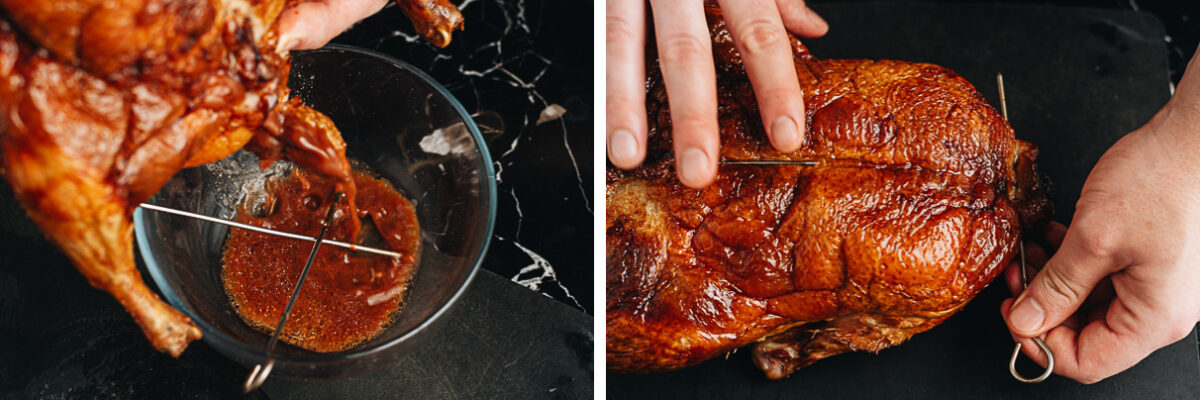
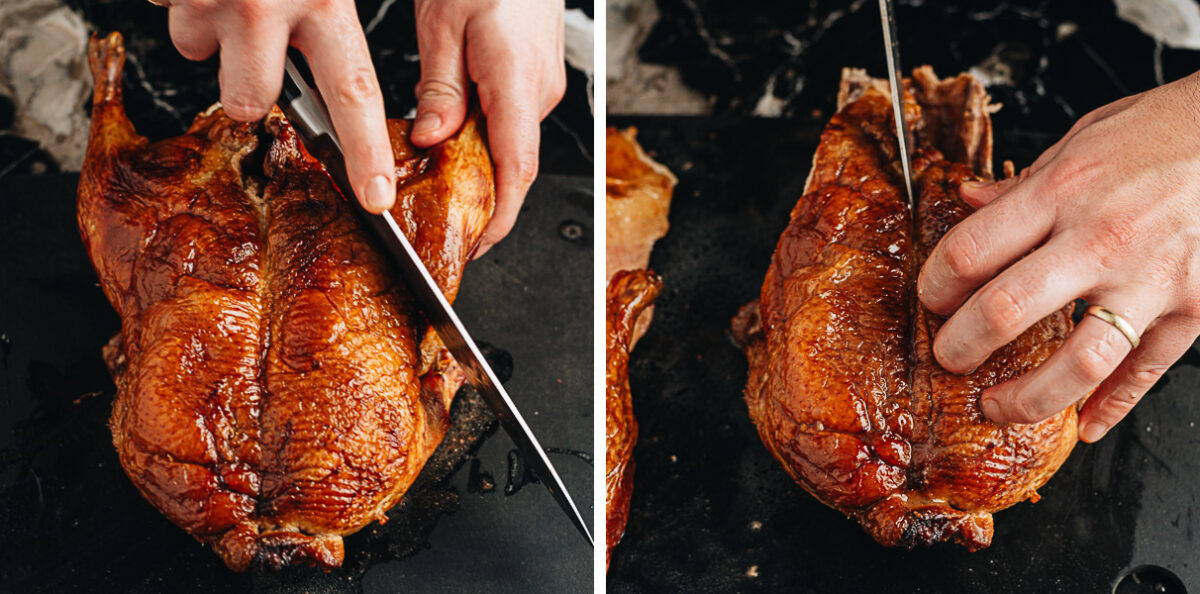
Then carve the duck by removing the legs from the joints. Cut off the breast meat (without any bones), and remove the wings. You can see more detailed carving techniques in the video.
How to store and reheat the duck
You should always roast the duck the day you plan to serve it. Chinese roast duck tastes the best when it’s served warm. It’s possible to prepare it slightly ahead of time and quickly reheat it right before serving. But as soon as the duck goes into the fridge, the skin becomes very soggy and it can’t really be saved.
You can serve the duck directly after the roasting. But unless you’re very familiar with handling poultry, you’re very likely to get the skin a little wet during the process of draining the marinade and carving the meat. And that makes the skin a little less crispy.
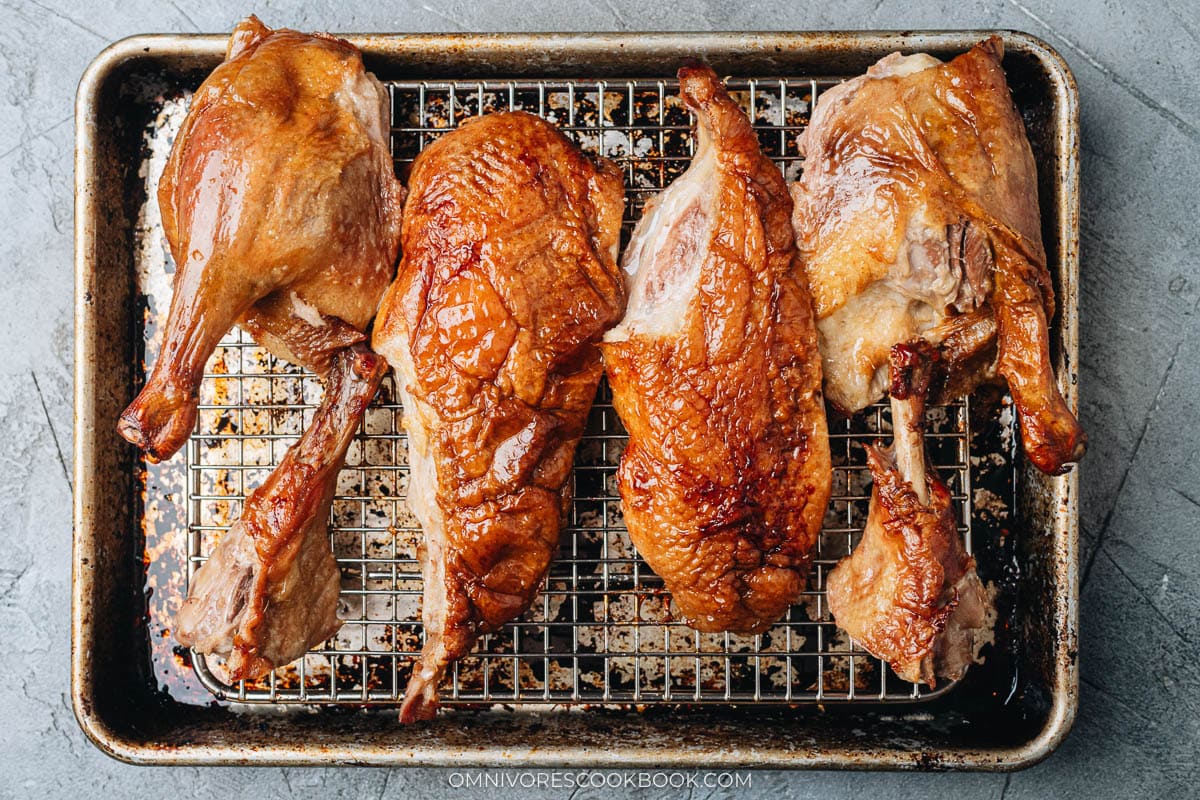
We found that it’s best to break down the duck into breasts and legs. Then gently roast the duck pieces at 450°F (232°C) for 5 to 10 minutes, just enough to crisp up the skin a bit more and gently warm up the meat.
Once reheated, you can carve the breasts into smaller pieces, and separate the thighs from the legs. Then plate them and serve.
Note, this recipe does not use the Cantonese carving method to chop the duck into bone-in pieces. That requires a bone cleaver, which is another special tool. It’s also hard to cut through the bones very cleanly without practice. If not hacked properly, some bones will shatter, and those fragments do not create a good mouthfeel.
How to serve Chinese roast duck
Serve it the Cantonese way
This is my favorite way to serve Chinese roast duck.
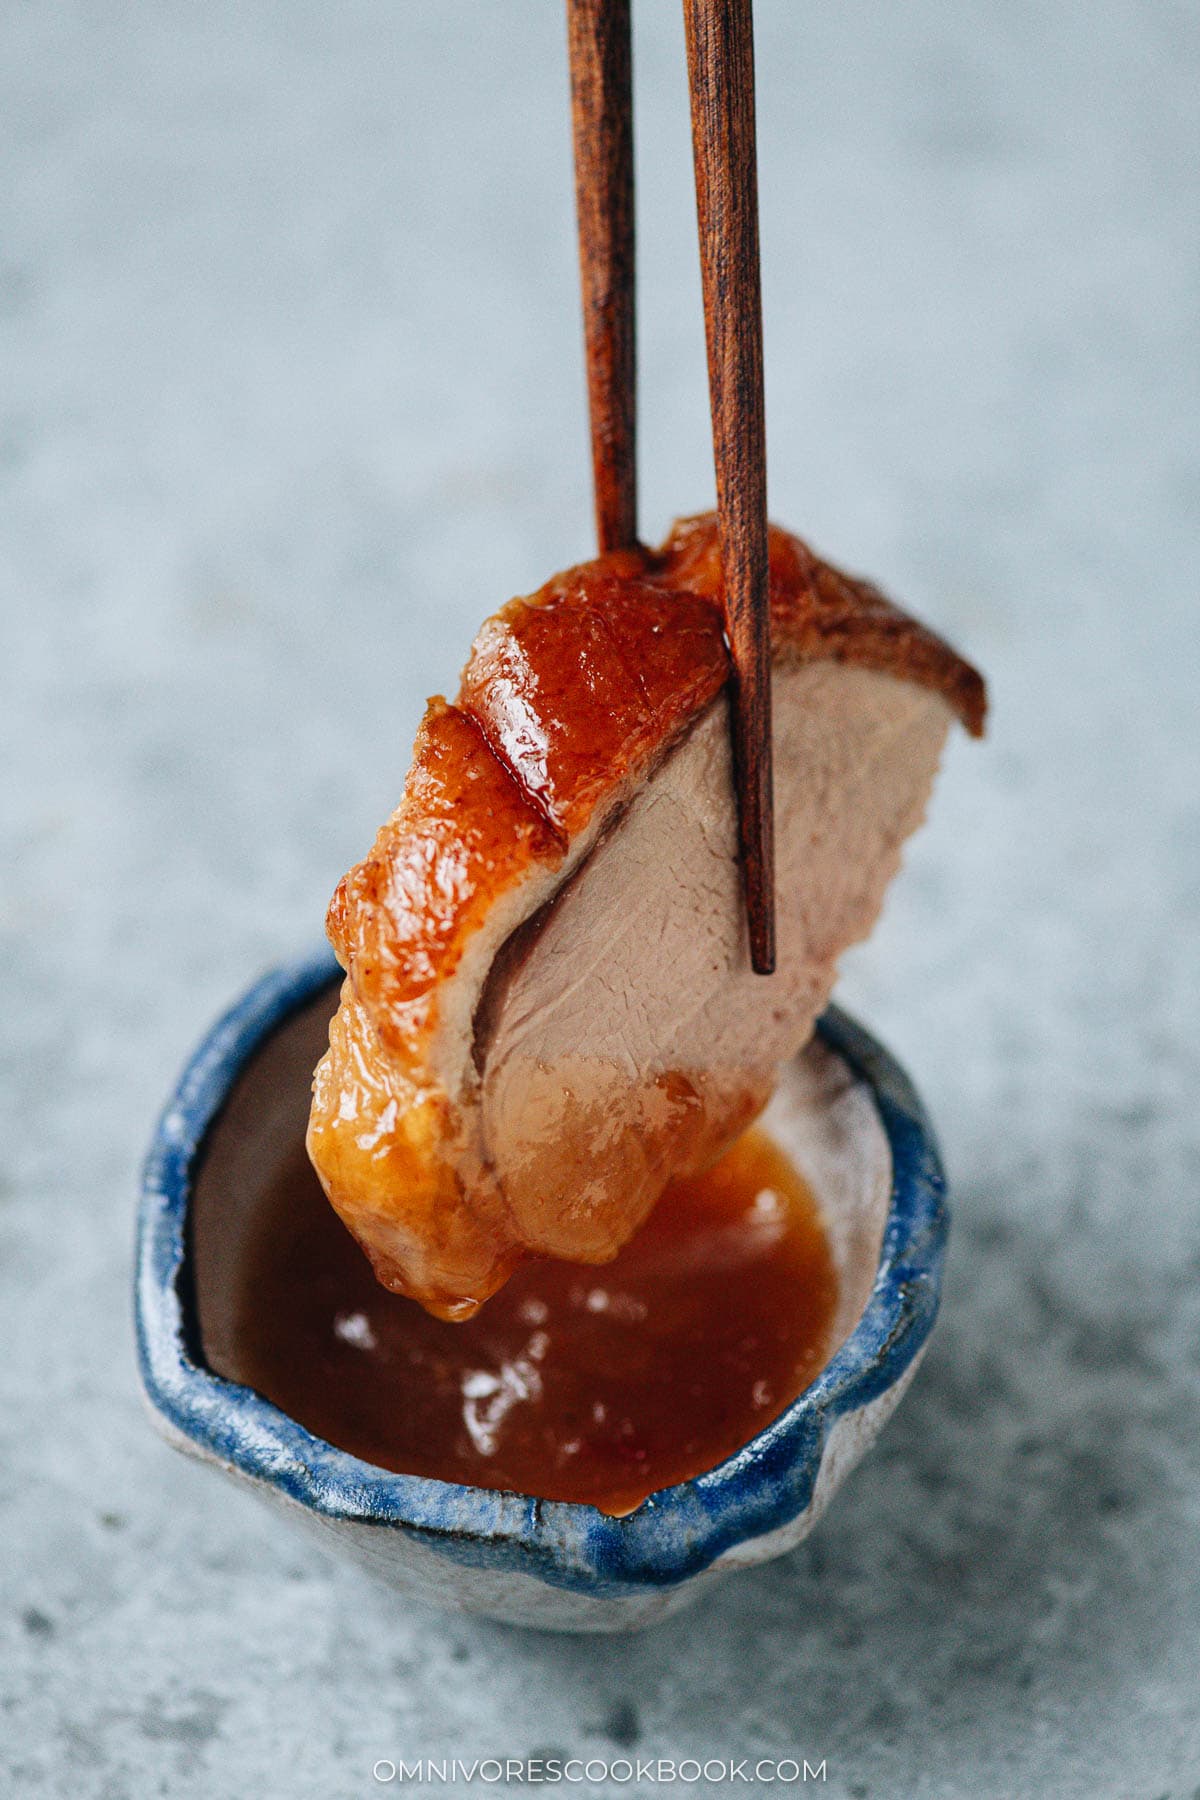
Serve the carved duck plated with a side of plum sauce. For a full-on Cantonese BBQ (烧腊) experience, you can create a mixed platter with char siu pork, siu yuk (crispy pork), and/or soy sauce chicken.
You can serve the duck with other dishes to make it a feast:
- Cantonese Wonton Noodle Soup
- Chinese Broccoli with Oyster Sauce (蚝油芥蓝, Gai Lan)
- Choy Sum with Garlic Sauce (白灼菜心)
- Shrimp Fried Rice
Serve it the Hong Kong way
In Hong Kong, roast duck is commonly served with a brown sauce made with the reduced duck marinade. And it’s also common to serve the duck with ginger scallion sauce. Personally, I don’t really like the brown sauce because it’s super salty and it masks the delicate flavor of the duck meat. That’s why I didn’t include it in my recipe. I do love to serve the duck with ginger scallion sauce and I have a recipe for it here.
Serve it like Peking duck
Technically this is not a Peking roast duck, but it’s very possible to serve it like one.
You will need mandarin pancakes (or gua bao buns). You can get both from the freezer section of a Chinese grocery store. I also have recipes for mandarin pancakes and bao buns.
For the sauce, the most authentic one is Tian Mian Jiang (a dark brown sauce made with fermented flour, salty and slightly sweet). Or you can use hoisin sauce as an alternative.
You should have julienned scallion and cucumber on the side.
To assemble, smear some sauce onto the pancake, add two to three pieces of duck, add a small amount of scallion and cucumber. Wrap it up like a burrito and enjoy. You can stuff all the ingredients in a gua bao and eat it like a tiny sandwich.
How to use leftover duck
The leftover duck meat will still be very tasty, but the skin may be a bit sad once refrigerated. I found the best way to reheat leftover roast duck is to pan fry it. By searing the skin on a hot pan, it draws out the moisture and crisp it up nicely. If you have larger leftover pieces, pan fry the skin until crispy, then reheat at 350°F (176°C) until heated through.
You can either heat up the meat and eat it with a sauce, or use it to make fried rice. For example, use this chicken fried rice recipe but replace the chicken with duck (skip the chicken marinade).
Afterthoughts
It takes a lot of time and effort to make Chinese roast duck. But I found that with some patience, you will be able to produce a very delicious duck without a professional kitchen. Without using a pure bred Peking duck and the specialty ingredients, the duck might not look exactly like the one from the restaurant. But I assure you that you’ll be delighted at how juicy and flavorful the meat is, and by the quality of the crispy skin.
No matter whether you’re roasting a duck for Chinese New Year, Christmas, or any other special occasion, I hope you give this one a try!
If you try this recipe out, leave a comment below to let me know what you think.
Chinese Cooking Made Easy
Are you new to this website? This free email series is a great place to start. I’ll walk you through a few of my most popular recipes and show you how and why they work. You’ll quickly start to cook better Chinese food in your own kitchen.
Watch video
Chinese Roast Duck (烤鸭)
Ingredients
- 1 whole duck ,preferably Pekin duck, 3.5-4.5 lbs (1.6-2 kg) (*Footnote 1)
Dry Seasonings
- 1 teaspoon sea salt
- 1 teaspoon five spice powder
- 1 teaspoon sugar
Wet Seasonings
- 4 cubes red fermented tofu
- 2 tablespoons Shaoxing wine
- 1 tablespoon hoisin sauce
- 1 teaspoon oyster sauce
Whole Seasonings
- 1 star anise
- 1 green onion , cut into 4” (6 cm) long pieces
- 1 ” ginger , cut into large slices
Blanching
- 8 cups water
- 1/2 cup Shaoxing wine
- 1/2 cup honey (or brown sugar syrup, or maltose) (*Footnote 2)
- 1/2 cup Chinese red vinegar (or cider vinegar, malt vinegar)
Serving options
- Plum sauce
- Ginger scallion sauce
Special equipment
- 2 skewers (metal or wooden)
- Kitchen twine
- Pump with a fine tip , electric or hand pump (*Footnote 3)
Instructions
- To prepare the duck: First remove any giblets and neck pieces from the cavity, and tear off the excess fat found inside the bird. Next, remove the wings by cutting through the joints, but keep the drumettes on the bird. Remove any remaining pieces of feather with kitchen tweezers.
- Have the skewers ready within reach. Cut off two pieces of 2’ (60 cm)-long kitchen twine, and place them within reach.
- Seal the front of the duck: Threading a skewer through both layers of skin. Seal the top by tying twine under the skewer. The top must be sealed before adding the marinade.
- Add the marinade: Combine the wet seasonings in a small bowl and mash the fermented tofu to mix well. Add the dry seasonings into the duck cavity, using your hands to rub the cavity a few times. Add all of the seasonings, ensuring they are snug within the cavity. Carefully pour the wet seasonings into the cavity, making sure that they do not leak out of the duck.
- Seal the tail of the duck: To close the duck’s cavity, carefully thread a skewer through both layers of the skin, and tie twine under the skewer to seal the bird. It is best to hold the duck at an angle, so the wet seasonings do not escape the cavity.
- Pump the air under the duck skin: After the duck has been closed, place the duck breast side up. Insert an air pump with a fine tip where the leg meets the breast of the duck. Begin pumping air into the bird, and ensure that the skin is separated from the meat as much as possible. Switch to the opposite side to guarantee all the skin has lifted up from the meat. Then insert the tip from the top of the breast pointing to the leg direction, and pump again to lift the breast skin. Do the same with the opposite side. (*Footnote 4)
- To blanch the duck: Prepare a tray that can fit into your fridge. Line it with a wire rack. Add all the blanching ingredients into a big wok, dutch oven or a large pot. Bring all the blanching ingredients to a boil over medium-high heat. Turn to medium heat. Carefully lower the duck into the seasoned water. Ladle hot water and pour over the duck until the skin becomes tight and smooth, about 30 seconds.(*Footnote 5) Use a spider strainer to lift the duck and transfer it to the lined tray. If the duck is too heavy, you can also use a spatula to lift the tail end, then use your hands to lift the leg bones (they won’t be too hot).
- Rest overnight: Once the duck has cooled off slightly, transfer it into the fridge. Allow to marinate and air dry in your fridge for at least 24 hours before roasting. (*Footnote 7)
- To roast the duck: Preheat your oven to 450°F (232°C). (*Footnote 8) If your oven has convection, roast at 425°F (218°C) with convection instead. This helps the duck cook more evenly. Wipe the duck skin with a paper towel, to remove any oil on the surface.
- Roast at high temperature: Transfer the duck to the oven. Roast at 450°F (232°C) for a total of 20 minutes. After 10 minutes, rotate the duck around (180 degrees, don’t flip it), and cook for 10 minutes more.
- Roast at a lower temperature: Lower the temperature to 350°F (176°C) or 325°F (163°C) convection, and rotate the duck again. Roast for another 30 minutes in total if using a 3.5-4 lb (1.6-1.8 kg) duck. Rotate after 15 minutes. If your duck is bigger, add 10 to 15 minutes of cooking time for a 4-5.5 lb (2-2.5 kg) duck, or add 20 to 25 minutes for a 6-6.5 lb (2.7-2.9kg) duck. Rotate every 15 minutes to ensure even cooking. (*Footnote 9)
- Test the doneness: The duck should have developed a nice golden brown color. Make an incision with a paring knife poking through the thickest part of the breast meat, then press the skin. If the juice runs clear, it is cooked. (*Footnote 10) If the juice is red, keep cooking for another 10 to 15 minutes.
- Rest the duck: Once the duck is cooked, transfer the duck to your kitchen counter. Let rest for at least 40 minutes.
- Drain the duck: Once the duck has cooled enough to handle, prepare a big bowl. Untie the tail end and remove the skewer. Use a sharp knife to cut through the skin and remove the part where you sealed the duck, exposing the cavity. Very carefully lift the duck over the bowl to drain the liquid from the cavity, then remove any solid aromatics. The inside of the duck will be very hot and you should handle it very carefully. Then remove the twine and skewer from the neck area.
- Carve the duck: Carve the duck by cutting through the part where the leg meets the breast. Find the joint of the thigh bone and cut through it to remove the duck leg. Then find the joint of the drumstick and the thigh, cut through it. Then cut down the center of the breast to remove both breasts.
- Reheat the duck (Optional): If you’re not serving the duck immediately, or you accidentally get the duck skin wet when draining and carving the duck, I highly recommend this step. Heat your oven to 450°F (232°C). Place all the carved duck pieces onto a baking sheet lined with a wire rack, skin side up. Heat in the oven for 5 to 10 minutes, until the skin is crispy again. Slice the breast into 1/2” (6 mm) thick pieces, and place them on a platter with the legs and thighs.
- How to serve: Serve hot or warm with plum sauce or ginger scallion sauce.
Notes
- Do your best to source a Pekin duck, as these birds are smaller and ideal for roasting. If you can only find a regular duck, which is usually a Peking/Mallard hybrid, that will work as well.
- Traditionally maltose is used for roast duck. Maltose can be substituted with honey or a rich brown sugar syrup. To make brown sugar syrup, add 2/3 cup dark brown sugar and 1/3 cup water into a small pot. Heat over medium heat until simmering. Stir to fully dissolve the sugar.
- A bicycle pump with a sanitized tip gets the job done well. But if possible, an electric pump will be more efficient. If using an electric pump, make sure to lower the pressure first so it does not add so much pressure that it tears the skin.
- To get truly crispy skin, 100% of the skin must puff up above the meat. Insert the air pump tip into multiple locations to fully lift the skin up.
- Blanching the duck does not take much time, you are only trying to render some fat and make the skin supple, not cook the meat.
- Chinese red vinegar is traditionally used. The red vinegar can be substituted with malt or apple cider vinegar.
- Air drying is essential to crispy skin. Most Chinese restaurants air dry their ducks for a few days before cooking. Blanching helps to eliminate bacteria, so you can safely age the duck.
- Having a reliable oven temperature is essential to getting a good end result. It is highly recommended to use an oven thermometer to guarantee that the duck is cooking correctly.
- If your duck is heavier than 4 lbs (1.8 kg) you may need to cook it for longer than 60 minutes total, while if it is closer to 3 lbs (1.4kg) it will need only 50 minutes total. Any additional cooking should be done at 350°F (176°C)
- To determine whether the duck is ready, judge by whether its juice runs clear, and if its color is a deep brown. The duck meat should be very moist now and the part attached to the bone still a bit pink. As you rest the duck, the residual heat will keep cooking the inside a bit more.
- To make the dish gluten-free: Use dry sherry to replace Shaoxing wine. Make sure to use a gluten-free oyster sauce.
Nutrition

Did you make this recipe?
I’d love to hear how it turned out for you! Please take a moment to leave a 5-star rating ⭐️ and share your thoughts in the comments further down the page. It really helps others discover the recipe too.

Bruce Jones
In the carving directions, it says, “Remove the wings.” This was done in the preparation of the duck for cooking, “Trim and clean the duck
Cut off the wings, so the duck is much easier to maneuver during blanching and roasting.
Should we remove the wings then, or during carving?
Maggie Zhu
Hi Bruce, sorry for being confusing in language. During prep, I only cut off the wing tip and wingette, but keep the drumette on. For the carving part, you only need to cut off the drumette.
Justin Edwards
Delicious! Turned out great!
Gabby
Duck was sensational! Printed out and followed exactly and was the crispiest, juiciest duck ! Don’t be put off by the long instructions, trust the process and enjoy – you will be thanked for the effort! This was truly delightful and will be a special occasion meal every year here now
Maggie Zhu
Hi Gabby, thanks so much for leaving a positive review! It’s a labor intensive recipe. I’m so happy to hear you tried it out and enjoyed the dish 🙂
Judith Metraux
Is it possible to substitute Broad bean paste , Doubanjiang, for the fermented tofu?
Maggie Zhu
Hmmm, I don’t recommend it because Doubanjiang is spicy, and its strong flavor will definitely take over so you won’t taste the other sauces much. That being said, Doubanjiang with the rest of the ingredients will definitely make a marinade that tastes good by itself. It just changes the flavor profile and it won’t taste like a Cantonese roast duck anymore, but the duck should still be tasty.