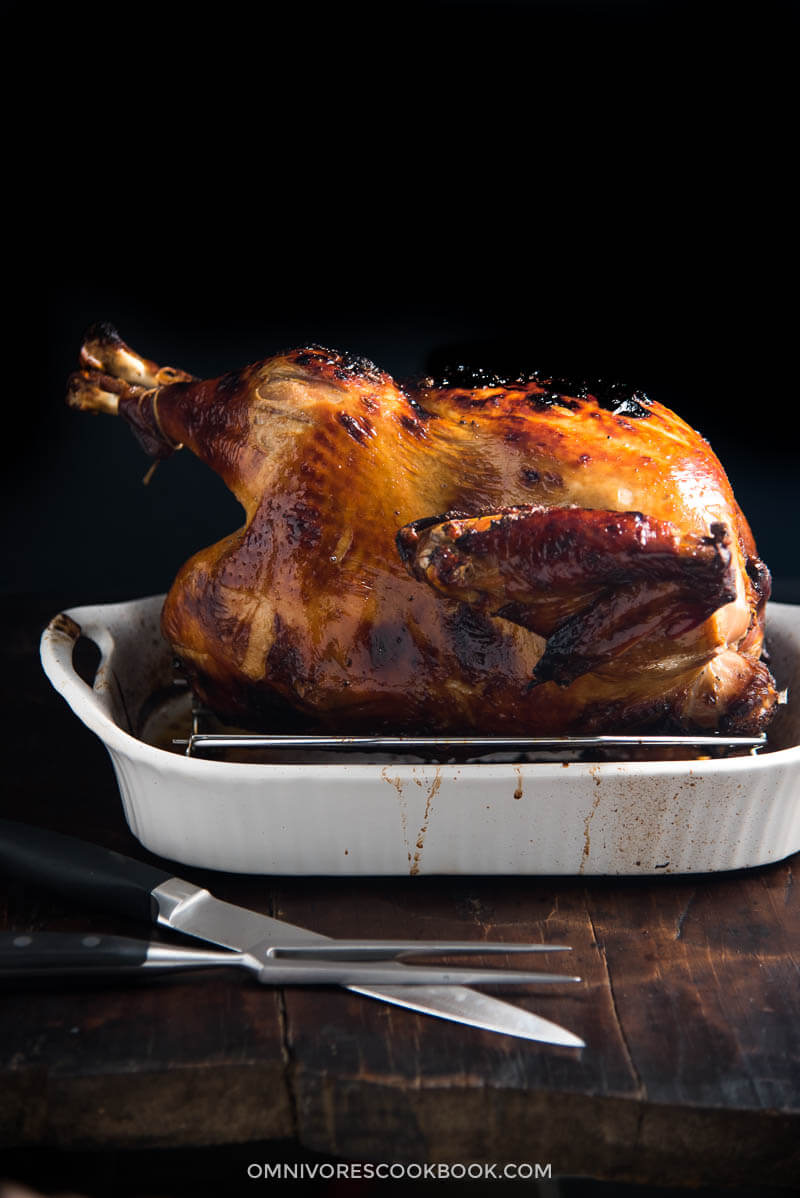
Broiler alert
I burned my turkey.
After 48 hours marinating, 3 hours of research and planning, and 2 hours of roasting, I was stirring the cranberry sauce with my right hand while checking the green beans with my left hand, thinking about the table decor and calculating the next dish to bake. The turkey in the oven was cooked but the breast side was not as browned as I hoped, so the broiler was on. One moment my eyes were on the bubbling cranberry sauce in the pan, starting to dry out, the next minute my fire alarm roared. Peeking through the oven door, the turkey breast had turned totally black.
I panicked. And almost cried.
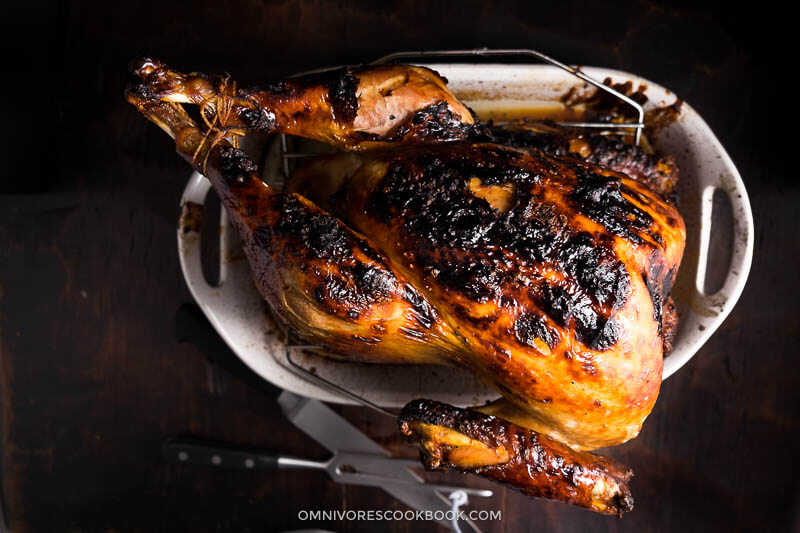
It was my first turkey and I’d spent many days preparing it. The first half of roasting went so well that I thought I’d nail the turkey dish in my first try. A moment of negligence ruined it all.
Reality proved again that multitasking doesn’t work.
The first thought that popped into my mind was to ditch the turkey into the trash can, cancel my yoga class, drive to Central Market and get a new turkey, and start all over again. The second I imagined doing turkey lifting and marinating for another two days, I almost cried again.
(I have to confess, this is just occupational habit, although really bad one. When the food doesn’t look perfect, I don’t even want to try it before deciding whether it’s a successful dish or not. Because it’s not useable on the blog, no matter what, it equals a redo.)
I was staring at the burned turkey and a tray of green beans waiting to be slided into the oven. Should I continue the photo shoot or not? Should I just carve the turkey and let go of my dreams of the whole bird hero shoot? Should I do it from the beginning again and take the photo another day? My mind struggled.
Five minutes later, I decided. What the hell, I’ll try to shoot the turkey and see how it turns out.
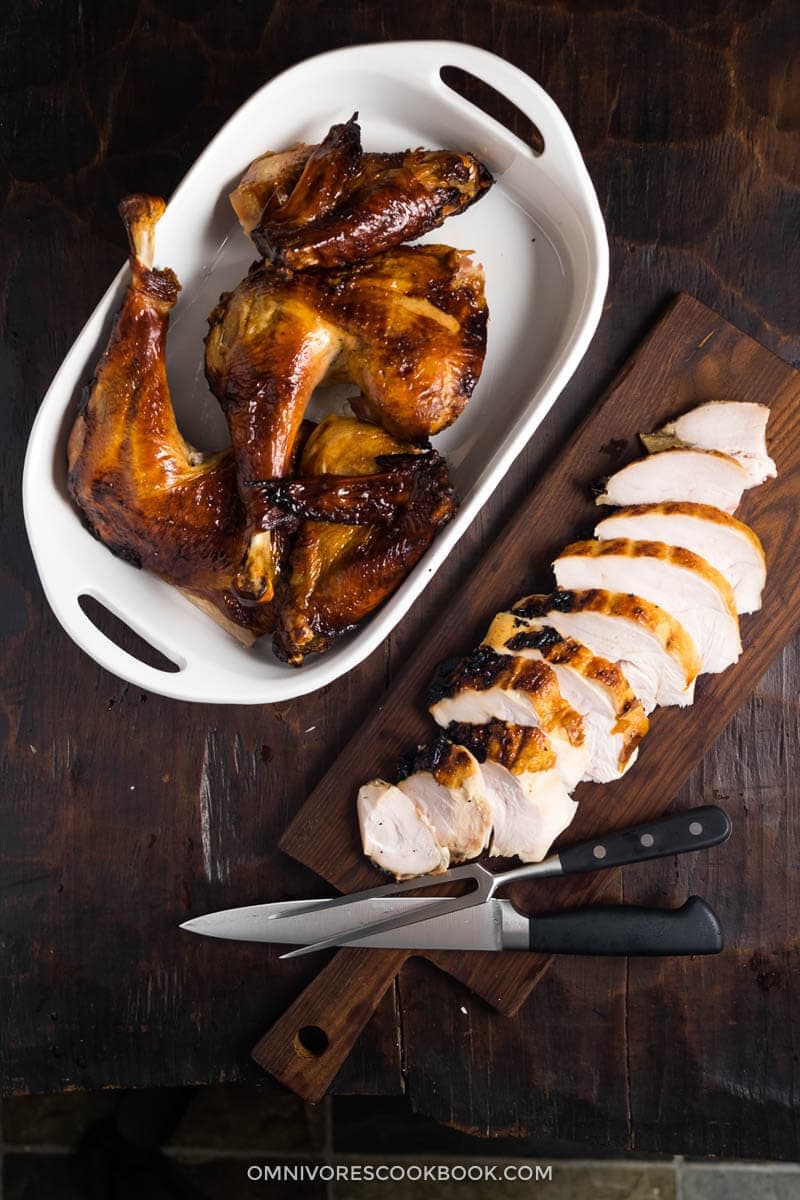
One hour later, after the turkey was properly rested and carved, I tried once piece and cried out, “OMG, this is the best turkey ever!”

I was so glad I didn’t threw it into the trash can.
Is brined turkey really better?
There is the great debate about whether or not to brine your turkey. A 4,000-word article nailed it down to three words – you should not.
The argument is that even though brining does make the meat (especially white meat) juicier, brining waters down the turkey meat and make it taste less flavorful.
My solution is – brine the turkey with a more flavorful liquid. Problem solved.
Instead of using salty water, I chose to use an Asian flavor profile with soy sauce, oyster sauce, rice wine, ginger and garlic. It will create a very salty solution that is just like a brining mixture, but contains much more flavor.
I was lazy so I used my good ol’ marinade for my Cantonese roasted chicken, and It worked out beautifully.
How to marinade (brine) with less liquid
To marinate a whole turkey without using bottles of soy sauce, I used the “fridge drawer & trash bag” trick.
First of all, try to place your turkey (still in the packaging) into your fridge drawer (the bottom one that stores vegetables) to see whether it fits and you can still close your fridge door. If yes, you can use this method.
This is the process:
- Wash and scrub your fridge drawer with detergent, dry, and place on a large working surface. Line a big bag inside. (You can find extra large Ziploc bags on Amazon, they are super sturdy. Without knowing that the large Ziploc bag exists, I brined my turkey in a normal turkey bag. It leaked, twice). This fridge drawer technique makes a double guarantee that it won’t make a mess, even if the marinade leaks.
- Remove the turkey from the package and transfer into the turkey bag, breast side down.
- Stuff onion, ginger and garlic into the turkey cavity. The onion is a filler here, it’s used to take up space so we can use less marinade later.
- Mix marinade and pour it over the turkey.
- Tie the turkey legs with kitchen twine, so it’s easier to flip later. Try to squeeze out as much air as you can and seal the bag.
- Now you can see that the marinade covers half of the turkey.
- You can pat crumbled paper on the bottom of the draw, so it “lifts” the bag. The marinade can then rise to cover two thirds of the turkey. Slide the fridge drawer back and marinade the turkey breast for 24 hours (or up to two days).
- When you’re ready to flip and marinate the other side, open the bag and rotate the turkey inside of the bag by lifting turkey legs with one hand and holding the neck part with your other hand. You can slide and flip easier this way than flipping the bag, and you’ll be less likely to poke a hole on the bag. Then, repeat the first day’s steps, pat the bag and seal. Marinate for another 24 hours.

The whole process requires a bit of effort (and helps you build your arm muscles). I did it because sauces are expensive and I don’t want to deplete my pantry just for a turkey. Of course, you can use more marinade to brine the whole bird and let the turkey sit in your fridge the whole time without touching it.
To determine how much marinade you need for a whole bird, place the bird into the container (or fridge drawer) and add water to cover. Then take out the turkey and measure the amount of water left. The recipe below makes 4 cups (1/4 gallon or 1 liter) of marinade, so multiply the amount according to your needs.
How to roast a juicy bird that is crispy on all sides
I’ve learned everything I know about turkey from this single post – the Step-by-Step Guide to the Best Roast Turkey created by The Yummy Life. It has the most clear and detailed instructions ever and the method is solid. I’ve documented my experience in this post, but make sure you go to the original post and read through it. Your Thanksgiving turkey will taste much better, starting from this year.
To roast the best turkey, the number one rule is: Do not overcook it.
…Which leads to another important point. You should NOT use turkey stuffing. Stuffed bird requires a much longer time to cook and the meat is more likely to dry out in the end.
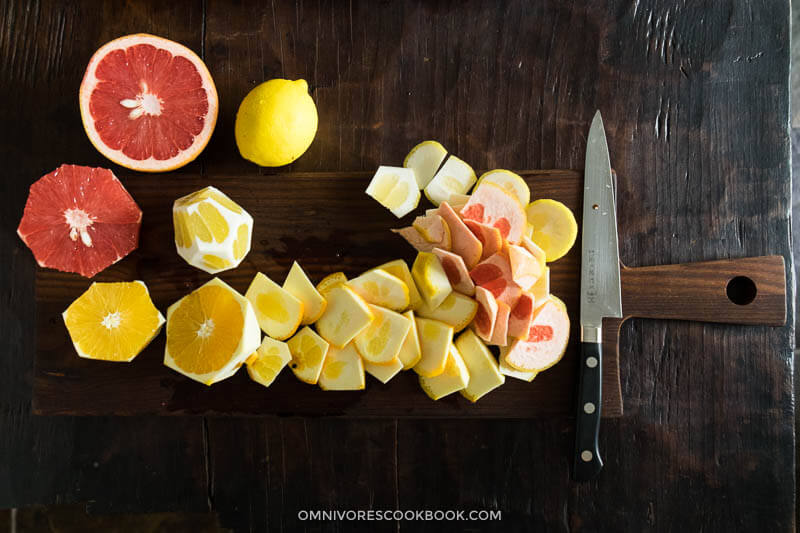
Here I used a method from my best slow roasted duck recipe – loosely stuff the bird with citrus. Not only do the fruits keep the meat juicy, they will also impart a nice aroma. This is a method used by a famous restaurant chef, that was then shared by one of my readers.
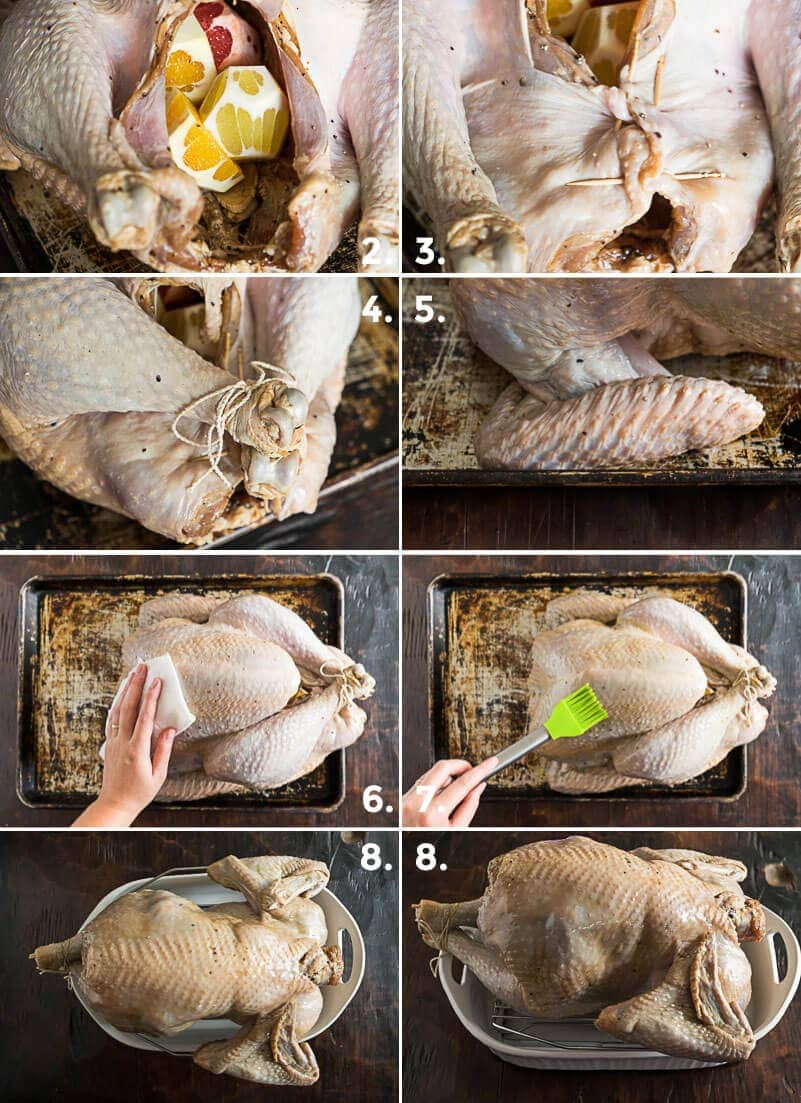
Here are the steps to prepare the bird before roasting:
- Take the bird out of the fridge one hour before roasting to let it return to room temperature. Pat the bird dry several times in between.
- Replace the onions in the bird with citrus. You can discard the onions or roast them later as a side dish.
- Seal the turkey bottom by using toothpicks.
- Tie the legs again with kitchen twine.
- Tuck the wing tips under the wings. It keeps the wings away from the bird to ensure a larger crispy surface. Plus, it prevents the wing tips from burning.
- Dry the bird thoroughly with a paper towel. Very important. It produces a crispier bird.
- Brush a thin layer of oil onto the turkey breast.
- Transfer the bird onto a roasting rack topped on a baking dish, breast side down. Brush oil onto the back so you’ve covered the whole bird.
Now your turkey is ready for roasting. The next question is – what is the best temperature?
I totally agree with the folks at The Yummy Life that low and slow doesn’t work for turkey. You should use a high enough temperature to crisp up the skin and properly cook through the bird at the same time.
For a young turkey that is 14 to 16 pounds (6 to 7 kg), the recommended method is:
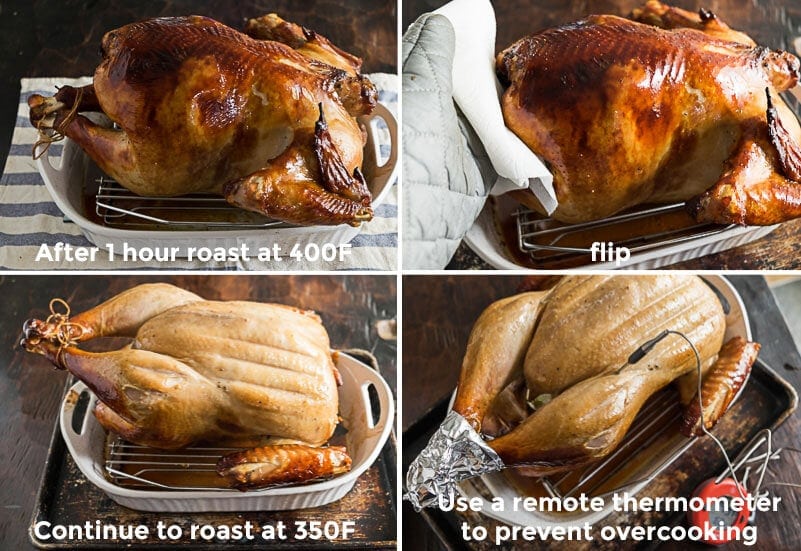
- Roast, turkey back up, at 400 F (200 C) for 1 hour
- Lower the temperature to 350 F (180 C), bake for another hour, with turkey back up.
- Then flip the turkey to be faced breast-side up, bake at 350 F (180 C) for another hour or so.
However, I encountered a problem. I found my turkey was cooked way faster than expected.
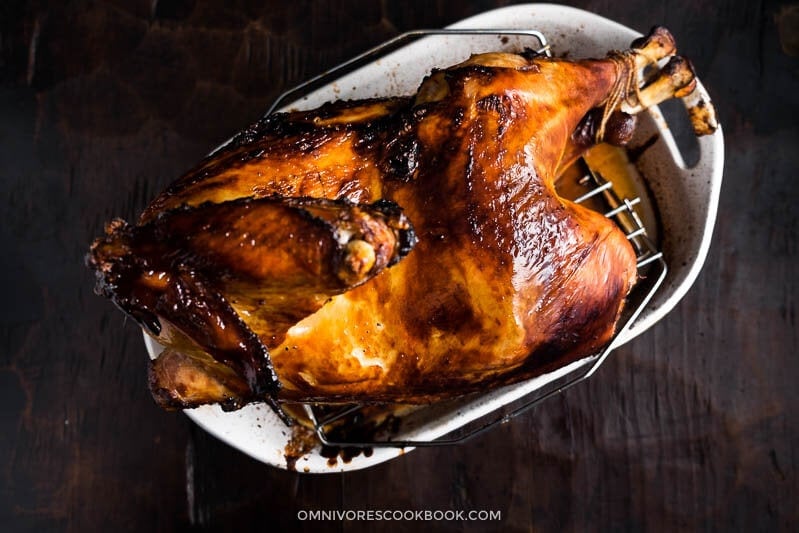
My 14-pound turkey was quite browned after the first hour of roasting at 400 F (partially because my oven rack lifts the turkey very high). The back was totally browned 20 minutes after I turned the temperature to 350 F. I flipped it to cook the breast side, earlier than the recommended 1 hour. But, the whole turkey was done after merely 40 minutes (and the total roasting time was 2 hours!). The breast side was not browned as I hoped, so I turned on the broiler to give it a final charred look which resulted in burned turkey breast skin…
Later on, I found out other people had encountered the same issue – their turkey was cooked too fast. My assumptions are that your true oven temperature, the type of bird, preparation method, and baking equipment all affect the roasting time.
My solution is to:
- Roast the bird back side up at a high temperature 400 F (200 C) for an hour.
- Lower to 350 F (180 C), and keep cooking until the turkey back is browned. You should flip it to bake the breast if the back is already browned at this point.
- Keep baking at 350 F (180 C) until the whole bird is cooked through.
When you start to cook with the breast side up, I highly recommend you to use a remote thermometer to measure the thickest part of the thigh, to make sure the bird won’t be overcooked. Once the roasting is done, you should use an instant thermometer to measure both thighs and breasts, to make sure every part is cooked to 165 F, the recommended safe temperature by USDA. A temperature beyond 165 F (74 C) yields dry and tough turkey meat.
Conclusion
Despite the fact that I ruined the turkey breast skin at the last minute, I considered my first turkey as successfully done. I know it’s strange to say this, but it’s the sexiest turkey back I’ve ever seen. I have a thing for crispy poultry skin, so this method is a treasure to me and it is now one of my go-to meal along with my slow roasted turkey legs when I plan Asian Thanksgiving recipes, especially when I want to serve something traditional with a fun twist.
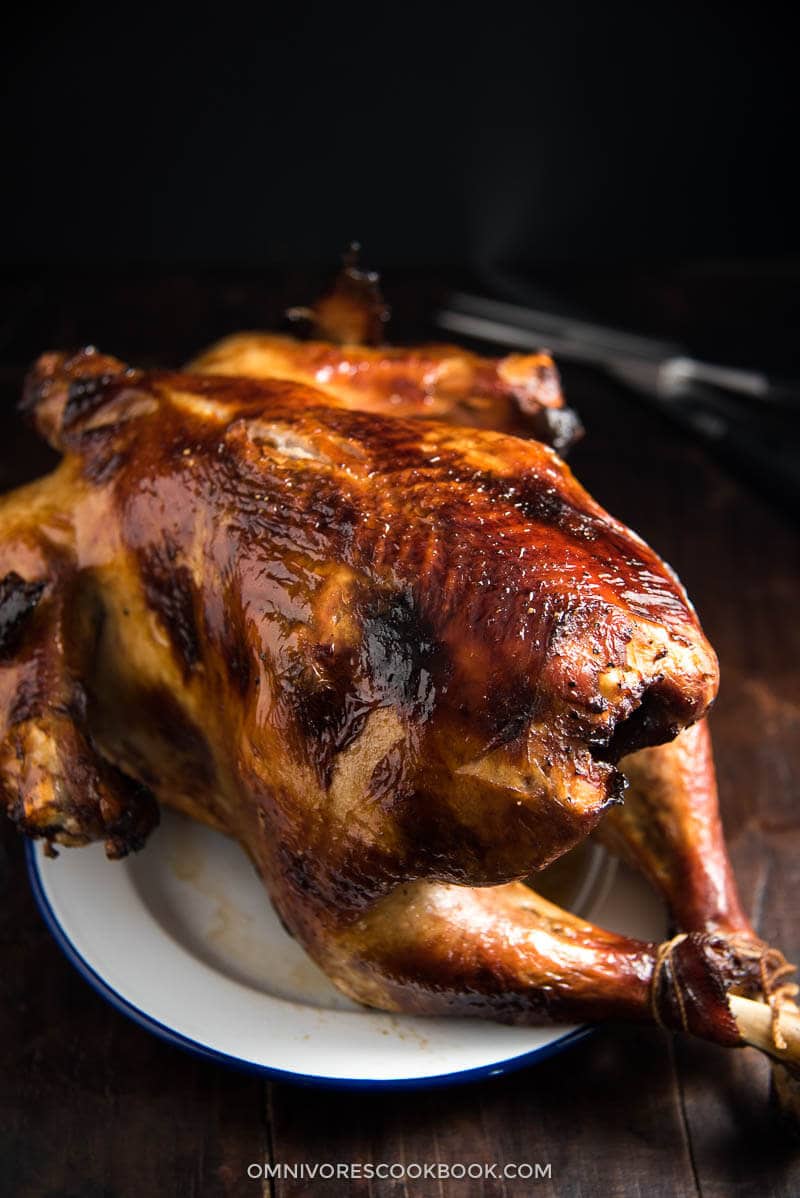
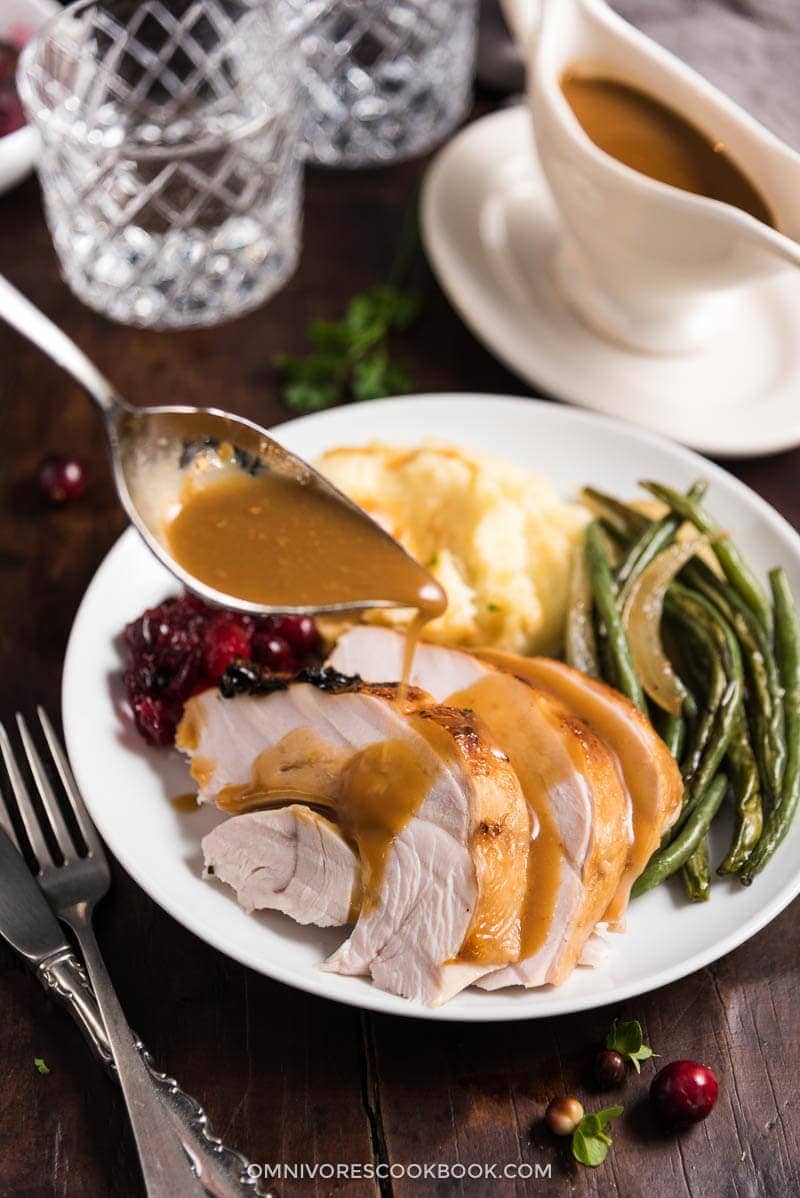
The breast meat was extra juicy and flavorful, and even the leftover meat was tender after reheating.
The legs and thighs were the best because they crisped up perfectly, on ALL sides.
The turkey meat was delicious enough by itself. It also goes very well with a sweet sauce, such as traditional cranberry sauce, or sweet Thai chili sauce.
The two-day marinating was well worth the effort because I ended up with one of the best turkeys I’ve ever had.
The only downside of the marinating method is that the gravy will end up tasting salty. I diluted the pan drippings with same amount of plain chicken stock, but the gravy was still quite salty. If you still want to serve the turkey with gravy, make sure to dilute it with more plain stock.
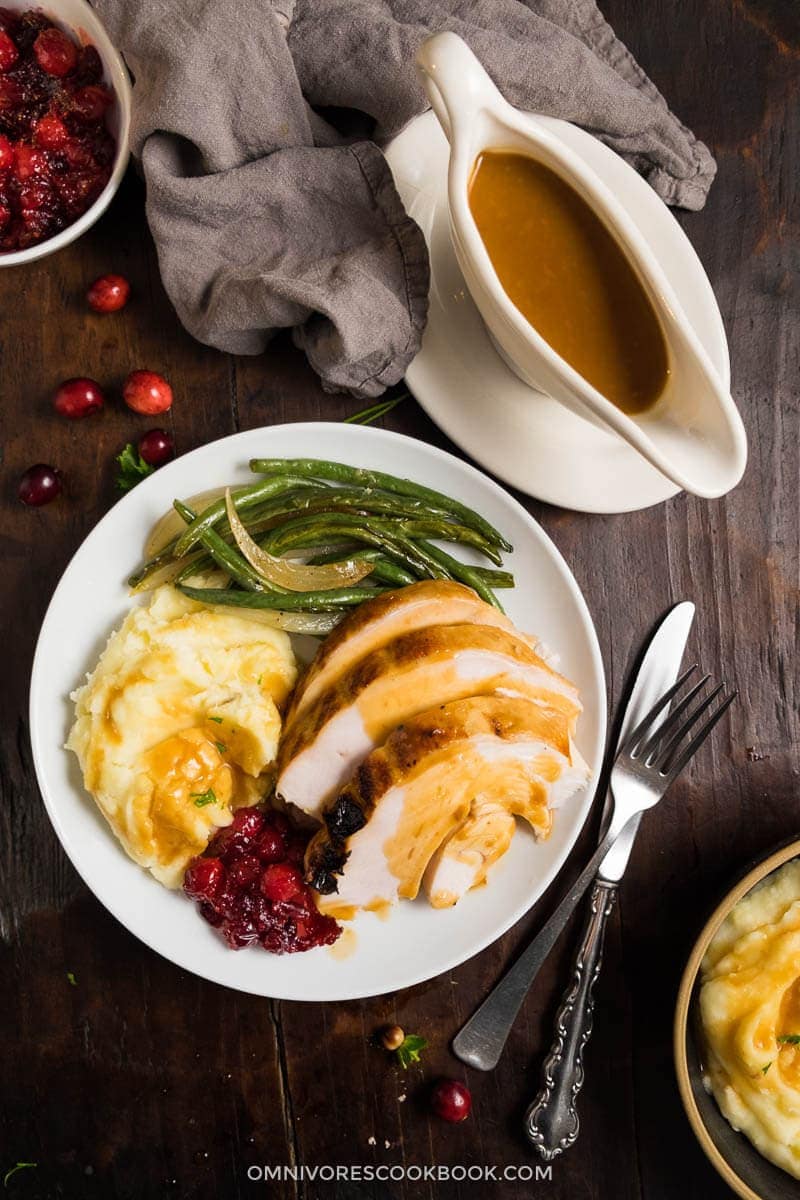
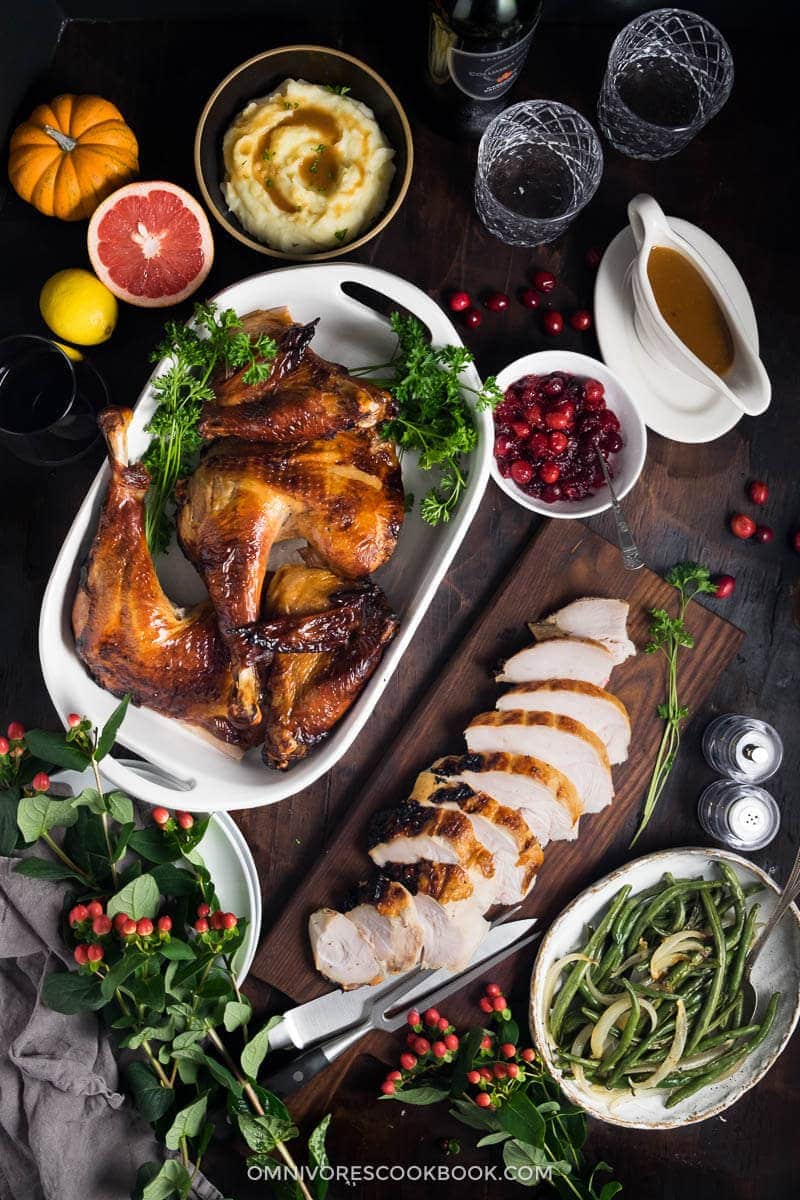
Serving suggestion
- Side dish 2: Do serve the turkey with oven roasted green beans garlic soy glaze.
- Cranberry sauce: Making it from scratch is much easier than you think.
- Thai sweet chili sauce or hoisin sauce (or homemade hoisin sauce) is a great option too.
- How to carve a turkey: Here is a video, or you can read this post.
- How to use the turkey bones and carcass: Make stock by using this method, and simply replace chicken bones with turkey bones.
That’s it! It is a long post, but I hope it helps you in the kitchen.
If you give this recipe a try, let us know! Leave a comment, rate it (once you’ve tried it), and take a picture and tag it @omnivorescookbook on Instagram! I’d love to see what you come up with.
Happy cooking and have a fabulous holiday everyone!!
Chinese Cooking Made Easy
Are you new to this website? This free email series is a great place to start. I’ll walk you through a few of my most popular recipes and show you how and why they work. You’ll quickly start to cook better Chinese food in your own kitchen.
Chinese Brined Turkey (Extra Juicy and Crispy on All Sides)
Ingredients
- 1 young turkey , 14 to 16 pound / 6 to 7 kg
- 6 cloves garlic , sliced
- 2 inches (5 cm) ginger , sliced
- 2 white onions , quartered
- 3 to 4 citrus fruits (I used lemon, grapefruit and orange) *(Footnote 1)
- 2 to 3 tablespoons olive oil
Marinade
- 2 cups soy sauce
- 1 cup oyster sauce
- 1 cup Japanese sake (or Shaoxing wine, or dry sherry)
- 1/2 cup sugar
- 2 teaspoons salt
- 2 teaspoons coarsely ground black pepper
- 1 teaspoon five spice powder (or make your own)
Instructions
Marinate
- Combine all the marinade ingredients in a bowl. Stir to mix well.
- Remove the neck and giblets from the turkey cavity. Save them to make stock later or discard them.
- Line a turkey bag over a large container *(Footnote 2). Place the turkey into the bag, neck side down.
- Spread garlic and ginger in the turkey cavity, and stuff with white onions. Tie turkey legs together with twine, so the onions won’t fall out.
- Pour the marinade on the inside and outside of the turkey. Carefully massage the bag to dispense the liquid evenly.
- Try to squeeze as much air from from the bag as possible, and seal it with a clipper. Crumble and stuff old papers into the bottom of the container to lift the bag, so the marinade will rise higher and submerge 2/3 of the bird. Place the container into the fridge and let it marinate for 24 hours.
- Once the breast side is marinated, transfer the container onto kitchen counter. Open the bag. Flip the turkey by lifting the legs with your one hand and use the other hand to hold the neck side. Squeeze the air from the bag and seal it. Rearrange the paper padding if necessary, to let the marinade submerge 1/3 of the bird. Place the container back into the fridge and let it marinate for 24 hours (or 12 hours if you’re in a hurry).
Prep for cooking
- Preheat oven to 400 degrees F (200 C).
- Remove the turkey from the bag and place onto a big tray. Discard marinade liquid. Remove kitchen twine and discard the onions. Pat dry the turkey with a paper towel.
- Remove the rind from the citrus. Cut into half if too large to fit into the turkey. I used lemon, orange, and grapefruit, but any other combination works too. Place the fruits into the turkey cavity.
- Use toothpicks to seal the bottom of the turkey, so the fruits won’t fall out.
- Use kitchen twine to tie turkey legs again. Pat dry turkey with paper towel again.
- Prepare a roasting pan with rack inside. Brush a thin layer of olive oil thoroughly onto the top side (breast side). Move the turkey onto the roasting rack, breast side down. Brush a layer of olive oil onto the back side.
Cook
- Place roasting pan at the bottom of the oven, or the position that allow the bird to sit right in the middle of the oven.
- Bake at 400 F (200 C) for an hour.
- Lower the oven temperature to 350 F (180 C). Cook for another 20 minutes to an hour for turkeys that are 14 pounds or larger (less time for smaller turkeys), or until the turkey back turns dark brown.
- Remove from oven. Wear a pair oven mitts with several layers of paper towel on top, hold both ends of turkey and flip, so the breast side is up.
- Insert a remote probe thermometer into the thickest part of the thigh, from the bottom of the turkey towards the breast in a horizontal position.
- Return turkey to oven and set thermometer monitor alarm at 165 F (74 C) *(Footnote 3).
- Once the turkey is done, remove it from the oven and use a instant thermometer to measure the other thigh and the thickest part of the breast. The breast should register 160 F (71 C).
- Once the turkey is fully cooked, cover loosely with aluminum foil with a cross cut on top (*footnote 4). Rest for 30 minutes (up to 60 minutes).
- Carve and serve.
How to make ahead and serve later
- Let the turkey rest after cooking, then carve the turkey into legs, thighs, breasts, and wings. Do NOT slice the meat, as it results in dry turkey. Wrap the meat in aluminum foil, then seal in ziploc bags. Store in the fridge for up to 3 days or in the freezer for up to a month.
- You should thaw the turkey in the fridge a day before serving, so it defrosts completely.
- To reheat, preheat the oven to 300 F (150 C), or 350 F (180 C) for faster heat up. Unwrap the aluminum foil and place the turkey and the foil on a baking sheet, skin side up. Baking uncovered for 30 to 40 minutes. Slice the meat and serve.
Notes
- The purpose of the citrus is to fill the turkey cavity. A mix of citrus is best, but use whatever you have on hand! You just need enough to fill the turkey.
- The container should be large enough to hold the turkey and fit inside the fridge. I found the fridge vegetable drawer (the one on the bottom) works perfectly in this case.
- USDA recommended safe temperature.
- The small window on the top will let steam out and keep the turkey skin crispy.
Nutrition

Did you make this recipe?
I’d love to hear how it turned out for you! Please take a moment to leave a 5-star rating ⭐️ and share your thoughts in the comments further down the page. It really helps others discover the recipe too.

TA
Do we need to rinse the turkey after brining or would you recommend against it?
Maggie Zhu
I didn’t rinse the brine from the turkey but I did pat dry the turkey, which removes most of the brine. I think rinsing off the brine might help the skin roast a bit more evenly, but some part will still brown faster than the other, due to the uneven surface. If you do decide to rinse the turkey, make sure to pat dry the surface thoroughly before roasting.
Mario Alexander Zelaya
Hi I wanted to ask what if my turkey is pre brined should I still use the brine that you have or should I skip it all together
Maggie Zhu
I think you should skip the brining in this recipe if your turkey is pre-brined, otherwise it might end up too salty.
Mike M
I haven’t made this yet but it looks excellent. My question is I’d like to do this with a bone-in turkey breast which usually run about 6-8 lbs. I’d imagine just follow the recipe as is overall, and adjust cook time accordingly, but if there’s any additional tips I’d appreciate it!
Maggie Zhu
I would definitely double check cooking time and roasting method. I referred to an America’s Test Kitchen recipe. It roasted a brined turkey breast at 450 degrees for 30 minutes (rotate the pan in between for even cooking), then roast at 325 degrees for another 30 to 45 minutes. until the thickest part of breast registers 160 to 165 degrees. I think it makes sense that they used a slightly higher temperature to crisp up the skin because you will use less time, then a lower temperature to cook through since the breast part is more delicate. I would try with this method (start with 450F), but keep an eye on the turkey breast just in case it browns too fast (due to soy sauce in the brine). Once the skin gets crispy, turn to 325 F to finish cooking. If you try out this recipe with turkey breast, please let me know how it goes! I’m looking forward to hearing the result 🙂
Grace Cun
My first time making turkey…but it turned out so delicious! My family isn’t a big fan of turkey since they have had dry turkey in the past. Well I attempted it with your recipe and it was the first food item gone! Everyone raved about it and said it reminded them of a plump Peking Duck! Lol definitely a keeper and going to make this for more years to come.
Jane Scarffe
It was delicious. Do you have any recipes for leftovers
Maggie Zhu
So happy to hear you like this one!
Here are some leftover recipes:
Curry ramen: https://omnivorescookbook.com/curry-ramen-with-ham/ It was made with leftover ham, but I think leftover turkey will work just as well
Turkey dumplings: https://omnivorescookbook.com/turkey-dumplings/ this takes some time to make but it’s super fun to eat.
Chicken congee: https://omnivorescookbook.com/chicken-congee/ one of my readers made this with leftover turkey and raved about it.
Happy cooking!
Skip D.
So I was looking for a different way to do turkey this year and came across this recipe so I thought I’d try it…
Went pretty well actually. @ 400° ,the skin started turning very brown after 45 min. so I turned it breast side up at that point, I have an oven thermometer, remote thermometer, and meat thermometer, maintaining consistent oven temp is challenging, the turkey was done after only 2 hrs 20 min! I was getting very different readings with the meat thermometer depending on where i probed, between 150°-190°, I figured the average temp was 170° so I took the bird our and let it rest and crossed my fingers. The skin was perfectly brown, and everyone loved the taste, even my picky daughter said it was so flavorful, as for me, I thought it was very good, however smoked turkey is still my favorite, But if you don’t have a smoker I would definitely recommend this tecipe!
Petitebee
My first time making turkey and it was a hit!! My guests said its the best and tasty turkey ever! Worth the 48 hrs marinade and all the muscle work to flip the turkey around. Thank you!
Petitebee
Can i inject the turkey with marinade?
Maggie Zhu
I think you can, but you probably won’t need as much marinade (Maybe you can halve the marinade).
Cindy
I would like to know instead of stuffing the citrus orange can we do sticky rice?
Maggie Zhu
I think stuffing with rice will significantly change the cooking, so I’m not 100% sure without testing this myself.
The citrus will keep the turkey juicy and does not affect the cooking time of turkey.
When you stuff with the rice, the roasting time will need to be adjusted to a longer time. You can monitor the cooking with a thermometer if you decide to use the rice stuffing.
Matt
In most of the turkey recipes I am looking at there is a step to cleanse the brine off the bird. I’m wondering if this is why your gravy turned out salty? I’m considering following your recipe but then washing the bird fully and making a chinese 5-spice compound butter to rub under the skin for more flavor. Do you think washing the bird would be a mistake?
April
Awesome. Everybody loved it.
Ronny
You should know that that turkey is NOT burnt.
Denise
I used this recipe this Thanksgiving and I have to thank you – we ended up with the most perfectly roasted, moist, and flavorful turkey! It was my second time ever making a turkey and the tips and guidelines you wrote out were game changing (plus of course the link to The Yummy Life, but your version was more tl;dr to be honest). Everyone we had over was impressed with the turkey, and the marinade made the skin so delicious. I even marinated the turkey in a giant zip lock bag in the fridge drawer!! Anyway, this is an older recipe but just wanted to drop by and thank you. I can’t wait to make it again next year!
Jennifer
I think your turkey looks perfect–not burnt at all.
I was thinking about brining my bird this year and I’m intrigued by your method of brining it in the vegetable drawer. That would save me from doing the cooler method as described in Cook’s Illustrated.
However, I don’t think my bird will fit in the drawer–I’m roasting a 19-pounder this year.
But, if I do another one for New Year’s Day (my family really Loves Turkey) I’ll try your recipe.
Jeanne
I’m curious if you are going to use more marinade, would you need to marinade it for half the time? Since all of the meat will be in contact with marinade rather than just the top half or bottom half, and then of course no flip required, would you only need to marinade for 24 hours rather than a total of 48?
Emma @ Charlotte construction
These look so delicious, and even far better, very simple! I don’t believe I’ll make them for Thanksgiving … We currently have method excessive taking place! Yet I’m bookmarking for a later day.