
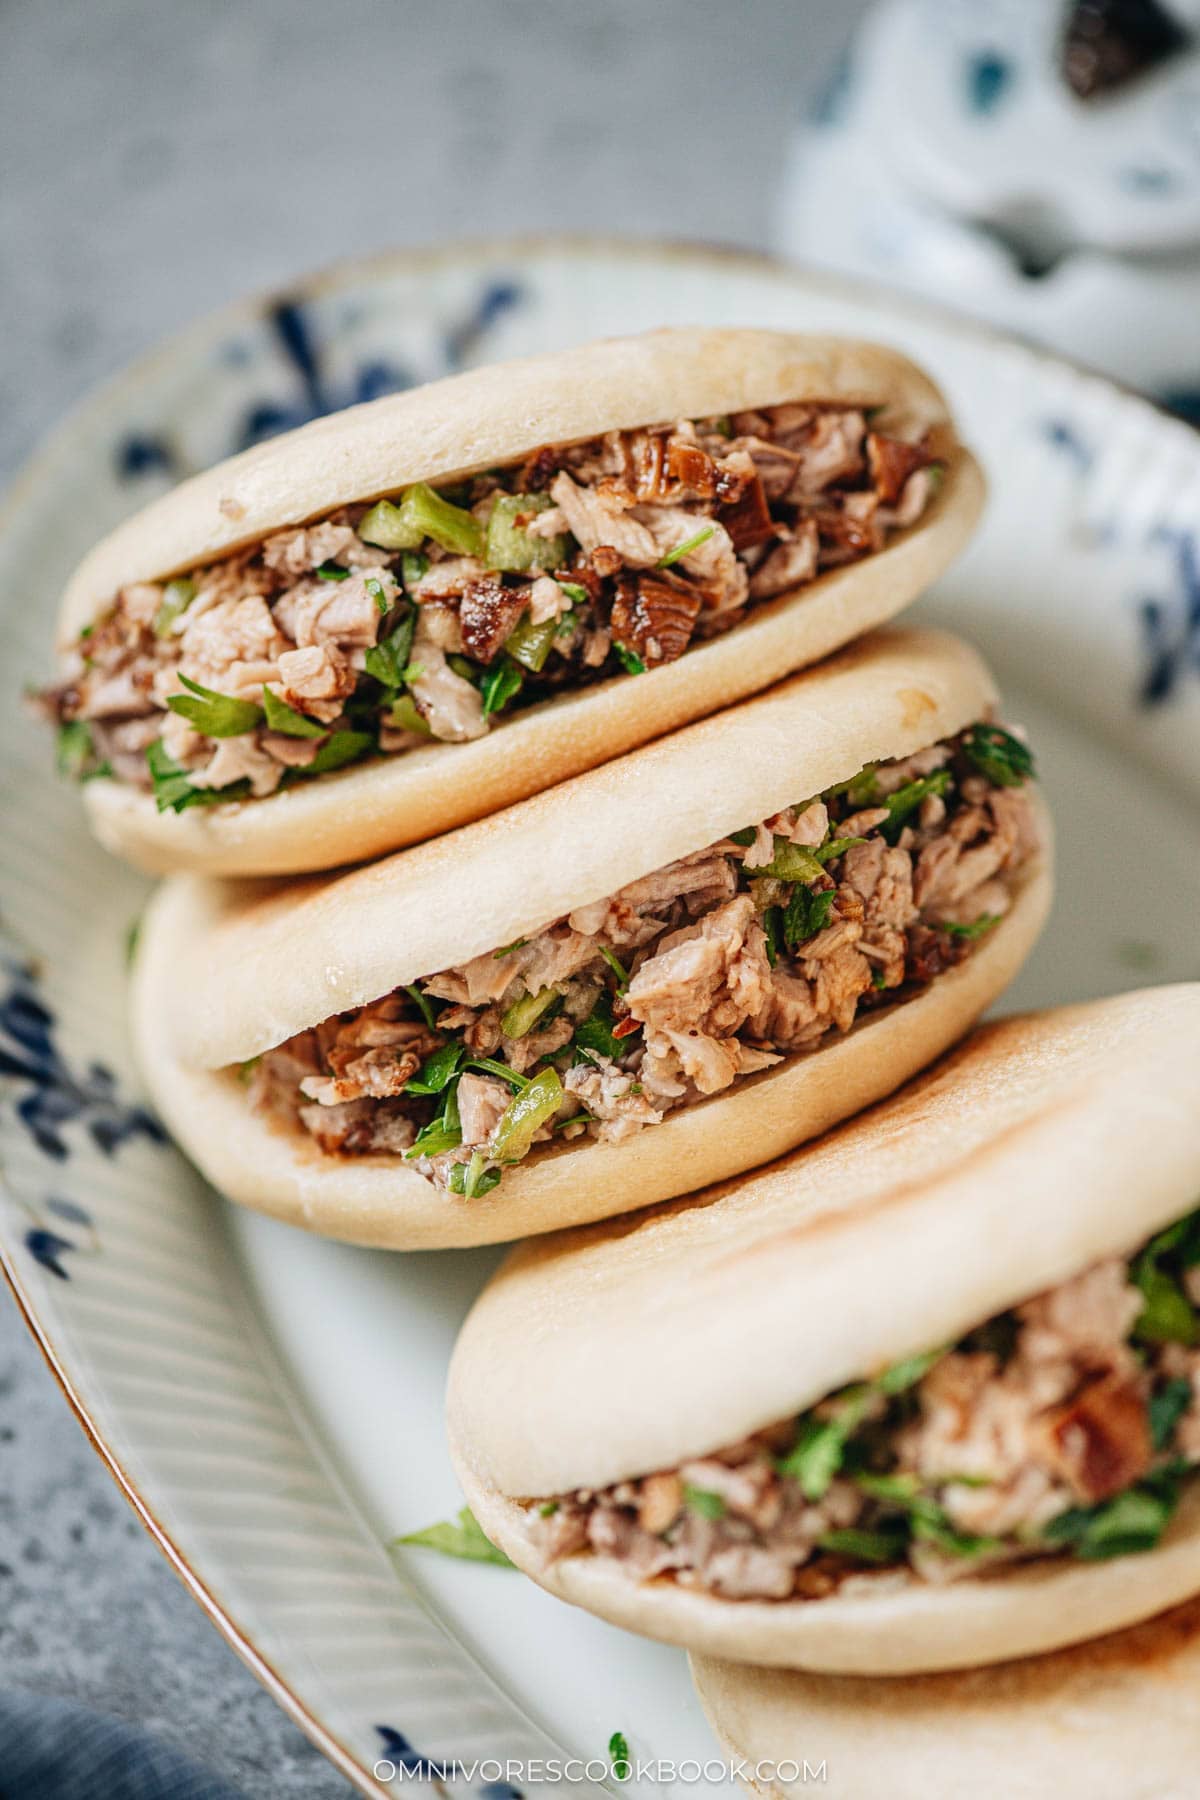
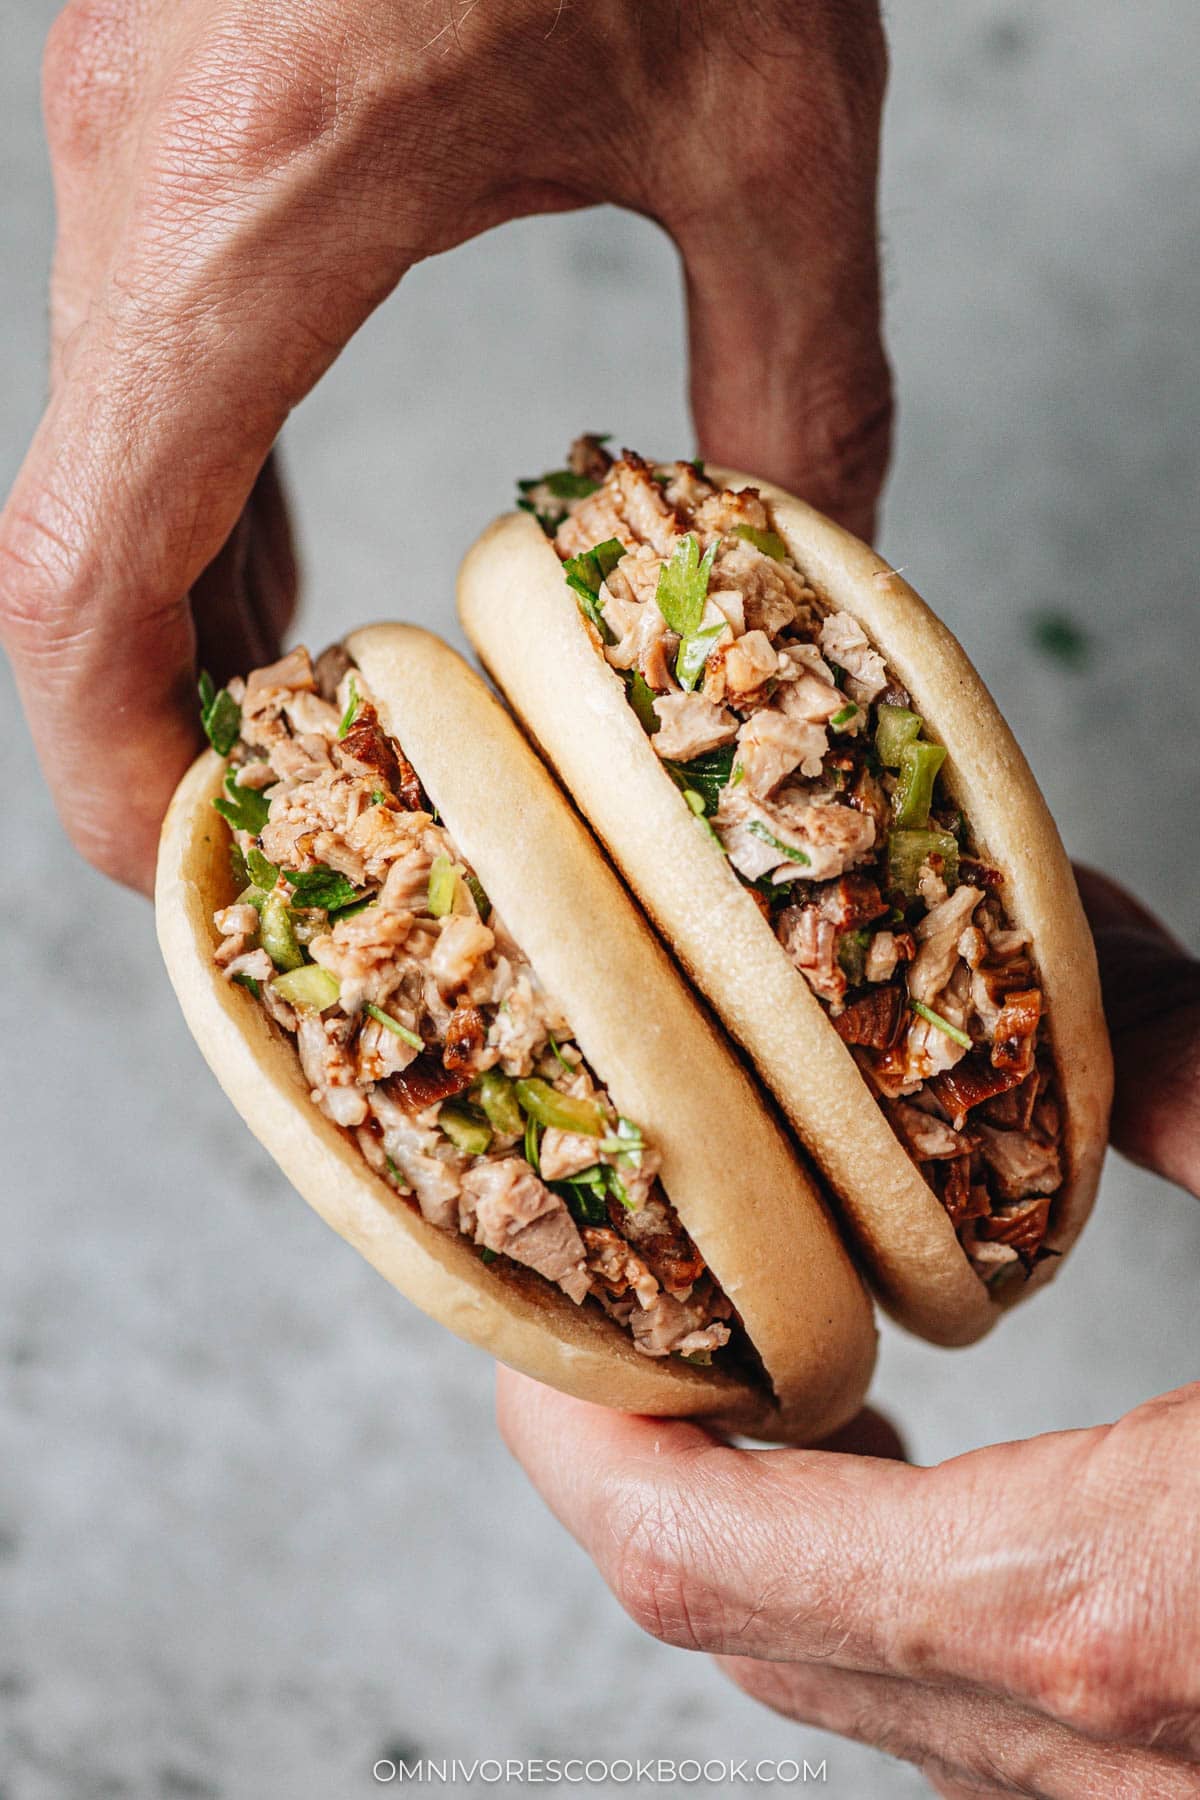
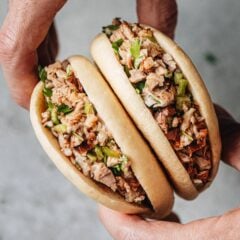
Rou Jia Mo sits somewhere between a sloppy joe sandwich and a taco in my opinion, with a long-simmered braise of clove, star anise, cinnamon, and Sichuan peppercorn giving the pork its master-sauce flavor, and the cilantro and pepper chopped straight into the meat on the cutting board so the herbs cut the fat. If you have ordered pork belly buns in a Chinese restaurant before, you have most likely met the Taiwanese version, Gua Bao, which uses skin-on braised pork belly in a folded steamed bun with pickled mustard greens, cilantro, and crushed peanuts. Well, I have to tell you that Rou Jia Mo is a different sandwich from a different region, closed on all sides in a wheat flatbread instead of an open steamed fold.
My original version of this Chinese pork belly bun recipe was published in 2018 and it linked out to a separate flatbread recipe. Today, I brought the flatbread back into the same post and redeveloped the dough method for a chewier and more authentic Rou Jia Mo texture, closer to the ones I remember eating on the street in Beijing under a buck a piece.
From start to finish, the work goes in 3 stages, the braise that simmers hands-off for 2 hours, the yeasted dough that rises and rolls into 10 flatbreads, and the fast chop-and-stuff assembly at the end. I encourage you to make this recipe as a weekend project when you have a little extra time. My step-by-step recipe walks you through the entire street vendor method, and I just know you and your family will absolutely love it.
Ingredients
I know the ingredient list looks a little long because the master braise uses a traditional Chinese spice blend, but almost every dried ingredient is something I already keep in my pantry for other Chinese recipes.
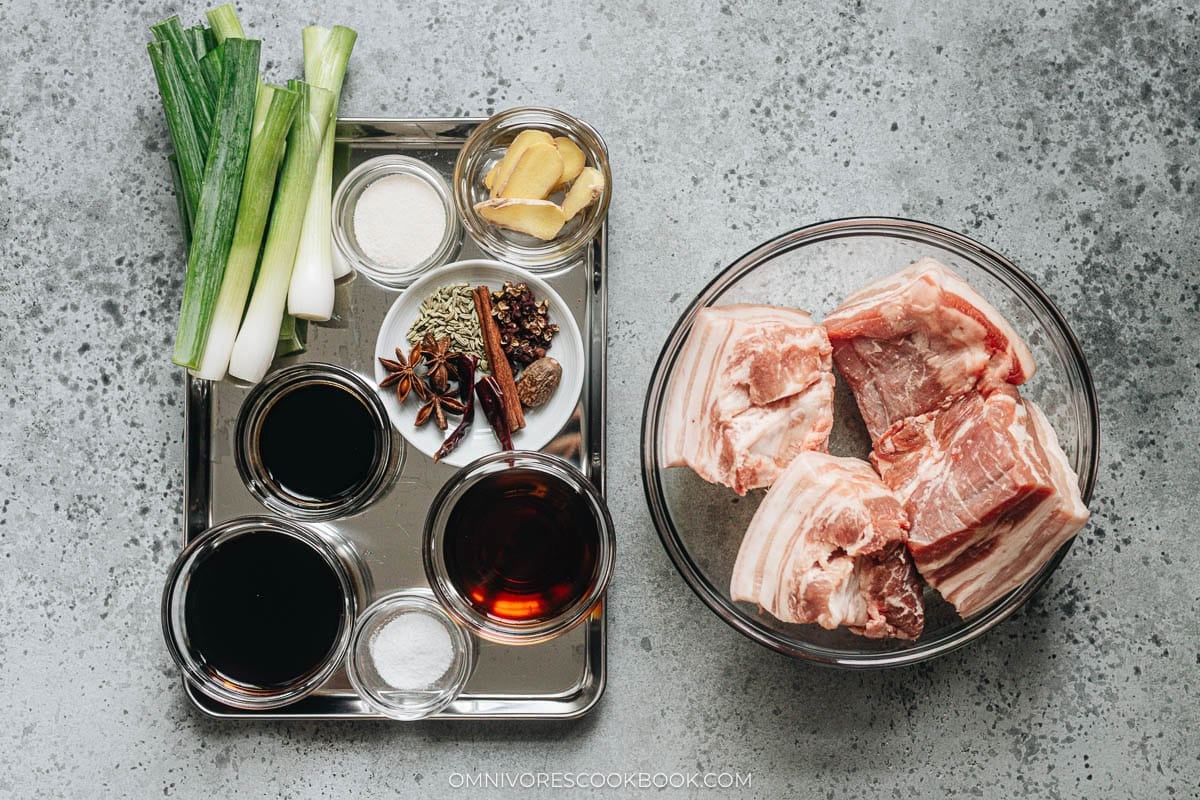
Pork belly: I use skin-on pork belly when I can find it because that is how it is cooked on the street in China, but skinless works if you do not like the texture of the skin. I cut the slab into 2-inch chunks so the pieces braise at the same rate and the fat has room to render into the liquid.
Master braise spices: Dried Chinese chili peppers, whole cloves, whole star anise pods, a cinnamon stick, fennel seeds, Sichuan peppercorn, and grated nutmeg give the braise its savory-warm base. This spice mix is the foundation of what Chinese cooks call a master sauce, a braising liquid that is meant to be complex and layered.
Braise aromatics and liquids: I add sliced ginger and halved green onions for freshness, Shaoxing wine, light soy sauce for saltiness, and dark soy sauce for a burnished color on the finished pork. A spoonful of sugar rounds out the salty and spicy notes.
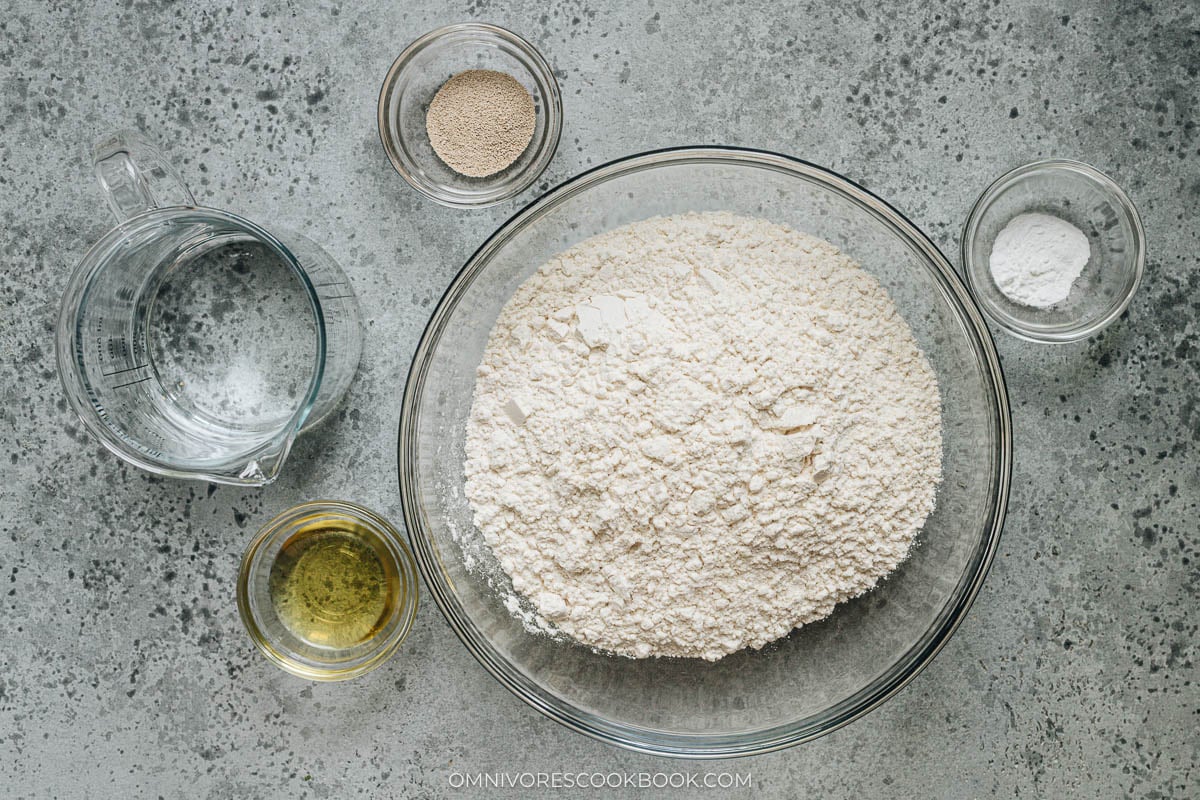
Flatbread dough: I mix instant yeast with warm water, all-purpose flour, a small amount of baking powder for a lighter crumb, and a spoon of vegetable oil for a tender crust.
Assembly toppings: I chop cilantro coarsely and dice fresh chili peppers small right before serving. Chinese long peppers are what I reach for when I want the traditional flavor, but Anaheim or a mix of sweet peppers and jalapenos also work well. A few drops of homemade chili oil at the table are optional for anyone who wants extra heat.
How to Make
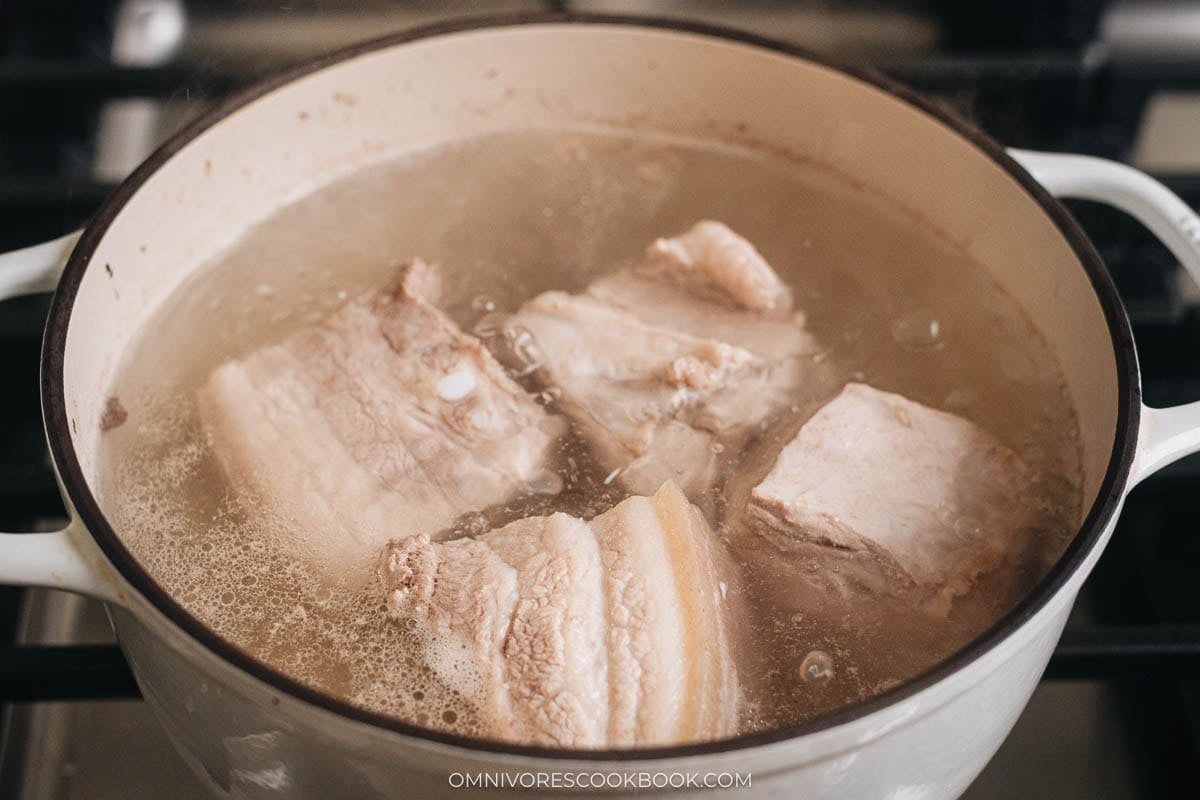
1. Blanch the pork: Place the pork belly chunks in a large pot and add cold tap water to cover the pork by 1 inch. Bring to a boil over medium-high heat, turn to medium, and boil for 10 minutes until no more brown foam rises to the surface. Discard the blanching water and transfer the pork to a clean pot just big enough to hold the pieces snugly.
2. Braise the pork: Pour in 3 cups of fresh water and add all the braising ingredients except the salt. Bring to a boil over medium-high heat, then turn to medium-low and simmer, covered, for 2 hours until the pork is tender enough to give under a chopstick. Add 1/2 teaspoon of salt halfway through and taste the broth.
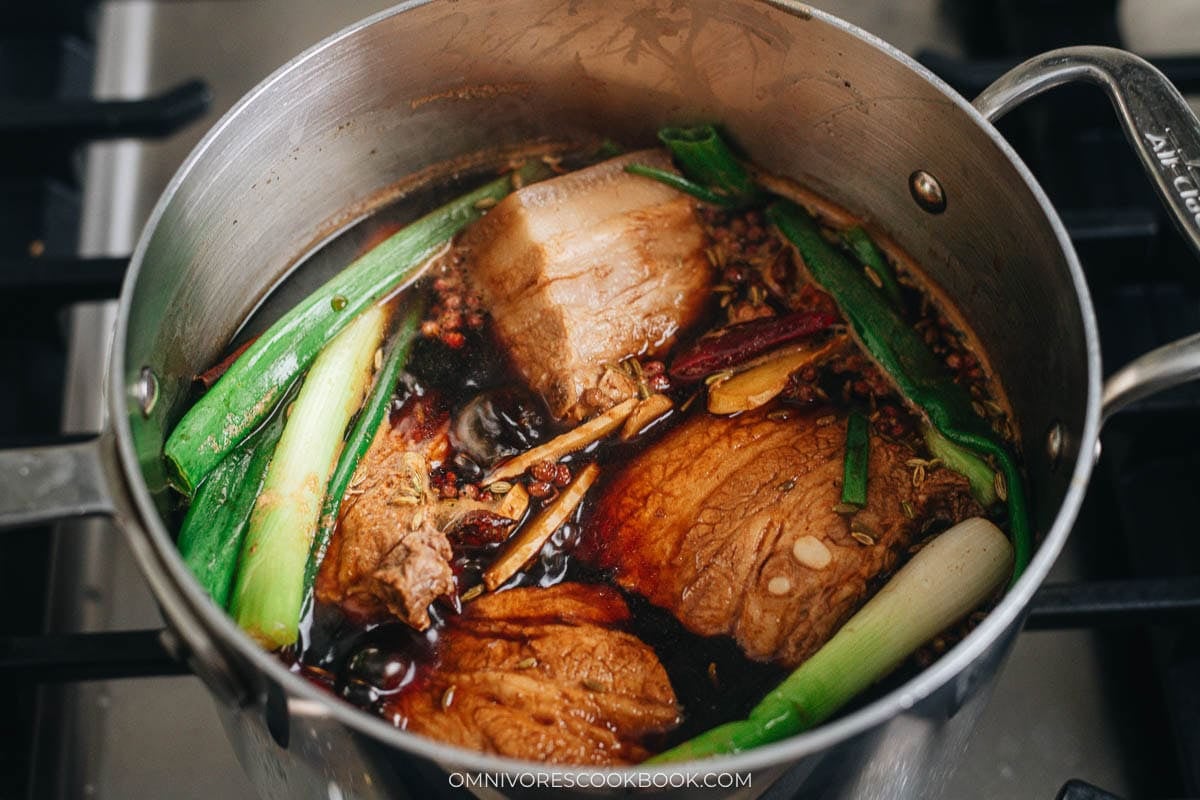
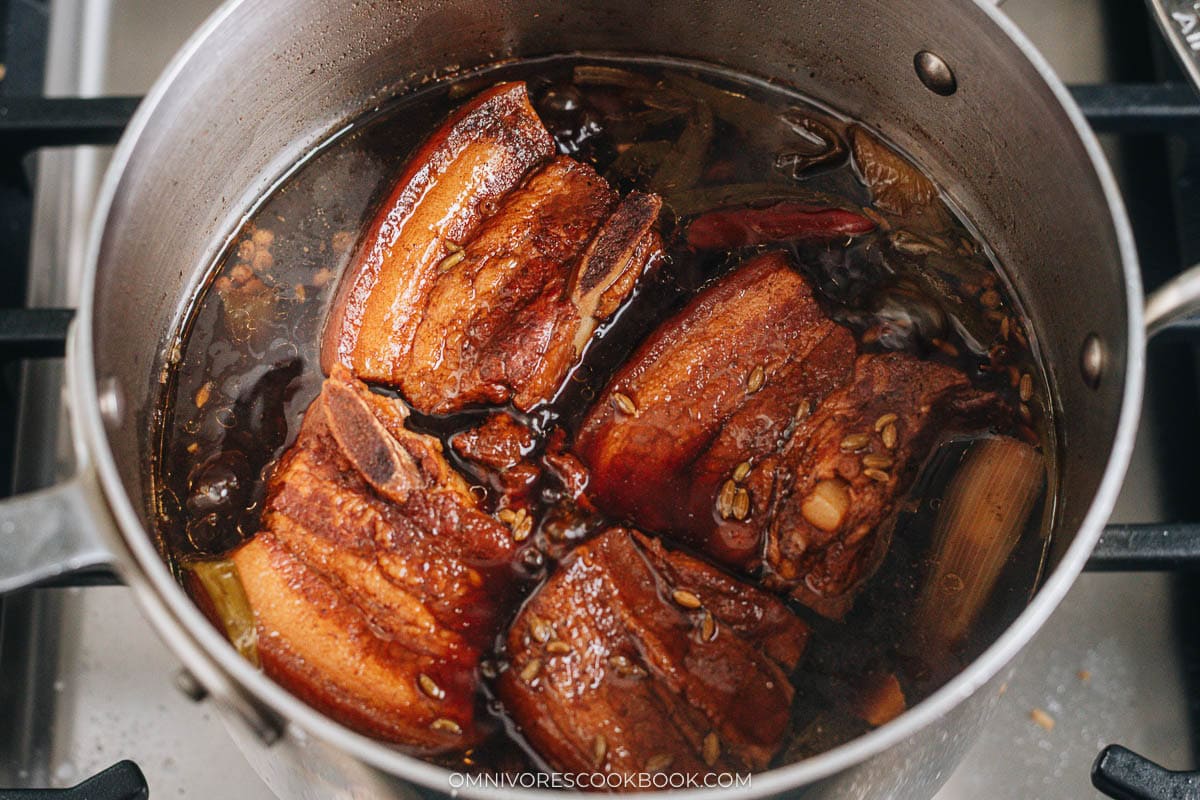
Once the pork is cooked, remove the large pieces of the aromatics and let the pork sitting in the braising liquid.
3. Activate the yeast: Start the dough while the pork is simmering. Pour the warm water into a small bowl at about 110°F, sprinkle in the active dry yeast, and let sit for 10 minutes until the surface bubbles up.
4. Mix the dough: Whisk the flour and baking powder together in a large bowl. Slowly pour in the yeast water while stirring with a pair of chopsticks in a clockwise direction, until the water is fully incorporated and semi-firm flakes form with almost no dry flour left. Drizzle in a little more water if needed. Add the vegetable oil and stir again to combine.
5. Knead the dough: Dust both hands with flour and start kneading in the bowl until the dough comes together.
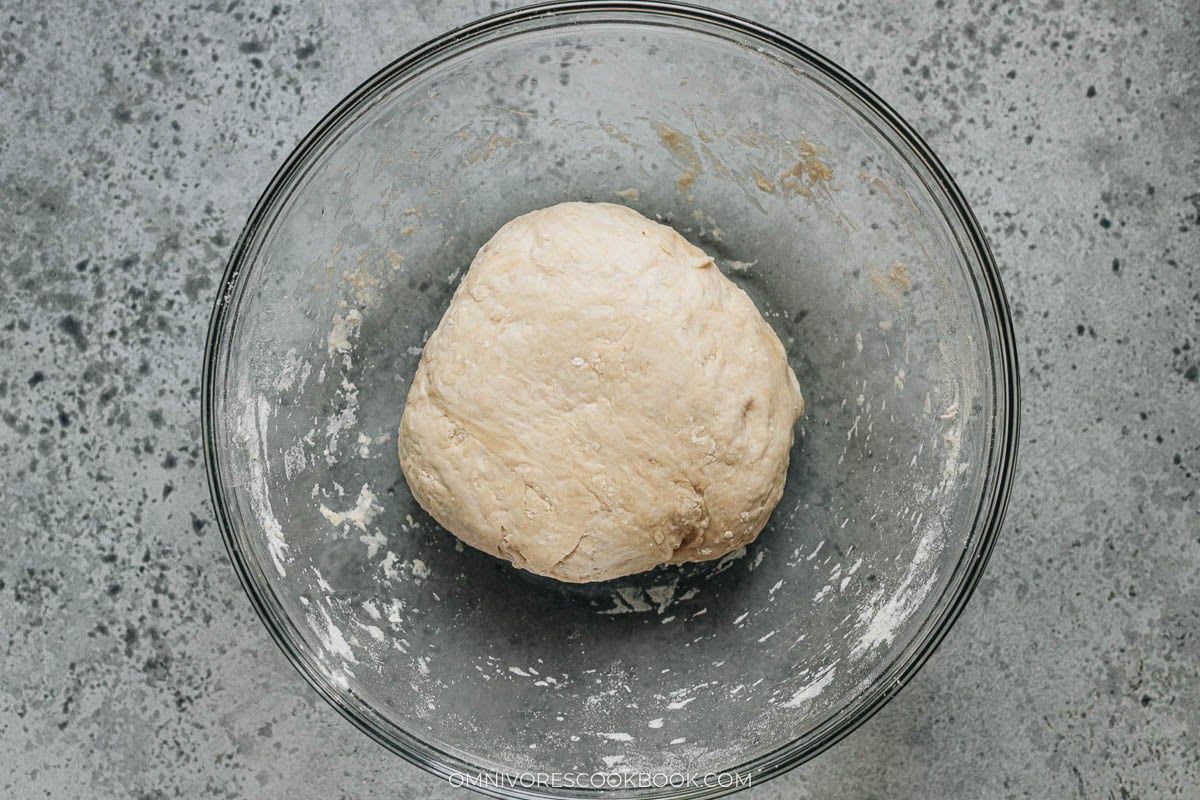
6. First rise: Transfer the dough to a medium bowl and cover with plastic wrap. Rest for 10 to 15 minutes so the dough hydrates and turns easier to knead.
7. Knead again: Knead the dough for 10 to 15 minutes until quite smooth.
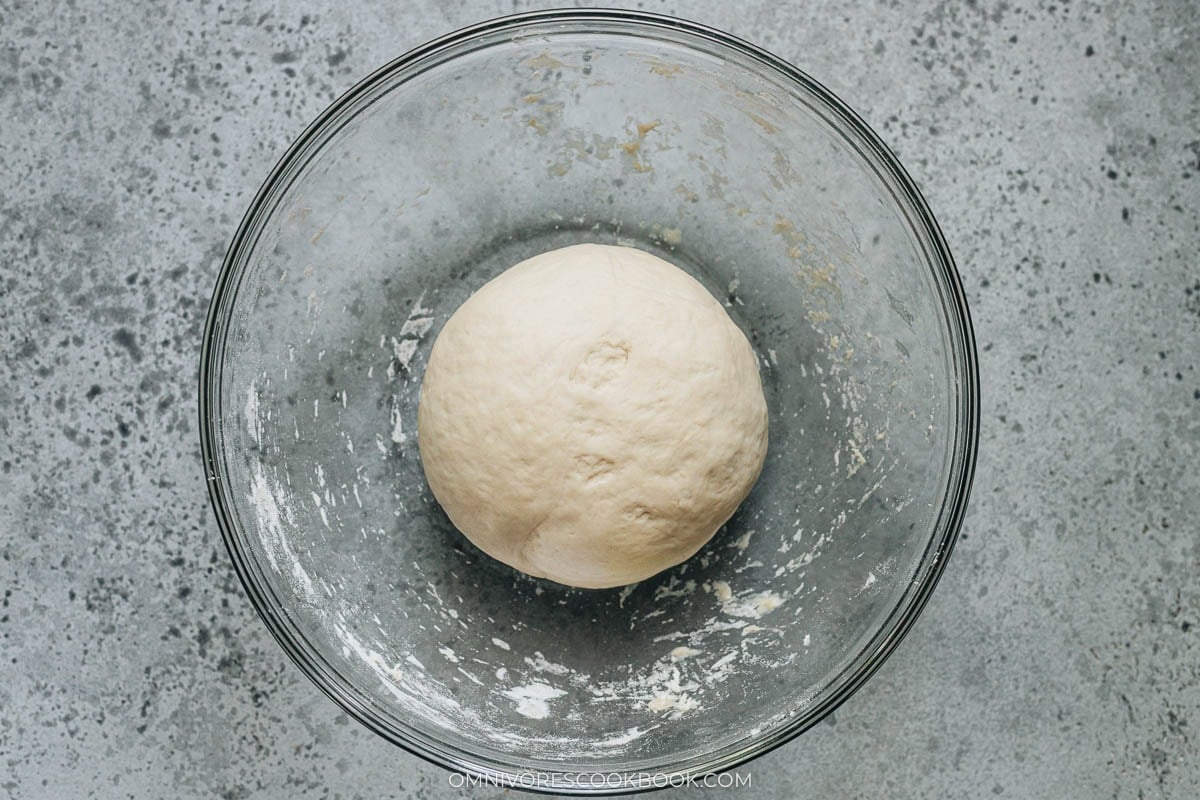
8. Start the second rise: Rub a large bowl with oil, place the dough inside, cover with plastic wrap, and rest until doubled in size, about 1 hour.
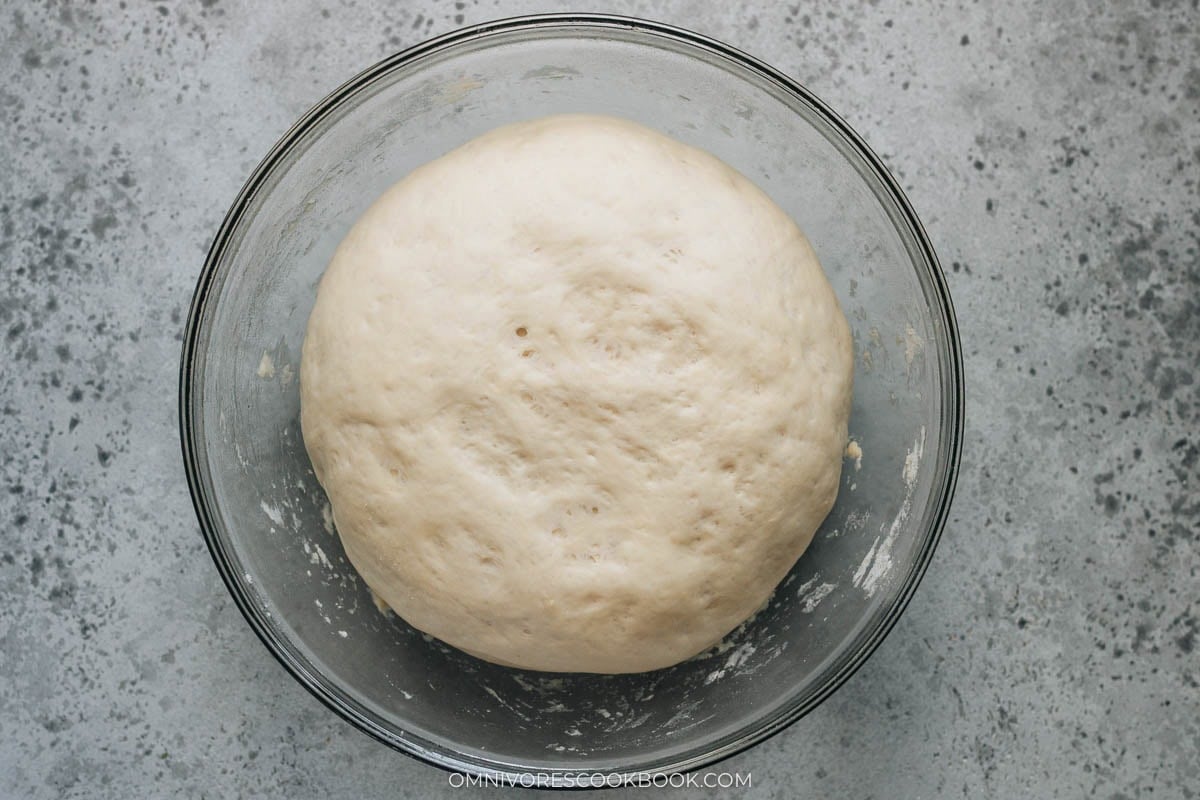
9. Knead the dough: Knead the risen dough a few times until it returns to its original size.
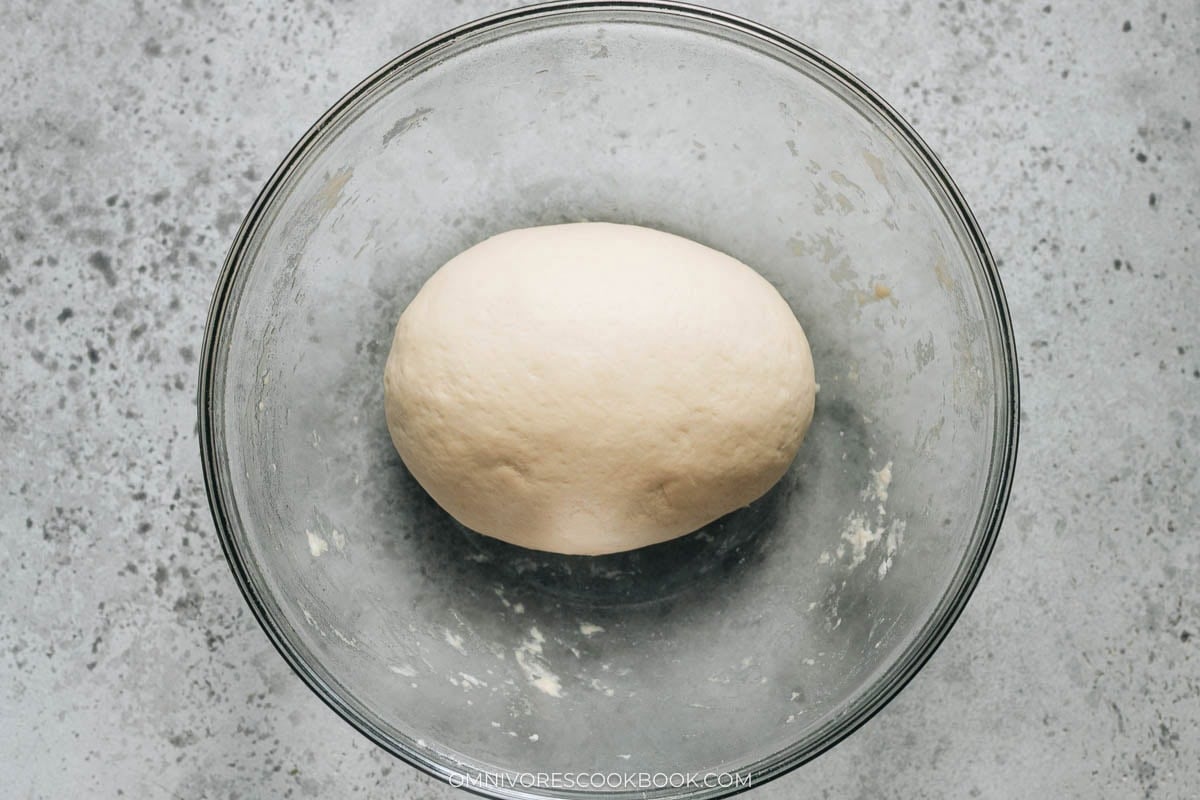
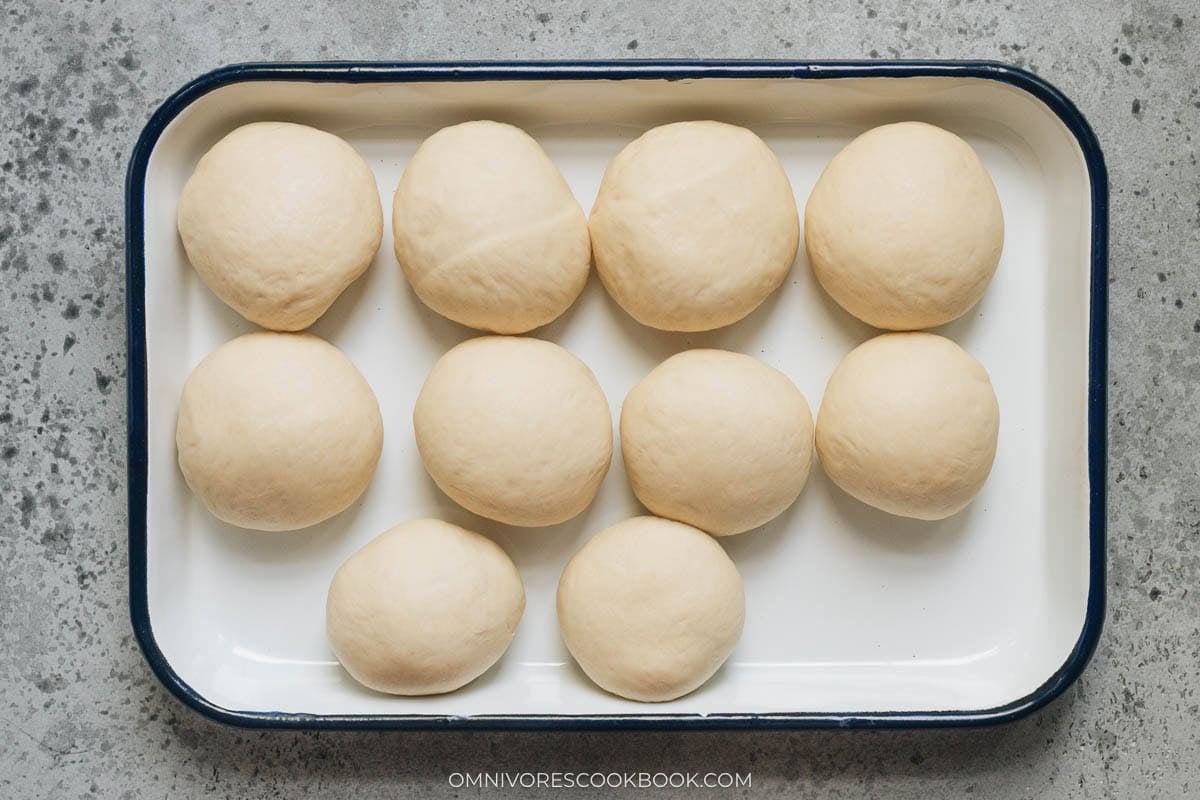
10. Divide the dough: Divide into 10 equal pieces of about 75 grams each and shape each one into a ball by hand. Transfer to a tray, cover with plastic wrap, and rest for another 10 minutes so the dough is easier to roll.
11. Roll and shape the flatbreads: Press one dough ball flat with your palm and roll it out with a rolling pin into a long oval about 8 inches long and 3 inches wide. The dimensions do not need to be exact as long as the shape is a long oval.
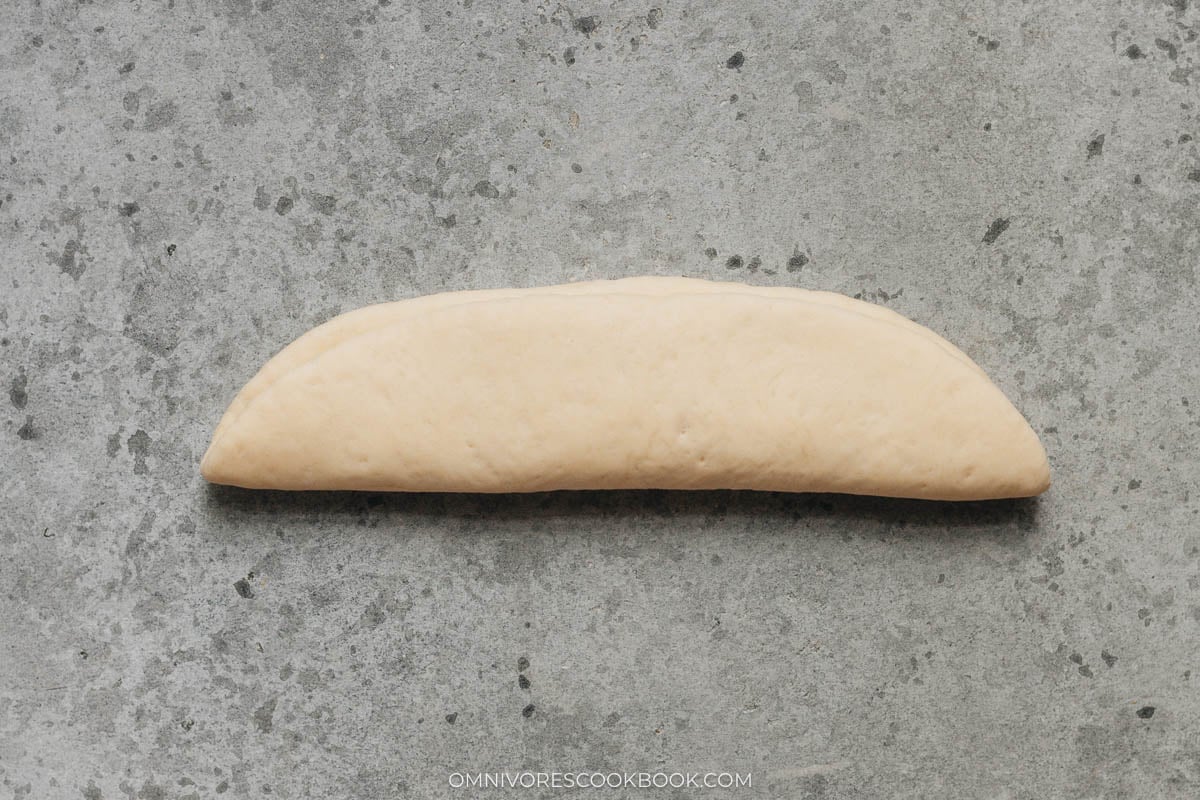
12. Create the spiral: Fold the oval lengthwise, then roll the folded strip up into a coil.
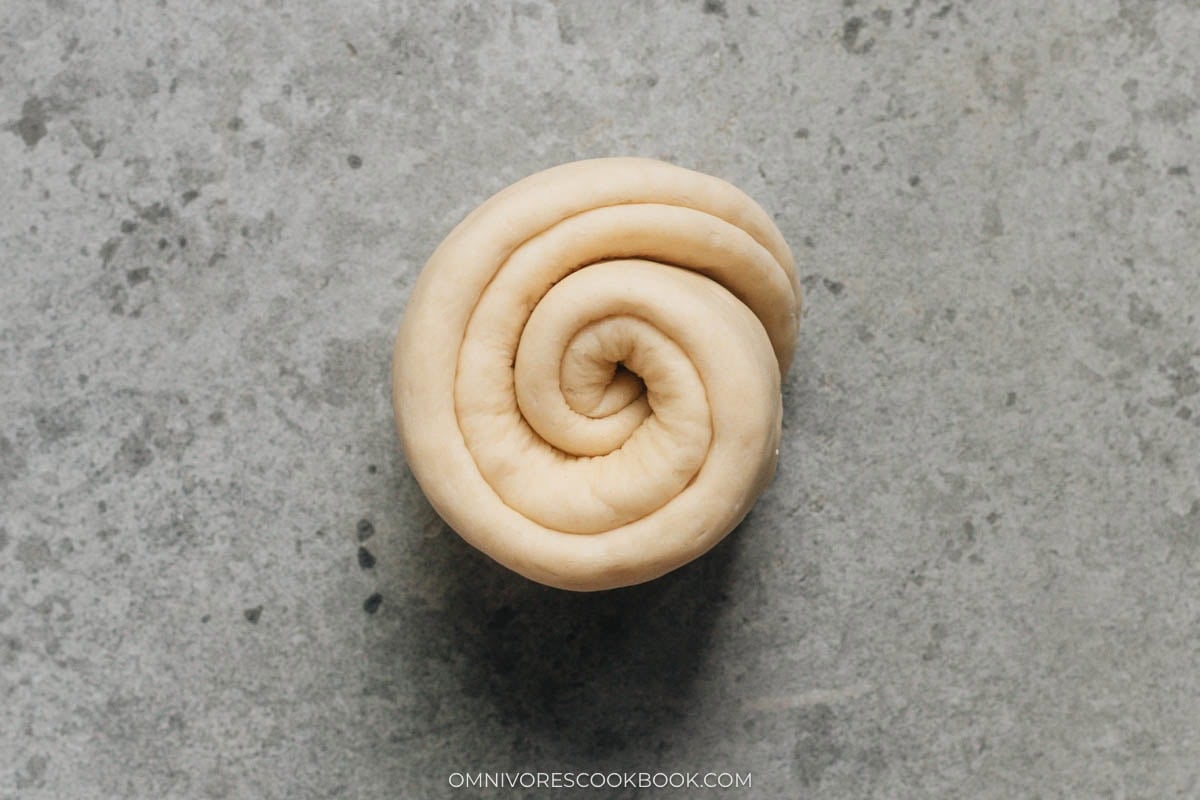
13. Shape the flatbread: Flatten the coil with the rolling pin into a disk about 4 inches across.
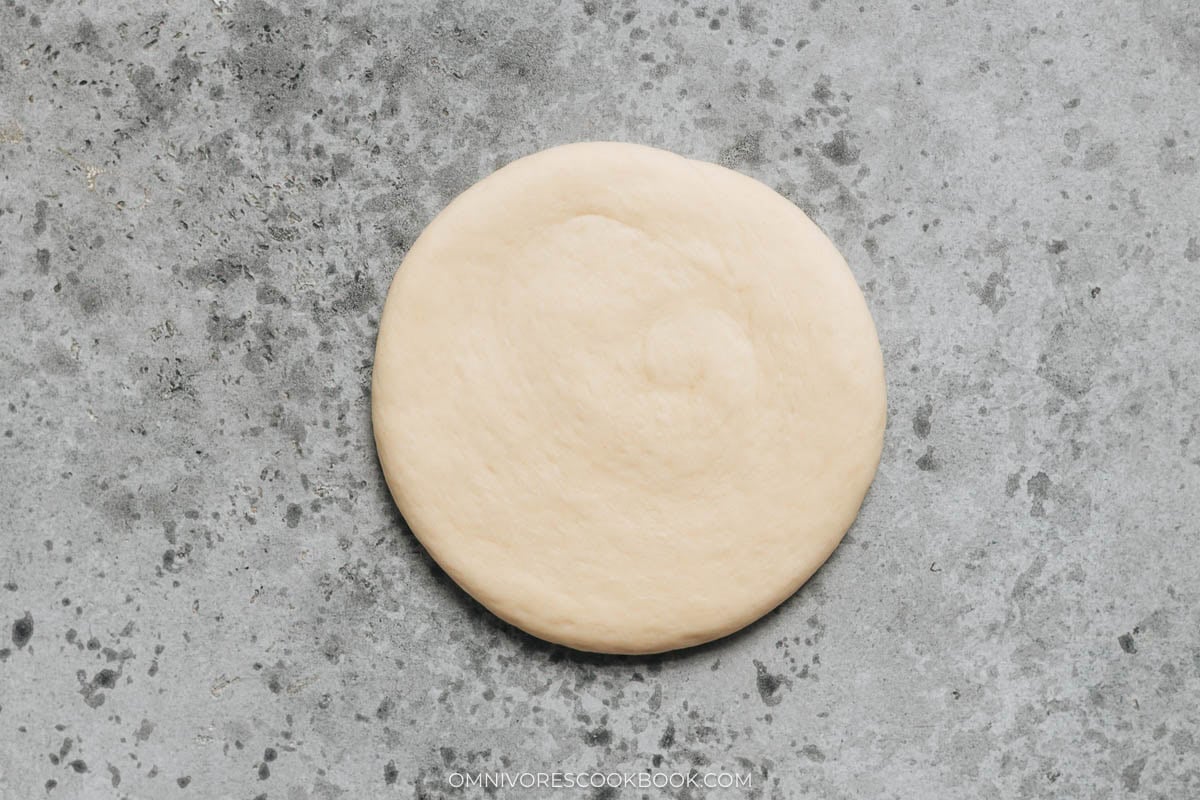
14. Rest: Once all are shaped, rest for 10 minutes after finishing the last piece so the dough relaxes and slightly expands.
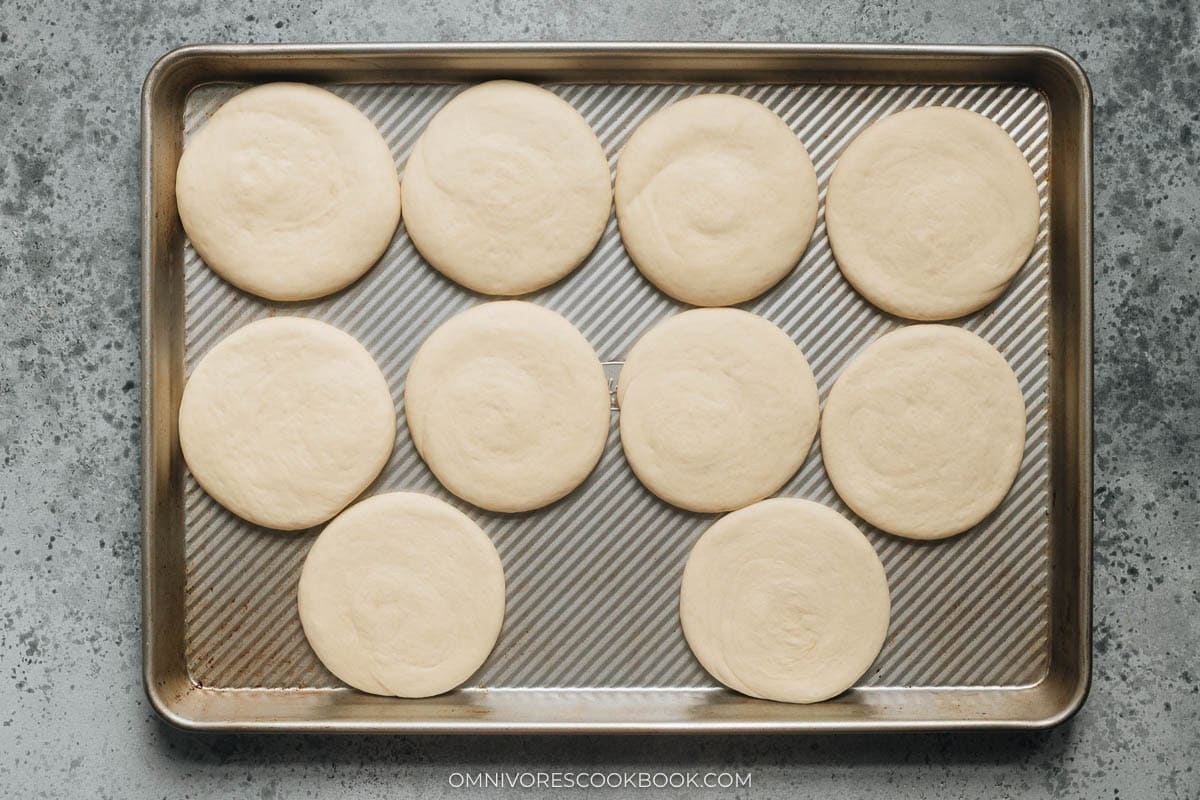
15. Cook the flatbreads: Heat a cast iron pan over medium heat until hot. Place the first flatbread you rolled into the pan, spacing multiple pieces about 1 inch apart. Cook covered for about 2 minutes per side, until the surface turns golden and the bread is cooked through. If the surface browns too quickly, turn to medium-low. If the surface is not quite golden after the full 4 minutes covered, uncover and cook for 1 minute per side to finish the color.
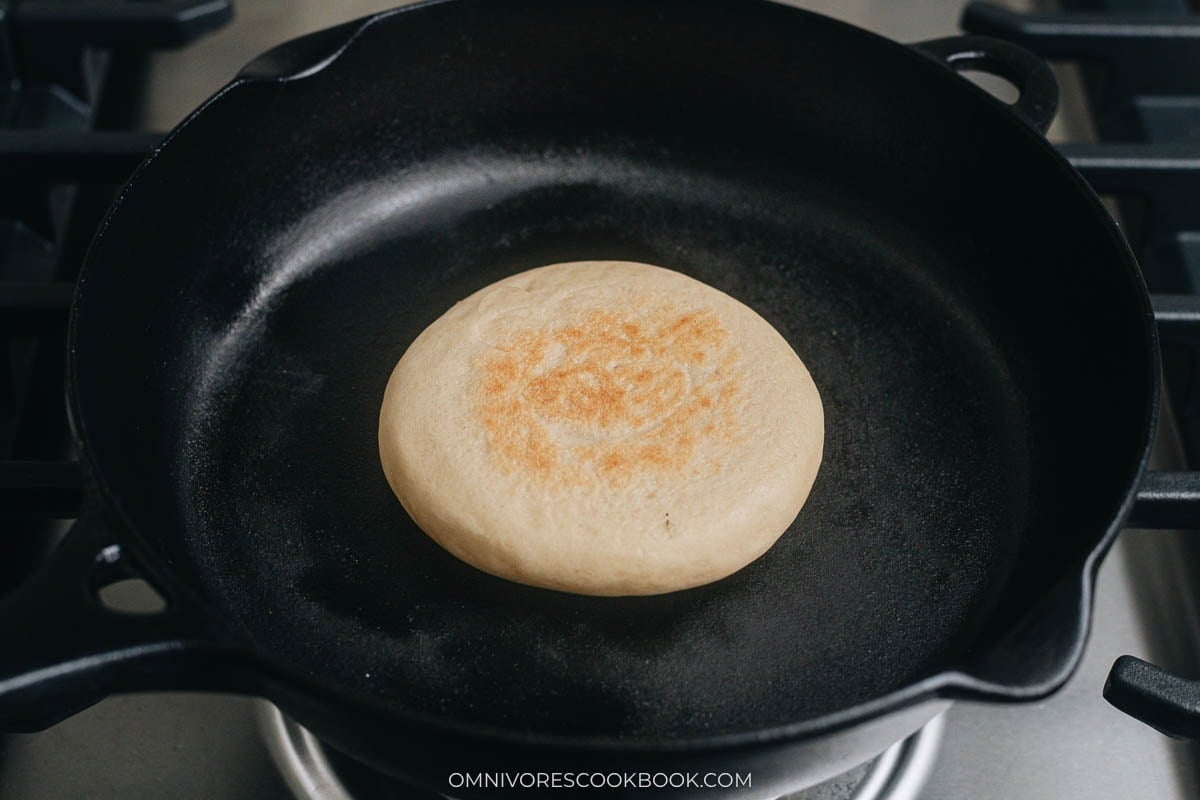
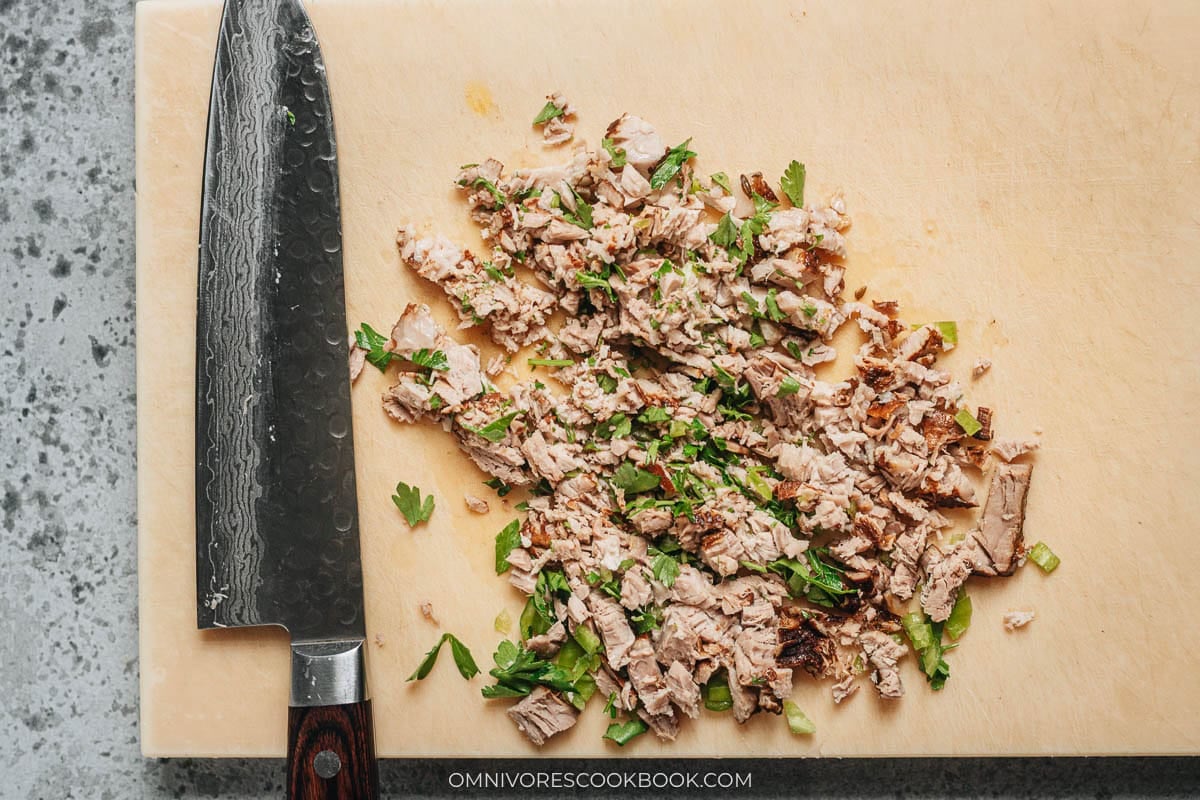
17. Chop the filling: Transfer one piece of braised pork belly onto a cutting board and cut it coarsely into small chunks. Place a handful of cilantro and a handful of diced peppers on top of the pork. Use a heavy knife to chop and mix everything together until the herbs and peppers are blended into the meat.
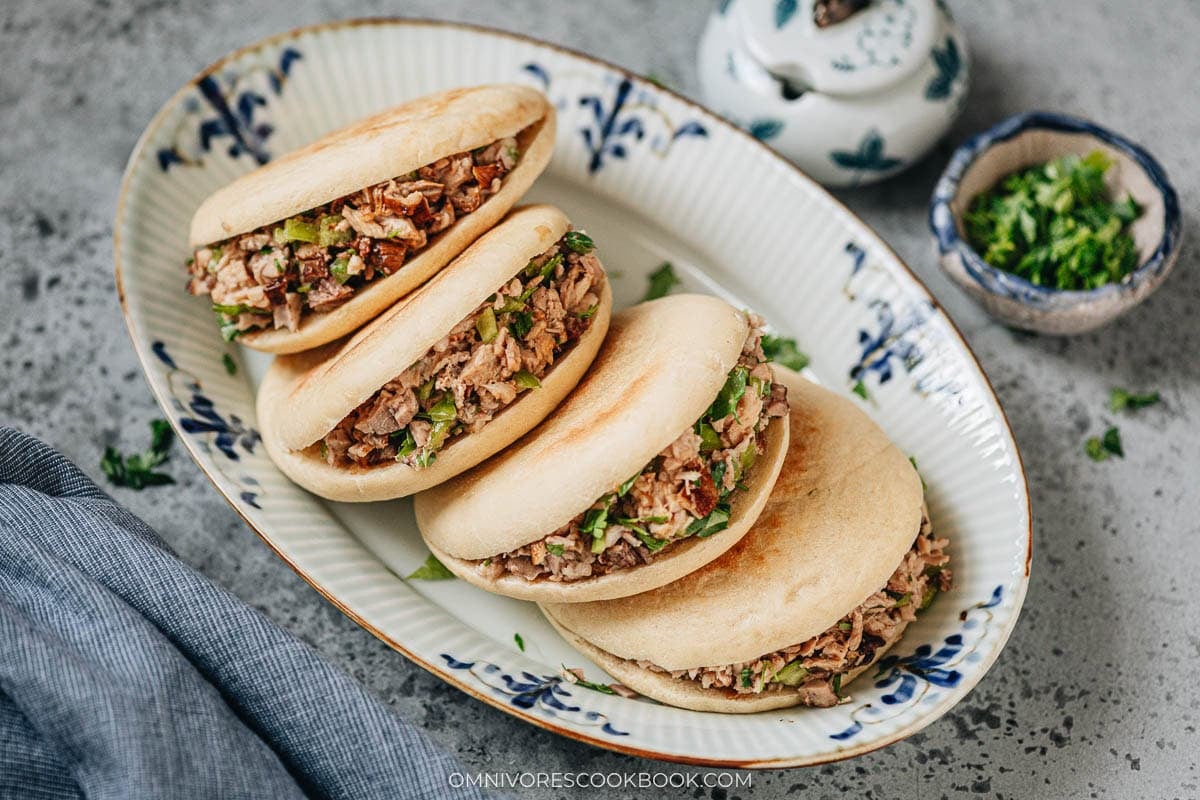
18. Assemble and serve: Slice a flatbread horizontally in half without cutting all the way through, leaving one end attached to form a pocket. Spoon the chopped pork mixture into the pocket, drizzle a spoonful of braising liquid over the filling, and add a few drops of chili oil if you want the extra heat. Serve immediately while the bread is still warm.
My Cooking Tips
Do not skip the blanch, even if you are in a hurry: The 10 minute blanch pulls impurities and any gamey notes out of the pork belly, which is what gives the braising liquid its savory taste at the end. If I skip the blanch the finished broth tastes muddier and there is a thin gray foam I have to skim over and over during the simmer.
Chop the filling on the cutting board, do not slice it: The reason street vendors mince the pork, cilantro, and peppers together with a heavy knife is that the chopping motion breaks down the fat and lets the herbs blend directly into the meat. The finished filling tastes juicy and moist without a heavy or greasy mouthfeel.
Save the leftover braising liquid: The seasoned braising liquid at the bottom of the pot is the best byproduct of this recipe. I strain it through a fine mesh strainer, cool it, and freeze it in a small container for the next batch of braised pork, hard-boiled soy sauce eggs, or a quick sauce for stir-fried noodles. In Chinese cooking this liquid is called lu zhi and cooks in China constantly reuse it.
Use the finger poke test for the second rise: Doubled in size is the easy visual cue for the dough, but the surer check is to press a fingertip about half an inch into the surface and read the spring-back. If the indent stays as a soft dimple and springs back slowly, the dough is ready to divide, and if the indent springs back fast and disappears, I give it another 10 to 15 minutes.
The first breads you roll will be the ones ready to cook: By the time you finish shaping the last coil, the first few you shaped have already rested 20 to 30 minutes on the tray, which is exactly what they need to relax before hitting the pan. I cook them in the order I rolled them, which keeps the resting time even across the batch.
How to Serve
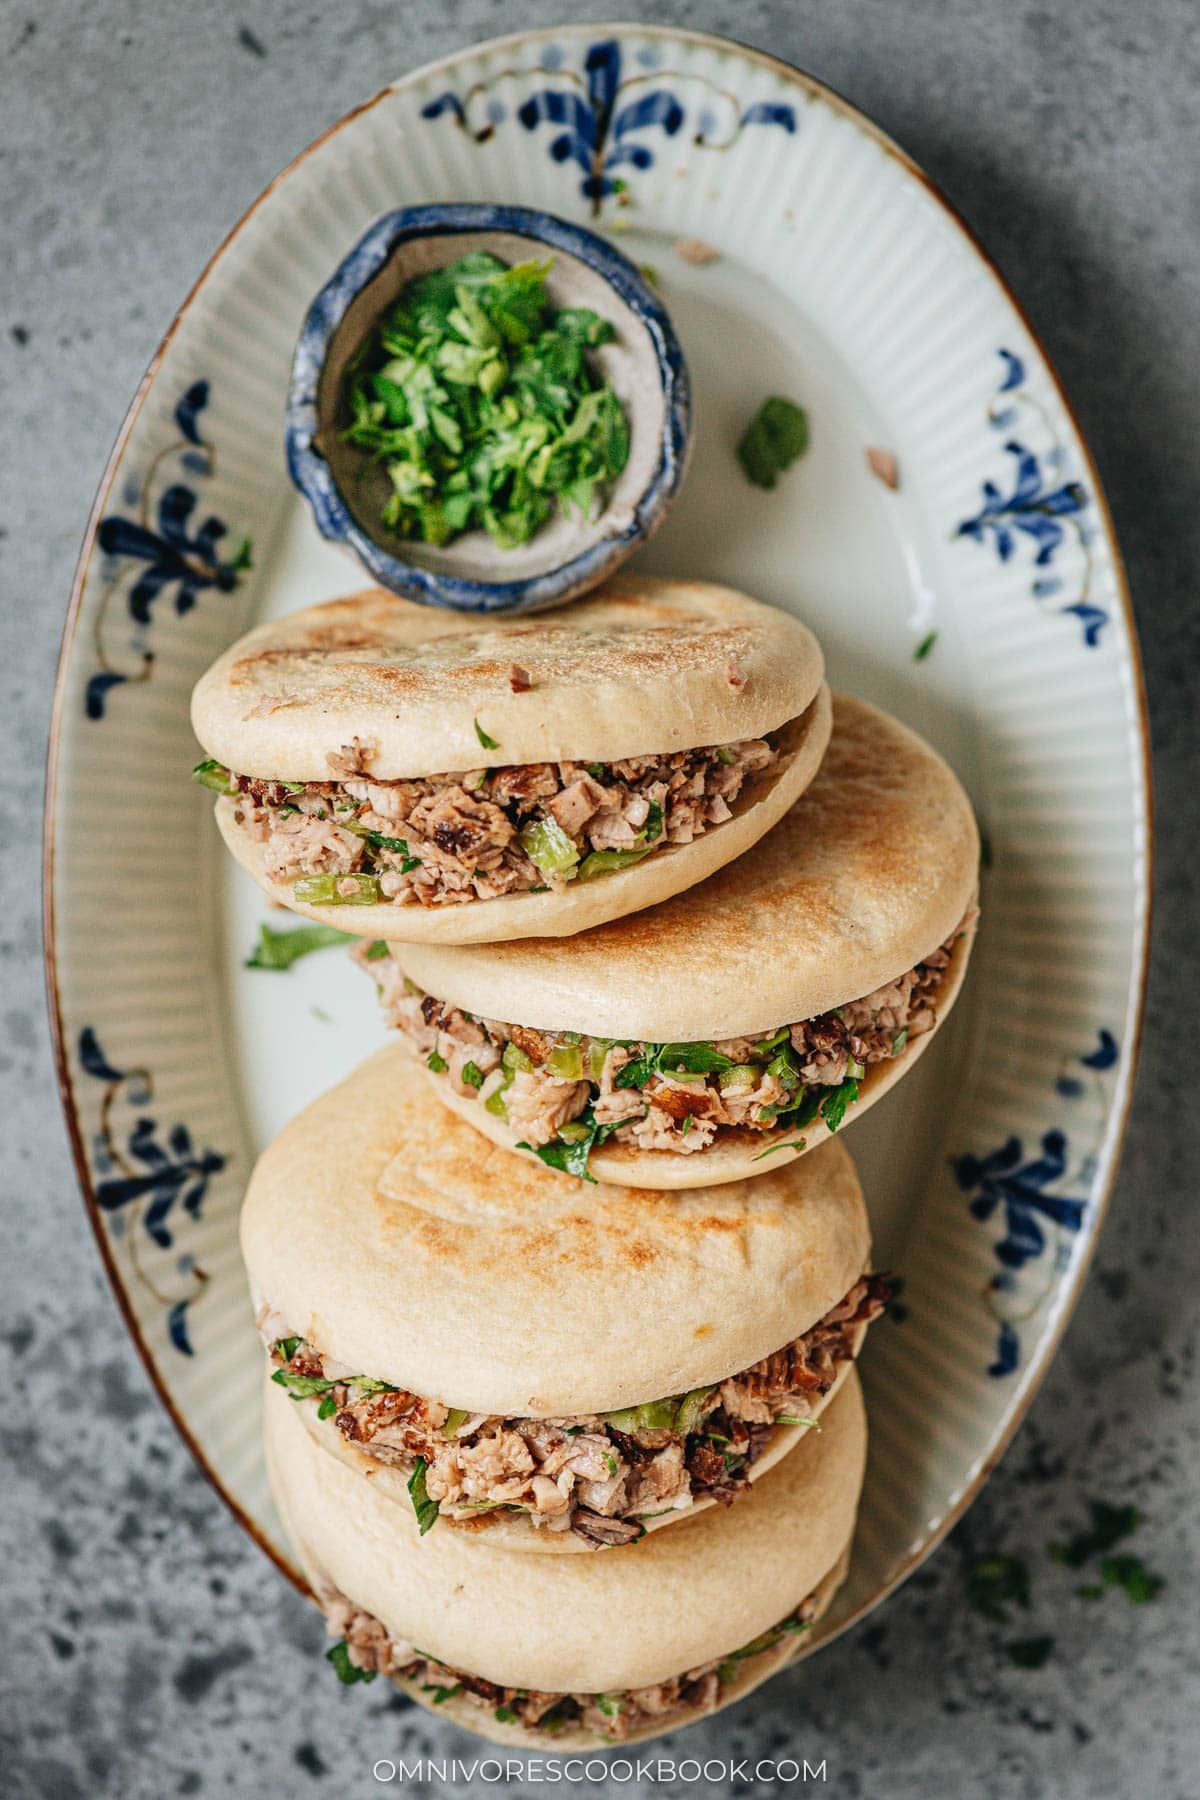
Rou Jia Mo is street food made for eating right away with your hands. I pass out the assembled buns as soon as the last one is stuffed, still warm from the pan, and I keep a small dish of the braising liquid on the table for anyone who wants to spoon more onto their sandwich mid-bite. On a weeknight this is a two-hand dinner for me and my husband, messy, but finger-lickering good.
For a family dinner that needs more on the table, I set the buns down as the main and set a small Northern Chinese foods around them. A cold Chinese cucumber salad does the refreshing work against the fatty pork, a plate of Chinese broccoli with oyster sauce adds the green, and a light Chinese egg drop soup is the perfect combo. If I am hosting a bigger group with a real Xi’an flavor in mind, I add a plate of real-deal Xinjiang cumin lamb for a second Northern protein that have the same spice-warm profile as the braise. Yum!
Frequently Asked Questions
Can I use store-bought bread instead of making the flatbread?
Yes, pita bread is my closest shortcut when I do not have time to make the dough, and it gives you a similar pocket for the pork mixture. Panini rolls also work as a quicker option. The result is not identical to the street-vendor Rou Jia Mo, but the braised pork is doing most of the flavor work anyway.
What if my dough sticks to my hands when I am kneading?
Add flour 1 teaspoon at a time and keep kneading. The dough for Rou Jia Mo is meant to be quite firm, not soft or tacky, so if it sticks the answer is usually a little more flour rather than more oil. Once the dough stops sticking to your hands and the bottom of the bowl, stop adding flour and let the rest of the kneading smooth it out.
How long do leftovers keep in the fridge and freezer?
The braised pork belly and its liquid keep in an airtight container in the fridge for up to 4 days and freeze well for up to 2 months, and I store the pork and the strained liquid together so the meat stays moist as it reheats. The flatbread is best the day it is cooked, but it also freezes for up to 1 month in a sealed bag, and I reheat it wrapped in foil in a 350°F oven or in a dry skillet over medium heat until warmed through. Assemble the sandwiches the day you plan to eat them so the bread stays soft against the pork.
Want to Save This Recipe?
Enter your email below & we’ll send it to your inbox. Plus get great new recipes from us every week!
Watch video
Chinese Pork Belly Bun (Rou Jia Mo, 肉夹馍)
Ingredients
- 2 lb pork belly , cut into 2-inch (4.5-cm) chunks (*Footnote 1)
Braising
- 3 cups water
- 2 dried Chinese chili peppers , seeds removed
- 3 cloves
- 2 whole star anise pods
- 1 cinnamon stick
- 1 thumb ginger , sliced
- 4 green onions , halved crosswise
- 1/4 cup Shaoxing wine
- 1/4 cup light soy sauce
- 1.5 tablespoons dark soy sauce
- 1 tablespoon sugar
- 1 teaspoon fennel seeds
- 1 teaspoon Sichuan peppercorns
- 1/2 teaspoon salt
- 1/8 teaspoon grated nutmeg
Pork bun
- 1 1/2 teaspoons instant yeast
- 1 cup + 2 tablespoons warm water (110ºC)
- 3 1/2 cups all-purpose flour
- 1/2 teaspoon baking powder
- 1 tablespoon vegetable oil
Assemble
- 1 cup cilantro , coarsely chopped
- 2 to 3 chili peppers , small diced (I used Chinese long pepper)
- Homemade chili oil (Optional)
Instructions
Cook the pork
- Blanch the pork: Place pork belly in a large pot and add cold tap water to cover the pork by 1” (2 cm). Bring to a boil. Turn to medium heat and boil for 10 minutes, until there’s no more brown foam forming. Discard the water and transfer the pork to a clean pot that’s just big enough to hold the pork.
- Braise the pork: Pour 3 cups of water and add all the braising ingredients except the salt. Bring to a boil over medium-high heat, then turn to medium-low heat. Simmer, covered, for 2 hours, until the pork is very tender. Add 1/2 teaspoon salt halfway through and taste the broth. It should taste slightly salty. If not salty enough, add more.
Prepare the buns
- Activate yeast: Start the dough when the pork is cooking. Pour the warm water in a small bowl and add the yeast. Let sit for 10 minutes to activate the yeast.
- Mix the dough: Mix the flour and baking powder together in a large bowl. Slowly pour in the water with yeast a few times, stirring with a pair of chopsticks in a clockwise direction, until water is fully incorporated and semi-firm dough flakes form. There should be little dry flour left in the bowl. Drizzle a little more water if needed. Add the oil and mix again. Dust both hands with flour and start by using one hand to knead until dough begins to form. The dough should be quite firm and not stick to the bottom of the bowl. Add more flour and keep kneading if the dough sticks to your hands, 1 teaspoon at a time.
- 1st rise: Transfer the dough to a medium bowl and cover with plastic wrap. Rest the dough for 10 to 15 minutes. This brief process helps the dough to hydrate and is easier to knead.
- 2nd rise: Then knead the dough again until quite smooth, 10 to 15 minutes or so. Rub some oil onto a large bowl, place the dough into it, and cover with plastic wrap. Rest until the dough has doubled in size, about 1 hour.
- Divide the dough: Once rested, knead the dough a few times again until it returns to the original size. Divide the dough into 10 equal parts, about 75g per dough, and shape each one into a ball by hand. Transfer the dough onto a tray and cover with plastic wrap. Let rest for another 10 minutes. So the dough is easier to roll.
- Roll out flatbread: Place one dough ball on the working surface, then press it with your palm into a round shape. Use a rolling pin to flatten the dough into a long oval shape that’s narrow on both ends, 8” long and 3” wide (*Footnote 2). Fold lengthwise, then roll up the roll into a coil. Use a rolling pin to flatten the bread into a 4” thick disk. Place the rolled dough onto a greased tray. Shape the rest of the dough balls the same way. Once all the dough has been shaped, let it rest until the bread has relaxed and slightly expanded, 10 minutes after you finish rolling the last dough piece. (*Footnote 3)
- Cook the bread: Heat a cast iron pan over medium heat until hot. Start with the first flatbread you rolled out. Place the bread into the pan, 1” (2.5 cm) apart. Cook covered, until the bread is cooked through and has turned golden on the surface, about 2 minutes or so per side. If the bread browns too quickly, turn to medium-low heat. If the surface is not quite golden after the full 4 minutes, uncover the pan, then keep cooking the flatbreads for 1 minute per side. Once done, set aside to cool.
Assemble
- Transfer one piece of pork belly onto a cutting board, cut it coarsely into small chunks. Place a handful of cilantro and a handful of diced peppers on top of the pork. Use a knife to chop and mix everything together. Slice the buns horizontally in half to form a pocket, with the end still attached. Use a spoon to stuff the pork mixture into the bun and drizzle a spoonful broth onto the pork. You can add a few drops of chili oil if needed. Serve immediately.
Notes
- Try to select pork belly that contains 70% to 80% of lean meat, so the finished meat will have a good lean-fat ratio and will be tender without tasting greasy.
- Anaheim pepper is a great choice because it is not overly spicy but is more flavorful than bell peppers. If you want to add spiciness, you can mix in some jalapeno peppers as well. I used a mix of sweet peppers and jalapenos for the color and the spicy taste.
Nutrition

Did you make this recipe?
I’d love to hear how it turned out for you! Please take a moment to leave a 5-star rating ⭐️ and share your thoughts in the comments further down the page. It really helps others discover the recipe too.
The recipe was updated on Mar. 29, 2018 and republished on July, 2026.
Esther
Hi Maggie, any other cuts of pork that may be suitable? Thank you!!
Maggie Zhu
Yes! Pork shoulder and shank is one of my favorite cuts for this dish, because it’s not as fatty and very flavorful. The connection tissues melt away after the slow braising so the pork is buttery tender. Another great option is pork ribs. But if you use ribs, you might need to double the braising liquid (water plus seasonings) because ribs take up more space to braise. You can easily remove the bones once the pork is tender and the ribs will taste great.
Gilda
Thank you so much for this wonderful recipe! I made the buns from scratch as well as the meat and sauce. This is the sauce I’ve been looking for for years. The taste is just one of a kind. I will be making my own flat bread from now on. Xie xie Maggie.
Elaine
Maggie- love your blog and meticulously detailed recipes. Turned this dish into an Asian “French dip” — put meat in soft French loaves with some pickled onions. Diluted braising liquid a bit in a small bowl with some chicken broth (though I imagine water would be ok too) and added chopped cilantro which became my au jus dipping sauce. Had some arugula and pickled daikon and carrot tossed with light vinegar/sesame oil dressing on the side for some freshness to cut the unctuous of the the pork. Really satisfying and delicious.
Elle
This is my new favorite way to prepare pork belly! My husband loved it the next day as well and said next time, just braise 8lbs of it so he can have even more leftovers lol. Thank you for a wonderful recipe. We will be making this often!
thwoo
Made this recipe yesterday and my husband LOVES it! We ate it as you illustrated with soft taco and I made a tomato salsa with it. Fantastic! And it was sooooo easy to make. Will definitely make it again for the next family party.
Pedro
These look like arepas!!!
Maëva @ Travel&Food
Oh my Lord! I just want to dive right in.
These look DIVINE.
J-Mom
I used different meat cuts because I couldn’t get pork belly but this was divine! My husband and I both stuffed ourselves silly because it was so hard to stop eating. After finishing the buns, my husband was still picking on the pork. Thank you for the recipe.
Maggie
I’m so glad to hear you tried the recipe and enjoyed it! It is a famous street food in China that I hope more people would like to try out. Hope you have a great day and happy cooking 🙂
Natalie Martinez
Thank you, Maggie! I lived in Xi’an for 4 years, and have been seriously homesick for the food of Shaanxi province lately. The only restaurant that I can find that serves it is in NY (and I’m in CA!). This was my favorite Xianese dish, so thank you so much for taking the time to develop the recipe. Big hug!!!
Maggie
Hi Natalie, I’m so glad you like this dish! It’s one of my favorite street food and it’s super famous in Beijing as well. I haven’t found a place serving this dish in Texas yet. So yes, it’s great that we can cook it in our own kitchens 🙂
Happy cooking and let me know how it turns out!
jose
Dear is similar whit a chicken or beef?
regards, jose
Maggie
Both works, but I would suggest to use a well marbled beef cut or chicken tight, otherwise the meat might turn out dry.
David
Hi, Maggie. i just went on a shopping adventure at the Asian market and picked up some pork belly. Do you think this recipe would work as a filling for the sticky rice cakes since I’m gluten free? Thanks for your continued advice while I explore Asian cooking.
Maggie
Hi David, I believe it works in the sticky rice cake. But I personally would suggest to served them on the steamed rice or boiled rice noodles. After braising the pork belly, you will get very a delicious broth. We normally use the wheat bread to soak up some broth. Plus you will want to add some veggies (chopped peppers in this case), to balance the pork fat, so the whole thing won’t be too heavy. The flavor will be different if you only wrap the pork inside of the rice cake. For a gluten free dish, you can simply top the pork belly, broth, and chopped veggies on a bowl of rice or rice noodle soup (blend the braising broth into the water you used to cook the noodles to make the soup). It should be very delicious 🙂
veronica
Thank you very much Maggie!I had been looking these recipe, exactly like yours. I lost my auntie last year, and only her could cooked these. Thank you once again
Maggie
Hi Veronica, I’m sorry to hear about your aunt. Thanks for leaving a comment and I’m so happy to hear you like my recipes! If you are looking for a Chinese recipe, drop me a message anytime and I’ll try to develop it for you 🙂
Have a great weekend!
Thomas
I cooked a one-pound batch of this stuff and have been working my way through it over the past week. Every time I have some, I have to eat at least three sandwiches. I seriously can’t stop at just one or two. It is literally addictive.
The recipe yields two pretty nice by-products, I noticed. The fat that floats to the top of the broth is awesome for fried rice and the broth itself (there was a lot left over) can be easily turned into a sauce that goes great with vegetables or noodles. Yum!
Maggie
Thanks for the tip of using the pork fat! Sometimes I think it’s too fatty and just threw them away… what a waste!
Yes, the broth part is very delicious and you can boil / stir fry other things with it. Next time I will use those fat and broth to fry rice noodles. Should be so delicious! 🙂
marcela
wow! Everything looks insanely tasty!
I can bet that I’d eat everything you cook/bake and beg for more:)
Maggie
Hi Marcela, thanks for stopping by my blog! Glad you like the recipes here. Happy cooking! 🙂
Lokness @ The Missing Lokness
I am sure the whole house must smell fantastic when you were making these! Love that you make your own buns too! These pork belly buns sounds very comforting and savory.
Maggie
Yep, you’re right about the nice fragrant from the braised pork and it makes me hungry! The buns take some time to make, but the fresh ones tasted so much better than the supermarket ones. 🙂