
Kung pao chicken is a favorite on every Chinese restaurant menu. But not everyone eats meat and even if you do, perhaps you’re looking for a meatless meal to keep up with your healthy lifestyle.
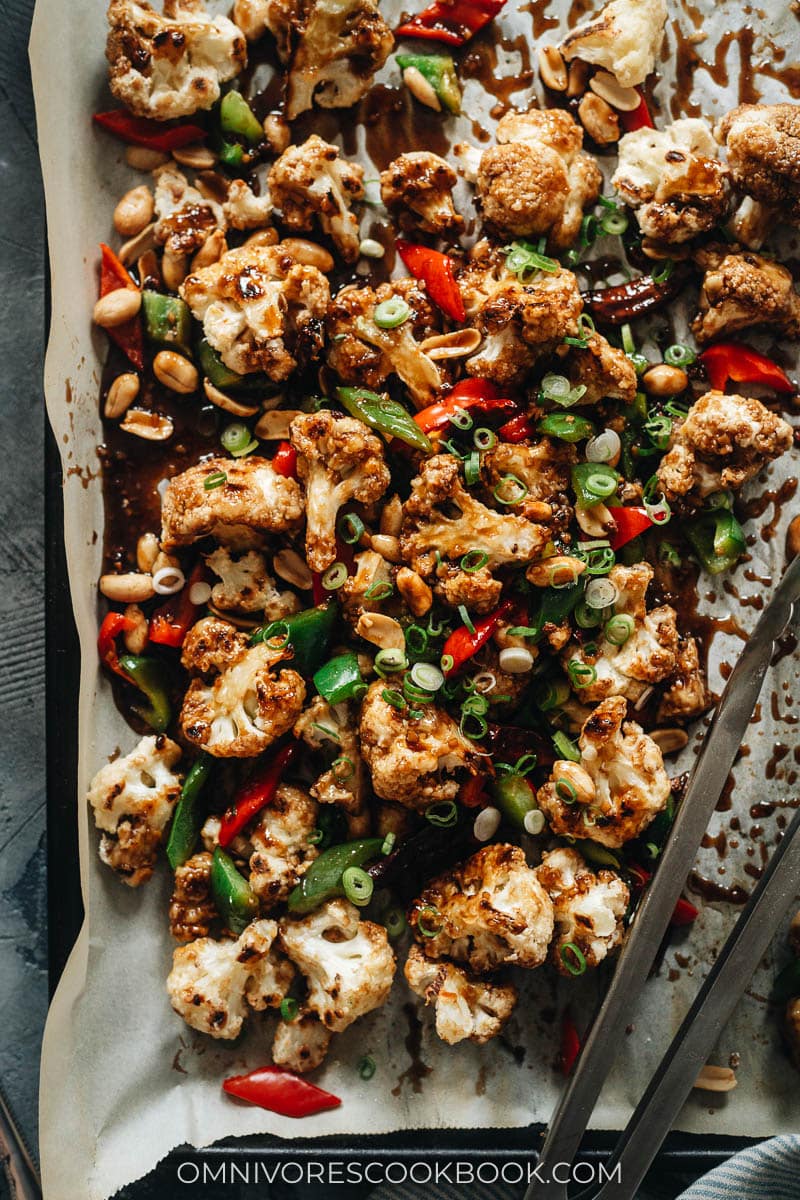
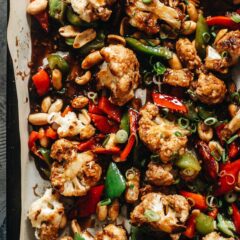
That’s where kung pao cauliflower comes in. Honestly, I think cauliflower can do just about anything. I’ll show you how to make kung pao cauliflower with that same sticky glossy sauce you love for its savory, sweet, sour, and spicy notes.
Why this recipe
To make it, the cauliflower gets coated with a thin batter and then is baked until crispy. Kung pao cauliflower is definitely a healthier version of this restaurant dish that’s often cooked with lots of oil. As much as I like a crispy battered cauliflower, I actually found that some restaurant versions use too thick of a batter, which robs the taste from the cauliflower.
After testing many formulas, we discovered the best way to create crispy cauliflower for this dish without deep-frying it. So the coating is a bit thinner than the kind you see in restaurants, especially with fried cauliflower dishes, yet it’s crispy and satisfying.
Honestly, I like the thin coating better. Not only is it healthier, but it also brings out the best texture of the cauliflower. Kung pao cauliflower is a vegetarian dish, but if you use plant milk, you can make it completely vegan.
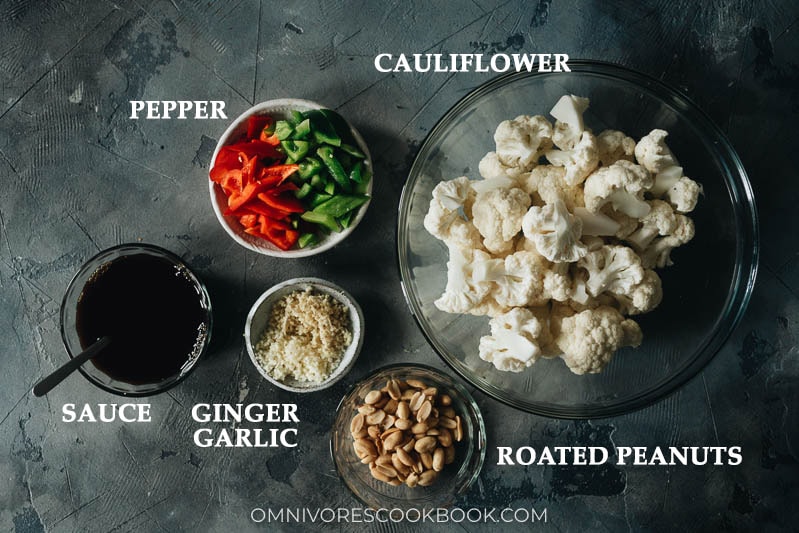
Ingredients
I know the ingredient list looks long, but don’t let that scare you off.
Once you’re done prepping, you can group your ingredients into a few bowls (See the picture below, plus the coating for the cauliflower).
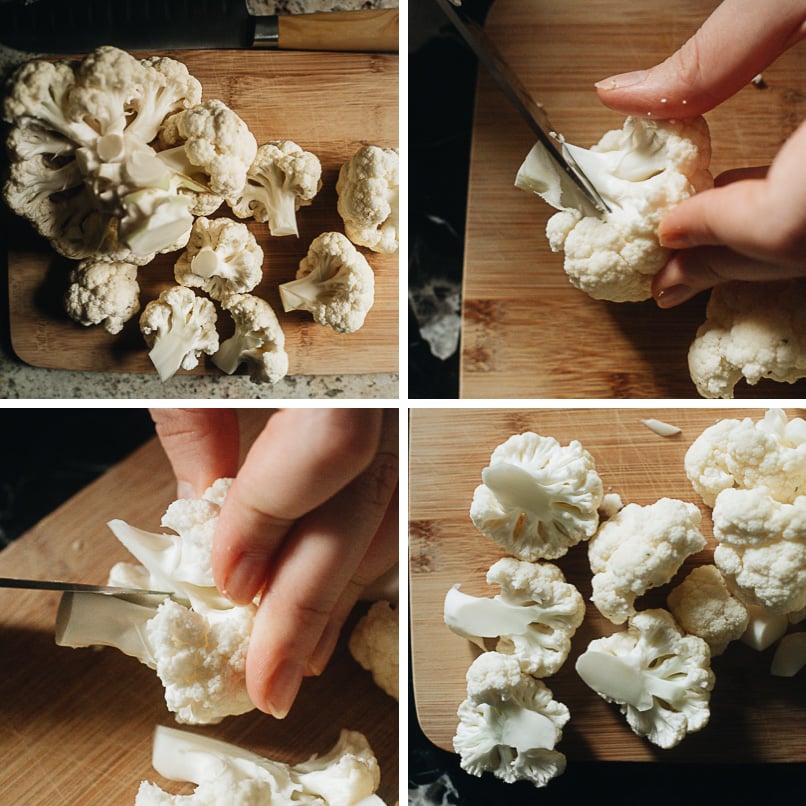
TIP – How to cut cauliflower for roasting
After many rounds of testing, we found out that it’s best to cut the cauliflower into small-ish bite-sized florets. This way, the dish will result in a better texture with properly cooked cauliflower and a crispy coating. If you cut the cauliflower too big, the cauliflower will release too much moisture during the baking and it will prevent the batter from crisping up.
To cut the cauliflower:
- Cut off the florets
- Use your knife to split the florets into 2 to 3 pieces, depending on the size
- I like to cut the stem of florets with a tilted knife, then use my hands to split the head part.
- This way, you will have very few cauliflower “crumbles” falling off during the cutting. The cauliflower will have a slightly uneven surface that yields a better texture on the thin ends, plus it holds the sauce better.
Cooking process
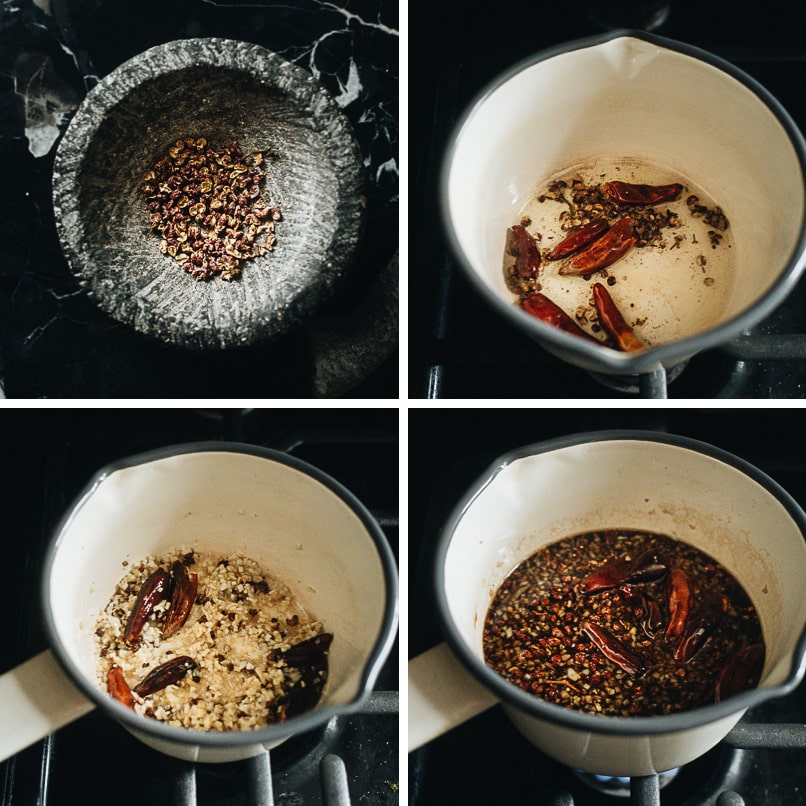
Make the sauce
- Grind the Sichuan peppercorns
- Cook the peppercorns and dried peppers to release fragrance
- Cook the ginger and garlic
- Pour in the sauce liquid and cook until thickened
PS. I prefer to grind my Sichuan peppercorns a bit coarse, so it’s not overwhelmingly numbing.
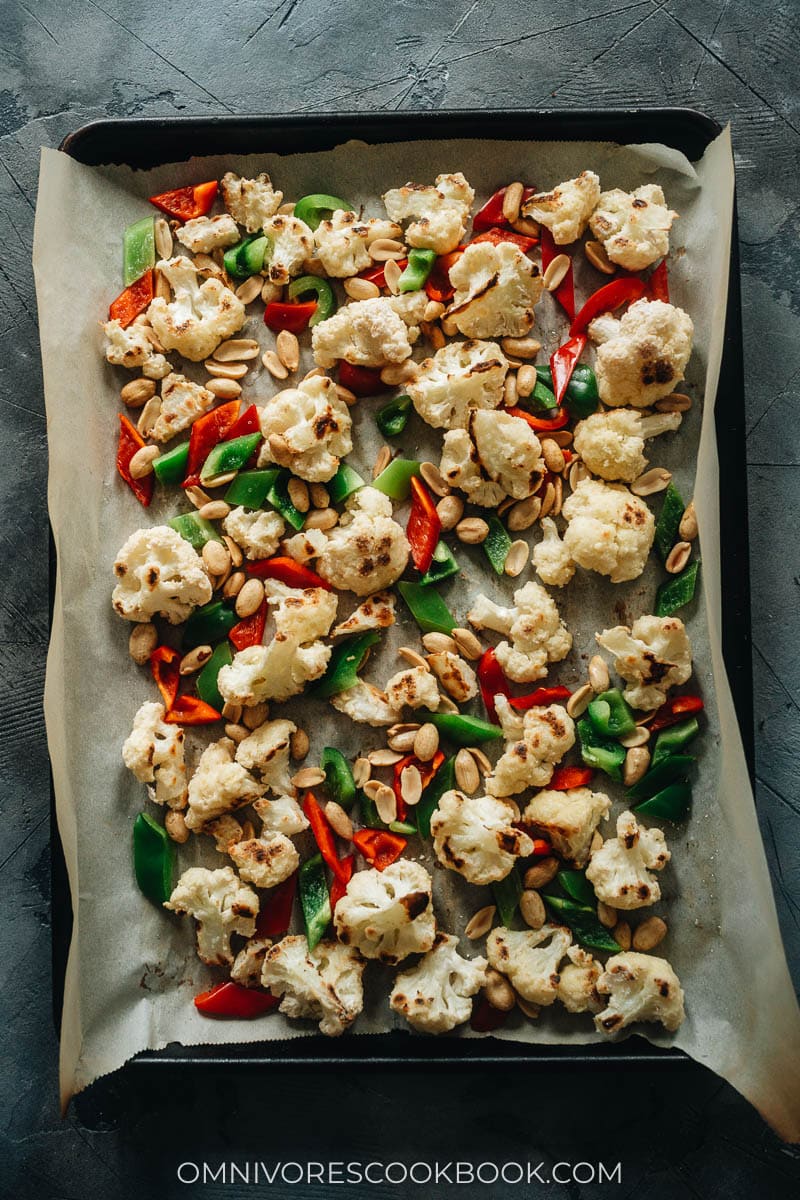
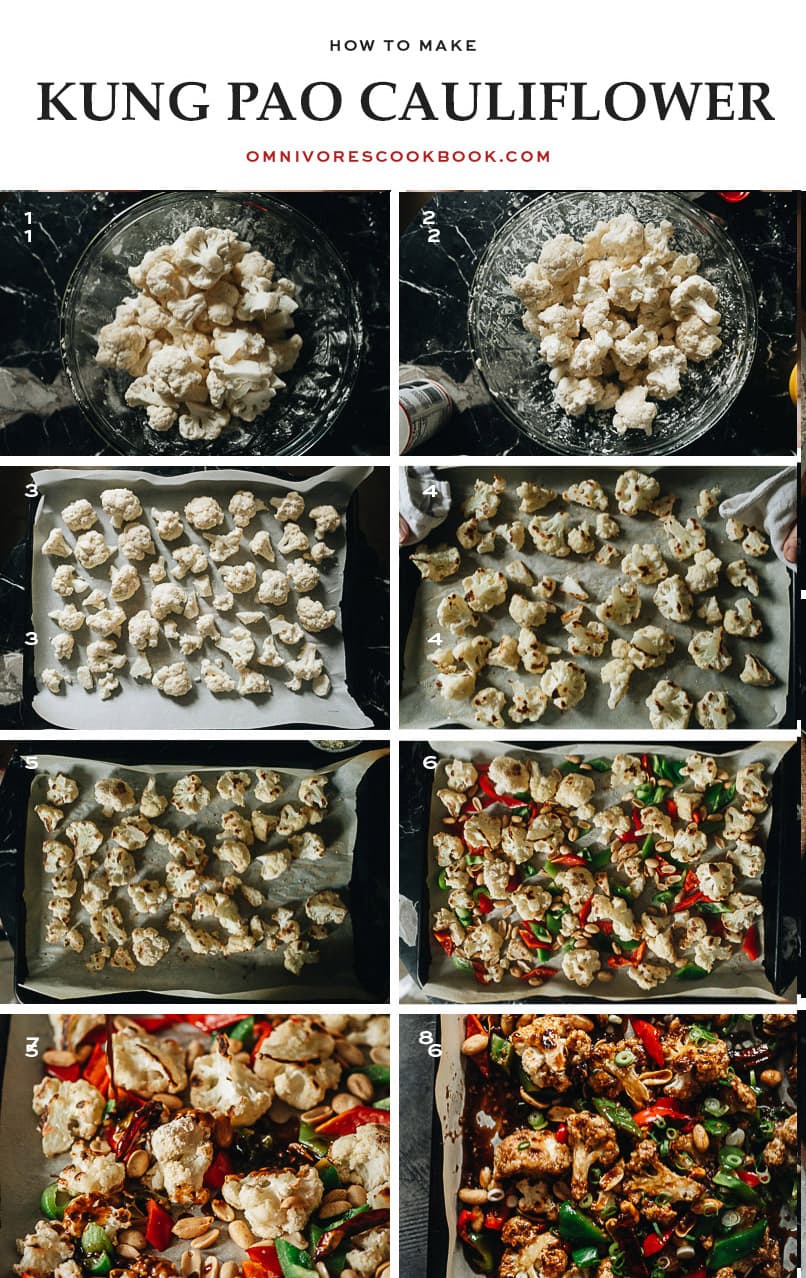
Roast the cauliflower
- Coat the cauliflower with oil and milk
- Then coat the cauliflower with the dry ingredients
- Arrange the cauliflower on a baking sheet, leaving space in between (very important)
- Roast for 15 to 20 minutes and flip once
- Keep roasting until the cauliflower is cooked and the coating is super crispy
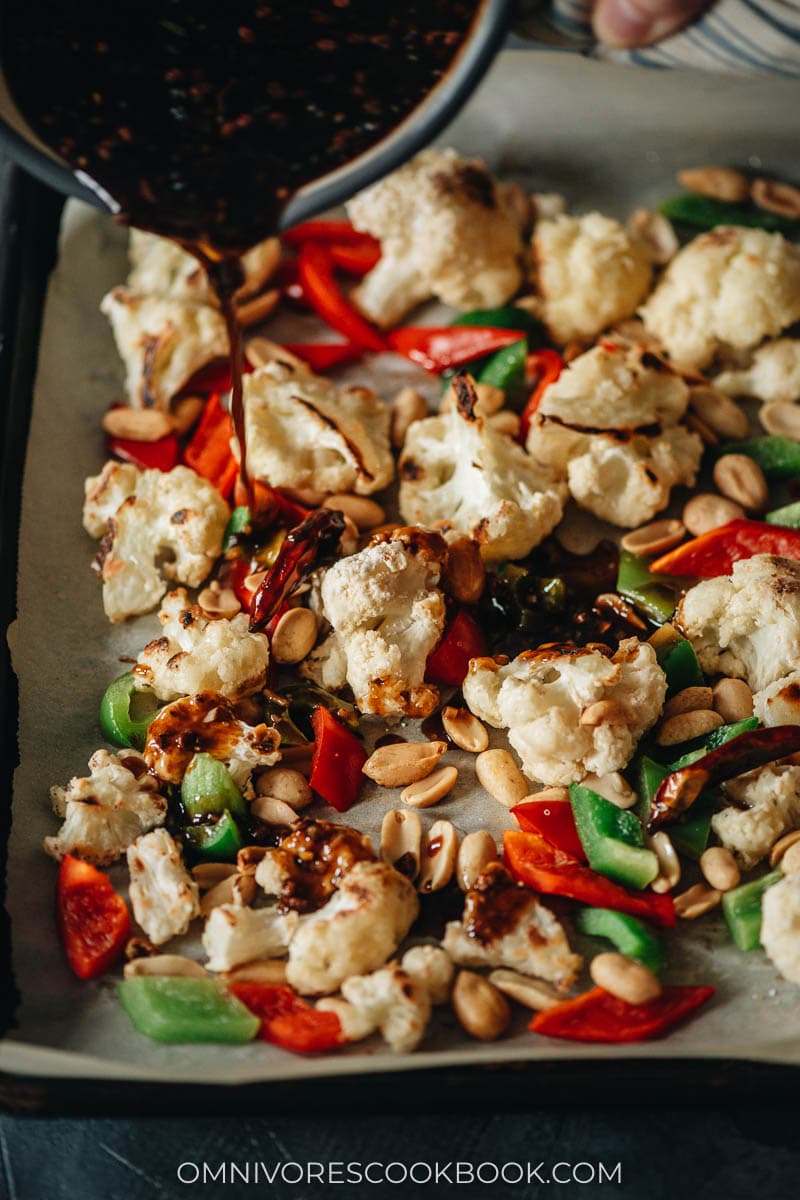
- Add the peppers and peanuts and give it a quick roast
- Stir in the sauce
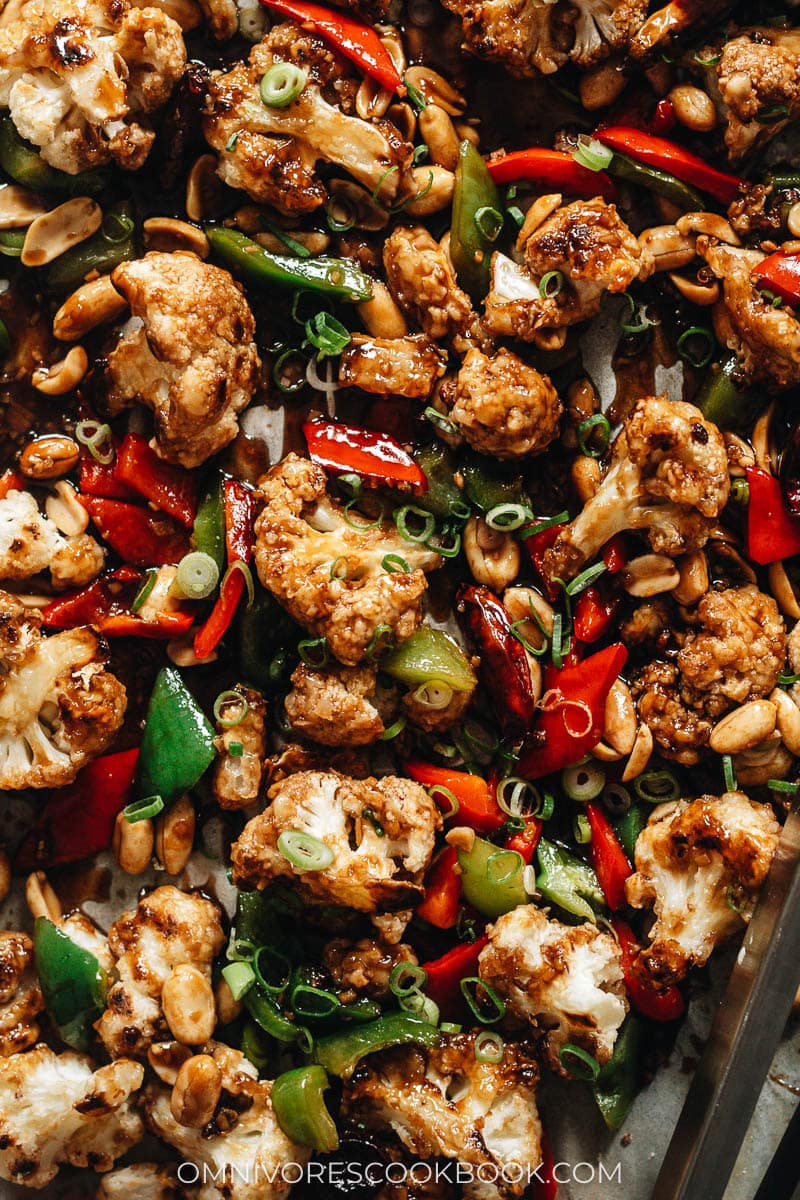
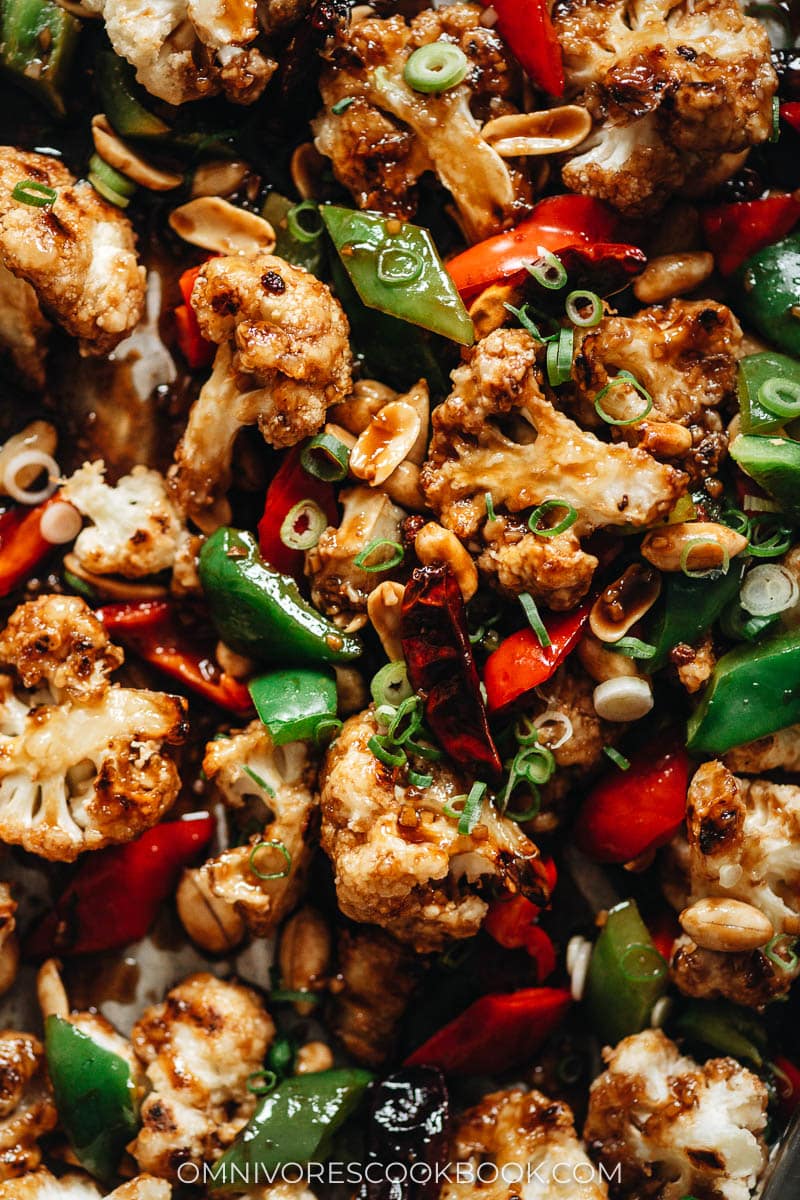
- Coat the cauliflower with sauce and enjoy!
You’ll be surprised how crispy this baked cauliflower turns out.
This dish is so easy and simple to put together and you’ll be rewarded with scrumptious flavors and fragrant aromas. Definitely pair kung pao cauliflower with rice to make a dinner that you’ll love. It can work as an appetizer or be served as one of your main dishes when you’re having people over. Why not invite them for a homemade Chinese takeout-themed dinner? It will be perfect!
Want to learn more about Chinese Cooking? Sign up my newsletter to receive the 5-Day Chinese Cooking Crash Course and recipe update!
Chinese Cooking Made Easy
Are you new to this website? This free email series is a great place to start. I’ll walk you through a few of my most popular recipes and show you how and why they work. You’ll quickly start to cook better Chinese food in your own kitchen.
Kung Pao Cauliflower (宫保菜花)
Ingredients
- 1 medium or small head cauliflower , cut into small florets
- 1 tablespoon peanut oil (or vegetable oil)
- 1/4 cup flour
- 1/4 cup milk (or non-dairy milk)
- 1/4 cup cornstarch
- 1/2 cup roasted peanuts
- 1 bell pepper , cut into 1” (2.5 cm) pieces
- 4 green onions , cut into bite-sized pieces (*Footnote 1)
Sauce
- 1/4 cup and 2 tablespoons Chinkiang vinegar
- 1/4 cup Shaoxing wine (or dry sherry)
- 1/4 cup soy sauce
- 1/4 cup sugar
- 1 tablespoon cornstarch
- 1 tablespoon peanut oil (or vegetable oil)
- 1 teaspoon Sichuan peppercorns , crushed
- 6 dried Chinese chili peppers
- 1 ” (2.5 cm) ginger , minced
- 4 cloves garlic , minced
Instructions
- Preheat the oven to 450°F (232°C). Line a large baking tray with parchment paper and spray with a light coating of cooking spray.
- Combine the Chinkiang vinegar, Shaoxing wine, soy sauce, sugar, and cornstarch in a medium-sized bowl. Stir to dissolve the sugar and cornstarch.
- Dry the cauliflower thoroughly with paper towels. Add the cauliflower florets to a large bowl. Drizzle with oil and toss a few times. Add the flour and toss until the the florets are coated. Pour in the milk and toss again. Add the cornstarch and toss until the cauliflower is evenly coated. Spread the coated cauliflower on to the lined baking tray, making sure the pieces are evenly spaced out with gaps in between (*Footnote 2). Bake for 25 minutes in total. Check the cauliflower at the 15- and 20-minute marks. If the bottom is browned, flip the cauliflower. Once the baking is finished, the cauliflower should turn golden brown spotly and crispy throughout.
- While the cauliflower is baking, make the sauce. Add the oil, peppercorns, and dried chilis to a small saucepan and turn the heat to medium-low. Once they become fragrant, about 1 minute, add the ginger and garlic. Cook until they are just starting to brown, another 1 to 2 minutes. Stir the sauce again to re-dissolve the cornstarch completely and add it to the pan. Raise the heat to medium-high and bring it to a boil. Boil until the sauce is just thickened. Remove the pot from the heat and set it aside.
- After the cauliflower has baked for 25 minutes, pull the tray out and turn the heat to 500°F. Add the peanuts, peppers, and green onions. Put the tray back in the oven and cook for another 5 minutes, until the peppers are lightly cooked.
- Pour the sauce over the cauliflower and gently toss to coat (*Footnote 3). Serve immediately as a side or a main.
Notes
- It’s important to cut the cauliflower to the right size to ensure even roasting and browning. See the blog post above to see how to cut the cauliflower.
- It’s very important to leave some space between the cauliflower florets, so the cauliflower will release steam and turn crispy once baked. If your baking tray does not have enough space, bake the rest in a separate tray. You can bake both trays at the same time by place the smaller tray on a different rack.
- If you’re not serving the dish immediately, let the cauliflower cool off for a bit before tossing in the sauce. The cauliflower will stay crispy better this way.
Nutrition

Did you make this recipe?
I’d love to hear how it turned out for you! Please take a moment to leave a 5-star rating ⭐️ and share your thoughts in the comments further down the page. It really helps others discover the recipe too.
If you give this recipe a try, let us know! Leave a comment, rate it (once you’ve tried it), and take a picture and tag it @omnivorescookbook on Instagram! I’d love to see what you come up with.
More delicious vegetarian/vegan recipes
- Bok Choy Soup
- Fire Roasted Eggplant with Garlic Vinegar Sauce
- Napa Cabbage Stir Fry with Vinegar Sauce
- Chinese Napa Cabbage with Glass Noodles
- Instant Pot Lentil Soup (Chinese Style)
Lilja Walter is a part of the Omnivore’s Cookbook team and worked closely with Maggie to develop and test this recipe.
Raúl
Great recipe, I never get tired of it
Dane Henas
My wife and I loved this recipe! I made the Kung Pao Sauces a week ago and having that ready-made mad the dish so easy! I kept looking for a mention of a wok or saucepan and to my surprise it was all done in the oven! My only suggestions is that you have a conversion of your recipes to the metric system. I’m in the U.S., but find that measuring ingredients by weight is much more accurate. In this recipe a “small or medium cauliflower” is open to interpretation. I had a large cauliflower so I guessed and used half of it. It turned out fine, but now days some things like Serrano or Jalapeno chilies are so huge that it’s almost impossible to know what the recipe’s intention is. Anyway, we loved it and will add it to the “keeper” file!
Barbara
Very good! Just made it and I will make it again! Thank you 😊
Louise Samson
Great texture and excellent taste. Thank you, Maggie!
Steven
First time trying this recipe which was very easy to make however I found it too sweet snd my cauliflower was soggy and it’s was not spicy so added additional Szechuan peppers and Thai chilies.
Next time I will just drizzle the sauce and reduce the sugar by half.
Stella
This was super tasty, and my family loved it too. Thank you!
Pam
Hello – this sounds delicious! Are all of your recipes vegetarian? I would like to add some meat protein. Also you cookbook sounds wonderful. Is it entirely vegetarian? I love vegetables but my hubs wants some meat added. How would you suggest I do that if the recipes are only plant based? Thank you so much in advance if you take the time to answer my question. Have a wonderday evening/day.
Maggie Zhu
Hi Pam, I do post a lot of meat recipes. The majority of my recipes are not vegetarian, but I do have a plant-based cookbook: Chinese Homestyle.
My other cookbook (it is E book only) is about Chinese sauces and it is not vegetarian: https://omnivorescookbook.com/The-Chinese-Stir-Fry-Sauce-Cookbook