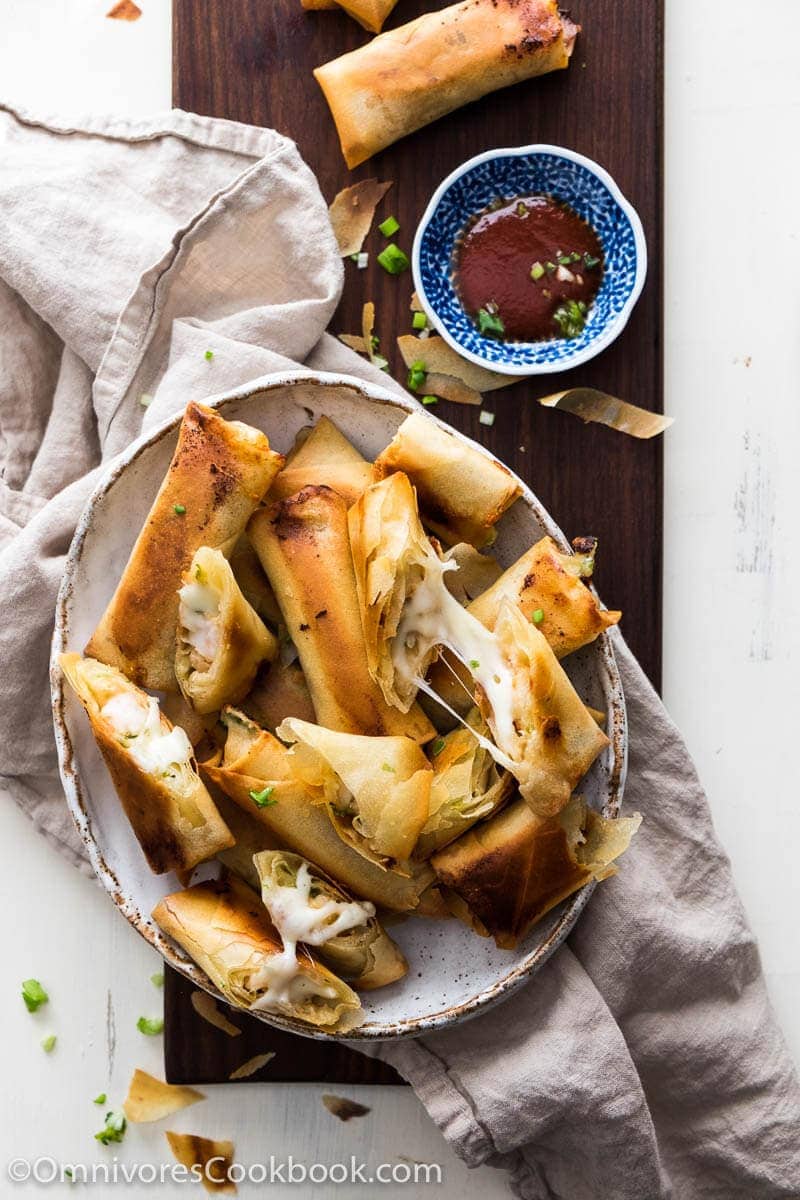
Authentic Chinese spring rolls are delightful treats, but the cooking makes my head ache every time I think about it. Nobody likes deep frying at home. Neither do I. Unless I’m cooking for a party or celebrating Chinese Spring Festival (Chinese New Year), I seldom use tons of oil just to fry a few spring rolls.
So, what do you do when you’re craving those crispy and crunchy rolls? The solution is – bake them!
Baked spring rolls do not look as pretty as deep fried ones, which have an even golden color and a nice sheen. I almost gave up publishing this recipe at first because of the look of the dish. Let’s admit it, nobody would like to try a new recipe if the picture doesn’t look appealing.
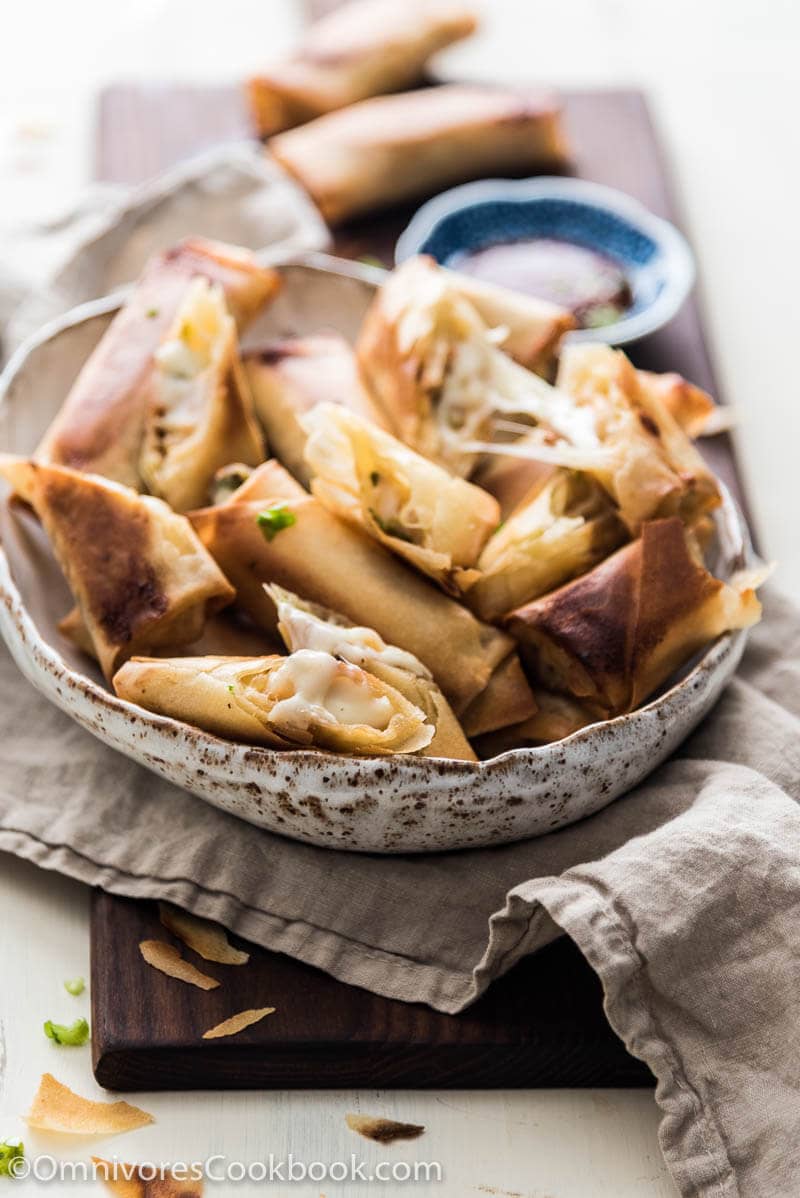
But these rolls are too good to pass on. So I decided to find a perfect way to bake them to make them look slightly prettier (and more delicious, of course!).
To test the best baking temperature, I tried baking the spring rolls at low and high heat. I found out that although baking at lower temperature cooks the spring rolls more evenly, it takes a lot longer to get them colored. By the time the wrapper is done, the filling will be way overcooked.
The spring rolls turned out much better when I raised the oven temperature to 200 degrees C (400 F). You’re probably not going to get an even color on the surface, but the whole thing is crispy, so it’s as great as the fried rolls.
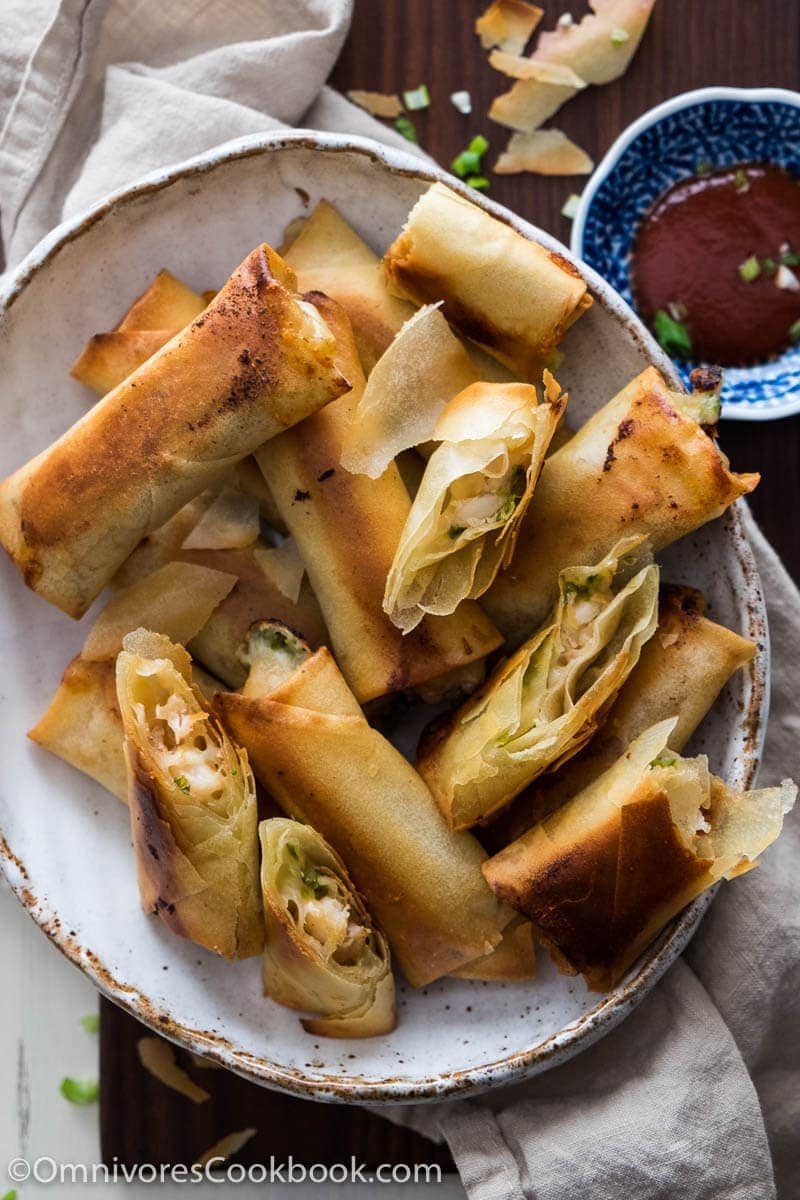
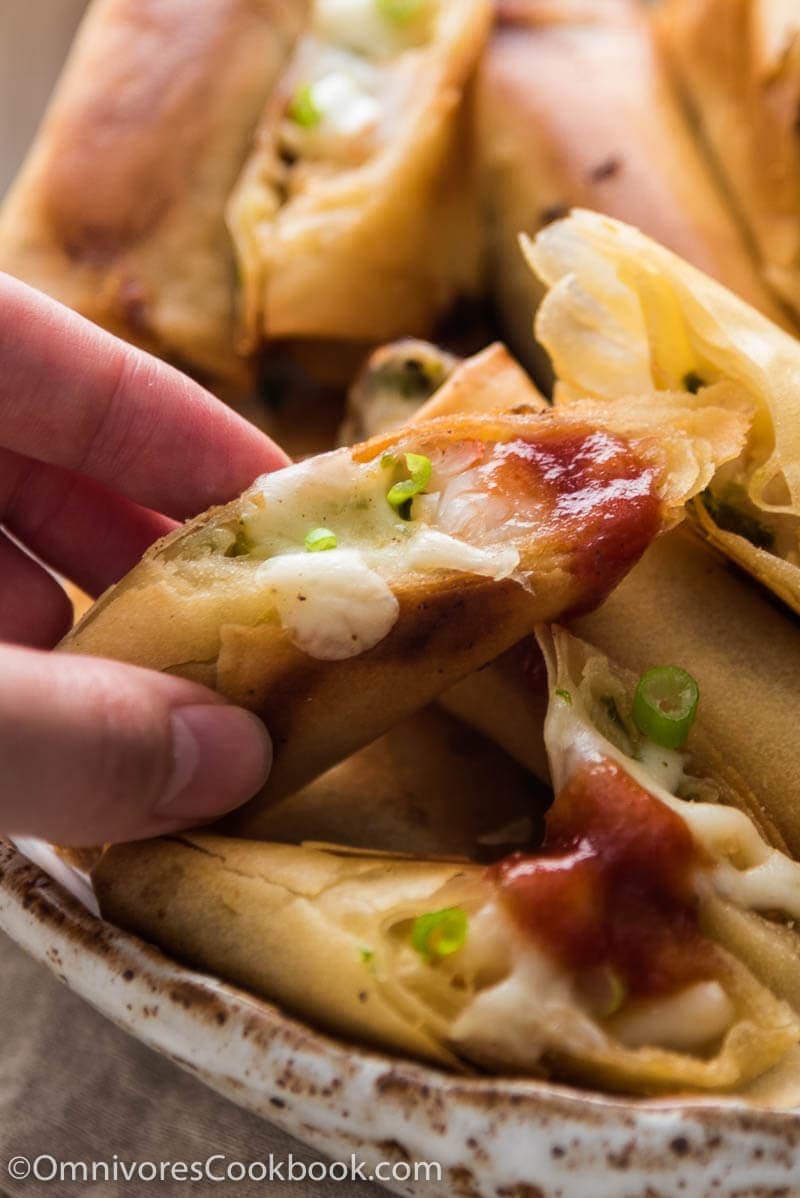
As you might have known, most spring roll (and egg roll) recipes require you to cook the filling before assembling them. So much work, isn’t it? To make the cooking process easier, I used a simple filling in this recipe that does not require precooking. You only need to marinate the shrimps for 10 minutes, then mix them with cheese and green onions. The shrimps will be just cooked through, the cheese will melt, and the wrapper will turn super crispy. I served these baked spring rolls with a ketchup based dipping sauce. They are addictively good!
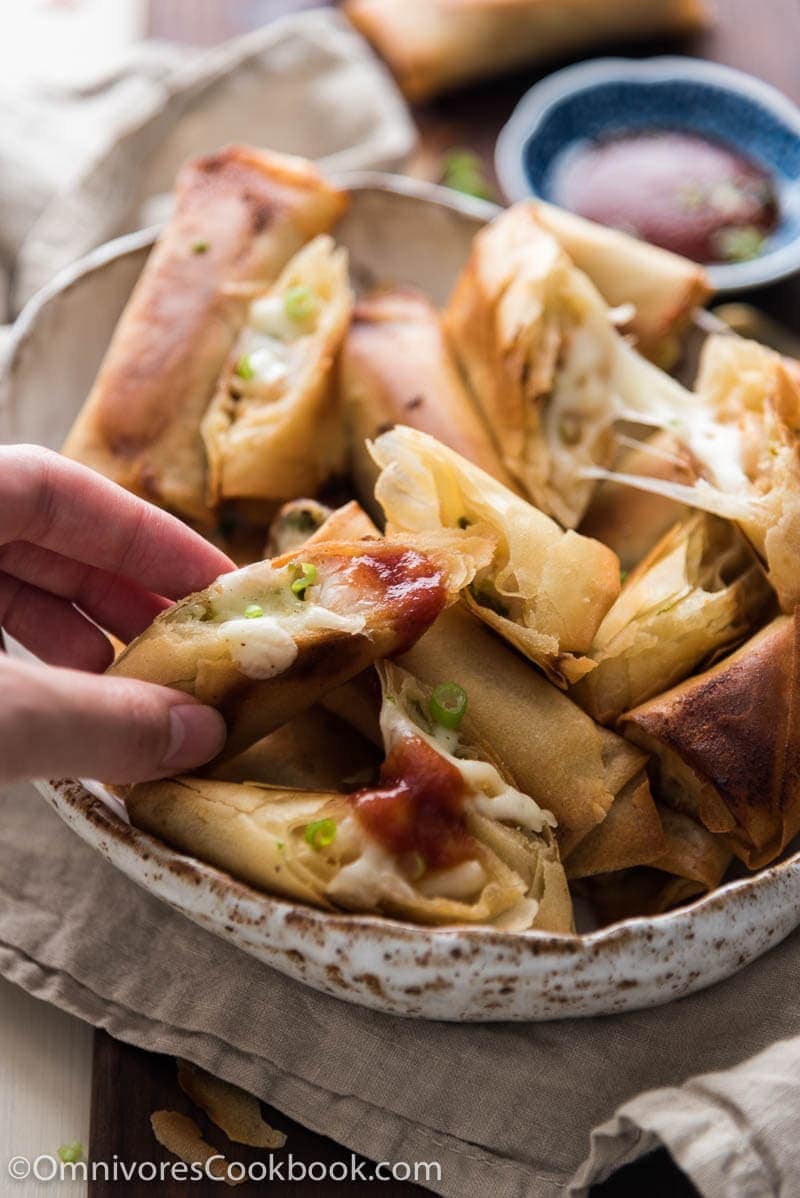
This is not an authentic Chinese recipe but I cannot wait to share it with you. Who says we can’t be playful with food once in awhile? I have no problem with that, as long as the food is tasty! 😉
Hope you enjoy!
Chinese Cooking Made Easy
Are you new to this website? This free email series is a great place to start. I’ll walk you through a few of my most popular recipes and show you how and why they work. You’ll quickly start to cook better Chinese food in your own kitchen.
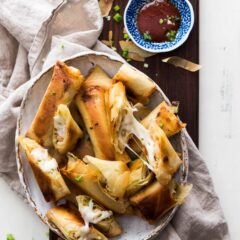
Cheesy Shrimp Baked Spring Rolls
Ingredients
Marinade
- 1/2 pound (230 grams) shrimps , peeled and deveined (about 16 to 20 medium size shrimps) (*footnote 1)
- 1 tablespoon Shaoxing wine (or rice wine, or lemon juice)
- 1 tablespoon soy sauce
- 1 teaspoon ginger , grated
- 1/4 teaspoon white pepper powder
Spring rolls
- 4 green onions , finely chopped
- 1 cup shredded mozzarella cheese
- 1 pack spring roll wrappers
- 4 to 5 tablespoons peanut oil (or vegetable oil for baking)
Sauce
- 4 tablespoons ketchup
- 2 tablespoons rice vinegar
- 2 teaspoons Sriracha sauce
- 2 teaspoons honey
Instructions
- Chop the shrimps to 1-cm (1/2-inch) pieces. Transfer to a bowl. Add Shaoxing wine, soy sauce, ginger and white pepper powder. Mix well and let marinate for 15 minutes.
- Preheat the oven to 200 degrees C (400 F).
- Set up all the ingredients before assembling the spring roll. Drain the shrimp thoroughly and discard the marinade. This is very important, so the shrimp won’t be too wet to cause the wrapper to break apart during baking.
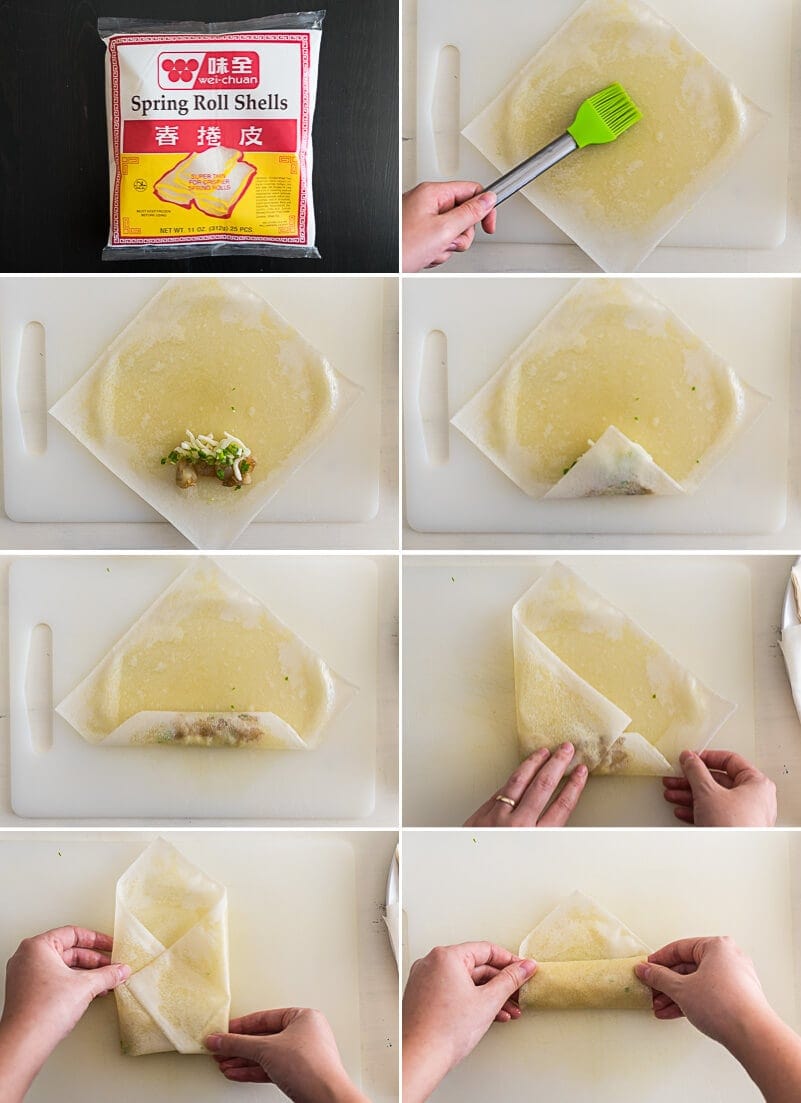
- Wrap the spring rolls one by one. Spray or brush a thin layer of oil onto the top of the spring roll wrapper (*footnote 2). Place 4 to 5 pieces of shrimp, about 1 tablespoon mozzarella cheese and 1 teaspoon green onion on the lower third of the wrappers (*footnote 3). Fold the bottom to cover the filling. Then fold both side of the wrapper towards the center. Tuck and roll the filling upward to seal the wrapper until it forms the spring roll. Place each spring rolls onto the lined baking sheet, seam side down, with about 2 fingers apart in between.
- Bake for 9 minutes, or until the bottom turns to a golden color. Flip the spring rolls and put them back in the oven. Bake for another 6 to 8 minutes, until the other side looks golden too.
- To preheat any leftover spring rolls, bake at 180 degrees C (350 F) until warmed through, or for about 10 minutes or so. The rolls will remain crispy.
Notes
- I used Wild Caught Gulf Shrimp from SizzleFish in this recipe. These shrimps are much more flavorful, have a firmer texture, and are a better mouthfeel. The shrimps are peeled, deveined, and packaged into serving sizes that are ready to cook.
- This step helps the spring rolls become even more crisp and it gives them a better color. If this is too much oil for you, you can skip this step and only brush oil onto the spring rolls after putting them together.
- Just like pizza toppings, the rule “less is more” applies here too. Keep the filling small so the ingredients won’t leak during baking.
Nutrition

Did you make this recipe?
I’d love to hear how it turned out for you! Please take a moment to leave a 5-star rating ⭐️ and share your thoughts in the comments further down the page. It really helps others discover the recipe too.

Tea
What other vegetables along with green onions would you recommend I use, to stretch my shrimp as much as I can? I’m fine with having to cook it beforehand. Someone in the comments mentioned using corn and you responded by saying you thought it was a good idea. Anything else comes to mind?
Also, how strong is the green onion taste, if you can remember? Is it cooked enough to mellow it down, or would it be preferable for me to briefly stir-fry it beforehand, if I were serving this to the raw-onion-taste-averse?
Thanks!
Maggie Zhu
I think corns and green peas are both good options. They taste slightly sweet, working very well also due to their size. Another idea is to use diced asparagus. With asparagus, you might need to gently saute it before wrapping.
The green onion flavor was not very strong. It will soften during the baking, so I wouldn’t stir fry it beforehand.
Tea
Thanks! I *did* add a couple small handfuls of corn and peas, and I thought their sweetness blended in just fine. And the onion was indeed quite tame. But… All of my rolls exploded all over my baking sheet! I know that you’ll probably say that I overfilled them (and you wouldn’t be completely wrong), but I didn’t put *that much* more than you instruct; I still rolled each many times ‘over itself’. Plus, only a few were very crispy, most of the wrapper-surface ended up kind of soft.
When I recently made my first standard fried meat+precooked veggies egg rolls, I also squeezed in a bit more filling than is advised, and I never got a single leak and they ended up very crispy. I made sure to drain the shrimp well, btw.
Maybe it’s the longer baking vs frying time, so the filling has extra time to ‘expand’ somehow? Maybe it’s the extra raw vegetables? Could they have ‘weakened’ the wrapper with moisture somehow?
Anyhow, I’m eager to know what you think. I still enjoyed the vibe of them, and the sauce fit nicely taste-wise.
Also, I couldn’t fit all of mine on the baking sheet, so I froze some, but I don’t know whether it’s better to bake them from frozen or to defrost them first?
Maggie Zhu
Hi Tea, thanks so much for the thorough feedback.
I’m surprised that the rolls exploded during baking. It’s not uncommon if the rolls won’t turn out completely crispy, since deep frying is always a better choice than baking when it comes to cooking egg rolls. But if the rolls break apart, it means a lot of air when into the rolls to cause the wrappers to expand.
For the veggies, did you use frozen corns and peas by any chance? The vegetables will leak a lot of water if you didn’t thaw and drain them. That is the only reason I can think of.
For the baking part, you will need to spray a lot of oil over the egg rolls, so the wrappers crisp up. But again, I think the issue you come across with was the moisture from the filling. Even if you didn’t use enough oil, the wrappers should come out chewy but not wet.
For the frozen ones, I would directly cook them without defrosting. The wrapper will probably get more soggy if you defrost first.
Edit: I forgot to mention, it’s also possible the issue was caused by the shrimp. Depending on how the shrimp is treated, some might contain more moisture (treated with salted solution), especially if you use frozen peeled shrimps. The shrimp will release a lot of liquid when you bake them and that causes the soggy issue.
Yafa
I had two egg roll wrappers left after making your vegetable egg roll recipe, so I made a mini batch of these with your sauce. We ate these first and really liked them alot. I had Provolone cheese open, so I used that instead of mozzarella and it was very good. We will make them again – but make a full recipe next time.
Miz Nan
This will be number two of your appetizers that I plan to make!
Anna
Made these today and my family devoured them at once. I added some corn I cut off the cob and used monterey jack cheese. My rolls were a very sad pale white still, but they were cooked through and crispy. Thanks for the detailed directions!
Maggie
The added corns sounds so good! I’m glad you like the recipe 🙂
Re color – it’s a bit tricky to make the baked rolls super yellow like fried. I did spray on extra oil when I made these so they char better 😛
Donna L Batdorff
I love the sound of this recipe, but was unsuccessful making it. My spring roll wrappers do not look like yours. Mine are crisp, see through, round and I had to put them between two moistened paper towels for about a minute in order to soften them enough to roll when I put the stuffing in. Then I tried cooking them and it was a runny mess. I only made 6 to start with, so I have more of the ingredients in the fridge and am going to try again with won ton wrappers and less oil. I am determined to get this recipe right.
Lisa
Hi, I haven’t made this recipe but I’m confused about the use of cheese. i have never made or eaten an Asian dish that had cheese in it. Could you tell me why this recipe has cheese in it?
Thanks!
Lisa
Maggie
Hi Lisa, this recipe is rather an Asian fusion dish that I developed myself. If you’re looking for a more traditional recipe, I highly recommend my Cantonese chicken egg rolls recipe: https://omnivorescookbook.com/chicken-egg-roll
Cherie Fedder
Hi Maggie. Love your recipe for the shrimp spring rolls. I love spring rolls but as you said not the frying and the mess! I really hate the mess of frying. So this is a definite for me and will surely keep my eyes open for more easy to do dishes. Thanks for sharing!!……..Cherie Fedder
Jeff
So, like I said in yesterdays comment I was going to make this recipe, I did, last night. I followed the recipe to the letter on the first batch and I have to say they were PHENOMENAL!!! Unfortunately, I had my sons friends over and I only got 2 of them out of 25.
I then got them together (since they ate most of them) and we had a rolling party for batch number 2. Luckily I had bought a 2lb. bag of the shrimp. I then ran out of Mozzarella cheese, but substituted shredded pepperjack. Wow did that take it to the next level. Anyway, thanks for the great recipe Maggie and I’ll be stopping back more often.
Maggie
Hi Jeff, I’m so glad to hear you guys enjoyed the dish! Adding shredded pepperjack sounds so delicious. I’ll need to try that out soon.
The rolls are indeed addictive, and my husband and I always eat too much every time I cook it. I’m really happy to hear it worked out great for a larger party too 🙂
Have a great weekend Jeff and I hope to see you more often here!
Jeff
***UPDATE*** ***UPDATE*** ***UPDATE***
Hi Maggie, I guess I am a glutton for punishment as I opted to put these on my Super Bowl spread. I particularly don’t care for rolling a large amount of egg rolls, BUT I sure love eating them! We had a large group of people, (20-30 in and out) and ended up rolling a 100 of these bad boys. I did 50 of the shrimp, and then did 50 more with a buffalo chicken filling and pepperjack, following your procedure. The only thing I did different was baked them on a rack so I didn’t have to turn them. They turned out FABULOUS, again,
Just wanted to say thanks again for the recipe! Jeff
Maggie
Hi Jeff, thanks so much for the update! Wow, you guys did make a LOT of the spring rolls. I hope you had some help instead of doing all the cooking by yourself!
The buffalo chicken filling sounds awesome! Did you cook the chicken or get it from supermarket? I think I’ll need to try out your recipe the next time 🙂
Also, love the idea of baking the spring rolls on a rack! More experiments to do in the kitchen!
Have a great week ahead Jeff 🙂
Aiden Berringer
I’ve spent some time on your website and am perplexed as to why nobody ever seems to MAKE any of your recipes. Are these comments from friends and family who are just trying to humor you? Because the best thing a person could do, is not comment until they have actually cooked something. Otherwise it just appears as if people are placating you. I won’t spend a moment longer on this site for that very reason.
Jeff
Hey, why don’t you try making the recipe yourself you dickhead. I’m doing them tonight and I certainly will comment on taste and texture.
Colette
Not sure why you find it necessary to write such a negative message. First of all, have you even tried this? If not then…. Shut it. I will for sure try this for my daughter’s shower. I will let you know. A thanks for sharing
CHRISTINE
Maggie, I’m the Instagram follower who asked a question about the spring roll wrapper difference. I decided to hop on here to see if you’ve posted any pictures of the specific brand you used so I don’t keep pestering you on IG. I’ve been searching online for the past hour and can’t find any reliable stores that carry it. Do you have any stores to recommend? I really, really, really want to try this recipe, please. Cheers
Maggie
Hi Christine, I didn’t have any luck locating this product online. The only store I found is this one: https://www.jetspreeinc.com/products/spring-roll-wrap-spring-home?utm_medium=cpc&utm_source=googlepla&variant=11816582849 It is a different brand. I’ve used it before and it will work. The best way is to travel to an Asian market if you can find one near your home. Because the product is fresh and requires keep frozen, it’s quite difficult to find online. Worst case you can still use egg roll wrappers. Egg roll wrappers are thicker than the spring roll wrappers, but should still general crispy texture in the oven.
CHRISTINE
Thanks very much for the link, Maggie. I had seen the site advertised whiles searching but just assumed it was linked to the awful Jet website. I live out in the boonies of the Atlanta so all the Asian stores are about 3 hours plus drive to and back home. I guess I’ll have to wait till I make a trip downtown next month to buy this wrapper and I hope they even carry it.
Maggie
If you travel to Atlanta next time, try Buford Highway market (our favorite) or H Mart. Pretty sure that Buford Highway freezer section will have it. My sister in-laws live in Atlanta and we spend spend Thanksgiving there every year. We visit the Buford Highway market every time because it’s so great!
Alma @ Writer India
What a magnificent recipe! I do not assume I’ve ever before seen a dish for baked spring rolls prior to and also I so enjoy the concept that you don’t have to pre-cook the filling. Certainly going to offer these a shot!
Helen @ Scrummy Lane
What a fabulous recipe!
I don’t think I’ve ever seen a recipe for baked spring rolls before. And I so love the idea that you don’t need to pre-cook the filling.
Definitely going to give these a try!
Maggie
I guess people are reluctant to post them due to its less appealing appearance. But believe me, they taste just as great as the fried ones!
Have a wonderful weekend Helen 🙂
alexa.al
Look so nice. I will try to cook it.
Soe @limeandcilantro
I love your recipes. You have a knack for making fusion food. These look delicious. I am definitely baking my spring rolls next time. I don’t care if they don’t cook evenly haha.