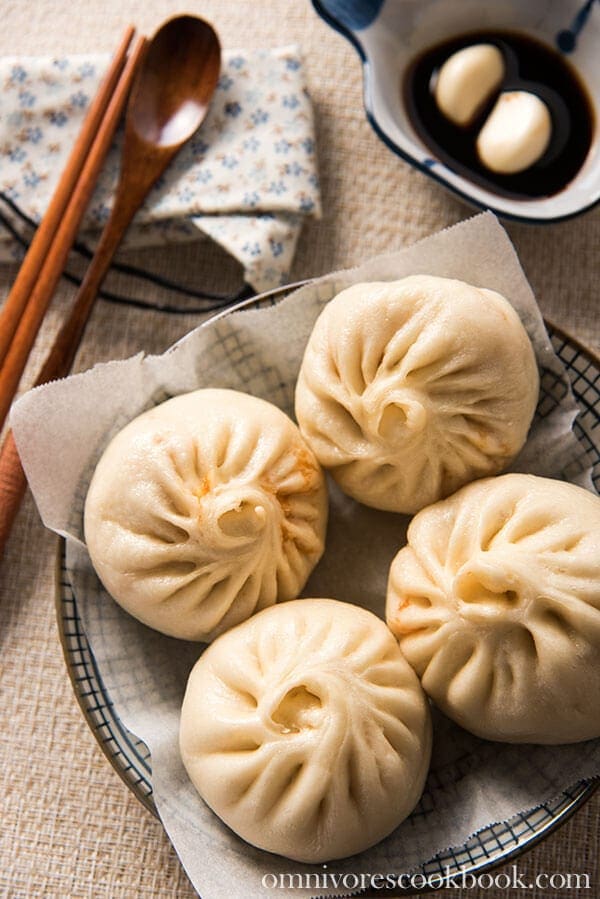
This kimchi pork buns is really addictive. The steamed buns is fluffy and springy, filled with mouthwatering spicy kimchi and moist pork. Learn the trick to creating the BEST filling with only four ingredients! The recipe includes a video so you can easily nail the dish and impress all your friends!
You might have thought this was a Korean dish when you saw the title. The classic combination of the kimchi and pork is indeed very popular and commonly used in Korean cuisine. But my grandparents have been making kimchi and cooking with it for quite some time.
Immigration of Kimchi to China
Back in my grandparents’ day, there were few greenhouse-grown vegetables in China. The only choice of green vegetables in the winter was Chinese cabbage. Every family would store tons of this big cabbage and cook it every day. In order to make monotonous daily meals more interesting, people invented many different ways to cook with Chinese cabbage.
My mom’s family comes from Liaoning, a province in the northeastern part of China (东北, dong bei). If you look at a map of China, you’ll notice that Liaoning and North Korea are adjacent. There is actually a Korean minority in China, and most of its members live in the northeastern area. That is where my grandma learned how to pickle very authentic kimchi at home. Growing up, I never actually thought of kimchi as a foreign item. It has been blended into our daily meals seamlessly, and we cook various types of dishes with it, including kimchi fried rice, kimchi pancake, and kimchi meatball stew.
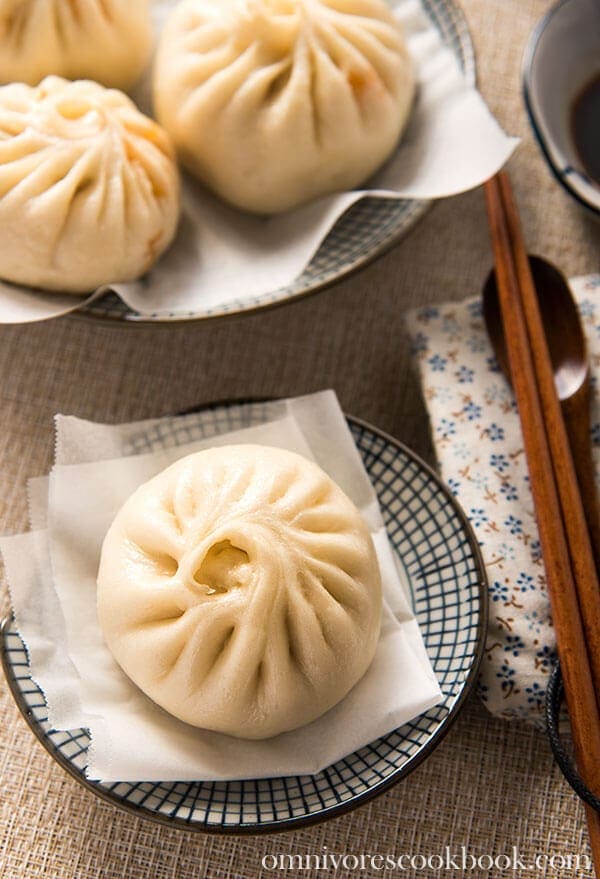
The Addictive Four-Ingredient Filling
The kimchi bun is something new that I just recently tried. The idea for this evolved from an idea for kimchi dumplings. In the end, I decided that dumplings were too small to wrap the delicious kimchi filling, so I turned them into kimchi buns. This time, I asked for my mom’s assistance in wrapping the buns, since I was standing behind the camera and busy shooting the video! (read: I can’t wrap beautiful buns the way my mom does. Tried, still can’t…)
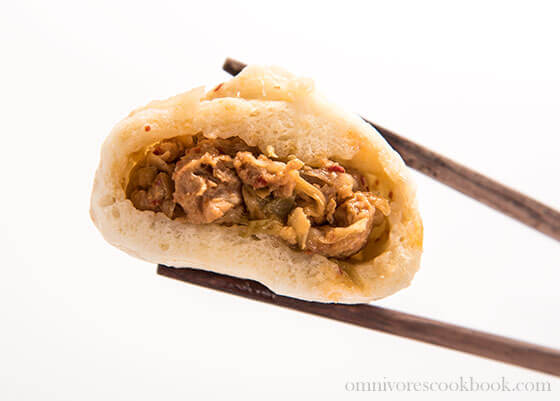
Why does the filling only contain four ingredients? Because kimchi is so pungent and flavorful by itself. Normally, I’d want to add garlic, green onion and sesame oil to create a standard northern Chinese style filling. But since kimchi already contains garlic and scallion, there is no need to add extra. The only thing I did is to add some soy sauce and cooking wine, to add a bit of saltiness and depth of flavor. The buns turned out so perfectly that I finished six in one sitting, AFTER DINNER!
Making the bun wrappers from scratch might look daunting, but it’s actually very easy. If you’ve ever made bread by yourself, you will find that the logic is essentially the same.
How To Make Perfect Steamed Buns
- Add plenty of water to make a very soft dough. The ratio in this recipe works very well for me every time. But the dough might require a bit more or less water, depending on the type of flour you use. My suggestion is to prepare 200 milliliters (7 ounces) of water and add 170 milliliters (6 ounces) according to recipe at first. If you have trouble blending all the dry flour with chopsticks, add a bit more water to the dry flour and keep mixing, until the dry flour is fully incorporated. If the dough turns too sticky and becomes difficult to handle, dust your hands with plenty of flour and add some dry flour onto the dough to make kneading easier.
- Knead the dough until the surface becomes smooth, which means the water is incorporated evenly. It will take a few minutes. Kneading the dough thoroughly the first time will save you a lot of trouble later.
- The fermentation time will vary depending on your room temperature. Check on the dough after two and a half hours. It might need as long as three hours to ferment.
- Don’t panic if the dough becomes a super sticky mess and can’t be held by hand after it has rested. Dust the working surface with plenty of flour and use a plastic spatula (if necessary) to transfer the dough onto the working surface.
- Knead the dough thoroughly and forcefully again, after it has rested, until its size has shrunk nearly to its original size. This will force the bubbles out of the dough, so the finished bun will have an even and smooth surface. If there are air bubbles left, the surface of the bun will be a bit coarse, but its taste won’t be affected.
- Make bigger buns if you’re not familiar with the process, because this will allow you to use thicker wrappers and make it easier to wrap more filling.
- Roll the wrappers so that they have thick centers and thin edges. The finished buns will have the same thickness all over, since you will pinch all the edges together to form a thick knot on the top of the bun.
- Let the buns rest for another 15 to 20 minutes before steaming, so the dough can rise again and the finished buns will be fluffy. This is a crucial step that you should never skip.
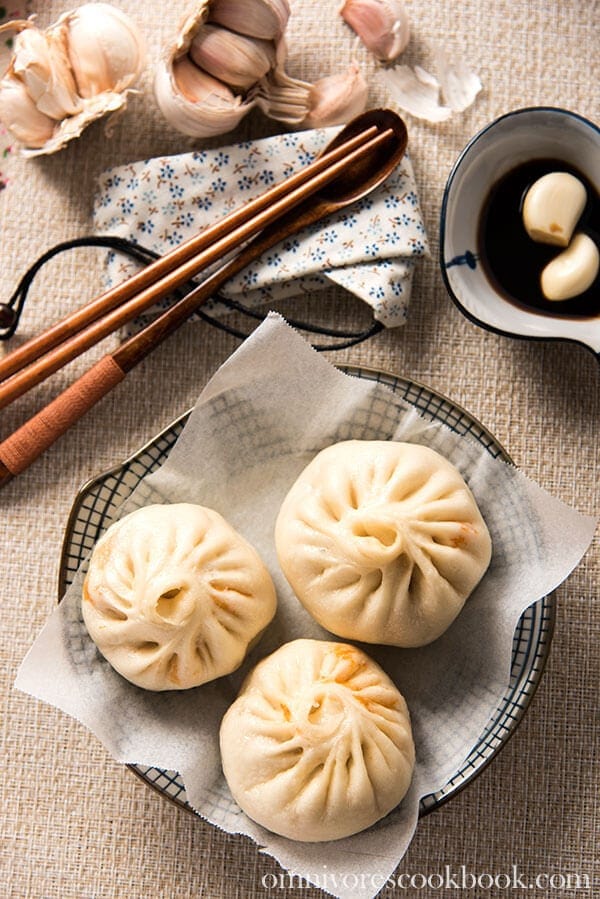
I admit this is a long post and the process might sound daunting and difficult. But trust me, if you try it out once, you will find it really easy. Most of the prep time is spent allowing the dough to rest. You only spend 40 minutes in active preparation and cooking. Even if you make a few mistakes, the buns will still turn out delicious. I actually found it easier to make steamed buns than potstickers, because you use thicker wrappers for the buns and don’t need to wrap so many of them to feed a bunch of people.
A final word, don’t make a big fuss over the shape of the buns. It takes some practice to wrap a beautiful bun (which I still can’t do!), and no matter what shape it ends up with, it will be super scrumptious!
I created a short video below to walk through the whole cooking process. If you like the video, don’t forget to check out my YouTube channel! I have a collection of cooking videos and it offers one of the fastest ways for you to get used to the techniques that are used in Chinese cooking!
Chinese Cooking Made Easy
Are you new to this website? This free email series is a great place to start. I’ll walk you through a few of my most popular recipes and show you how and why they work. You’ll quickly start to cook better Chinese food in your own kitchen.
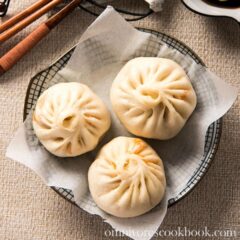
Addictive Kimchi Pork Steamed Buns
Ingredients
For the dough
- 250 grams (9 ounces) all-purpose flour (plus extra to dust the working surface)
- 1 teaspoon instant dry yeast (or 1 and 1/2 active dry yeast)
- 170 milliliters (6 ounces) water
For the filling
- 200 grams (7 ounces) ground pork (lean-fat ratio 7:3)
- 2 tablespoons Shaoxing wine
- 1 and 1/2 tablespoons light soy sauce
- 300 grams (10 ounces) kimchi (*see footnote 1)
Instructions
- Combine flour and dry yeast in a large bowl and mix well. Prepare a small bowl with extra flour on the side.
- Slowly pour the water into the bowl with the flour and yeast, mixing them with a pair of chopsticks. When the water is mixed with the flour, dust both hands with flour and start kneading to form dough. The dough should be quite soft and sticky. When dough has formed, dust the working surface with flour and dust hands again. Transfer the dough to the working surface and continue to knead the dough until the surface of the dough becomes smooth and its texture springy, about 5 minutes. Dust hands and the working surface with extra flour whenever the dough starts to feel sticky during the process.
- Rinse a clean dish towel with water. Dust the bottom of a large bowl with flour and transfer the dough to it. Cover bowl with the damp dish towel and a lid (or plastic wrap). Let the dough rest until its size doubles, 2.5 to 3 hours (depending on room temperature) (*see footnote 2).
- When the dough is almost ready, combine ground pork, Shaoxing wine, and soy sauce in a medium-sized bowl and mix well.
- Mince kimchi into small pieces. Add it to the ground pork and mix them well.
- The dough should be very fluffy and sticky now. Dust the working surface and your hands with extra flour and transfer the dough onto the surface. Use a rubber spatula if the dough is too sticky and difficult to handle. Knead the dough repeatedly and add more flour if necessary, until the dough has shrunk almost to its original size and has become smooth and springy again, 3 to 5 minutes. The purpose of this step is to squeeze the air bubbles from the dough, so the bun will have a smooth texture once cooked.
- To make the bun wrappers, divide the dough into two equal pieces. Roll each piece of dough a few times into a long stick, then further divide to make 12 to 14 small doughs in total (see footnote 3).
- Dust the working surface again. Take one dough and roll it a few times, until shaped into a ball. Press the dough to a round disc and roll it with a rolling pin into a round sheet. Try to roll so that that the edge is thinner than the center. The edge should be 2 to 3 millimeters (about 0.1 inch) and the center 4 to 5 millimeters (0.2 inch) in thickness (*see footnote 4).
- Scoop about 2 of tablespoons pork and kimchi filling and place it in the center of the wrapper. Hold the bun with one hand and start sealing the bun with the other hand (refer to the video to see how to fold a bun). Place the bun on the working surface and work on the rest of the doughs in the same manner.
- Place a large container or a bowl upside down to cover the buns. Let them rest for 15 minutes.
- Add water into a large pot and place the steaming rack on or in the pot, as the case may be. The water should be at least 3 centimeters (1 inch) below the steaming rack. Wet a clean kitchen towel and place it on the steaming rack (or you could cut baking parchment into a round shape to fit the steaming rack. Cut a few round holes in the parchment so the steam can go through). Carefully transfer the buns to the steaming rack, at least one finger’s width apart. Cook the buns in two to three batches if the steaming rack cannot fit all the buns. Add more water to the pot after each batch if the water level is running low.
- Cover and cook over high heat (or highest heat for electric stove). When water starts to boil, turn to medium high heat and continue to cook for 10 minutes (12 minutes if you make 12 bigger buns), until the buns are cooked through. Stop heat and let the steam release for a few minutes. Carefully transfer the buns to a plate. Cook the remainder of the buns in the same way.
- Serve warm as main course or snack.
Notes
- You can use kimchi made form a whole cabbage, or chopped kimchi. The former has a more delicate flavor and better texture. If you’re using whole kimchi, drain the juice and add about 4 tablespoons of juice into the ground pork first, and mix well. If you want a less spicy bun, discard the kimchi juice. If you’re using the chopped kimchi from a package, the dish will taste spicier.
- I let the dough rest for 2.5 hours in the summer. In the winter, I usually need 3 hours, when room temperature is about 18 degrees C (64 F).
- The size of the bun is very flexible. The bigger the bun, the thicker the wrapper. A bigger bun is easier to handle for beginners.
- If you’re making 12 buns, roll the wrapper a bit thicker than this.
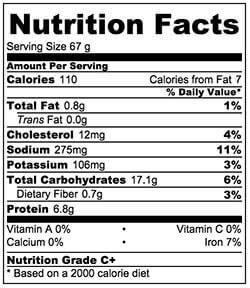
Nutrition
Have a question or feedback? Add a Comment
Did you make this? I want to see! Tag @OmnivoresCookbook on Instagram, and rate the recipe below.
The nutrition facts are calculated based one 1 of the 12 buns generated by this recipe.


Yanna
Wow, I will def give these a good try!
My grandparents used to make these when I was a kid. My grandfather especially cooked in northern Chinese style as then grew up around Shanghai. When my great grandparents fled the revolution in Russia and into China they adopted a hybrid blend of cooking which we still use to this day. Sadly they have passed years ago and coming across your website last night really got me excited to see so many Asian style variations. As u may know it’s very rare for that generation to write recipes down, so your recipes are a saving grace! Thank you
Erin Maher
Hi wondering what dipping sauce you would suggest for these? Thank you!
Maggie Zhu
I usually don’t use a dipping sauce or simply use some Chinkiang vinegar.
That being said, you can use any dipping sauces from this page: https://omnivorescookbook.com/dumpling-sauce/
My go-to is the first one, northern dumpling sauce.
Diana S
I made the buns too thin and overstuffed them which was problematic but I definitely want to try again. I used a Korean all purpose wheat flour (Gompyo) instead of all purpose flour. Do you think this made a difference in making the bun? Should I have just used my Pillsbury unbleached all purpose flour?
Maggie Zhu
I’m not familiar with Korean all purpose flour, but as long as the gluten content is around 3% and wheat flour is the only content, it should be fine.
Jess
Hello! I am planning on making this recipe in the next few weeks but was wondering if these can be frozen? Thanks!
Maggie Zhu
You can freeze the cooked buns and reheating them by steaming. The uncooked buns is not good for frozen because it affect the rise.
Diane
Wow! Maggie, such a delicious recipe for such simple ingredients.
I used my stand mixer to knead the dough pre-rise, then went old school post-rise and they came out so soft and fluffy.
At first I thought the filling was missing a little salt and possibly a tiny bit of minced ginger but when I ate them the next day the flavour improved. There was a nice sweetness that I think came from the store bought kimchi that I used.
Thank you for this simple, delicious dish. I’m definitely adding it to the rotation.
Patricie
Would it work with white bread flour too? We have different types of flours where I live, so I dont`t really know if there’s much difference from the all purpose flour. We have just regular white flour or bread flour. I checked that our bread flour has just a little bit more gluten than regular white flour.
Maggie
Hi Patricie, I think you can, but the texture of the buns might come out differently. I created the recipe when I was still living in China, and the gluten content in the all-purpose flour is lower than the ones I find in the US. I would prefer regular white flour over bread flour if you have it.
Melanie Sparkes
Hi I made these today, great recipe thank you. I was wondering if you had reheating instructions from frozen?
Maggie
I’m glad to hear you liked the recipe! Yes, you can freeze the buns once you cook them. To reheat, you don’t need to thaw them. Just steam them like when you cook the buns until they heated through.
Emil
Great, easy recipe. Thanks.
– I used ground dark chicken instead of pork; worked well.
– I activated the yeast in 95 degree (F) water with some sugar until it bubbled, then added to the flour. It doubled in about a hour.
– I left some formed buns rise for 60 minutes and the filling soaked through, compromising their integrity. So, I wouldn’t wait much more than 15 minutes before cooking.
– Buns by themselves were good. But, with Maggie’s chili oil recipe and some black vinegar, they were out of this world.
Tam
Hi Maggie,
I want to make the kimchi recipe from your video, but…can I use less red pepper flakes so it isn’t very hot? I’m still learning to like hot foods.
L
Hi Maggie,
Can we use a food processor for making the dough?
I have the machine I might as well use it.
I cannot wait to make these!
You use raw minced pork, how long does it take to fully cook the meat?
Thank you
Looking forward to your quick response.
PS I can’t wait to prepare these for my husband as he is always asking me if I purchased some from the store..hahaha
I’m going to surprise him this weekend!
Thank you again!!
Jade
Hi Maggie!
I absolutely adore this idea but I do not eat meat. I was wondering if there is anything I could use in place of pork? I’m a pescatarian so I do eat fish but not sure if anything fishy would work here!
Your mums bun-wrapping abilities are beautiful! <3
Mehul
Excellent Recipe
Larry
Very good recipe. I’m using a circle of paper towel and some wet, wadded up paper towel for the filling to practice my bun forming. My fingers are getting better and better at the pleating with this method. This batch of buns turned out looking fairly good. Can I use Tien Jin preserved vegetable instead of Kimchi?
Cindy
Hi ! This look amazing !
Would you suggest to freeze them ?
Maggie
Hi Cindy, I suggest you to freeze the cooked buns. The dough uses yeast and the steaming process will finish up the final leavening process. If you freeze the raw buns, the dough won’t turn out very fluffy.
Krysia
Chinese cabbage is a bit hard to come by now and not in season ( in Poland), so is regular fermentented cabbage a good substitute? I make the cabbage a little spicier than the regulsar Polish version with chili pepper, so I guess adding the garlic and scallion would be recommended for this recipe? I am grateful for any modifications or suggestions 😉
Maggie
Hi Krysia, I believe the Polish Sauerkraut will work in this recipe. You’re totally right, adding a few cloves of grated garlic, finely chopped green onion, and some grated ginger (this is optional), will make them tasted closer to this recipe 🙂
Happy cooking and let me know how the dish turns out!