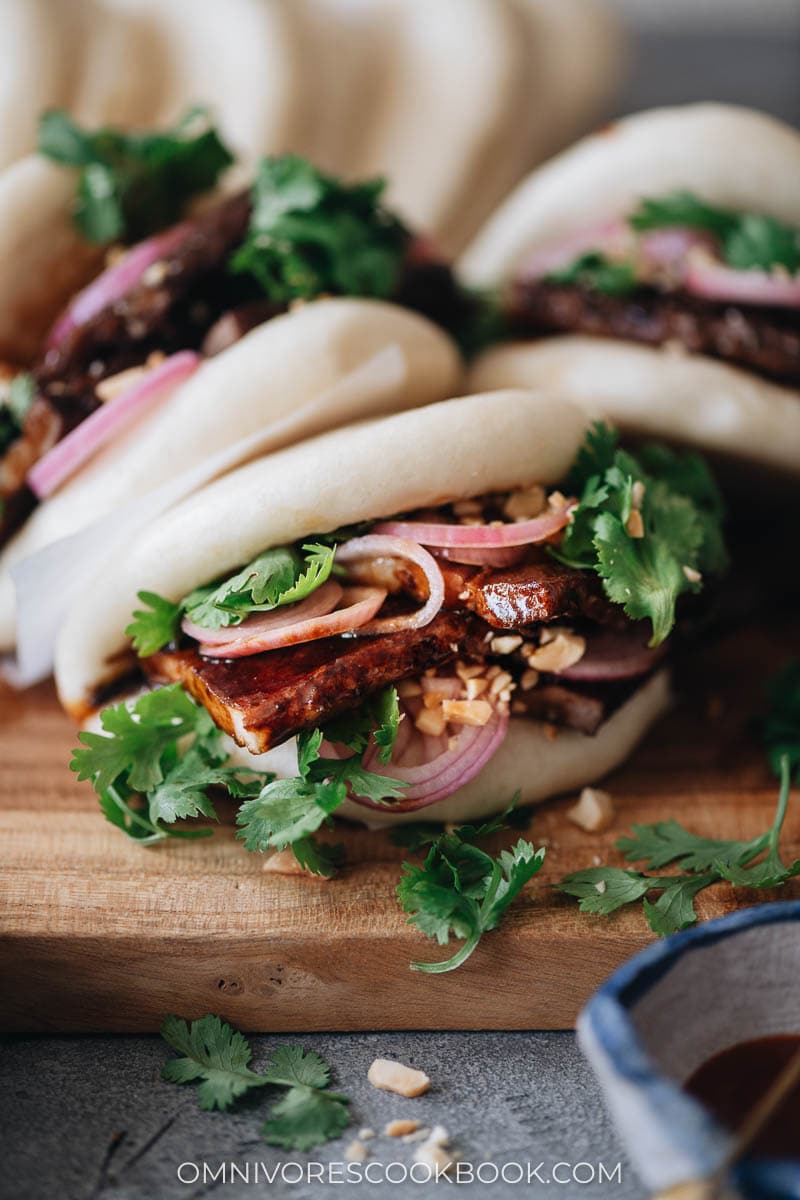
Everyone seems to love dim sum, so I wanted to share my Gua Bao recipe. If you’ve never had it, this classic is such a treat to have at home. Gua Bao is a popular dish from Taiwan. It’s made with a fluffy semi-circular-shaped bao bun stuffed with tender pork belly, cilantro, pickled mustard greens, and crushed peanuts. They’re usually eaten as an appetizer but can absolutely be the main event on your table.
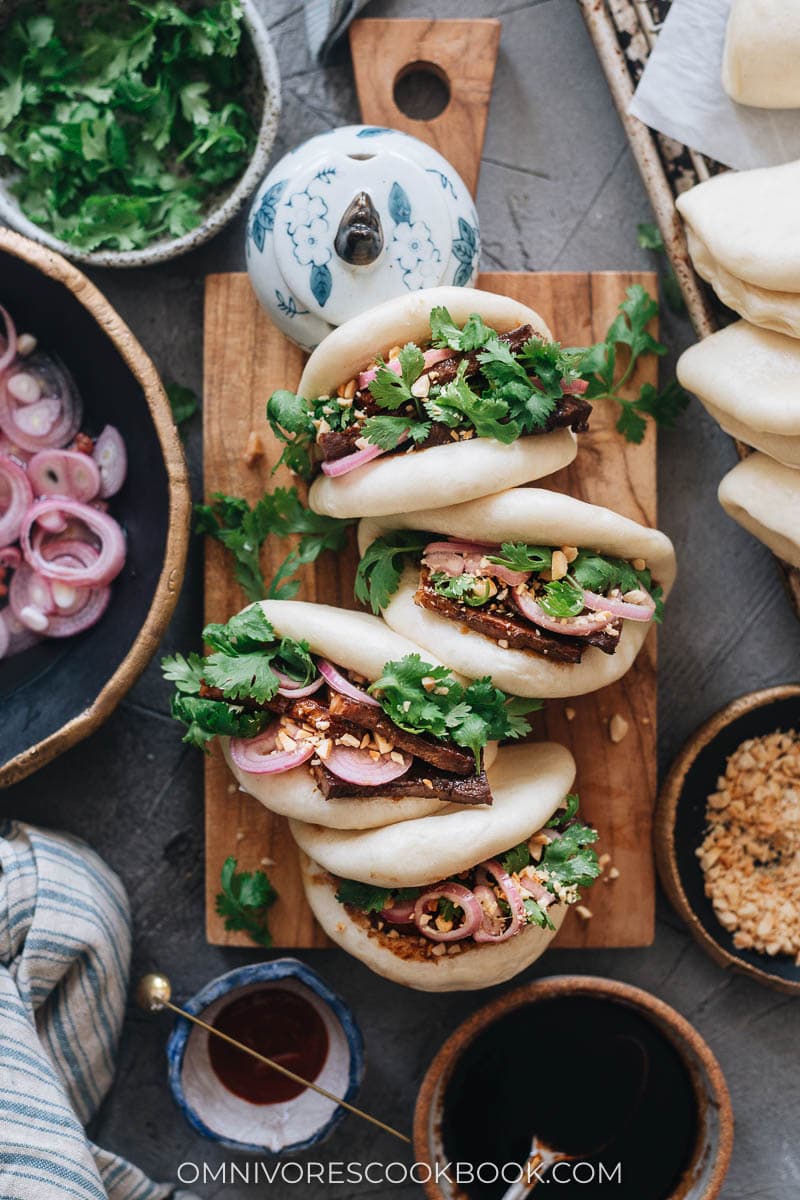
Gua Bao is quite similar to Rou Jia Mo, a northern-style Chinese burger that is made with flatbread and chopped up pork belly. You can also make my Rou Jia Mo recipe and compare the flavors!
In this post, I’ll show you how to make the tender pork belly filling for Gua Bao. I’ve already created a post on how to make the super-soft and fluffy steamed bao buns. They require simple ingredients but do take time to make. The effort is worth it, but if you don’t have a lot of time, you can pick up store-bought buns to use instead. You can usually find them at Asian markets in the freezer section.

Ingredients
The ingredients for making braised pork belly for gua bao are quite basic and a well-stocked Chinese pantry may already have them.
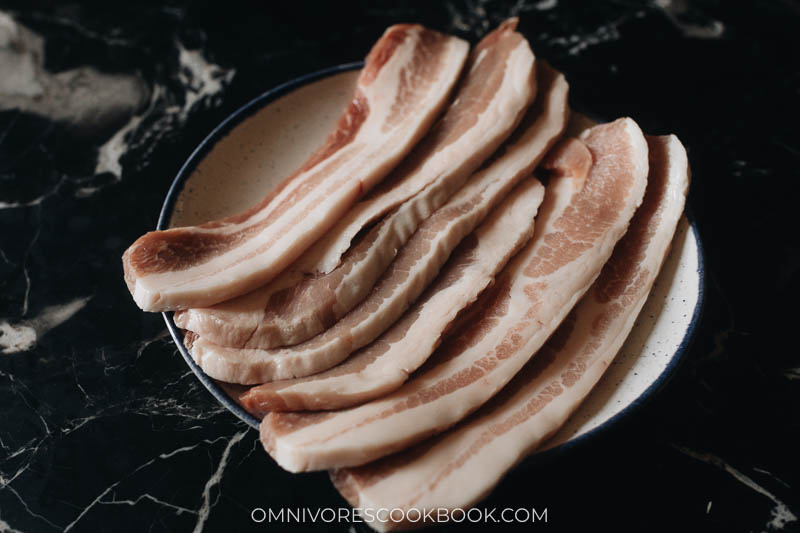
For the pork belly, it would be most convenient if you can find the thinly sliced type. This type of pork belly is slightly thicker than bacon and Asian markets usually carry it. It requires less time to braise and soaks up flavor better. But don’t worry if you can only find the regular pork belly. I’ve included instructions for both types.
Cooking process
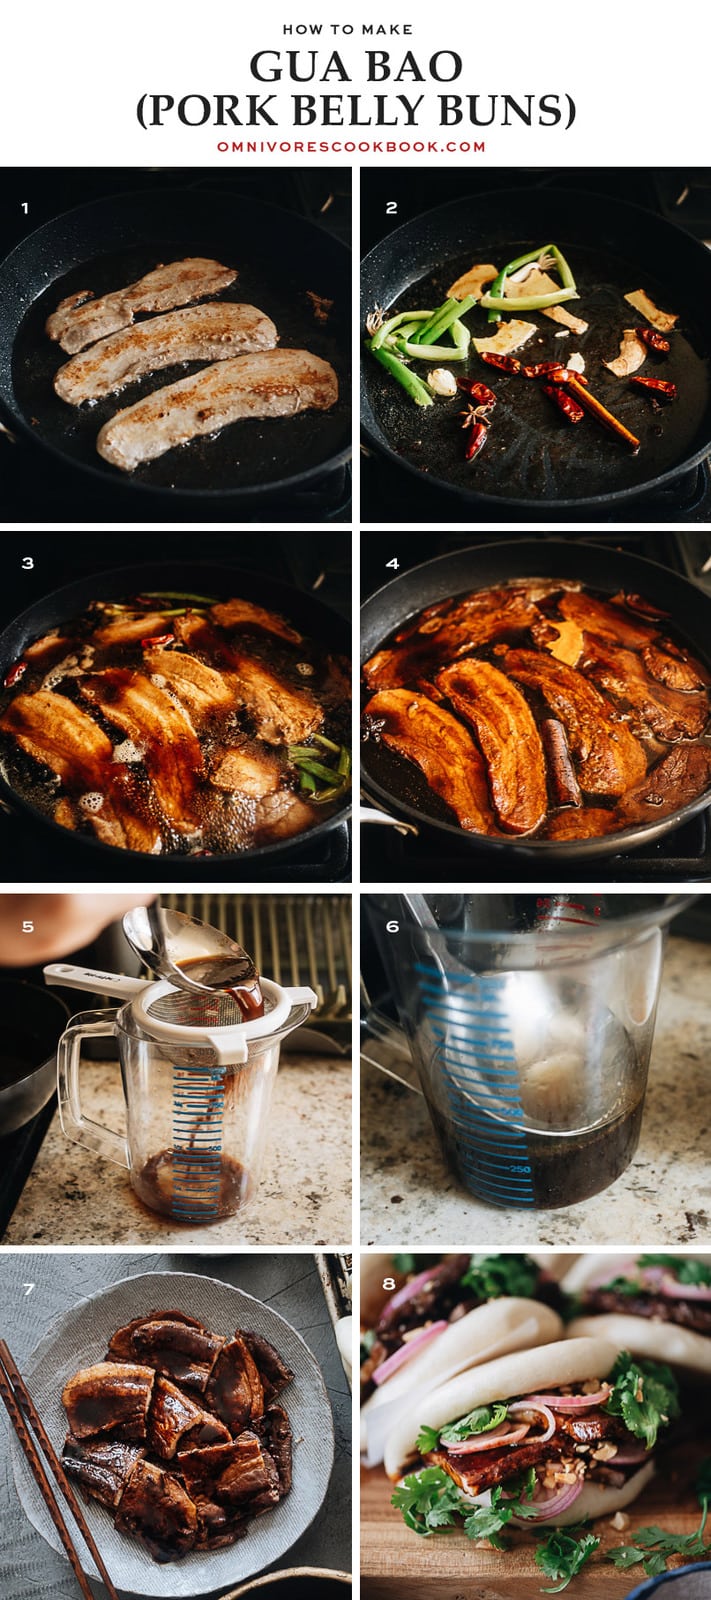
Making the filling for Gua Bao is so easy. It takes just 15 minutes of active cooking time. I recommend making a bigger batch too since you can easily use it for meal prep and freeze it for whenever the mood for dim sum strikes.
- Brown the pork belly
- Saute the aromatics
- Add the seasonings to the pork and bring it to a simmer
- Braise the pork until tender, flipping the pork in between
- Drain the broth and remove the solid spices
- Remove and discard the oil from the broth
- Reduce the broth and coat the pork with it
- And you’re ready to assemble the gua bao!
How to assemble and serve Gua Bao
Typically, Gua Bao is served with Chinese pickled mustard greens, but I highly-recommend using my quick pickled shallots instead. It creates a more refreshing taste and texture that pairs beautifully with the richness of the pork.
Besides the pickles, you should also use some chopped peanuts and cilantro to further add texture to the sandwich.
For the buns, either homemade bao buns or store-bought ones will work.

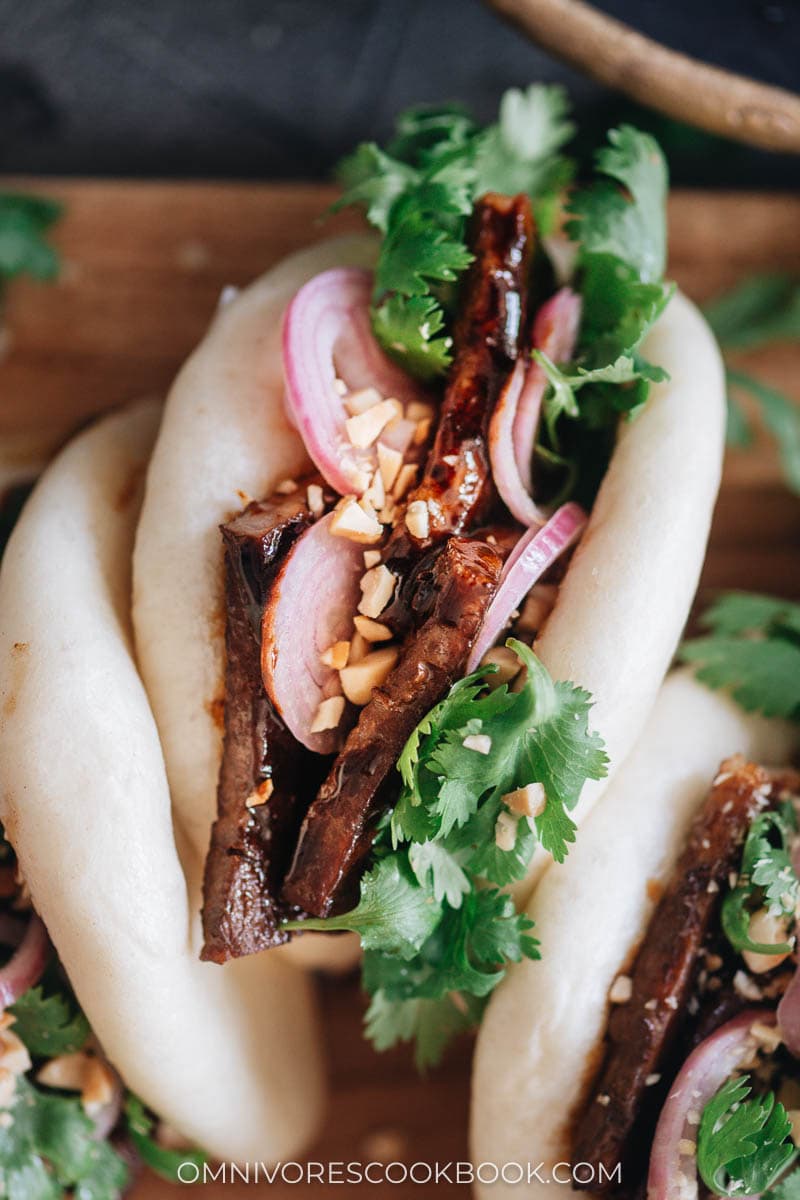
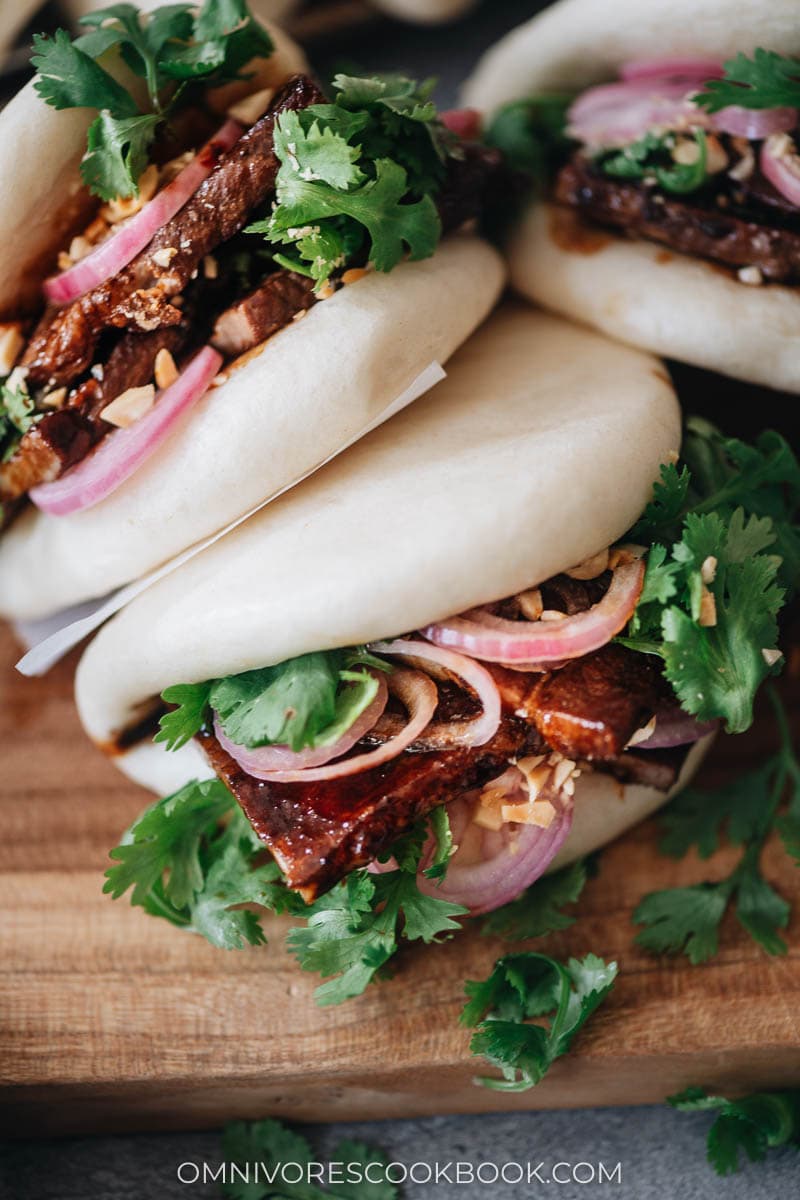
When you have guests over, Gua Bao makes a perfect appetizer. That’s how it’s traditionally served, but by all means, you can enjoy it as your main dish or for a lovely light lunch.
For entertaining though, it really is perfect since you can prep everything ahead and make it easy to serve so everyone can enjoy it as they wish.
Want to learn more about Chinese Cooking? Sign up for my newsletter to receive the 5-Day Chinese Cooking Crash Course and recipe update!
Chinese Cooking Made Easy
Are you new to this website? This free email series is a great place to start. I’ll walk you through a few of my most popular recipes and show you how and why they work. You’ll quickly start to cook better Chinese food in your own kitchen.
Watch video
Gua Bao (Taiwanese Pork Belly Buns, 割包)
Ingredients
Pork
- 1 lb pork belly (*Footnote 1)
- 1 tablespoon peanut oil (or vegetable oil)
- 4 cloves garlic , smashed
- 2 green onions , knotted
- 3 slices ginger
- 1 star anise
- 1 cinnamon sticks
- 6 dried Chinese chili peppers
- 3 tablespoons Shaoxing wine (or dry sherry)
- 2 tablespoons light soy sauce (or soy sauce)
- 1 tablespoon dark soy sauce (or soy sauce)
- 1 tablespoon brown sugar (or regular sugar)
- 1/2 teaspoon white pepper
- 3 cups water
Buns
- 5 to 10 homemade steamed bao buns (or store-bought buns) (*Footnote 5)
- Homemade pickled shallots (or Chinese pickled mustard greens) (*Footnote 6)
- 1/4 cup peanuts , crushed
- 1/4 cup cilantro , chopped
Instructions
- (Optional) If you’re making my Gua Bao Bun recipe, cook the pork during the first rise of the dough. Shape the steamed buns while the pork is cooking. Then steam the buns after the pork belly is cooked.
- Heat a large skillet (*Footnote 2) over medium-high heat and add the oil. Once the oil is hot add the pork belly. Cook on both sides until the edges just turn golden, then transfer to a plate.
- Add the garlic, green onions, and ginger to the same skillet. Stir to release the fragrance, about 1 minute. Add the star anise, cinnamon, and chilis. Stir and cook for another 30 seconds.
- Pour in the shaoxing wine, scraping the bottom of the pan with a wooden spatula to release the brown bits. Then add the light soy sauce, dark soy sauce, and sugar. Stir to mix well.
- Add the browned pork back back to the pan, flipping once to coat the pork with the seasonings. Add the white pepper and water. Bring to a boil, then reduce to a simmer. Braise, covered, for 1 to 1.5 hours, flipping occasionally, until the pork turns tender but not to a degree that it falls apart.
- Once the pork is done, remove the pork from the pan and place it onto a big plate. Cover with plastic wrap to prevent from drying out.
- Add a mesh strainer over a tall cup (or an oil separator), strain the braising liquid and discard all the solid spices. Use a ladle or big spoon to skim the fat off the top and discard (*Footnote 3). Once you’ve removed most of the oil, return the liquid to the pan. Cook over medium-high heat and let the broth reduce until thickened, 10 minutes or so. (*Footnote 4)
- Slice the pork belly into 2.5” (6 cm) pieces and add it to the reduced sauce. Flip a few times to coat the pork, then transfer the pork to a serving plate with the remaining sauce on the side in a small bowl.
Assemble
- Take a bun and add 2 to 3 slices of pork, some pickled shallots, a sprinkle of crushed peanuts, and a few sprigs of cilantro. Drizzle some extra sauce over the filling.
Notes
- I used thinly sliced slabs, similar to bacon, and braised it for 1 hour. Alternatively you can use a bigger cut and braise it for 1.5 hours or until tender, slice it into bite-size pieces after braising, then coat it with the reduced braising liquid. (see the cooking video for more details on how to use a regular cut of pork belly)
- I prefer to use my 11” frying pan for this recipe, so all the pork belly pieces can be submerged in the braising liquid. If you use a different cut of pork belly, you might need to use a smaller pan or a dutch oven so the braising liquid can cover most of the pork.
- Do not pour the discarded oil (mostly pork fat) down your drain. It will solidify in cold water and clog your drain. Pour the oil into a small bowl and let it cool in the fridge until solidified, then throw it into the garbage.
- Keep an eye on the sauce while reducing it and avoid overcooking. The sauce will thicken further once cooled, so it’s ready once it’s thick enough to coat the back of a spoon.
- This recipe yields enough filling for 10 gua bao if you stuff 2 pieces of pork in one bun. You should double this recipe if you prefer a slightly meatier result and intend to use 3 pieces of pork per bun and still make 10 buns.
- Although Chinese pickled mustard greens are commonly used in traditional gua bao recipes, I highly recommend the homemade pickled shallots. They add a more refreshing taste and texture that pair very well with the fatty pork.
- The nutrition facts are calculated based on 1 of the 6 servings created by this recipe without including the steamed buns. You can refer to my homemade bao bun recipe for that nutrition information.
Nutrition

Did you make this recipe?
I’d love to hear how it turned out for you! Please take a moment to leave a 5-star rating ⭐️ and share your thoughts in the comments further down the page. It really helps others discover the recipe too.
If you give this recipe a try, let us know! Leave a comment, rate it (once you’ve tried it), and take a picture and tag it @omnivorescookbook on Instagram! I’d love to see what you come up with.
More delicious dim sum recipes
- Baked BBQ Pork Buns (Char Siu Bao)
- Chinese Scallion Pancakes (葱油饼)
- Pineapple Buns (Bolo Bao)
- Turkey dumplings (A Thanksgiving Leftover Recipe)
- Wonton Soup
Lilja Walter is a part of the Omnivore’s Cookbook team and worked closely with Maggie to develop and test this recipe.

Judy Chiu
Any suggestion on the store bought bun, best name I can purchase in the store instead of making one. Thank you.
Judy
Simone Kolb
Spot on, restaurant quality. One of my favorite dishes.
CC
What’s your recommendation for reheating the pork belly? I’m planning to braise the day before, refrigerate overnight, and reheat the next day for quick assembly. Thank you!
Maggie Zhu
The best way to heat them up is by steaming (put the pork belly in a small bowl with the sauce). It’s OK to heat them over stovetop in a small pan as well, but you need to make sure to use low heat and stir often to prevent from sticking. They don’t heat well in a microwave.
Greg
This was absolutely delicious. The meat was tender and flavourful, and the combination of flavours… well, it’s famous for a reason I guess! 绝了!
Justin
Do you use pork belly with the skin on?
Maggie Zhu
No, I used skinless pork belly. You could include the skin if you like its texture, but personally I think the skinless works better.
Amber Young-Donahoe
Omg my new favorite recipe! The flavor is absolutely AMAZING. My 3 year old loved it. Definitely a new staple in my home.
shannon
Thanks for a great recipe–I had these in Taiwan a few years ago and have been dreaming of them since–who knew how easy they are to make! I subbed in chicken thighs (cut in thirds) for the pork belly as I’m making these for a party that includes pork-averse folks, and it was great (though I only braised for about 20 minutes so the chicken didn’t overcook). I’m sure the pork belly is delightful and I’m planning to try that next time when I don’t have special dietary considerations to accommodate! The reduced sauce is awesome. I also subbed the shallots for some pickled turnips with umeboshi plums that I had lurking in the fridge–can’t go wrong with any pickle, I’m sure.
Yoemi
These were so delicious! Instructions were very clear and easy to follow, and they turned out wonderfully. My partner said that this is the most delicious dish I’ve ever made. Thank you so much for the recipe, I’ll definitely be making them again soon!
ella
I’m trying this with leftover pulled pork. How would you recommend I make the sauce?
Emma
Quick question, do I have to use pork belly? I really want to try making this recipe, but with all the fat in pork belly I’m not sure if I can use that specific cut. Do you have a recommendation for any other cuts of pork to use instead?
Maggie Zhu
You can totally use a different cut of pork that is leaner. Pork ribs and shoulders are the best (leaner, flavorful, and tender after braising). You might need to slightly adjust the cooking time since both needs a bit longer to become tender. And you can pour in a bit hot water if the braising liquid starts to run too low towards the end.
Erinna
Thank you for sharing this beautiful recipe. I am just wondering if we would be able to substitute the pork with beef brisket instead? Thank you for your advice…looking forward to giving it a go! 🙂
Maggie Zhu
You can substitute the pork with beef brisket but you will need to cook it for much longer so the beef will turn tender. You can either:
1) At step 5, put everything in an Instant Pot (or pressure cooker) and cook on high for 1 hour. OR
2) Braise until the beef turns tender, anywhere between 2 to 3 hours on the stove. If cook on the stove, check the pot from time to time to make sure the liquid won’t reduced too low.
You should also cut the beef to bigger chunks (maybe twice or three time of bite-size) so you can slice them later.
Erinna
Sounds perfect Maggie, thank you very much for your help…
MT from Philly
This is great! I love it a lot. I also use your recipe for the buns( excellent too). My picky boy ate 3 at once and requested the same thing for dinner. Today, My kids requested me to cook this again for their American cousins. They want to show off their mom is good at cooking! But they did not know I was actually just following your recipe. Thank you for letting my kids have happy tummies!
Cristina
I’m really looking forward to making this! I bought some char sui sauce at the Asian market yesterday thinking it could be a shortcut but I feel like it will be too strong. Any advise as far as using a pre made sauce? Love your recipes!
Taki
I just made this recipe and my husband and I couldn’t not believe we were eating this at home and not a restaurant!!! I had never made baos before and they turned out excellent.
I followed all three recipes (pork belly, picked shallots and Bao buns) exactly as they were and didn’t change anything. I only doubled the pork belly because I knew we would want more!
These recipes are not difficult at all and I had all the ingredients in my pantry. They just take a bit of time to prepare but not a lot of active cooking time.
Thank you so much for your amazing recipes.
Maggie
Hi Taki, thanks so much for leaving a positive review and I’m glad you enjoyed the dish! It’s great to hear that you made all three recipes 🙂
Phoebe
These are delicious! Do you think the pork belly could be made faster in an Instant Pot?
Maggie
Glad to hear you like the dish!
Yes you can definitely use an Instant Pot to make the pork belly. I would only use 1 cup water (as long as it covers half of the pork), because if you use too much water, it will take forever to reduce the sauce later. As for the cooking time, it really depends on the size of the cut you use. If you use the super thin cut, it probably needs 15 to 20 mins, and if you use a larger cut, 30 minutes should be good. Once done, you can remove the pork and reduce the sauce in Instant Pot using the saute function.
Taryn
I just made these, it took me 5 hours because of how unprepared I was. Truly, these are utterly amazing, I am so happy I tried them. I am no chef, but know that I appreciate you posting the recipe so others have a chance to try.
They are so delicious, I made the buns, the pork belly, and the shallots. Thank you.