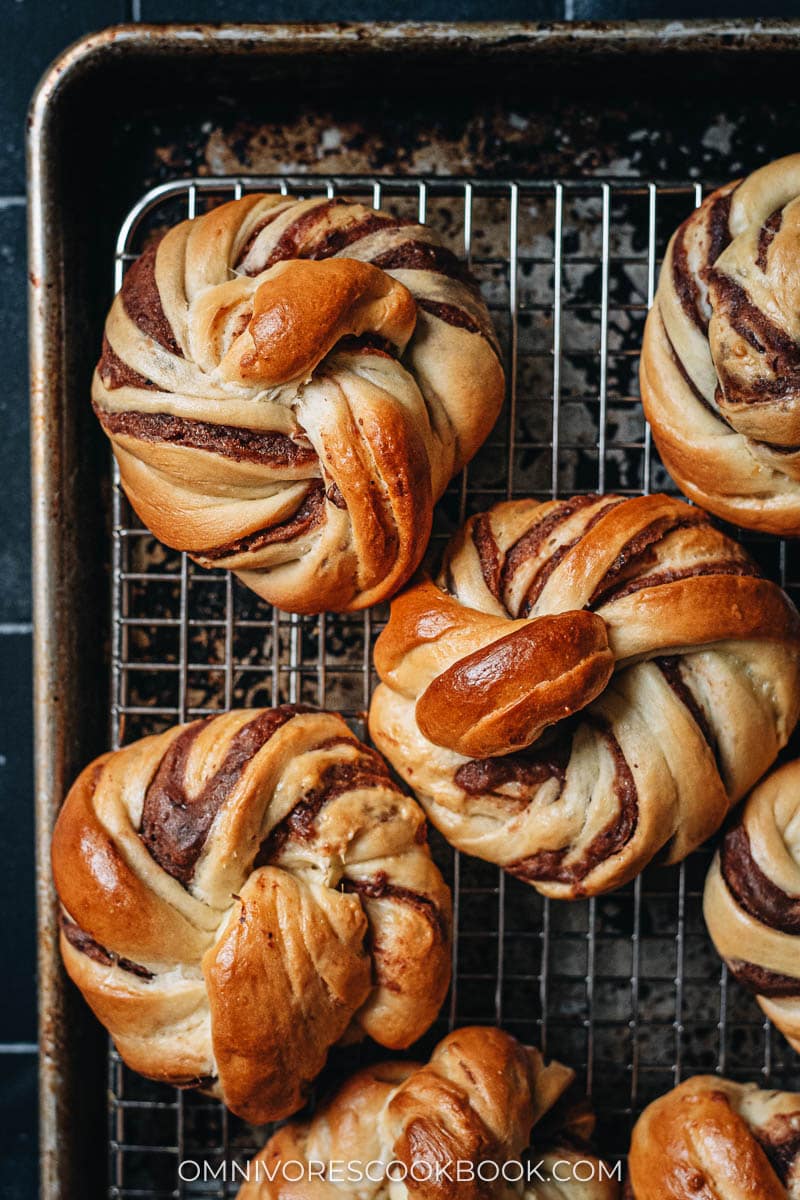
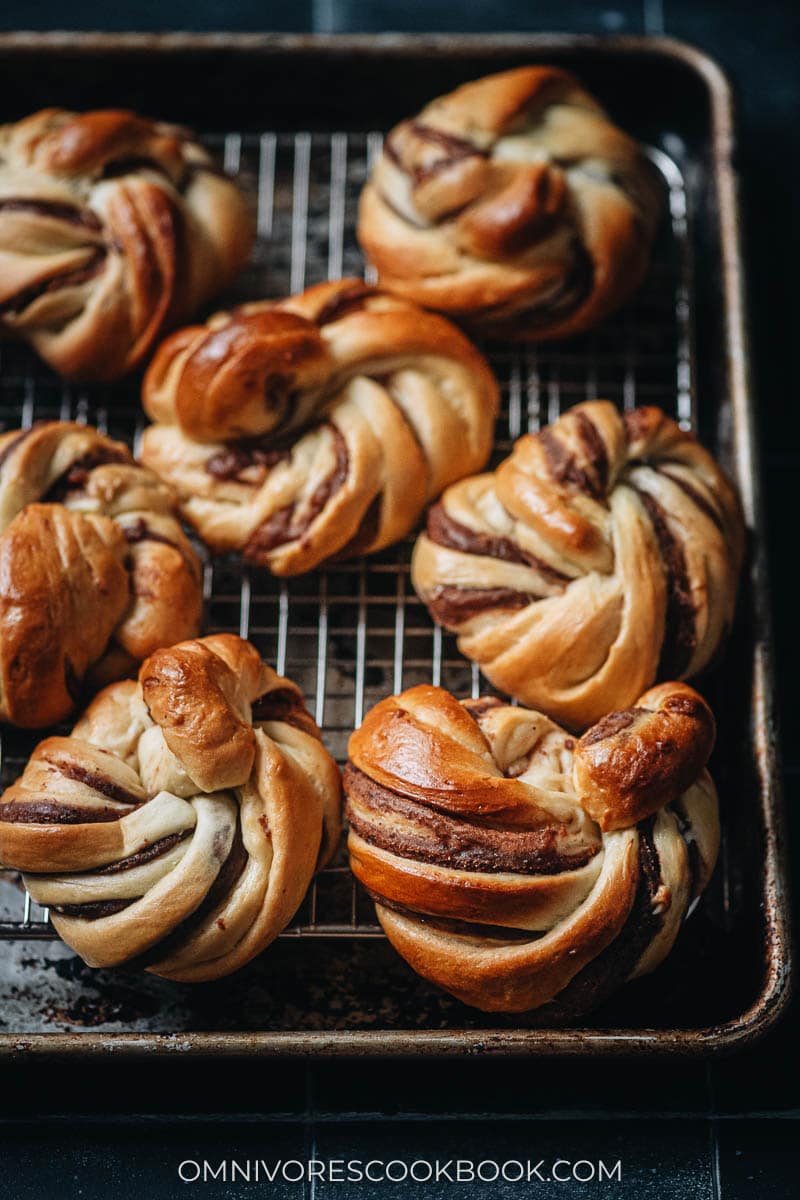
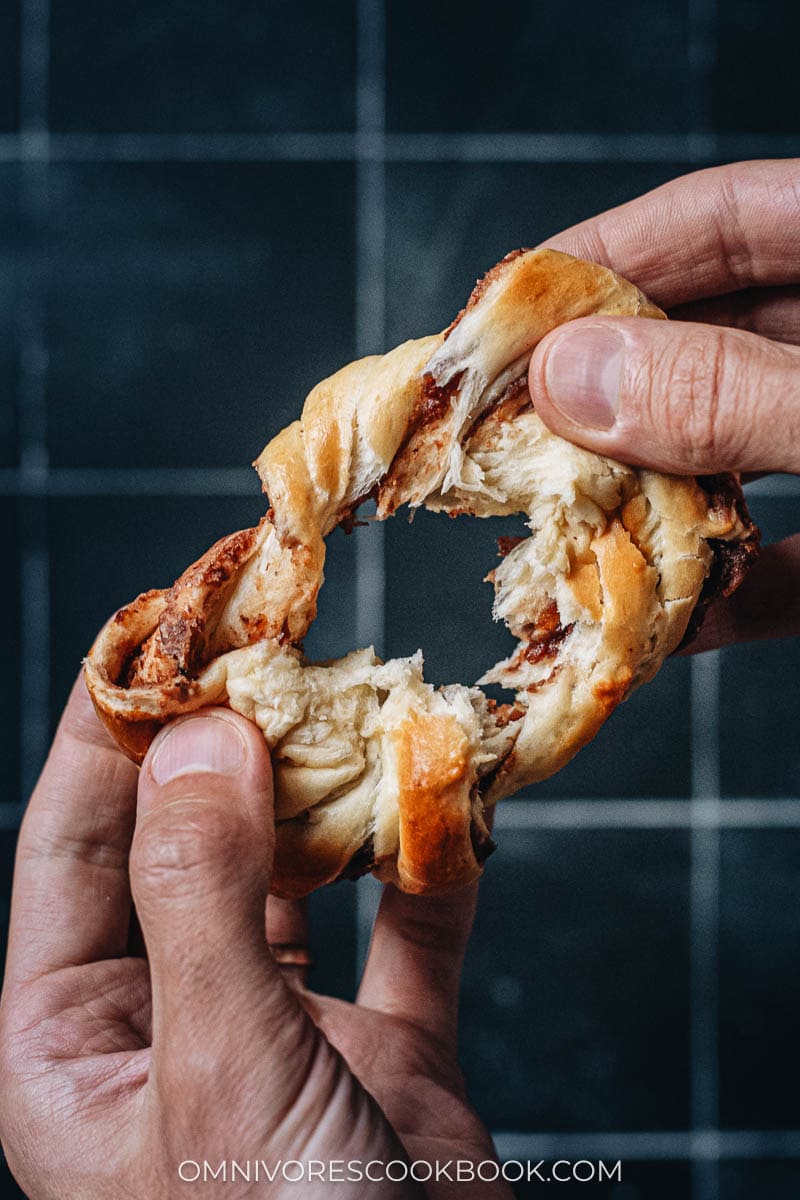
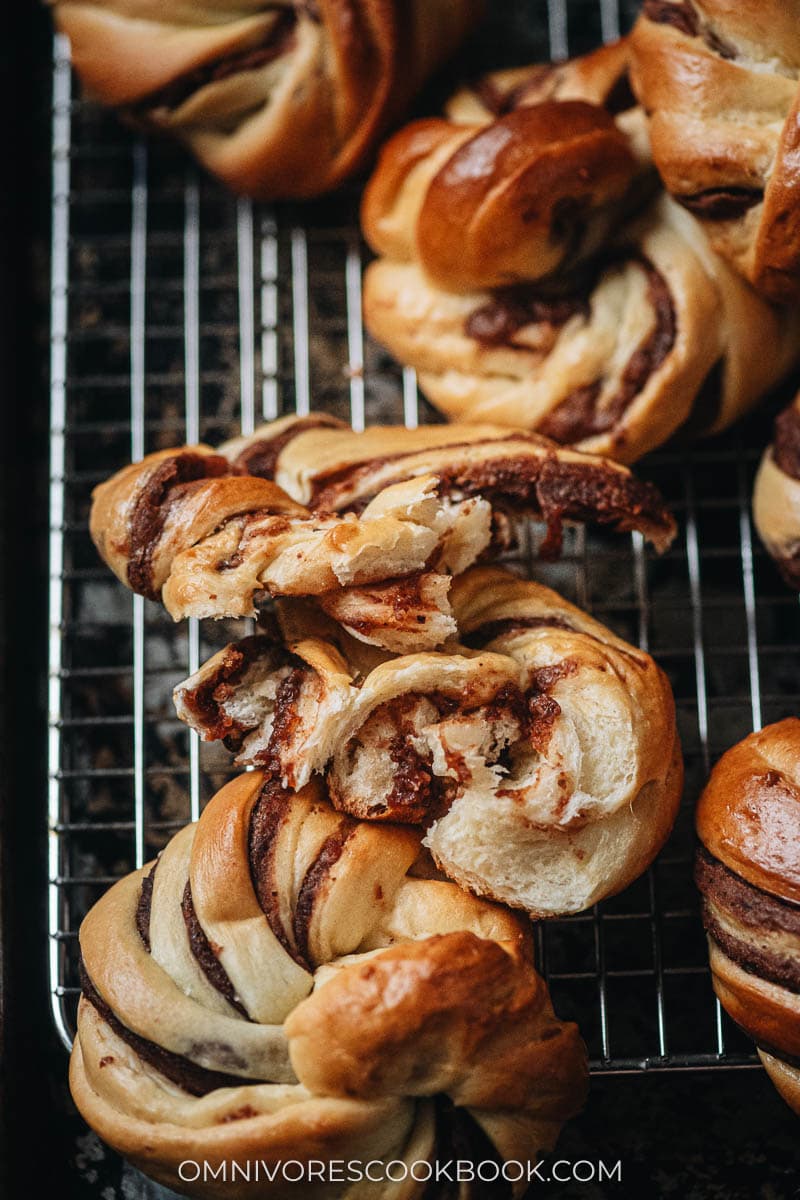
Baked red bean bread is a Chinese bakery classic. The bread is light, fluffy and slightly sweet. It is filled with creamy sweet red bean paste that pairs so well with a cup of tea for your breakfast or afternoon snack.
Making red bean bread is super easy. I want to share my easy milk bread dough. You can use a mixer to easily make the dough. This recipe shows you how to make beautiful swirl bread just like a professional bakery. But you can totally make the easier roll-style version with the red bean paste sealed inside.
Red bean bread ingredients
Red bean paste
You can either use homemade red bean paste (I have a recipe here) or store bought red bean paste. I always prefer the homemade type because I can control the sweetness. But the store bought type would easily work as well.
When you purchase red bean paste, make sure the ingredients do not include maltose. The type that contains maltose is for making mooncakes. It is quite sticky and it is hard to work with when making red bean bread.
You can purchase red bean paste in most Asian grocery stores and on Amazon.
Mise en place
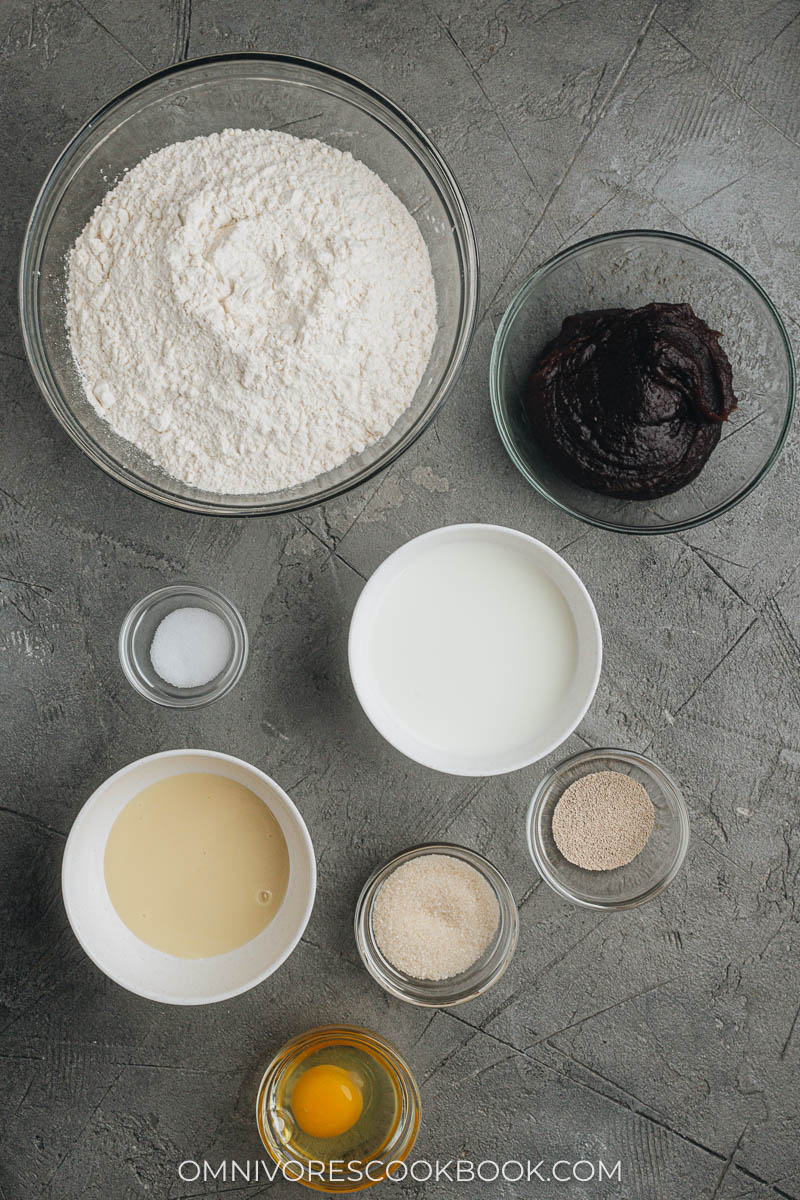
Here are the ingredients you need for making red bean bread:
- All-purpose flour
- Red bean paste
- Whole milk
- Condensed milk
- Sugar
- Salt
- Active dry yeast
- Egg
How to make red bean bread
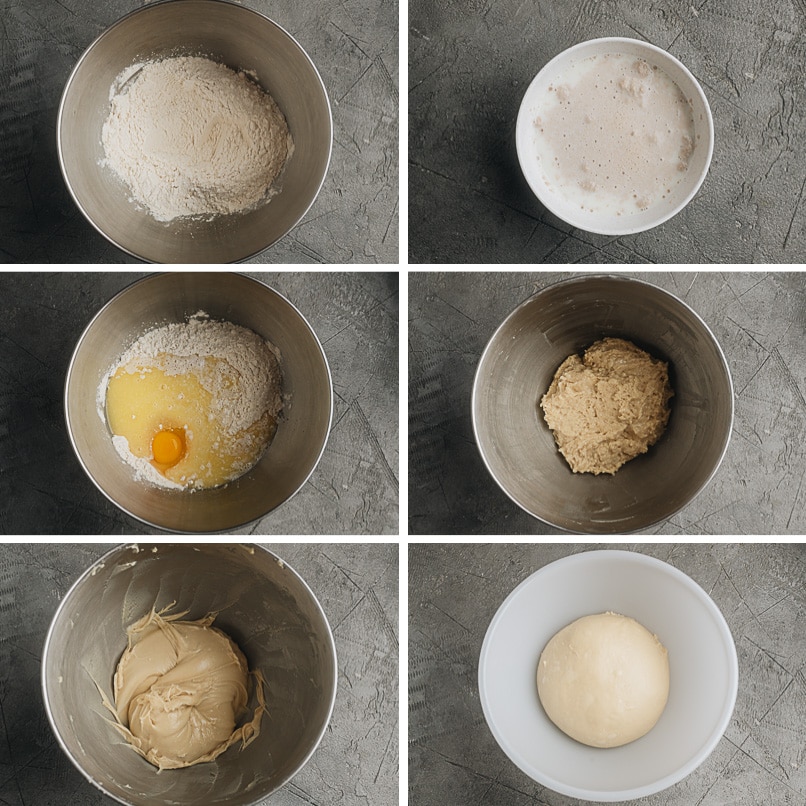
Prepare the dough
- Combine the dry ingredients in a mixing bowl.
- Add the yeast into warm milk to activate it.
- Pour the milk with the yeast mixture into the dry ingredients. Add the rest of the wet ingredients.
- Mix everything together with a spatula.
- Knead in the mixer until dough forms.
- Shape the dough and let it rest until the size doubles.
Assemble the red bean bread
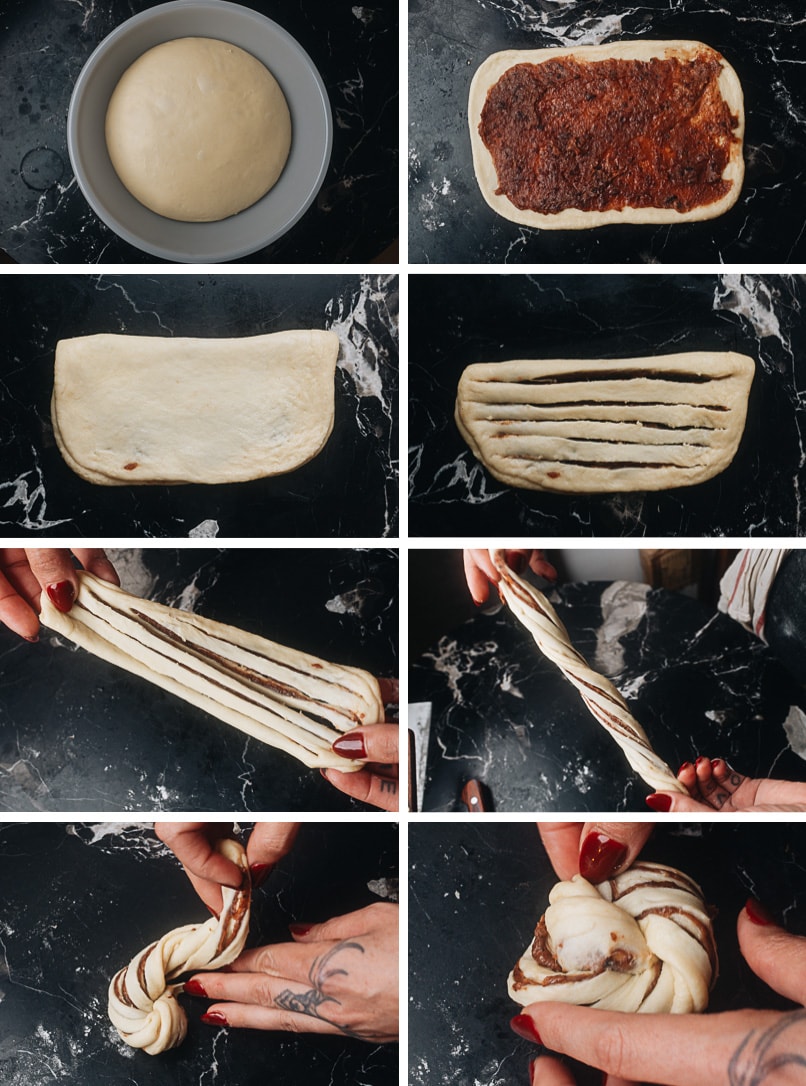
- When the dough has doubled in size, punch it down. Divide the dough into 55-gram pieces.
- Roll each dough piece into a rectangle. Spread the red bean paste on top.
- Fold the rectangle lengthwise.
- Slice 5 evenly spaced slits with a sharp knife lengthwise.
- Stretch out the dough pieces.
- Twist the stretched dough.
- Wrap the twisted dough piece on the working surface into a coil.
- Tuck the end underneath to seal the bread.
This process might look a bit confusing at the beginning. But once you try it, it’s surprisingly straightforward.
Bake the red bean bread
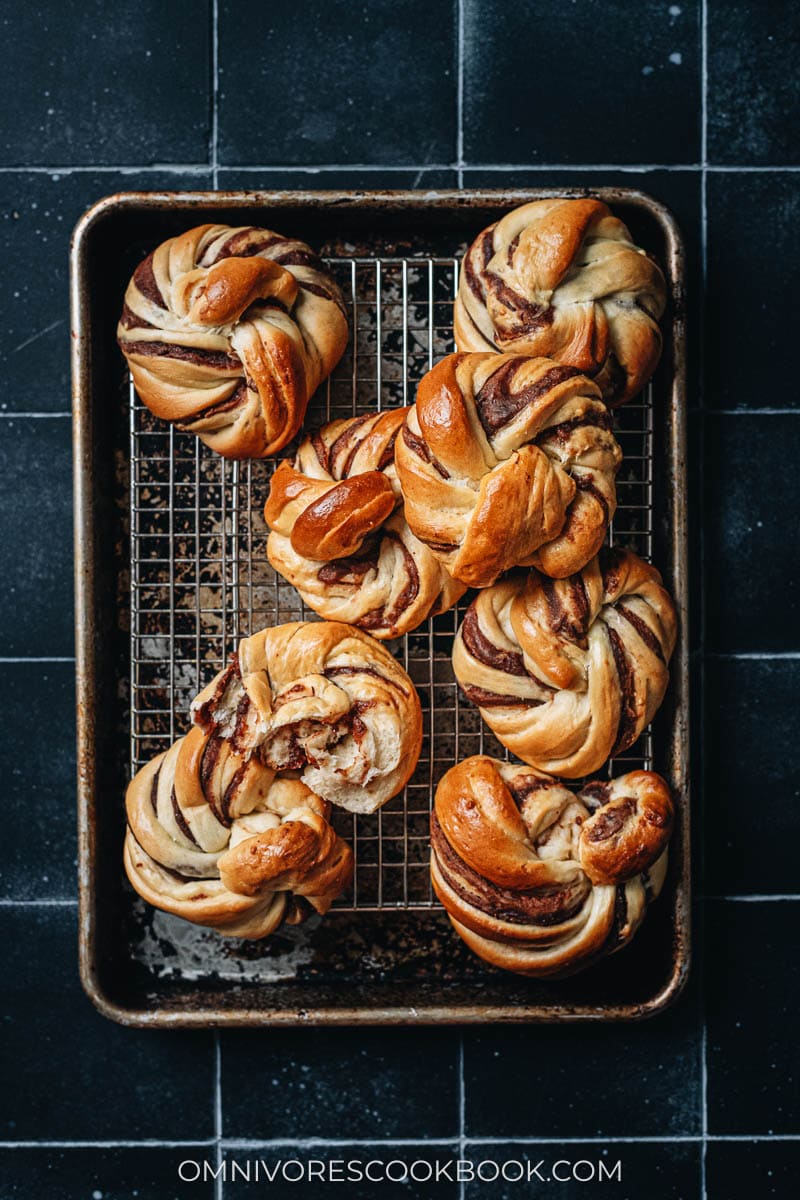
- Wait until the size of the buns doubles.
- Brush the buns with egg wash.
- Bake the buns until they are golden and fluffy.
Shape the buns with a different method
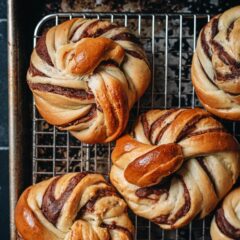
The swirl-style red bean bread is beautiful and delicious. I really like the way that the red bean paste get toasted when it’s exposed.
However, this shaping method does take extra time. If you want a simpler approach, you can wrap the red bean paste inside of the bread.
In this case, the measurement of the dough pieces and the red bean paste should be the same in the recipe below. For the assembly part, you can refer to my baked char siu bread recipe (there are step-by-step pictures showing the shaping method).
How to store and reheat red bean bread
I love freshly baked red bean bread that is still warm. But these buns stay really well in the fridge and freezer, so you can store them and reheat them anytime.
If you plan to eat them within a day or two, you can store them in a ziplock bag in the fridge. Otherwise, I highly recommend storing them in the freezer to retain their moist and fluffy texture.
Once refrigerated or frozen, it’s always best to warm the bread at a low temperature in the oven, to bring back their texture.
This red bean bread is such a treat and they pair well with milk or a cup of hot tea. I hope you enjoy this one and happy baking!
Chinese Cooking Made Easy
Are you new to this website? This free email series is a great place to start. I’ll walk you through a few of my most popular recipes and show you how and why they work. You’ll quickly start to cook better Chinese food in your own kitchen.
Red Bean Bread (豆沙包)
Ingredients
Dough
- 300 g (2 1/2 cups) bread flour
- 140 ml (1/2 cup) whole milk , and extra for brushing onto the bread
- 7 g (1 packet / 1 teaspoon) active dry yeast
- 30 g (2 1/2 tablespoons) sugar
- 5 g (1 teaspoon) salt
- 80 g (1/4 cup) sweetened condensed milk
- 4 tablespoons butter , melted
- 1 large egg
Egg wash
- 1 large egg
- 1 tablespoon heavy cream (or milk)
Filling
- 330 g red bean paste (homemade or store-bought)
Instructions
1st rise
- Add the milk into a small bowl and warm to approximately 100-110°F (38°C), about 30 seconds in the microwave. The milk should be warm, just a bit above body temperature. Add a pinch of sugar and the active dry yeast. Let sit for 5 minutes so the yeast will activate.
- While the yeast activates, add the rest of the ingredients into your mixer bowl.
- Once the yeast is activated, you should see bubbles on the surface of the mixture. Pour it into the mixer bowl. Mix with a spatula until the dough just comes together. Cover with plastic wrap and let rest for 20 minutes.
- Install the dough hook on your mixer (I used a KitchenAid). Start at low speed, then gradually increase to setting 8 out of 10. Knead for 10 to 12 minutes, until the dough is very smooth. If the mixer is getting too hot, reduce the speed to 6. Stop the mixer in the middle and scrape the dough from the sides of the bowl. Test the dough by pulling a piece of it using both of your hands. It should stretch into a very thin and translucent sheet. The dough should be wet and a bit sticky.
- Grease a big bowl with a thin layer of oil. Place the dough into the bowl. Cover with plastic wrap. Let rise until the dough doubles in size, about 1 hour.
2nd rise
- Line a baking sheet with parchment paper.
- Punch the air out of the dough (but do not knead it). Transfer it onto a lightly oiled working surface. Divide the dough into 11 even pieces, 55 g per dough. (*Footnote 1)
- Shape the dough one piece at a time. Tuck the dough onto itself by pinching the dough from all sides into the center using your fingers, creating a round shape. Then roll the dough in a circular motion with your palm against the table, until it forms a round ball.
- Sprinkle flour over the working surface. Work on one dough at a time. Roll the dough with a rolling pin into a 5”x7” (13 x 18 cm) rectangle sheet. Add a heaping tablespoon of the red bean paste, about 30 g, over the dough. Spread the paste into a thin layer, leaving about 1/2” gap on the edges. Fold the dough in half lengthwise. Gently pat the dough to remove any air bubbles. Then tightly press down the edges to seal. Cut 4 to 5 evenly spaced slits with a sharp knife lengthwise, about 1/2” apart. Hold the two short ends in your hand, stretch out the dough, and then twist it to form a spiral rope. Wrap up the rope on the working surface into a coil, then tuck the end underneath to seal the bread. Repeat with the rest of the dough.
- Place the shaped bread on a lined baking sheet, 3” (7 cm) apart. Cover the baking pan with plastic wrap. Let rest again for another 35 to 45 minutes, until the size has doubled.
Prepare the egg wash
- Make the egg wash just before baking by combining the egg and heavy cream in a small bowl. Stir to mix well.
Bake the buns
- Once the buns have finished their second rise, brush the edges gently with the egg wash. Bake at 375°F for 15 minutes, until golden brown. Once done, let the buns cool off a bit until you can handle them with your hands, then transfer to a cooling rack to cool.
- Serve the buns warm or at room temperature.
Store and reheat
- Once the buns have cooled off completely, place them in a ziplock bag or airtight container. Store in the refrigerator for up to 3 days, or in the freezer for up to 3 months.
- To reheat the buns, you can either microwave them or bake them in a 300°F (148°C) oven until warmed throughout, 5 minutes for refrigerated buns or 10 to 15 minutes for frozen ones.
Notes
Nutrition

Did you make this recipe?
I’d love to hear how it turned out for you! Please take a moment to leave a 5-star rating ⭐️ and share your thoughts in the comments further down the page. It really helps others discover the recipe too.

Min
I made this by hand with 碗豆餡 that I made which was fairly sticky from the corn syrup I added – this is actually a great recipe for sticky pastes since it’s an open-faced bread. Other doughs won’t wrap around it easily as the shape is too soft. I just used a metal spoon to spread it on the dough, and used my oiled hand to push the rest off the spoon. but chopsticks/spatula should work fine.
I don’t think it can’t be done with sticky paste, just that using a metal utensil makes it less difficult.
I set my butter out to soften, let the yeast rest for 20 minutes, continually mixed the dough and added the yeast milk in and then mixed until it came together more before adding in cubed softened butter. Butter actually slows down gluten, so it is better to add it in after the gluten develops. (It was much more difficult to knead the 2nd time with butter added in right away) I added in milk powder which is often added to milk breads for an extra richness. This recipe is delicious.
Is there any suggestion on how to get clean cuts because I struggled with that.
Maggie Zhu
Thanks so much for sharing your experience! I made mine with sticky paste in the paste as well and I think it makes the process harder, but not impossible. I’m glad that mung bean paste worked out for you!
To make clean cut, I would use a very sharp pairing knife. Coat the knife with some flour for each cut, and wipe the knife clean after each cut and coat with flour again. I think the sticky filling makes the cut a bit harder as well.
Rachel
I am super excited to make these with my daughter for Thanksgiving. Quick question- have you had success doubling this recipe? I am wondering if I should literally double the ingredients in one bowl or if it would be better to make 2 batches simultaneously. TIA
Maggie Zhu
I think it depends on what mixer you use. If using a KitchenAid classic 4.5 qt, it’s safer to make two batches separately. It’s not a very big dough, but the mixer might have a hard time working on a bigger dough since it requires a lot of kneading.
If you use a 5-qt Artisan KitchenAid, the double batch might work together because it’s a more powerful model.
I think it’s the safest if you make two batches simultaneously.
Twizzy
Took way longer for me since I have a toddler and have never made bread before besides biscuits once. These were well worth the back pain, from me standing forever, in the end! Looking forward to everyone else I will have eat these enjoying them as much as I did. Wish I could share photos. I had to leave mine in a bit longer than 15 minutes to get the same golden top as the photos, more like 18 minutes. I live on the East Coast. I wound up buying the right bean paste but couldn’t spread it as well at the photos showed so I floured up the paste and my hands then smacked the paste into the dough to try and thin my spread but also get it to stick the the dough and not my hands or spatula. I used wheat flour and forgot to add the egg until I mixed the yeast-milk in already. They probably could’ve been flakier because mine seem a bit dense, but they still taste great so can’t argue next time I make these (probably not for another year) they should be flakier. I used a scale for measuring the dough and a pizza cutter for the cuts.
Maggie Zhu
Thanks for leaving a thoughtful review and I’m glad to hear you like the bread! For the red bean paste, check the ingredients next time and avoid the type with “maltose” in it. It’s the type designed for making mooncake and it’s extra sticky. Regular red bean paste without maltose shouldn’t be so hard to spread out. Depending on the location of your oven heating element, the topping might not get as brown and that’s totally OK too! I would reduce a few minutes of baking next time, so the dough will be a bit softer.
CO Lee
This is one of those awful comments on a food blog. Cause I didn’t make this recipe at all …
But thank you Maggie for the ideas and the techniques!
I made a savory baked bun filled with some leftover beet, cabbage, and tofu filling from baozi I made the other day. They’re very good!
So, of course, a lot of the recipe changed: savory instead of sweet, no reason to mess with condensed milk, and so forth. I kept the hydration and total amount of flour the same, reduced sugar, used only regular milk (no condensed).
And, the resulting little breads are beautiful and yummy! The trick of filling and then making cuts to expose some of the filling is great. Very cool!
I’ll make some more things like this. They’re so cute. As well as tasty. And I might even make some sweet ones with red bean paste some day …
Thorn
These turned out wonderfully! My family usually doesn’t go for more traditional Chinese sweets (they’re very American, lol) but they loved these! They made for wonderful breakfast and dessert pastries. I’m very glad that I could introduce them to the wonders of sweet red beans with this. 🙂
Hannah
Delicious and they turned out so pretty! Well worth the time and effort.
Jean
Hi Maggie. Love your blog. Always looking for an update from you. I would like to substitute the condensed milk with regular milk to reduce the sweetness. Are there other ingredient modifications I should make when doing this? Thank you.
Maggie Zhu
If you plan to use milk instead, I highly recommend using the dough in this recipe: https://omnivorescookbook.com/baked-bbq-pork-buns/
Because you will need to adjust water and fat ratio in this recipe (a lot of adjustment and I don’t have a good measurement without testing it myself).
Min
I used something like half evaporated milk and half sweetened condensed milk and it worked great