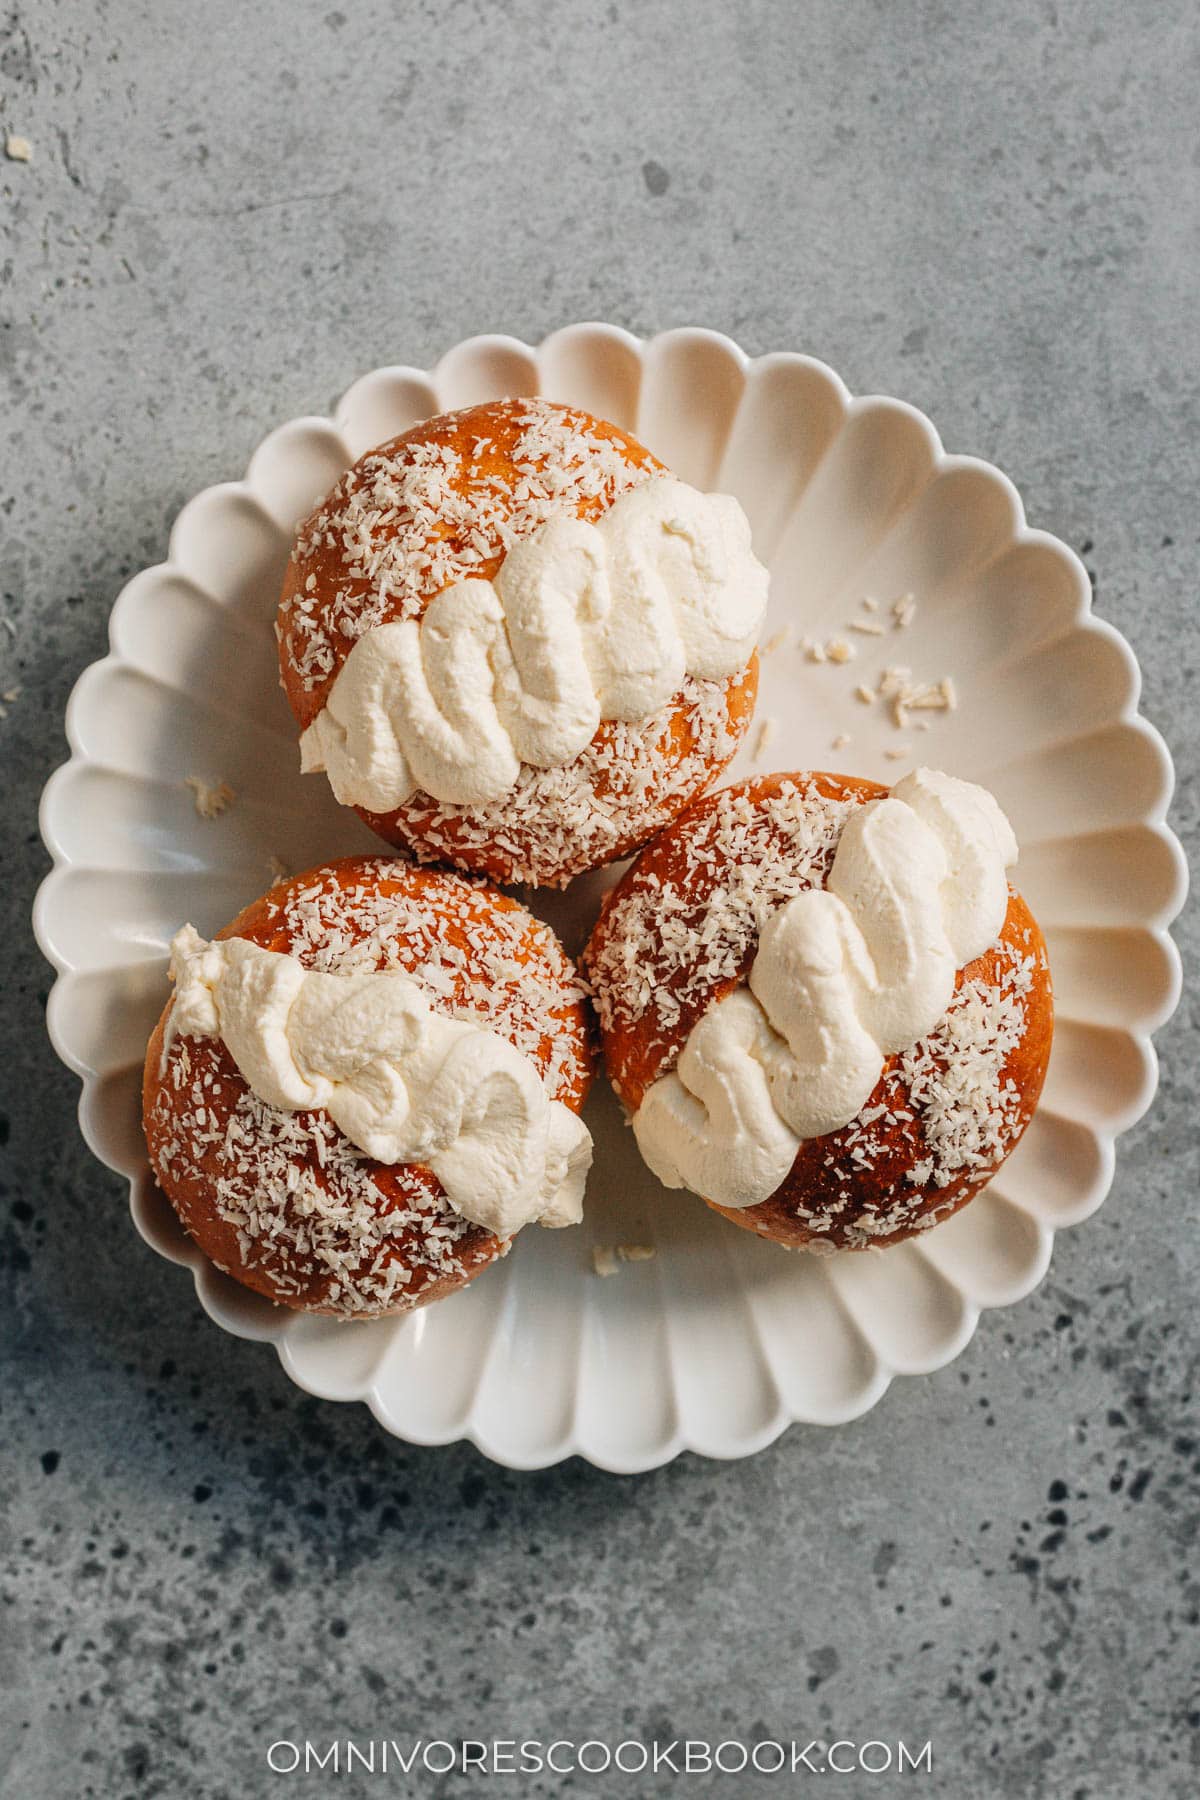
If you like goodies from Chinese bakeries, you can’t miss these coconut cream buns! They are a delightful and comforting treat that I have loved ever since childhood.
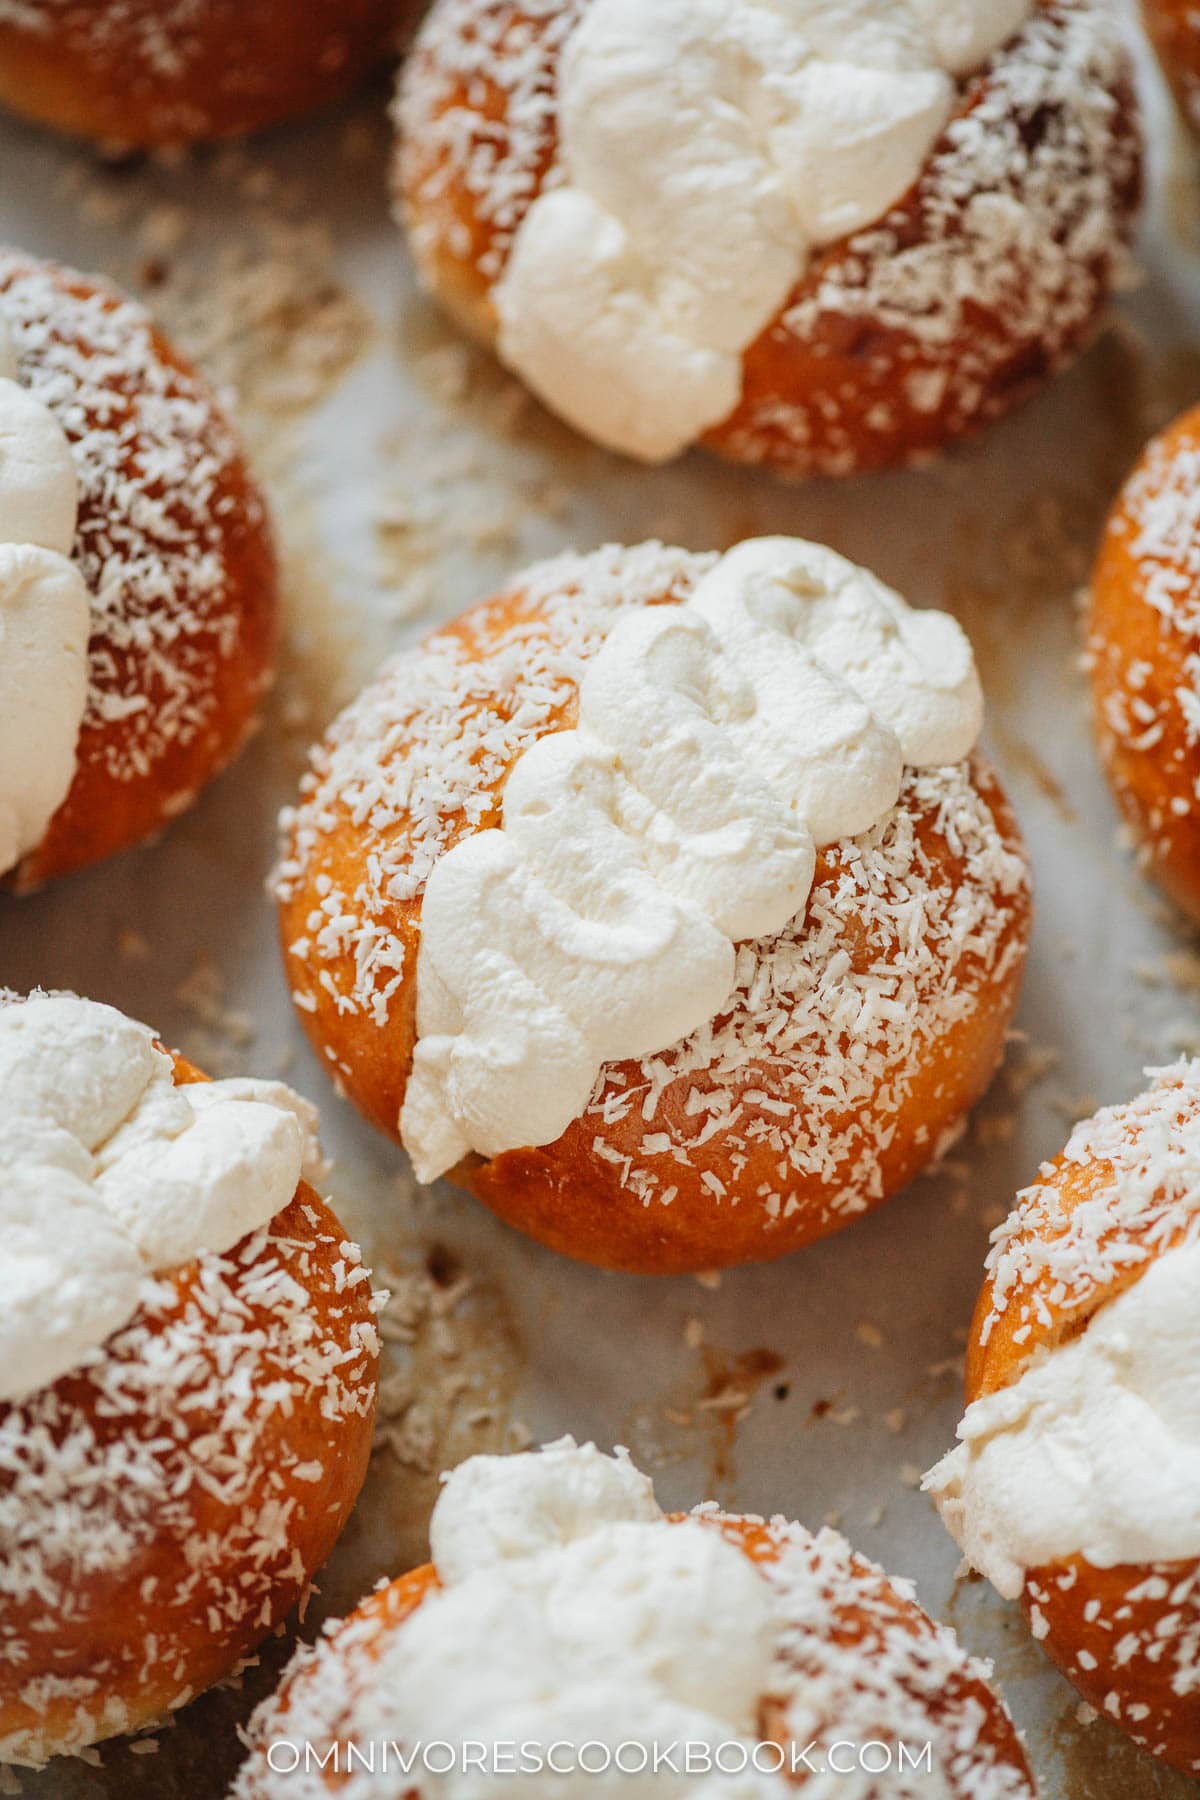
Do not confuse this one with the coconut buns (or cocktail buns), which have a butter based coconut filling baked into the buns. These coconut cream buns have a soft sweet bread dough, topped with coconut flakes, and filled with a fluffy whipped cream.
These buns are quite easy to put together, and they look super cute. They are a crowd pleaser and loved by kids, too. It’s a nice treat if you’re planning to bake something for the holiday season, or when you’re hosting guests for any occasion.
In this recipe, I will introduce a very simple way to put together the milk bread dough. All you need to do is put the wet and dry ingredients together and use a stand mixer to finish up the dough.
Why this recipe?
- It has a very simple and foolproof milk bread dough with minimal hands-on time.
- Your kitchen mixer will do most of the work for you.
- The bread is light and soft, with a pillowy texture.
- Filled with a sweet whipped cream, it is sure to be a hit!
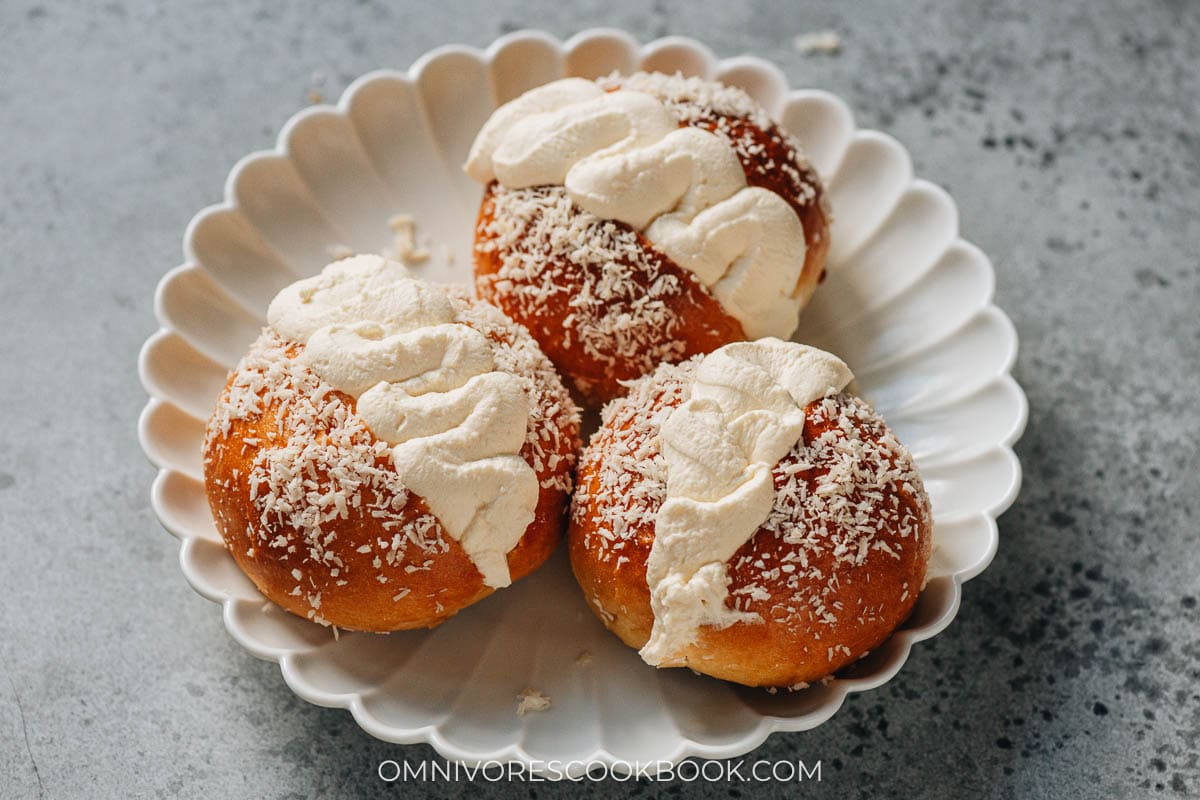
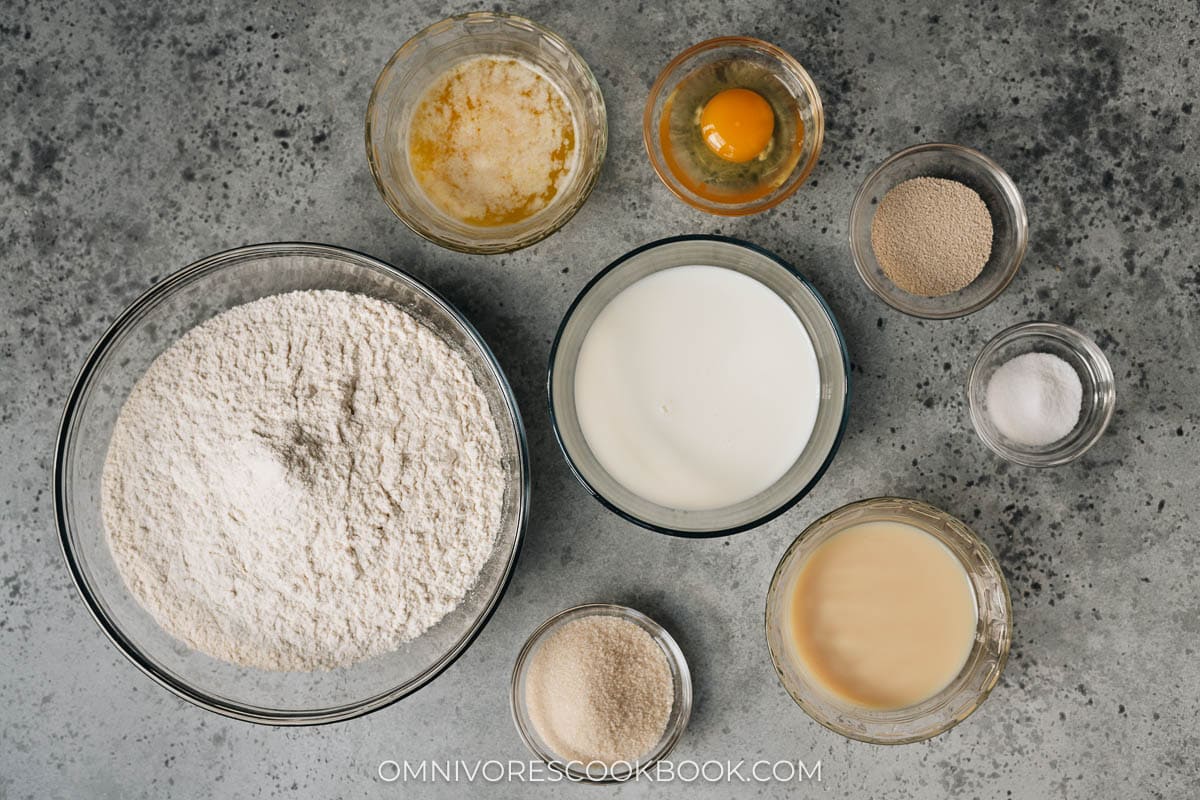
Coconut cream buns ingredients
Ingredients for the milk bread
You only need eight ingredients for the milk bread dough:
- Bread flour
- Yeast
- Sugar and salt
- Whole milk
- Sweetened condensed milk
- Butter
- Egg
Ingredients for the filling and topping
- Egg
- Sugar (granulated sugar and powdered sugar)
- Heavy whipping cream
- Vanilla extract
- Salt
- Unsweetened desiccated coconut
How to make ham and cheese buns
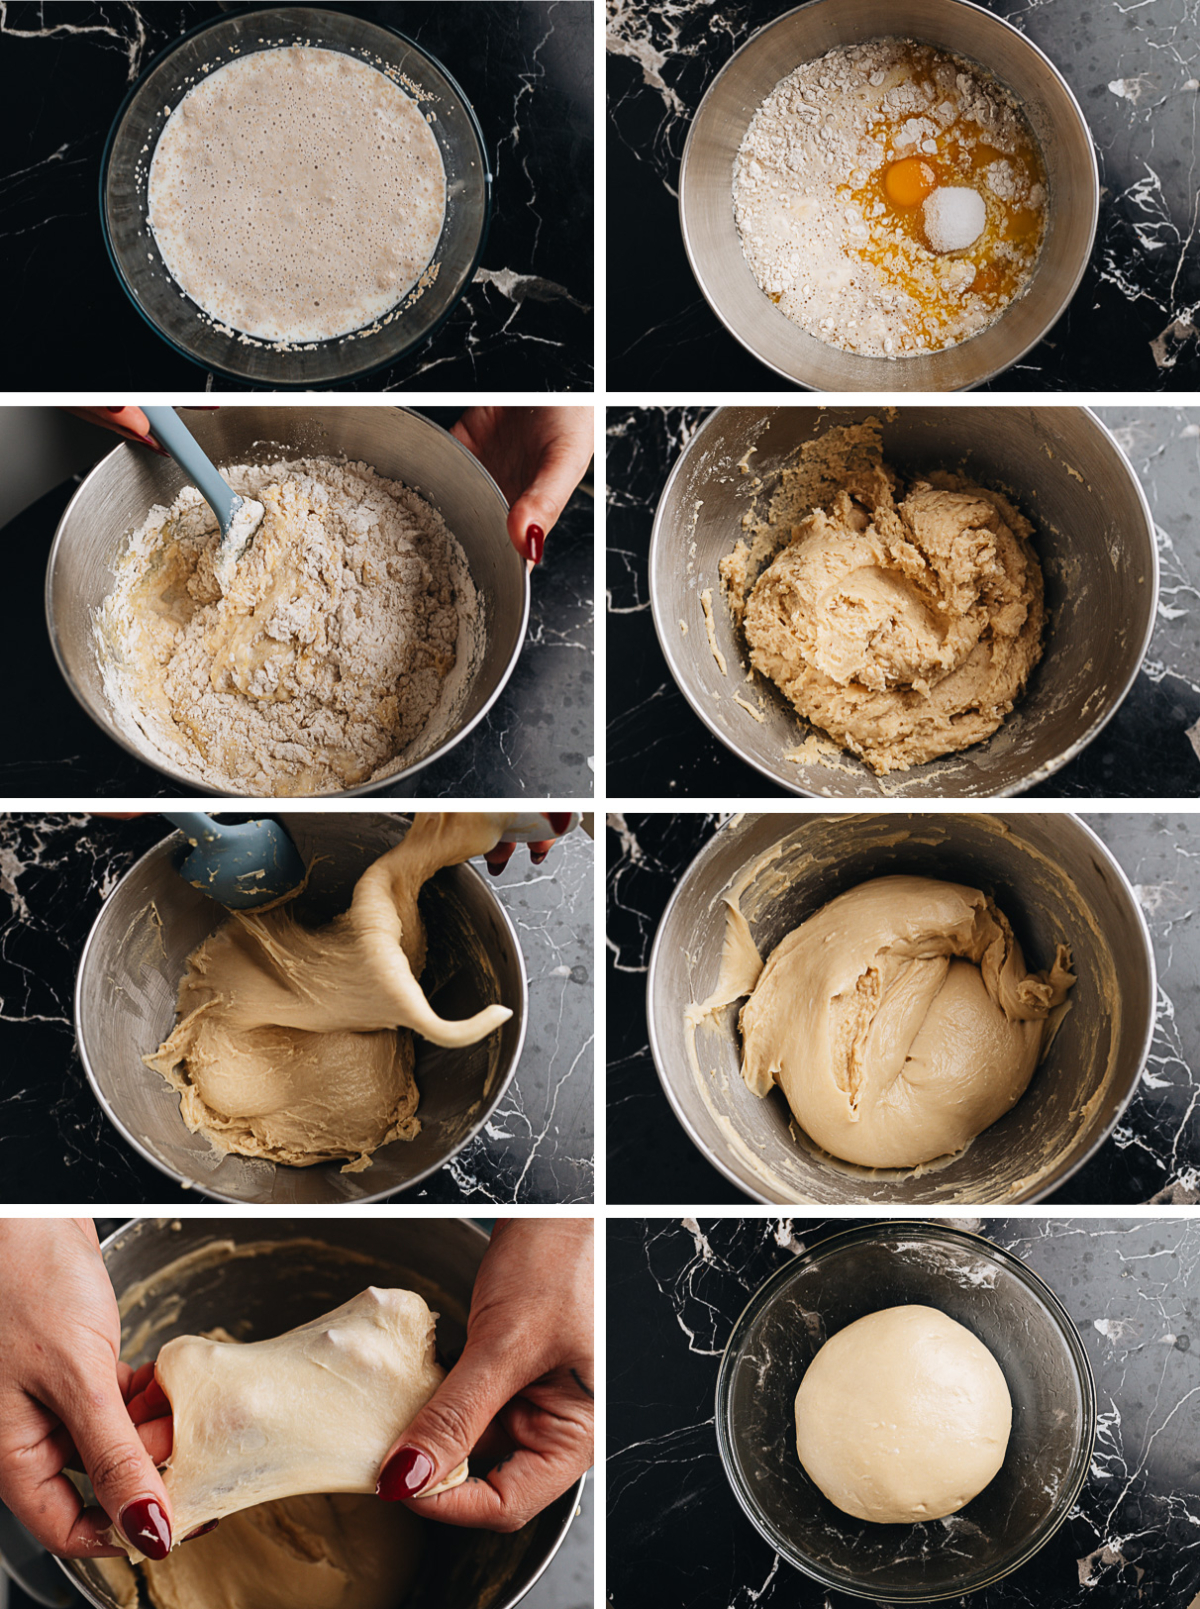
Prepare the milk bread dough – first rise
- Activate the yeast
- Mix all the ingredients together
- Mix with a spatula until a rough dough forms
- Let the dough rest for 20 minutes
- Knead the dough with a mixer, scraping down once halfway through
- Mix until a smooth sticky dough forms
- The dough should pass the windowpane test
- Gather the dough in a bowl and rest until its size doubles
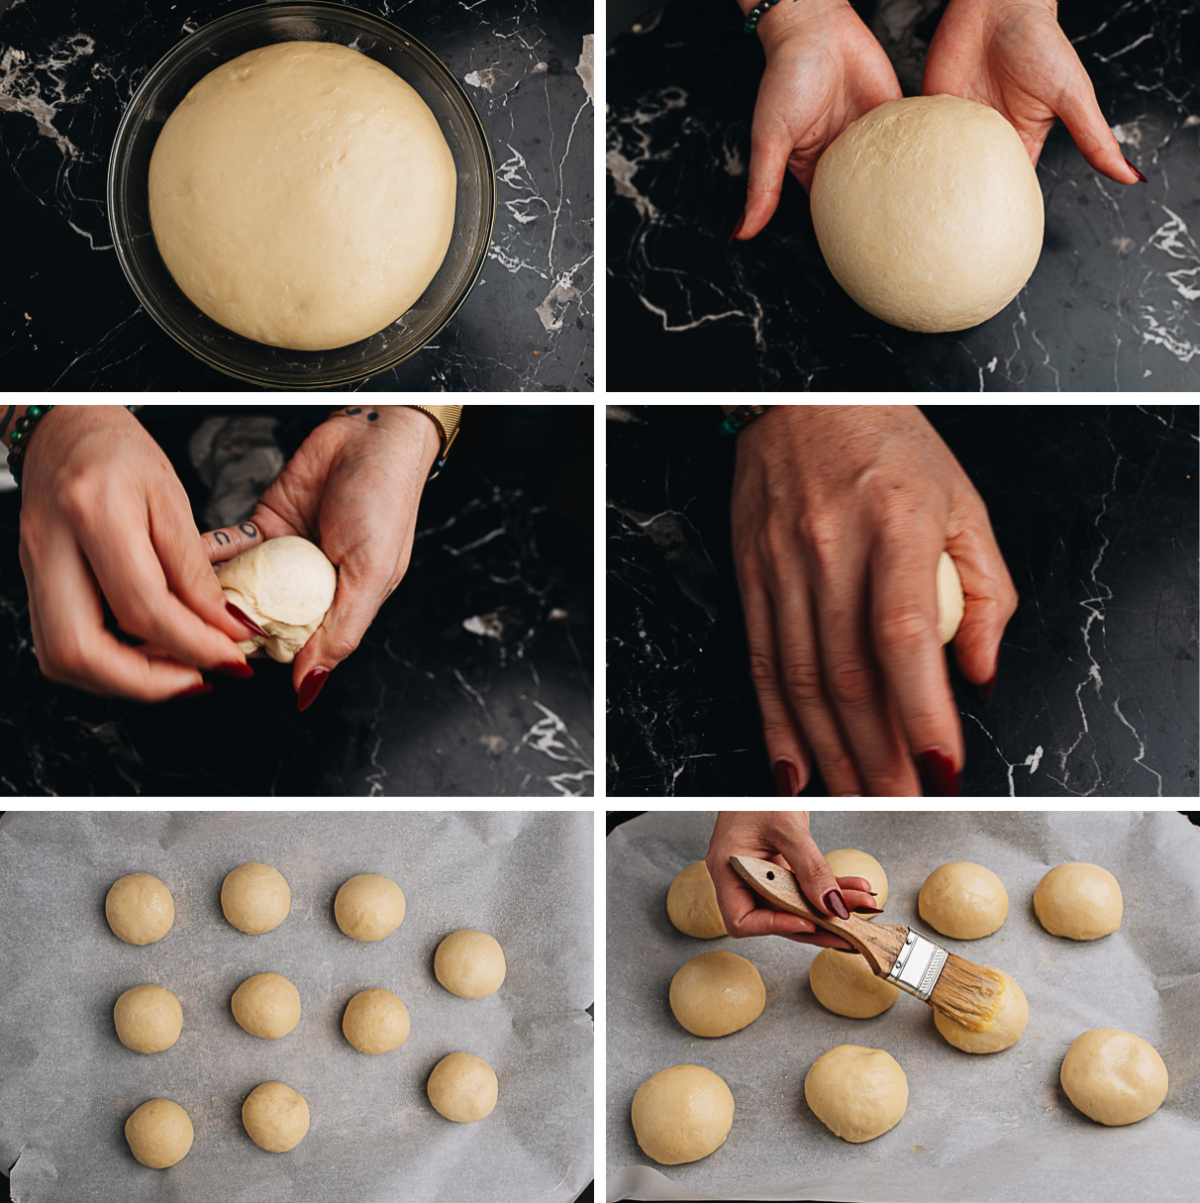
Shape the buns and bake – 2nd rise
- Punch down the dough
- Gently knead the dough, then divide it into 10 even pieces
- Shape each piece into a small ball
- Roll the dough with your hand to make it round
- Let the dough rest until doubled in size
- Brush the dough with egg wash then bake
Assemble the buns
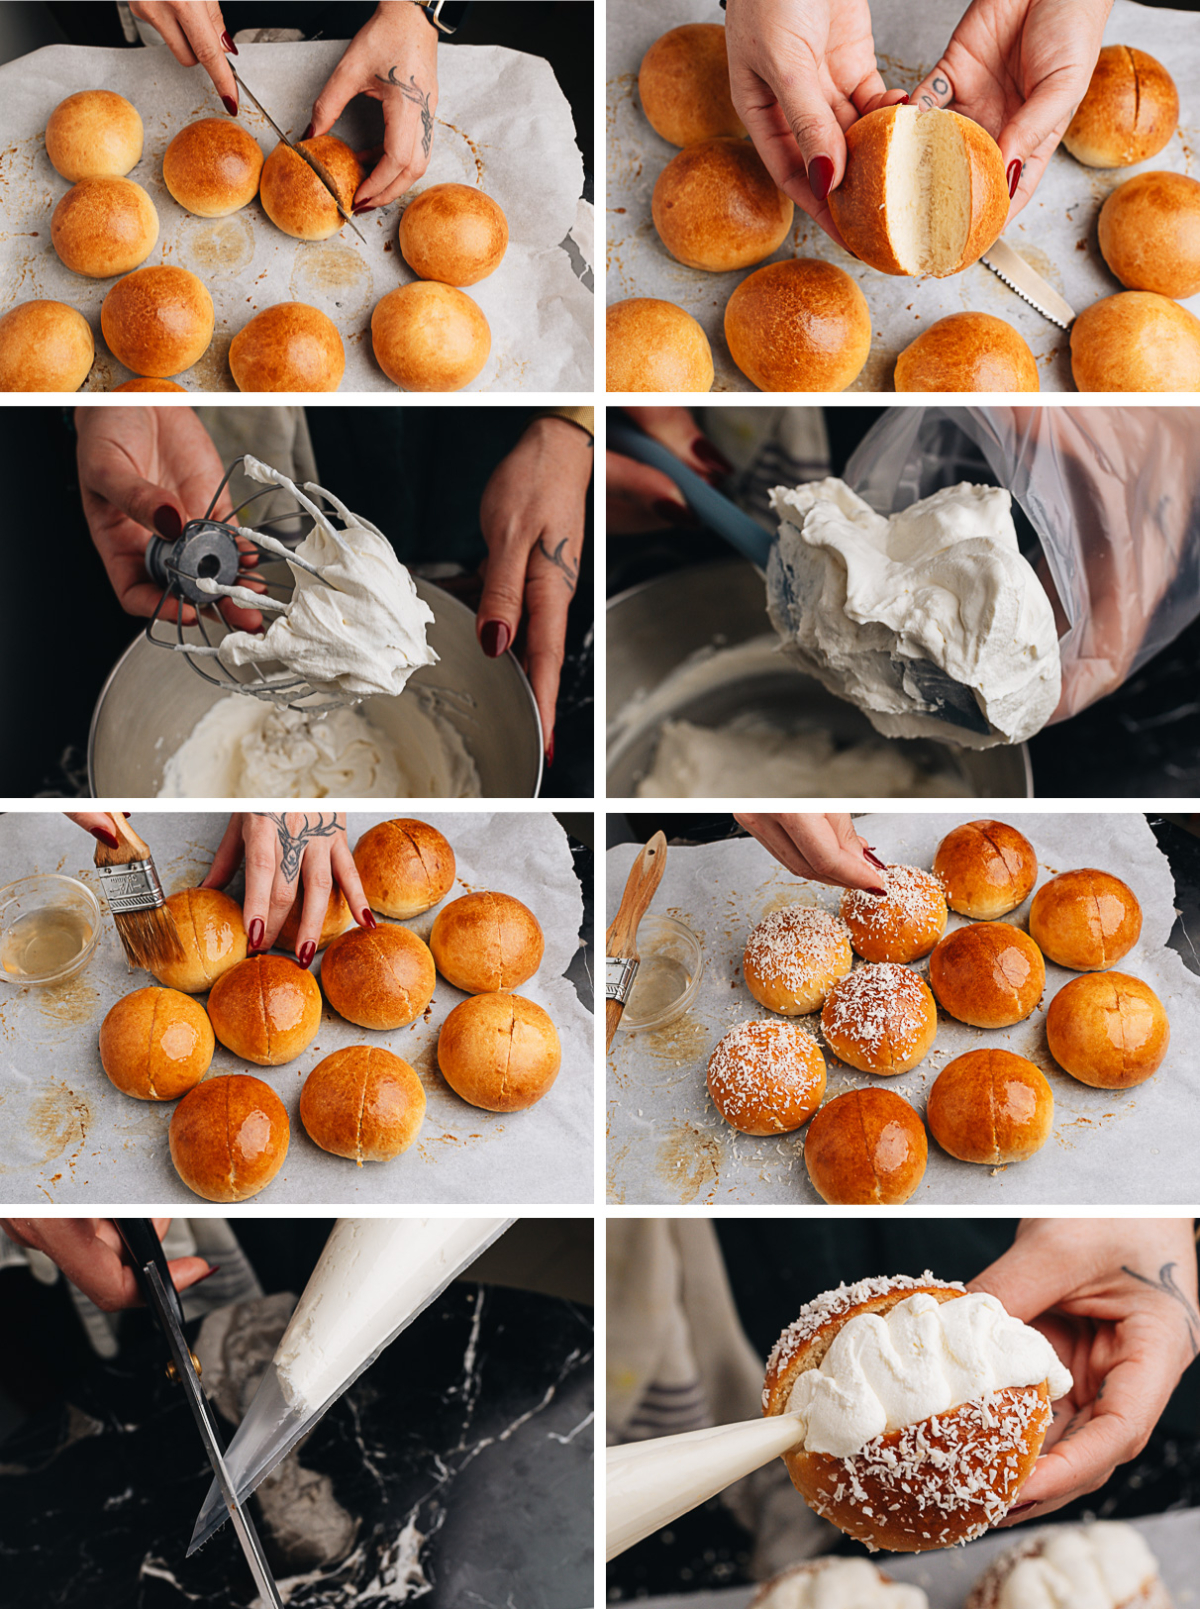
- Once the buns are baked, slice them in half with bottom attached
- Use your hands to open the buns to create a big opening for the cream filling
- Whip the cream until medium stiff peaks form
- Fill a piping bag with the whipped cream
- Brush the cut buns with the syrup
- Sprinkle the coconut flakes over the buns
- Cut the piping bag to create a slanted angle
- Fill the buns using an “S” motion to create the look
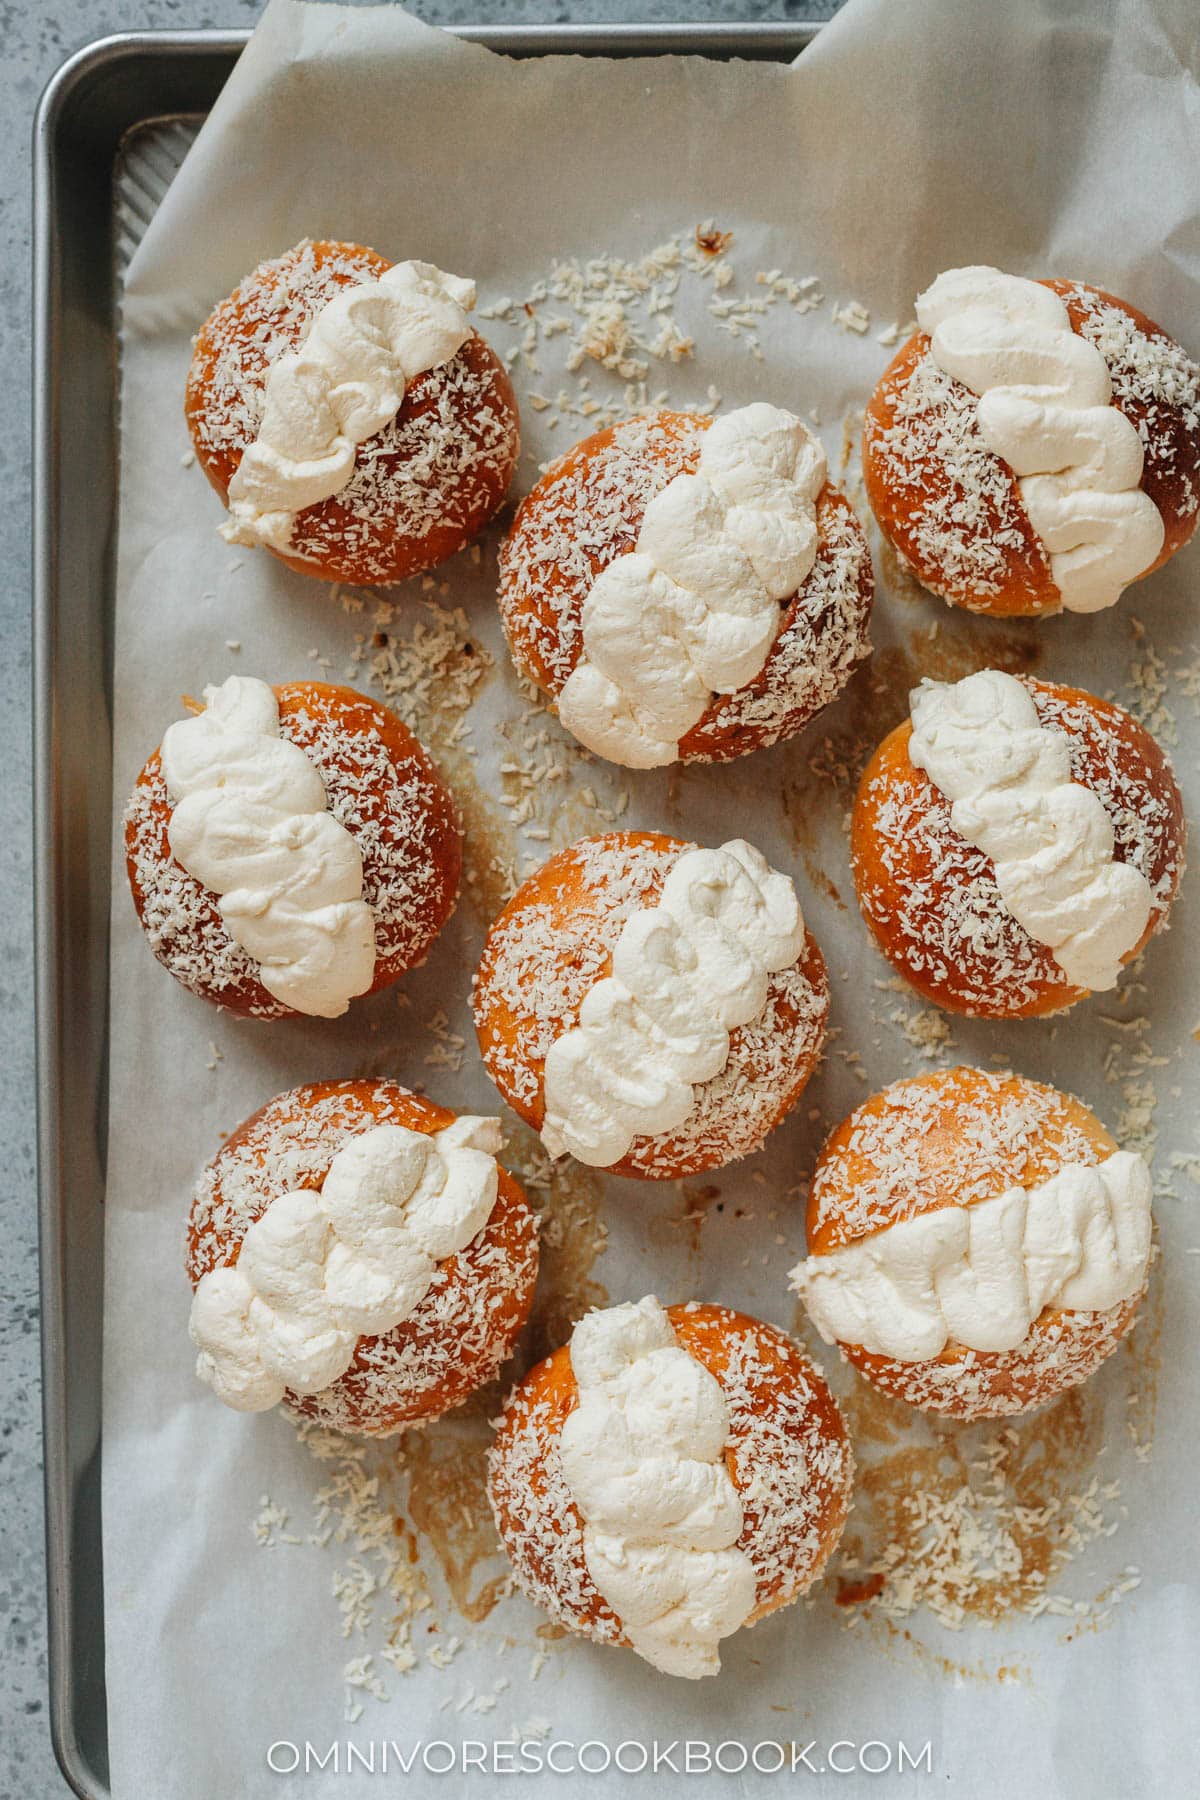
That’s it! Now you can enjoy these fluffy buns. They taste really good when they are freshly made.
How to store and transport coconut cream buns
Once the coconut cream buns are assembled, you can store them in a loosely covered container. I like to use my large baking dish to hold the buns and cover it with the lid if I don’t plan to serve the buns immediately. If you plan to bring these buns to a party, the baking dish is also a great container to keep the buns intact.
If you want to prepare these buns a day ahead, I would leave out the cream filling. Make and fill the cream the day you plan to serve the buns, to guarantee the best result.
Other delicious Chinese bakery recipes
- Pineapple Buns (Bolo Bao)
- Baked BBQ Pork Buns (Char Siu Bao)
- Chinese Egg Cake (鸡蛋糕)
- Red Bean Bread (豆沙包)
- Hong Kong Egg Tart (港式蛋挞)
Chinese Cooking Made Easy
Are you new to this website? This free email series is a great place to start. I’ll walk you through a few of my most popular recipes and show you how and why they work. You’ll quickly start to cook better Chinese food in your own kitchen.

Coconut Cream Buns
Ingredients
Dough
- 300 g (2 1/2 cups) bread flour
- 140 ml (1/2 cup) whole milk
- 7 g (1 packet / 1 teaspoon) active dry yeast
- 30 g (2 1/2 tablespoons) sugar
- 5 g (1 teaspoon) salt
- 80 g (1/4 cup) sweetened condensed milk
- 4 tablespoons unsalted butter , melted
- 1 large egg
Filling and Topping
- 1 egg , beaten, for egg wash
- 1 tablespoon granulated sugar
- 1 tablespoon boiling water
- 2 cups heavy whipping cream
- 1 teaspoon vanilla extract
- 1/4 cup powdered sugar
- 1/4 teaspoon salt
- 1/4 cup unsweetened desiccated coconut
Instructions
Prepare the bread dough – 1st rise
- Add the milk into a small bowl and warm to approximately 100-110°F (38°C), about 30 seconds in the microwave. The milk should be warm, just a bit above body temperature. Add a pinch of sugar and the active dry yeast. Let sit for 5 minutes so the yeast will activate.
- While the yeast activates, add the rest of the ingredients into your mixer bowl.
- Once the yeast is activated, you should see bubbles on the surface of the mixture. Pour it into the mixer bowl. Mix with a spatula until the dough just comes together. Cover with plastic wrap and let rest for 20 minutes.
- Install the dough hook on your mixer (I used a KitchenAid). Start at low speed, then gradually increase to setting 8 out of 10. Knead for 10 to 12 minutes, until the dough is very smooth. Stop the mixer in the middle and scrape the dough from the sides of the bowl. Test the dough by pulling a piece of it using both of your hands. It should stretch into a very thin and translucent sheet. The dough should be wet and a bit sticky.
- Grease a big bowl with a thin layer of oil. Place the dough into the bowl. Cover with plastic wrap and place the bowl in a warm spot. Let rise until the dough doubles in size, about 1 hour.
Assemble the bread – 2nd rise
- Line a 13” x 9” (33cm x 23 cm) baking pan with parchment paper.
- Punch the air out of the dough. Transfer it onto a lightly oiled working surface. Divide the dough into 10 even pieces, 65 grams per piece.
- Shape the dough one piece at a time. Tuck the dough onto itself by pinching the dough from all sides into the center using your fingers, creating a round shape. Then roll the dough in a circular motion with your palm against the table, until it forms a round ball. Cover the dough pieces with plastic wrap to prevent them from drying out. Let rest again for another 35 to 45 minutes, until the size has doubled.
Final assembly and baking
- Preheat the oven to 350°F (176°C).
- Whisk the egg in a small bowl to make an egg wash.
- Once the dough balls have proofed, gently brush the top with the egg wash.
- Bake at 350°F (176°C) for 18 minutes, or until the top turns golden. Once done baking, let the bread cool off while preparing the toppings.
Prepare the toppings
- Make the syrup: Stir 1 tablespoon sugar with 1 tablespoon boiling water. Stir until dissolved completely. Set aside to cool.
- Make the whipped cream: Make the whipped cream when you’re ready to assemble the buns. Combine the heavy cream, vanilla extract, powdered sugar and salt in your stand mixer bowl. Attach with the whip attachment. Whip on speed 6 until medium-stiff peaks form.
- Once done, transfer the whipped cream into a piping bag. Cut end of the cream filled piping bag on a bias, about 1/2” (1 cm) from bottom. Set aside until ready to use. (*Footnote 1)
- To assemble the buns: Once the buns have cooled completely, use a sharp knife to slice the slice down the middle, leaving the bottom of the bun intact.
- Brush the buns with the syrup. Then sprinkle the unsweetened desiccated coconut.
- Open the buns with your hands carefully, to make a big opening without detaching the bottom of the bun. Holding the bun with one hand, using the other hand to fill the buns with the cream. You can draw an “S” shape when filling the buns, to make a nice pattern.
- Enjoy the buns immediately. You can place the buns in a loosely covered container if planning to enjoy them in the next couple of hours. If planning to store the buns for a longer time, store them in an airtight container and the cream separately. Assemble right before serving.
- Once the bread has cooled completely, store the bread in an airtight container at room temperature if planning to serve within the day. Store in the refrigerator for up to 2 days, or in the freezer for up to 3 months. Reheat in the oven at 350°F (176°C) until warmed through before serving, for the best texture. (Footnote 2)
Notes
- A simple way to add the cream: If you do not wish to create the wavy looking cream filling, or do not have a piping bag, you can simply fill the cream using an offset spatula or a spoon. This method is quite useful if you plan to wrap up the buns and transport them to a different location.
- For longer storage: If you plan to make the buns the day before serving them, I would store the bread in an airtight container in the fridge. Instead of slicing the bread, then brushing with syrup and adding the coconut, I would do the syrup and coconut step first, leaving the bread uncut. When you’re ready to serve, gently warm up the bread in the oven for a better texture. And then add the cream when the bread has cooled off.
Nutrition
Have a question or feedback? Add a Comment
Did you make this? I want to see! Tag @OmnivoresCookbook on Instagram, and rate the recipe below.


