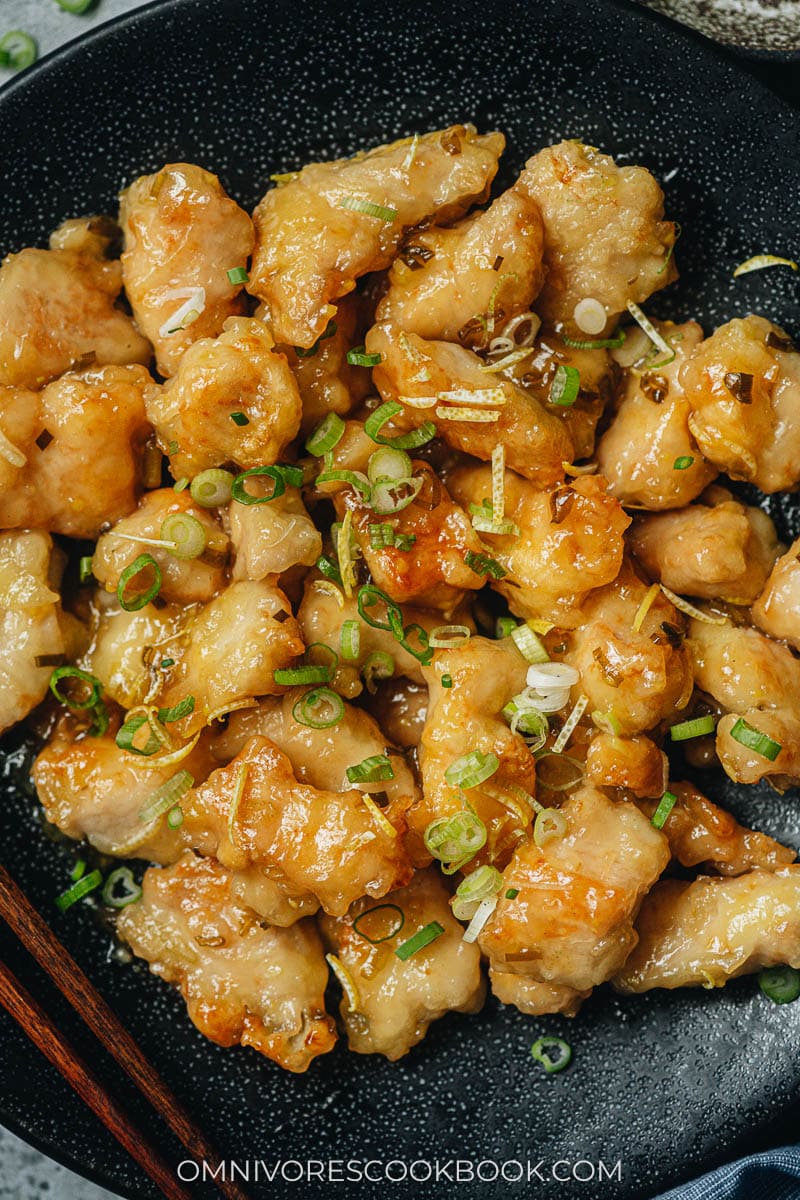
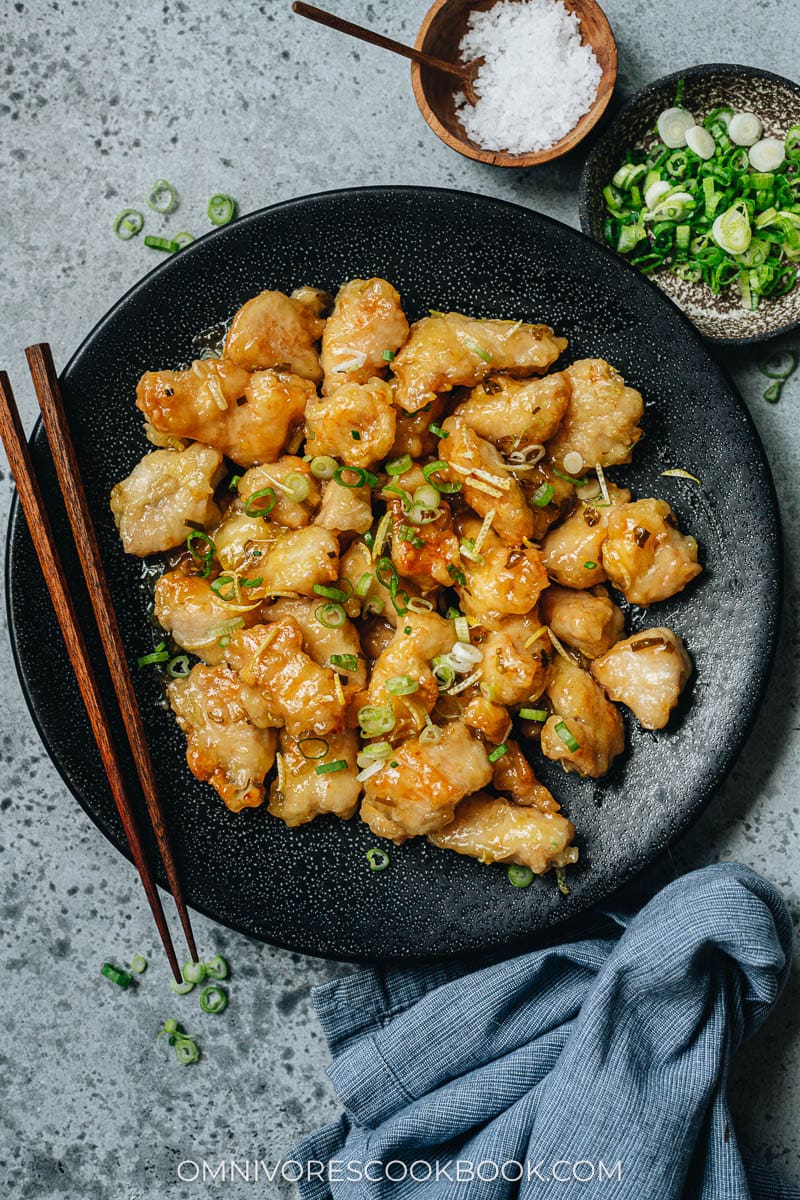
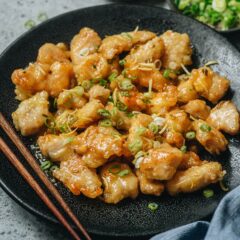
For those that order Chinese takeout, if Chinese lemon chicken is one of your go-to items, you simply must try making it at home. This famous takeout dish is glorious, but at restaurants, it tends to be loaded with more sugar and oil than you need.
As a result, it’s often not an especially healthy choice. But when you make it at home, you get crispy chunks of chicken breast without deep frying. Coated in a delightful lemony sauce, it is bursting with fresh flavor that will turn you into a kitchen god(dess).
Ingredients for Chinese lemon chicken
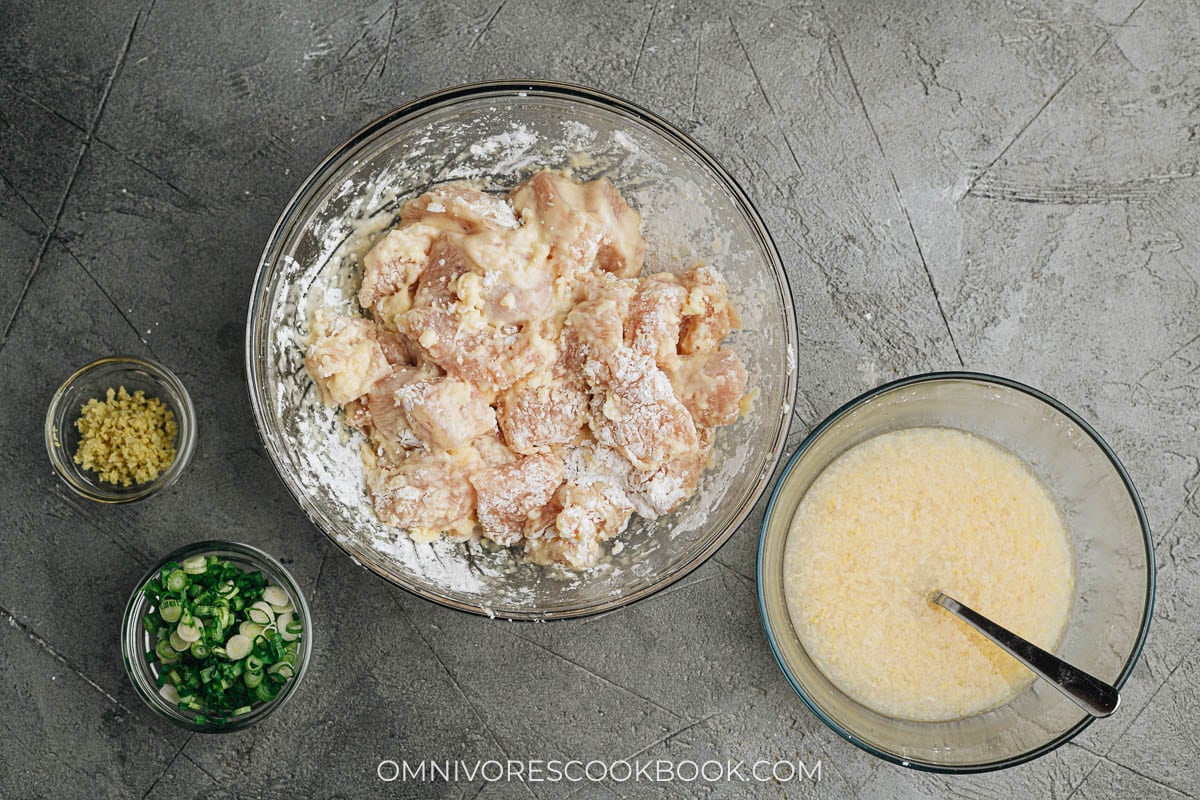
So, what’s the secret to that crispy chicken you’ll be craving in your dreams? It’s cornstarch! Adding it to a beaten egg and then coating the chicken with it is what helps you achieve that restaurant-quality crispiness without the need for deep frying.
Making lemon chicken requires a few ingredients that you probably already have in your pantry. To make a fragrant and balanced lemon sauce without getting too tangy, I used a mix of chicken broth, lemon juice, lemon zest and rice vinegar. Compared to using 100% lemon juice, the sauce is more well-rounded this way.
Mise en place
When you’re ready to cook, your table should have:
- Marinated chicken
- Mixed lemon sauce
- Ginger
- Green onion
How to make Chinese lemon chicken
- Pan fry the chicken
- Gently cook the aromatics
- Pour in the sauce and cook until thickened
- Add back the chicken
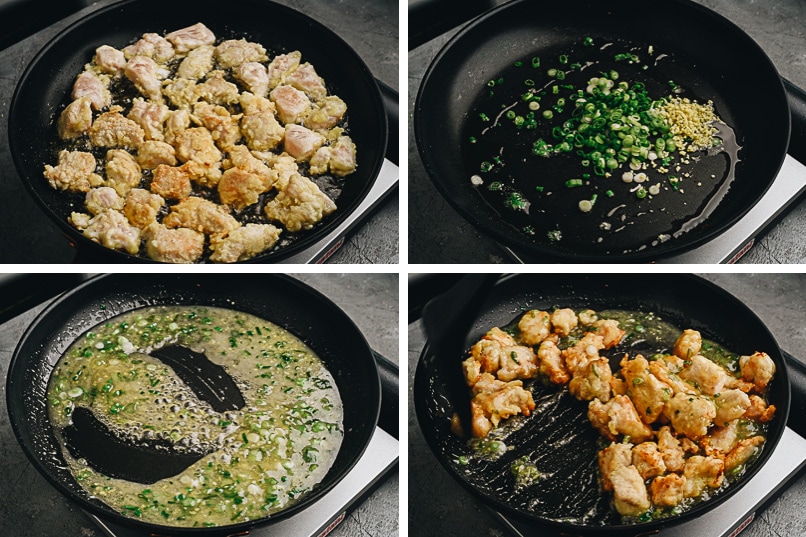
Tempting as it may be, you don’t want to move the chicken after you place the pieces in a single layer, preventing them from touching each other. This allows the bottom of each piece to reach a nice golden brown. After you flip, it’s the same story…just let it crisp up.
Also, you want to let the chicken cool off a bit once you take it out of the pan, so the crust crisps up further. So when you add the chicken back, it won’t become soggy immediately after mixing with the sauce.
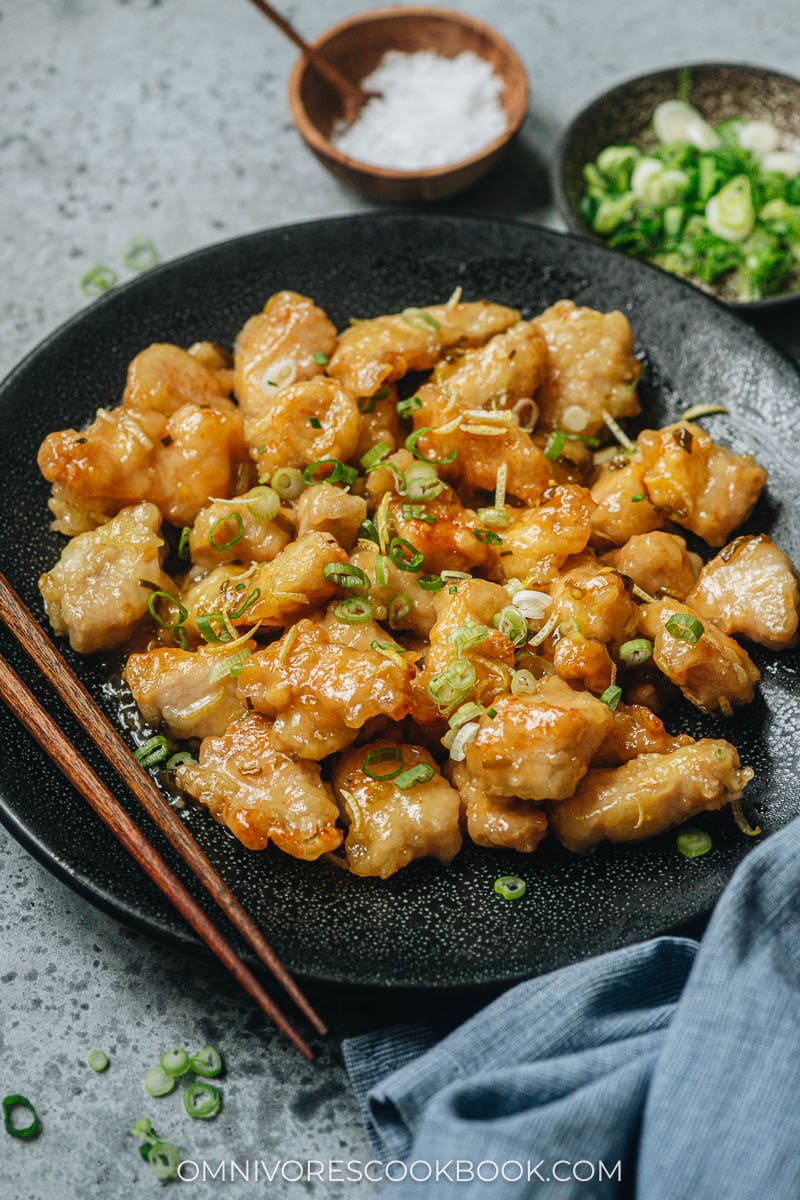
You’ll see it looks just like your old reliable Chinese lemon chicken takeout order. And the taste is spot on! Try it tonight, perhaps with one of my fried rice recipes to make your meal complete!
How to serve lemon chicken
You can serve lemon chicken by itself as a main dish. I also like to top it on steamed white rice. To complete your meal, serve it with a simple veggie side dish and a soup. For example: Tomato Egg Drop Soup, Air Fryer Garlic Green Beans, Chinese Broccoli with Oyster Sauce, or Bean Sprout Stir Fry.
Other delicious Chinese takeout recipes
- Chinese Orange Chicken (Crispy Chicken without Deep Frying)
- Chicken Lo Mein (Restaurant Style Without A Wok)
- Beef with Snow Peas
- Crispy Peanut Butter Chicken
- Pork Chop Suey
- Mongolian Beef (Without Using a Wok)
Chinese Cooking Made Easy
Are you new to this website? This free email series is a great place to start. I’ll walk you through a few of my most popular recipes and show you how and why they work. You’ll quickly start to cook better Chinese food in your own kitchen.
Watch video
Chinese Lemon Chicken
Ingredients
Sauce
- 1/4 cup chicken broth
- 1/4 cup lemon juice (juice from 1 big lemon)
- 2 tablespoons rice vinegar
- 1 teaspoon Shaoxing wine (or dry sherry) (Optional)
- 4 tablespoons sugar
- 1 tablespoon cornstarch
- 1 teaspoon lemon zest zest from 1 lemon (*Footnote 1)
- 1/2 teaspoon salt
Marinade
- 14 oz large boneless skinless chicken breast , cut to 1” (2.5-cm) pieces (or 2 chicken thighs)
- 1 tablespoon vegetable oil
- 1/2 teaspoon salt
- 1 egg
- 1/2 cup cornstarch
Stir-fry
- 1/3 cup vegetable oil
- 2 green onions , sliced (white part for cooking and green part for garnishing)
- 2 teaspoons minced ginger
Instructions
- Combine the sauce ingredients in the bowl and mix well.
- Combine chicken, oil, and salt in a big bowl. Mix well and let marinate for 15 minutes.
- When you’re ready to cook, add the beaten egg to the chicken. Stir to mix well. Add cornstarch. Stir to coat chicken, until it forms an uneven coating with a little dry cornstarch left unattached.
- Heat oil in a large skillet until hot, just starting to smoke. Add chicken all at once and spread into a single layer in the skillet. Separate chicken pieces with a pair of tongs or chopsticks.
- Cook without touching the chicken for 2 to 3 minutes, or until the bottom turns golden. Flip to brown the other side, 2 to 3 minutes. Transfer chicken to a big plate and remove the pan from the stove. Let cool for 2 to 3 minutes (very important, so the chicken crisps up further).
- Place the pan back on the stove and turn to medium heat. You should still have 1 to 2 tablespoons of oil in the pan. If there’s too much oil, pour out or use paper towels to remove the excess oil. Add green onion and ginger. Cook and stir a few times until it releases fragrance.
- Stir the sauce again to dissolve the cornstarch completely. Pour into the pan. Stir and cook until it thickens.
- Add back the chicken. Stir to coat chicken with sauce. Transfer to a plate and serve hot as a main dish.
Notes
- For garnish, you can use a peeler to peel a small part of the lemon rind, then thinly slice it.
Nutrition

Did you make this recipe?
I’d love to hear how it turned out for you! Please take a moment to leave a 5-star rating ⭐️ and share your thoughts in the comments further down the page. It really helps others discover the recipe too.
Sarah Hood
Such a great recipe! I’ve tried out lots of different recipes and combinations for Lemon Chicken, as it’s my daughter’s favourite Chinese dish. This one’s my go-to. Perfect every time. We’re not huge vinegar fans here, so I add a tablespoon each of Rice Wine Vinegar and Rice Vinegar, and make sure that I let the sauce simmer for a few minutes so the acetic flavour boils off (the vinegar does add an important component to the sauce, however, so I wouldn’t miss it out completely).
Jess
This was amazing! I also doubled the sauce because I like using it to flavor my rice. I admit to being skeptical about the addition of rice vinegar, but it was pleasantly tart and sweet once everything was done–I’m going to be adding this to my recipe collection from now on.
EK
easy and delicious, a must try. I substituted firm tofu for the chicken. (pat dry, brush lightly with oil, season with salt, cube, and coat with the cornstarch, then pan fry.)
we used 2.5 tablespoons sugar and it was the perfect balance of savory (from the broth), tangy from the vinegar and shaoxing wine, and sweet. i added snow peas while the sauce cooked down for a crunchy complement. I’d bet cabbage, bean sprouts, or asparagus would be great too.
EK
About to make this again and realized I forgot to mention last time that I added 1/4 tsp powdered lemon peel (avail from Penzeys) in the sauce as a lemon flavor booster. After juicing the lemon I will slice or quarter it for a garnish when serving.
Holly
Thoroughly enjoyed this dish. Will reduce the sugar next time and add broccoli florets. Winner!
Stacy
I had been saving this recipe for a few months and I finally made it and glad I did! It was soooo yummy, way better than takeout. Thank you 🙂
Mark Medellin
Wow Maggie! This was great! I doubled the sauce since I love a lot of it on top of the chicken and rice. The sauce made this dish 10x better than takeout! It was savory yet still tangy. After mixing the sauce, I took a little taste and was blown away with the incredible flavor. Must keep this recipe in my rotation!
Natalie
We thought this was terrific. We tend to use even less sugar than called for since we really love the tartness of the lemon sauce. The hardest part was not eating all the chicken as “taste tests” before the sauce could even get finished.
Pam
I made this recipe on Sunday! Very easy and delicious!
Ruth
I cooked extra firm tofu this way and it was great!