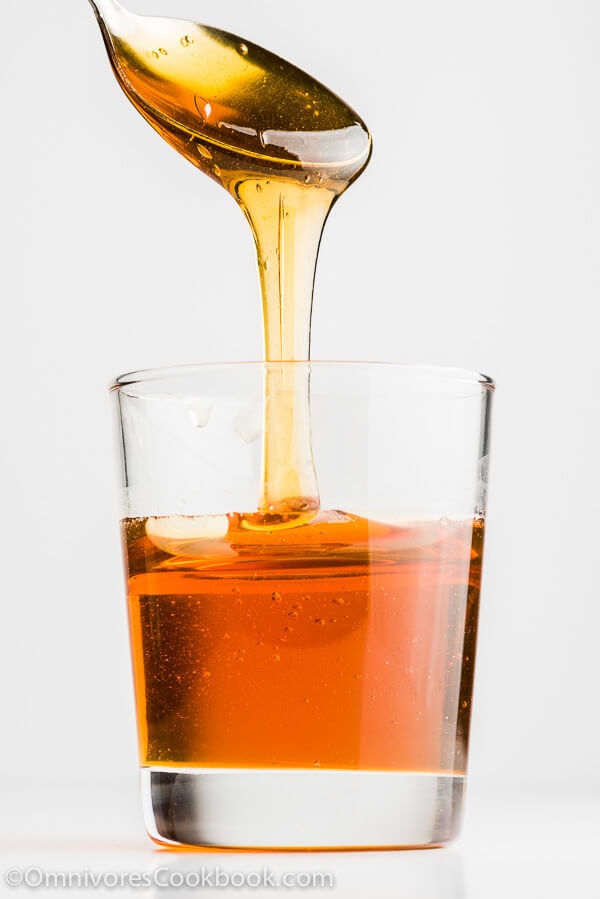
This homemade golden syrup recipe was created to be used for traditional Cantonese mooncakes and other Chinese desserts.
Golden syrup is a type of inverted sugar syrup used in traditional Cantonese mooncakes and lots of other Chinese desserts. It’s a type of inverted sugar that has a beautiful amber color, a rich and fruity aroma, and a very creamy texture.
But what is inverted sugar?
According to Wikipedia, inverted sugar is a mixture of glucose and fructose. Compared to sucrose, the granular sugar we use every day, inverted sugar is sweeter. By adding inverted sugar to a dish, you prevent sugar in it from crystallizing. Products made with it tend to retain moisture, have a tender texture, and thus have a better mouthfeel. It is an ingredient often used in bakery and pastry shops. It is also used in the process of making ganache, jelly, fudge, taffy, and ice cream.
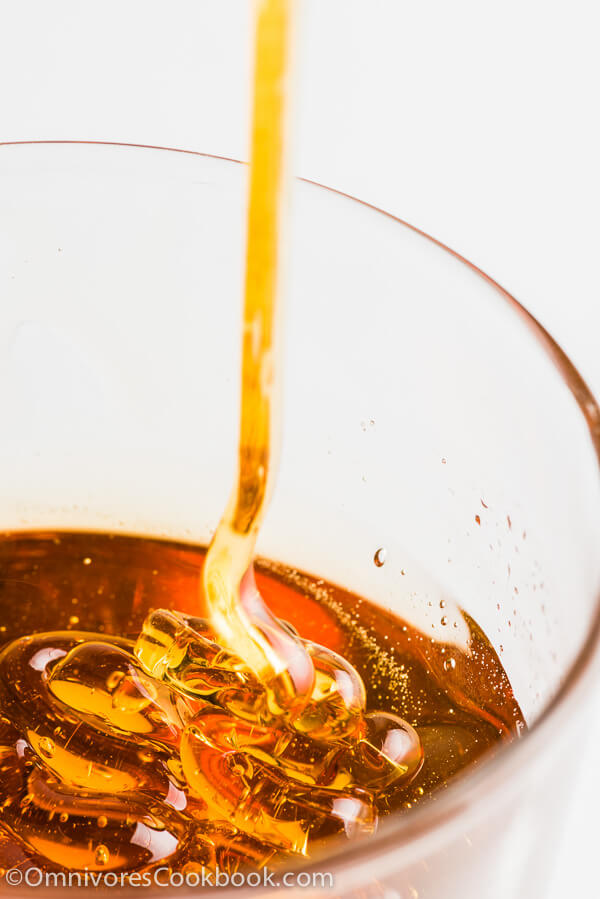
When I attempted to make mooncakes the first time. I purchased Lyle’s golden syrup from Amazon. It is a great product, but quite pricey. After some research, I found it’s very easy to make golden syrup from table sugar. It is a bit time consuming, but the process is very easy and the cost extremely low.
The logic is simple. If you add sugar into water and boil it long enough (40 to 60 minutes), the sucrose will be inverted and produce a golden colored syrup. This process includes introducing acid (lemon juice in this case). It speeds up the inversion process and prevents the sugar from crystallizing.
I used this homemade golden syrup to cook mooncakes, and the results were great, but the story doesn’t end here.
When I was experimenting with two batches of mooncakes, one with homemade syrup and one with store bought syrup, I found a surprising result.
The difference between homemade golden syrup and store-bought
A quick introduction to making mooncake dough – it requires use of golden syrup and an alkaline solution (also called kansui). The golden syrup will create a tender and moist cake which keeps its shape despite being paper thin, and can be shaped into delicate patterns (those you see on the beautiful traditional mooncakes). Kansui is used to neutralize the acid that is introduced by the golden syrup, resulting in a sweet pastry with no sourness. The amount of kansui also determines the tenderness and color of the cake (light yellow to dark brown), and slightly increases the fluffiness of the cake without causing it to rise too much.
When I started using homemade golden syrup to make mooncake dough, I found the syrup emulsified once it was introduced to the alkaline solution. Later on, I learned that this emulsification is actually an important step in dough making. It didn’t happen when I used the store-bought golden syrup.
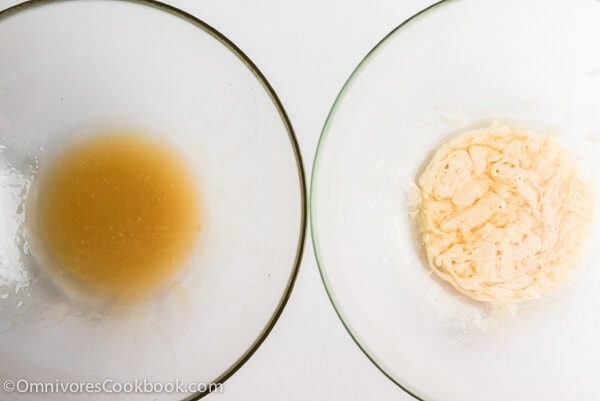
So I checked the label on the bottle of syrup. It contains only cane sugar. Then I found out there are two ways to make golden syrup. It can be made (1) in the process of refining sugar cane or sugar beet juice into sugar, or (2) by treatment of a sugar solution with acid (from Wikipedia). Evidently, the store-bought golden syrup is made by the former method, and the homemade one takes the latter approach. The commercially prepared syrup does contain acid, but the amount is very low, only 0.1%. The homemade syrup has a much higher acid content.
What matters here, is since store-bought golden syrup contains much less acid, there is no reason to use a lot of alkaline water to neutralize it. When I thought back, I found that the mooncake batches made with store-bought golden syrup had a darker color, which would logically result from adding too much alkaline solution.
A darker colored mooncake is not necessarily a bad thing. But please note, homemade golden syrup has different contents than a store-bought one. When you are using a mooncake recipe that includes store-bought golden syrup, using a homemade one might yield a lighter color.
The other thing you need to note, is that while you’re cooking golden syrup, the inversion percentage of sucrose varies depending on the temperature of the sugar solution. To make mooncakes, the golden syrup needs to register 230 to 239 degrees F (or 110 to 115 degrees C) at the end of boiling. However, even if your golden syrup registers within this range, the water percentage will vary (from 15% to 25%), which might require some adjustment to the amount of flour added to the mooncake dough.
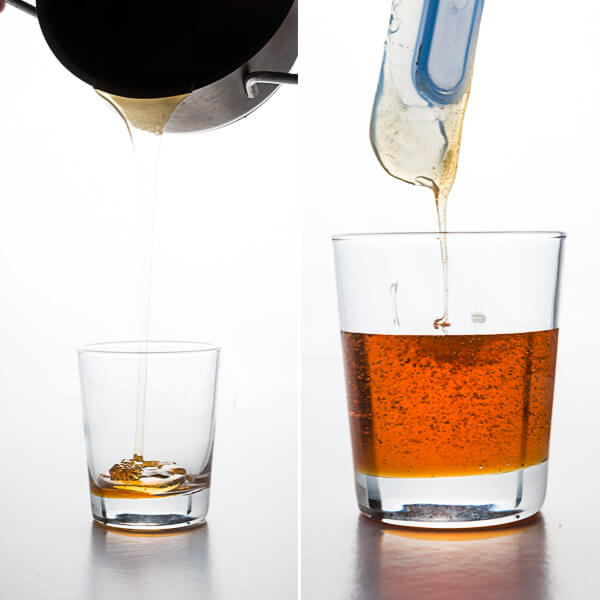
That’s it. I hope this doesn’t sound confusing or complicated. The truth is, as long as you follow the instructions below, you will get a rich and fruity syrup that will allow you to create beautiful mooncakes.
Chinese Cooking Made Easy
Are you new to this website? This free email series is a great place to start. I’ll walk you through a few of my most popular recipes and show you how and why they work. You’ll quickly start to cook better Chinese food in your own kitchen.

Homemade Golden Syrup (转化糖浆, Invert Sugar Syrup)
Ingredients
- 50 ml (1/4 cup) fresh lemon juice , strained (from 1 big lemon)
- 400 grams (2 cups) caster sugar
- 200 ml (3/4 cup plus 2 tablespoons) filtered water , and more to brush on the pot
Instructions
- Juice one big lemon. Drain lemon juice through a coarse strainer, discard the seeds and fruit bits. Place a funnel (or the funnel part of a coffee machine) over a cup and line a coffee filter inside. Pour in lemon juice and let drain. If the coffee filter gets clogged, change to a new filter. Alternatively, you can use several layers of cheesecloth or a fine strainer to drain the lemon juice. Measure 50 milliliters lemon juice in a bowl. Set aside.
- Prepare a cup of filtered water and a silicon blush.
- Combine caster sugar and 200 milliliters filtered water in a small stainless pot (or ceramic pot). The deeper the pot, the better. (*see footnote 1) Do not use a pot made of aluminum or cast iron. Heat over medium heat until bringing to a boil.
- Add lemon juice. Keep cooking until it reaches a boil again. Turn to low heat and let the solution simmer. I used a heat level of 2.5 out of 10 on an electric stove. (*see footnote 2)
- Do not stir the syrup from this point forward.
- While simmering the sugar. Dip a basting brush in water and brush along the walls of the pot to let the water run down into the syrup. This helps prevent the sugar from crystallizing along the walls of the pot. You might only need to do this at the beginning of the cooking.
- Check on the syrup every 10 minutes during simmering. If you notice any crystal-like masses appearing on the walls of the pot (close to the surface of the syrup), brush water over the mass to dissolve it and let it run down into the syrup.
- It takes 40 minutes to 1 hour to cook the syrup. Keep close watch after 35 minutes. You should notice the color of the syrup turning darker and more bubbles appearing on the surface in the last 10 minutes of cooking. The pictures below shows the the syrup after 30 minutes and 40 minutes of simmering.
- When the syrup color turns amber, measure with a clean thermometer. The temperature should register 230 to 239 degrees F (or 110 to 115 degrees C). It took me 54 minutes to simmer the syrup. (*see footnote 3)
- If the temperature of the syrup raised too fast while its color still pale, you can add more water and let simmering a bit longer.
- When the syrup is done, remove pot from heat and let cool completely.
- Transfer the golden syrup to a clean, airtight jar and store in room temperature. If you sanitize the jar, the golden syrup can be stored up to a year.
- The golden syrup will be ready to use after 24 hours. The taste gets much better after 2 to 3 days. The bubbles will disappear and the sourness will reduce significantly, thus producing a fruity aroma and more concentrated flavor.
Notes
- The syrup will thicken and make a lot of splatter on your stove if you use a shallow pot.
- It’s very important to let the syrup cook slowly so the water won’t evaporate too quickly. The longer you cook the syrup, the darker it will become, and the more sugar will be inverted. If you let the water evaporate too quickly, you will end up with a lighter syrup.
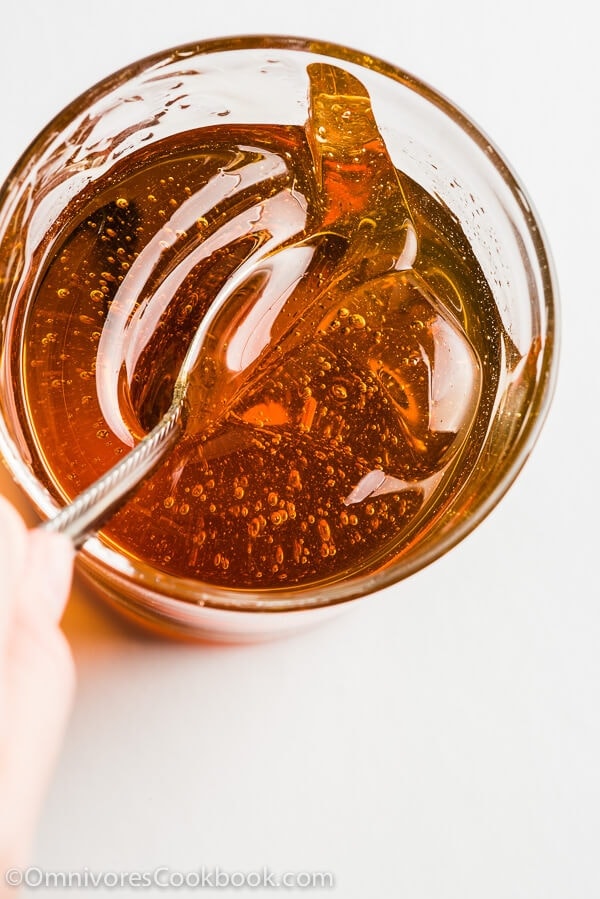
- I highly recommend you use a thermometer during the cooking process. The syrup thickens relatively quickly towards the end of the cooking, and it’s very difficult to tell when it’s done by simply observing the color. The color of the syrup should reach a golden amber that is not too dark. And you’re looking for a texture that is very runny and thinner than honey. The texture will thicken a lot as the syrup cools down. And it will become even thicker after two days.

Did you make this recipe?
I’d love to hear how it turned out for you! Please take a moment to leave a 5-star rating ⭐️ and share your thoughts in the comments further down the page. It really helps others discover the recipe too.

jules
I am excited to try this method, most methods i find call for caramelizing 100g sugar in about 50 ml water, then dumping 300ml boiling water in the hot sugar and adding 500g more sugar. Needless to say, sputtering molten sugar and boiling water is treacherous business! Plus, it’s very easy to burn the carmelized sugar in the first step, and you still have to simmer an additional 45 min! Your recipe sounds wonderfully simple, and thank you for explaining that the sour lemon flavor mellows after a few days, I was worried I used too much lemon in mine today, but I’ll wait a few days to make a fair judgment. I wonder if there’s any difference in the end result between these two methods?
Maggie
Hi Jules, I never tried out the other method so it’s hard to tell the difference. If the other method does not use lemon, I do think the end taste of the syrup from this recipe will be slightly fruitier.
Hope you like how yours come out!
Michael
Hi, I tried this last night as I am experimenting to make some moon cakes. But my golden syrup has the right color, got the right temperature but now that it has cooled over night it is the consistency of super thick and sticky maltose. Is this correct? I should I thin it out with some hot water?
Samantha
I used this recipe the other day, and the flavour came out great, but it became very hard after it cooled. I didn’t have a thermometer on hand, so that might’ve affected it. Is there a way to save it still? I’d love to use it for mooncakes!
Lauralie Kay
Turned out great! Can’t waitbto use it!
Claudia George
How long will this last before spoiling?
Madeleine
Can I use lime instead of lemon?
Marina
Sorry for wakening up this post in 2018! Ive tried making the golden syrup but mine turn black and bitter,what could it be wrong?? The first 20minutes it turns brown and i thought i should wait more longer as i follow what you’ve written in this post 40-54minutes to make it amber color.. waiting till 40minutes and all are turning black! I quickly add some more water hoping that will change it but its not. Huhu.. any advise what did i do wrong??
Maggie
Hi Marina, sorry to hear it! I think you might have overcooked the syrup. It took me a very long time to make the syrup because I use an electric stove and it takes forever to raise the cooking temperature. If you’re using a gas stove, which heats up immediately, or if you are using a slightly higher heat level, the cooking time might change a lot. The sugar is burned when it changes to a darker color and unfortunately there’s nothing you can do to bring it back 🙁
Erika
Thank you so much for this recipe!
I actually used it to make a homemade cookie butter, and it worked beautifully. I couldn’t justify buying a tin of golden syrup for $8 when I could easily make a much better tasting product. Thank you again!
Kari
Hi, Maggie.
Thank you for such a good explanation. Is it possible to obtain more or less the same results using cream of tartar (minus the desired fruity-ness)?
Maggie
Pretty sure I saw a recipe using cream of tartar somewhere, but I can’t remember where. I’m afraid you need to search on Google for another recipe. I never tested it with cream of tartar so I cannot say for sure.
Juju
Hello, Maggie:
Have been putting off making golden syrup for quite a while, but your photos are truly drool-worthy, which has spurred me into action. Often, I make pure caramel syrup, as well as plain invert (homemade light corn syrup minus the additives found in many commercial brands), using the microwave, which takes just a few minutes, depending on wattage.
From a chemistry standpoint, a bit of extra time is saved by allowing the sugar to completely dissolve in the water, prior to heating. Just a few stirs over a few minutes.
Checking out the caster sugar amount listed above, it appears a typo may have been made in grams vs milliliters.
400g caster sugar is ~420ml, not 200 ml
200ml caster sugar is ~190g, not 400g
Based on an almost 2:1 ratio sugar to water, I am hazarding a guess 400g is correct, but the amount in ml is a typo or a bit off.
Natalie Lim
Thank you for this. It was a very informative read and I found the tips that you shared really helpful. I just baked my first mooncakes today and they didn’t look good so I was trying to research on why that is so and found your site. Thanks for your sharing! I’ll bake another batch tomorrow and see how it goes. Fingers crossed.
Your mooncakes look divine!
Hsin
Hi Maggie,
Thank you do much for the great post and clear instruction. I’m a newbie at your website and I was so happy and excited when I found your post about home made mooncake 2 days ago!
I tried this recipe to make golden syrup and it turned out well. I tasted it a bit when it’s done, the texture reminds me maltose that I had in my childhood. <3
I have one question regarding the golden syrup. How should I keep it and how long it can stay good?
Thank you very much and look forward to reading more your recipes!
Kind regards from the Netherlands!
Hsin
Maggie
Hi Hsin, sorry for replying this late. As for the storage of the syrup, if stays good for a long time if your room is not too hot. I remember mine stayed good for months. However I do suggested you to use it as soon as possible, since the fruity aroma will get a bit stale after storing for too long time.
I hope your mooncakes turned out well and have a great week ahead 🙂
jackie
h0w deep does the pot need to be? regards from jackie in Ukraine. I can’t afford a thermometer
Maggie
Hi Jackie, a small pot that is at least 10-cm above the syrup will be fine. If you don’t have a thermometer, try cook the syrup for 45 minutes, it should be done around the time. Just observing the syrup when it’s nearly done. If it gets too dark, you can add a bit water to return it back to the amber color.
Lee Gundlach
Excellent article with detailed instructions worked perfectly.
I was in Beijing a few years ago and got a moon cake mold. Getting ready to make my first batch since i now have Golden Syrup.
Wish me luck.
Maggie
Hi Lee, I’m glad to hear your cooking turned out well! Good luck with the mooncakes. It’s a challenging task and very rewarding. Let me know how they turn out 🙂
Have a great week ahead!
Hanner
Thanks so much for putting this out for the world! As soon as I finish of my last few drops of Lyle’s, I’ll be trying this to refresh my stash.
We make many spicy ginger cakes as gifts and party food from October through December every year, so this will save us some cash for sure!
(If anyone wonders, the Double Ginger Cake by Hugh Fearnley-Whittingstall can be found online and is the base recipe we use. We add more ginger, some faintly bitter candied lemon rind, and we let it age a few days before serving. It ships well, too.)
Hanner
Whoops! That double ginger loaf cake is by Nigel Slater, actually.
Maggie
You’re the most welcome Hanner! If you’re planning the baking, make sure to make the syrup a few days ahead so it has enough time to rest. The syrup tastes quite sour at first, but then the acid taste will mostly disappear after a few days.
Will check out the double ginger cake for sure because it sounds heavenly!
Thank you for sharing and have a great week ahead 🙂
Rachael
I have just made a double batch of this. I was right at 1 hour for the right consistency and I was monitoring it constantly with a candy thermometer. I took it off the heat at 230f and put it straight into a sterilized mason jar. I had a sneaky lick around the pan and it tasted so great! Can’t wait to taste it in a few days…hopefully the acid taste will be gone. Thanks for the recipe!
Maggie
Hi Rachael, thanks for reporting back your cooking result! Yes the acid taste will mostly go away after a few days. I hope the syrup turned out as good as you hoped 🙂
Yanyan Wang
Wow, that’s so educational, this article explained very well about how the sugar was inverted. Thanks, Maggie.
Maggie
Glad to hear the article is helpful! It’s so much cheaper to make it at home, and it tastes just as good 🙂
Dini @ The Flavor Bender
Just made this yesterday and I have to ask my husband to hide it from me! I get to have Golden syrup and buttery toast again which makes me very very happy! 🙂
I made 1.5 batches and I didn’t change a thing, but I think I might have squeezed a little too much lemon in mine – I should invest in a better measuring cup (there was no 75mL mark). Mine took about 50-55 minutes to reach the right consistency too. I absolutely love it! It’s fruity, delicious and I will be making it again 🙂
Thanks Maggie!
Maggie
Hi Dini, I’m so happy to hear the cooking came out well! I was so nervous cooking it the first time! Actually I remember my golden syrup tasted a bit sour too, when it’s just cooked. But after letting it resting for 3 days, the acid (might even be a bit astringent) taste was mostly gone, and turned to a very fruity flavor. Me too, I love snaking on it here and there, and I ended up not having enough syrup for baking!
Hope you’ll have enough left for the baking, and hope the baking turns out great! 🙂
Thanks again for taking time to report back the result!
Dini @ The Flavor Bender
I needed golden syrup, but it was way too pricey! Then I remembered that YOU had a recipe for one and I am SO glad I checked it out! 🙂 I will definitely be making this. Thank you Maggie!!
Adina
Great post! I have been wanting to make Harry Potter’s favorite cake Treacle Tart forever, but I need golden syrup for that and I didn’t know what that is or what to buy instead here in Germany. Maybe now I can give it a try. 🙂
Angelina
Do you know if I can immediately use the syrup for mooncakes? I didn’t plan ahead and already prepared my lotus seeds and I don’t want to leave them in the fridge.
Kevin | Keviniscooking
Wow, thanks for educating me on that one, lots of valuable information Maggie, well done! And these photos? Holy smokes they are outstanding, simply beautiful. Pinned. 🙂
Jen
Hi Maggie, thanks for sharing the recipe of your experiment. Loved the pictures! Will try to making the golden syrup for my next batch of moon cakes.
Wishing you a happy mid autumn festival!
Maggie
Thanks for leaving a comment Jen! Wow, I’m really glad to hear that people really want to make the syrup and mooncake at home. The process is a bit time consuming, but the result is definitely rewarding! Happy cooking and do let me know how the mooncake turns out!
You too, happy Mid Autumn Festival!