Homemade Soy Milk (with Soy Milk Maker, 豆浆)
Please note, the prep time doesn’t include soaking the beans.
Servings: 4 and 1/2 cups
Ingredients
- 1 and 1/2 cups (120 grams / 4.2 ounces) dried soy beans (by using the cup comes with the machine)
- 7 cups filtered water
- Agave syrup or maple syrup (Optional)
Instructions
- Use the soy bean cup that comes with the machine to measure 1 and 1/2 cup dried soy beans. Add into a bowl. Rinse with tap water for 1 to 2 times to remove dust on the surface and drain. Add water to cover the beans at least 1-inch deep.
- (Cook with soaked beans) Soak the beans overnight or for at least 6 hours.
- (Cook with dry beans) Skip the soaking process above and start making the soy milk immediately after rinsing. (*Footnote 1)
- Drain the soaked soy beans and add to the soy milk maker. Add filtered water until it reaches the 1700ml mark.
- Place the lid of the soy maker on and adjust so it’s firmly attached. When you plug in the cord, you should hear a beep and the soy maker shows “Keep Warm” on the lid. This means you’ve set up the machine properly. Choose “soaked beans” and you will hear two beeps. This means the machine has started. Soon after you start the machine, you will hear a loud noise for a few seconds, which means the machine has started to grind the beans while heating up.
- Now your job is done and you can relax. A big jar of freshly made soy milk will be ready in 30 minutes. During that time, you will hear the machine mixing from time to time; the noise is about same level as your blender.
- Once the soy milk is done, the machine will beep for 1 minute and automatically switch to “keep warm” for an hour. Please note, you should not leave the hot soy milk in the machine for more than 4 hours.
- Place the fine mesh over the jar that comes with the machine (*Footnote 2). Pour the soy milk into the jar to remove the soy pulp. You can use a small spoon to stir and press the soy pulp, so it speeds up the process and lets the milk drain thoroughly.
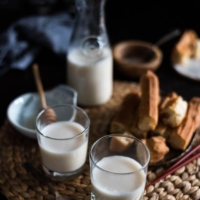
- Now the soy milk is ready to drink. You can enjoy it hot or cold. My favorite sweetener is agave nectar or maple syrup. If you feel the bean flavor is too strong, adding one to two drops of vanilla extract will even it out a bit.
- To store the milk, let it cool to room temperature, then transfer to airtight jars. Store in the fridge for 3 to 4 days.
Notes
- The soy milk made with dry beans tastes almost as good as with soaked beans. However it generates a very fine bean pulp that is difficult to remove using the fine mesh, so the milk is not as smooth as a result. You can strain the milk first and let sit for a while. The bean pulp will sink to the bottom; then you can pour the milk into glass without pouring the bean pulp.
- The jar is plastic. I always let the the soy milk cool down for a bit before draining. If you do not like pouring hot liquids into a plastic jar, you can use a ceramic bowl instead.