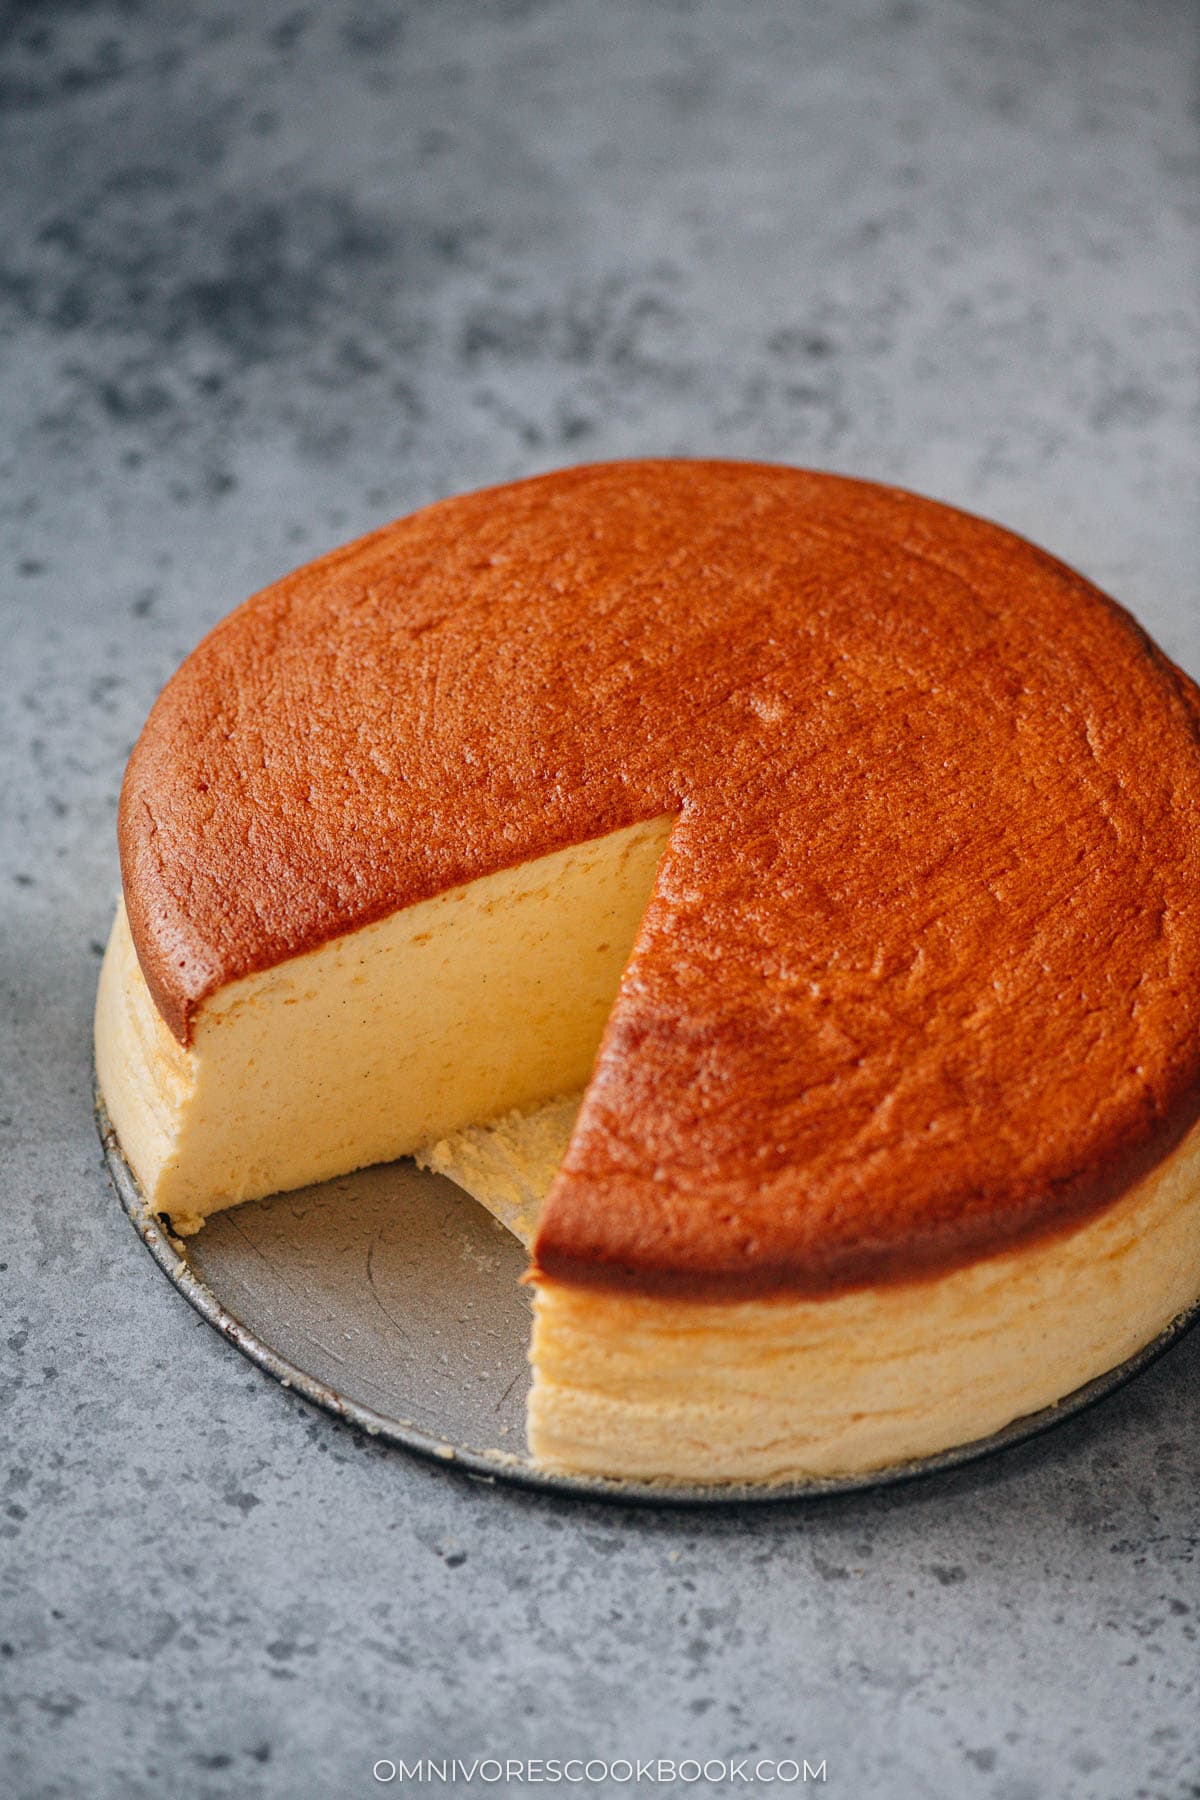
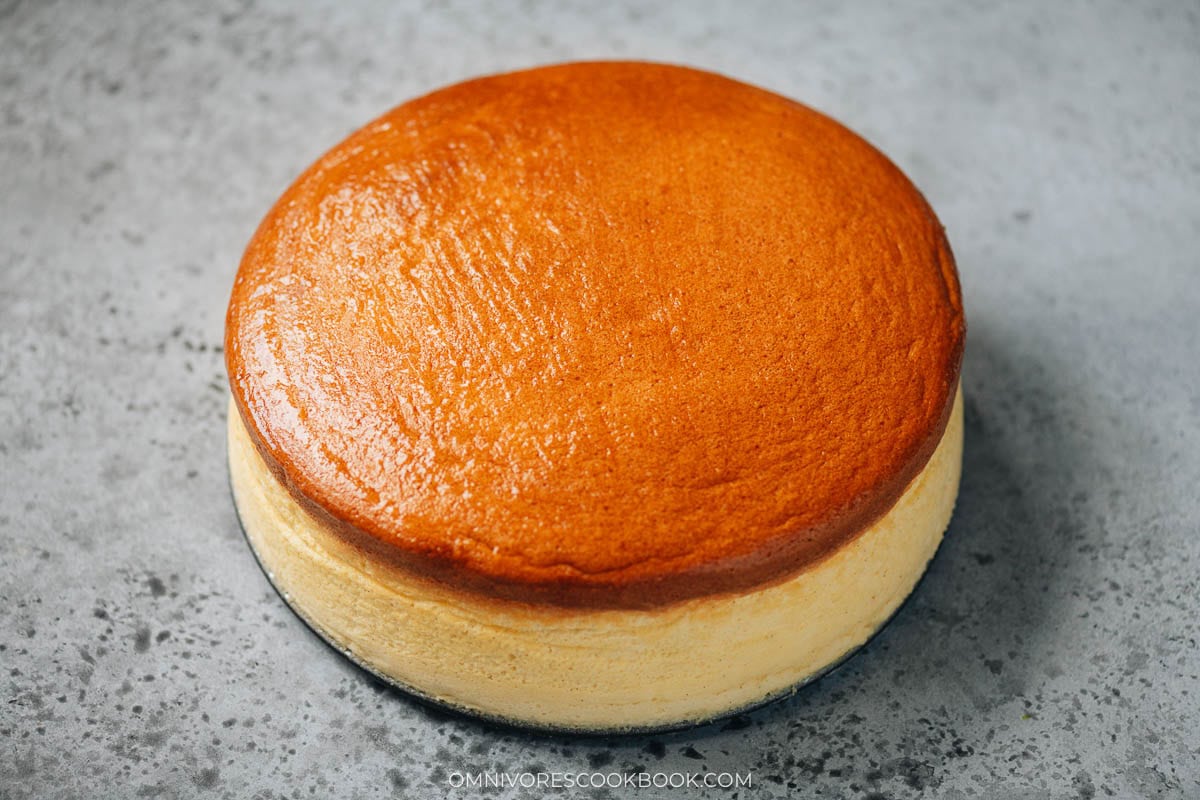
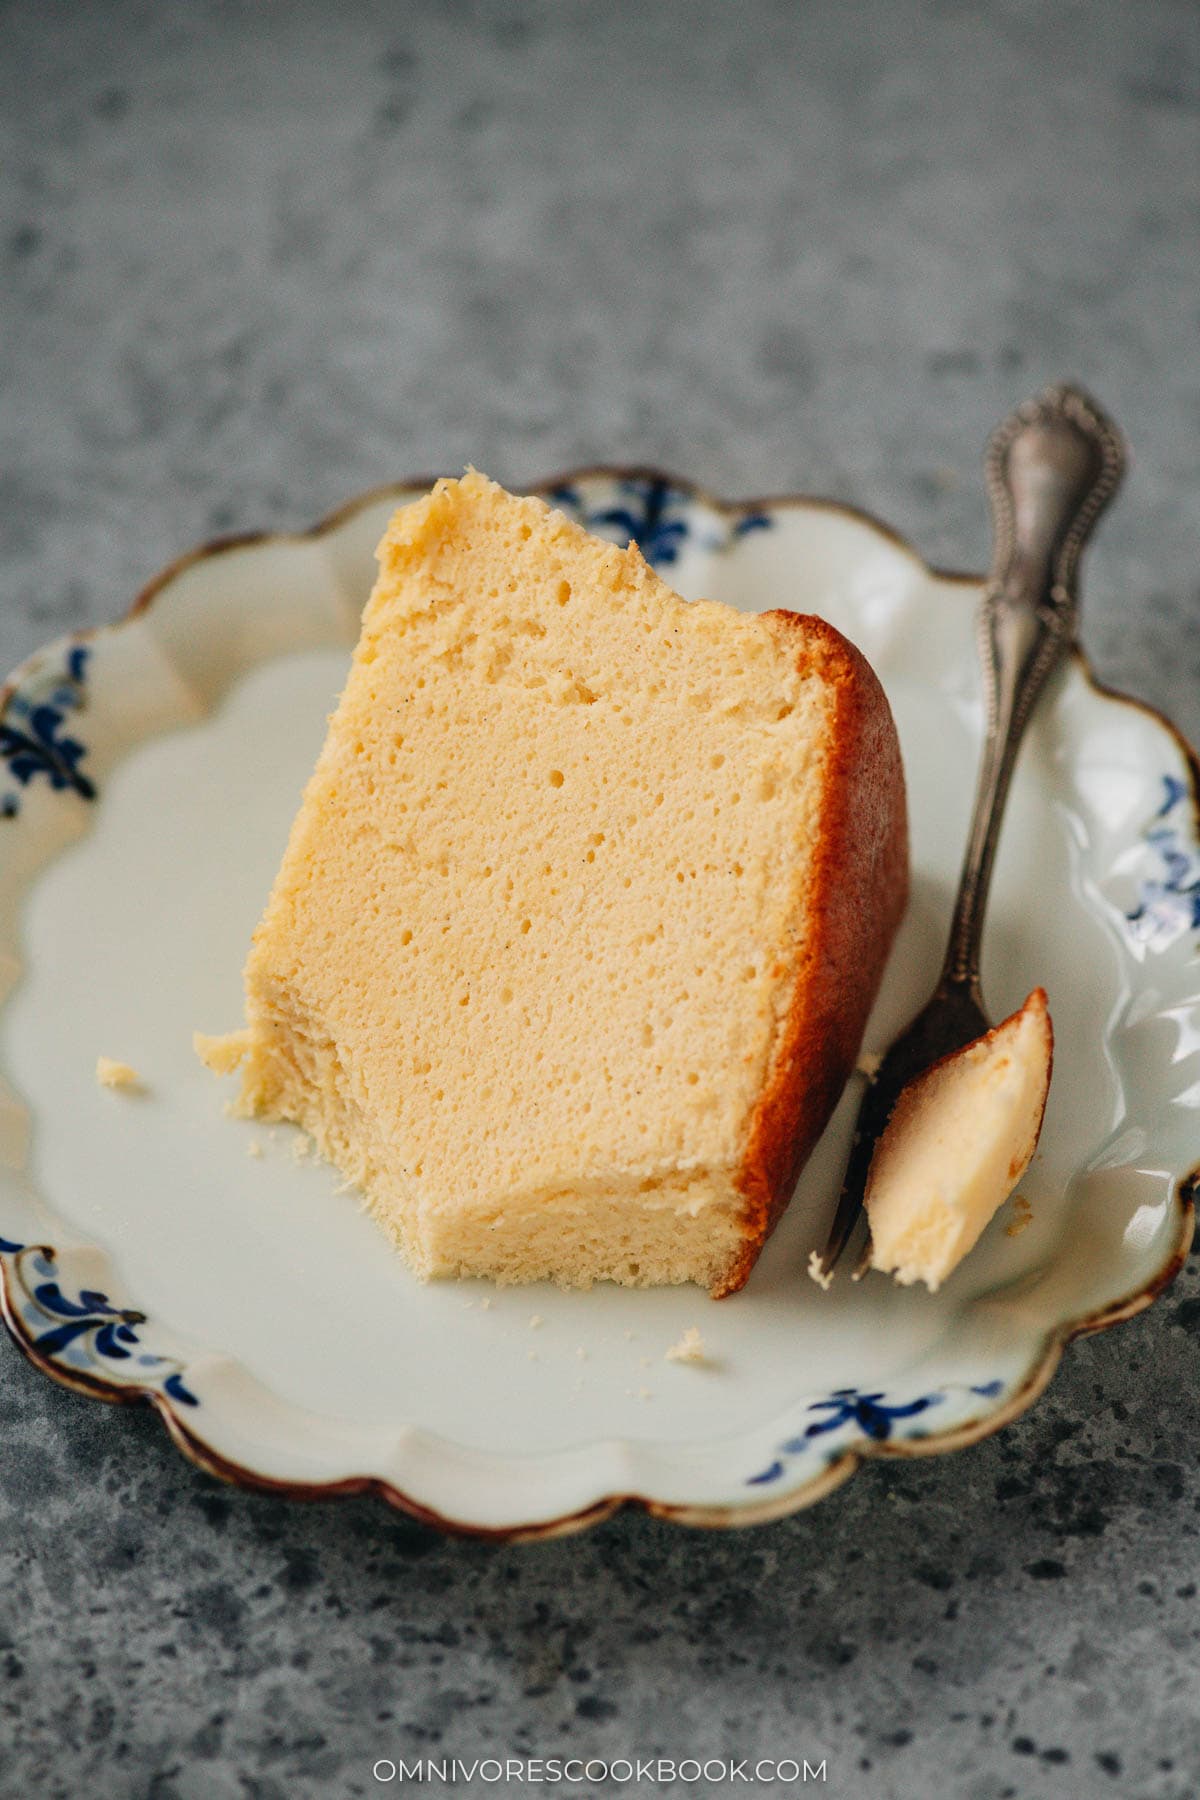
This Japanese cheesecake recipe produces a light and airy cheesecake texture that jiggles, yet tastes very moist, creamy, and cheesy. It is not super sweet and has a zesty and bright undertone. This blog post dives into the details of the process to help you make this Japanese bakery cheesecake in your own kitchen.
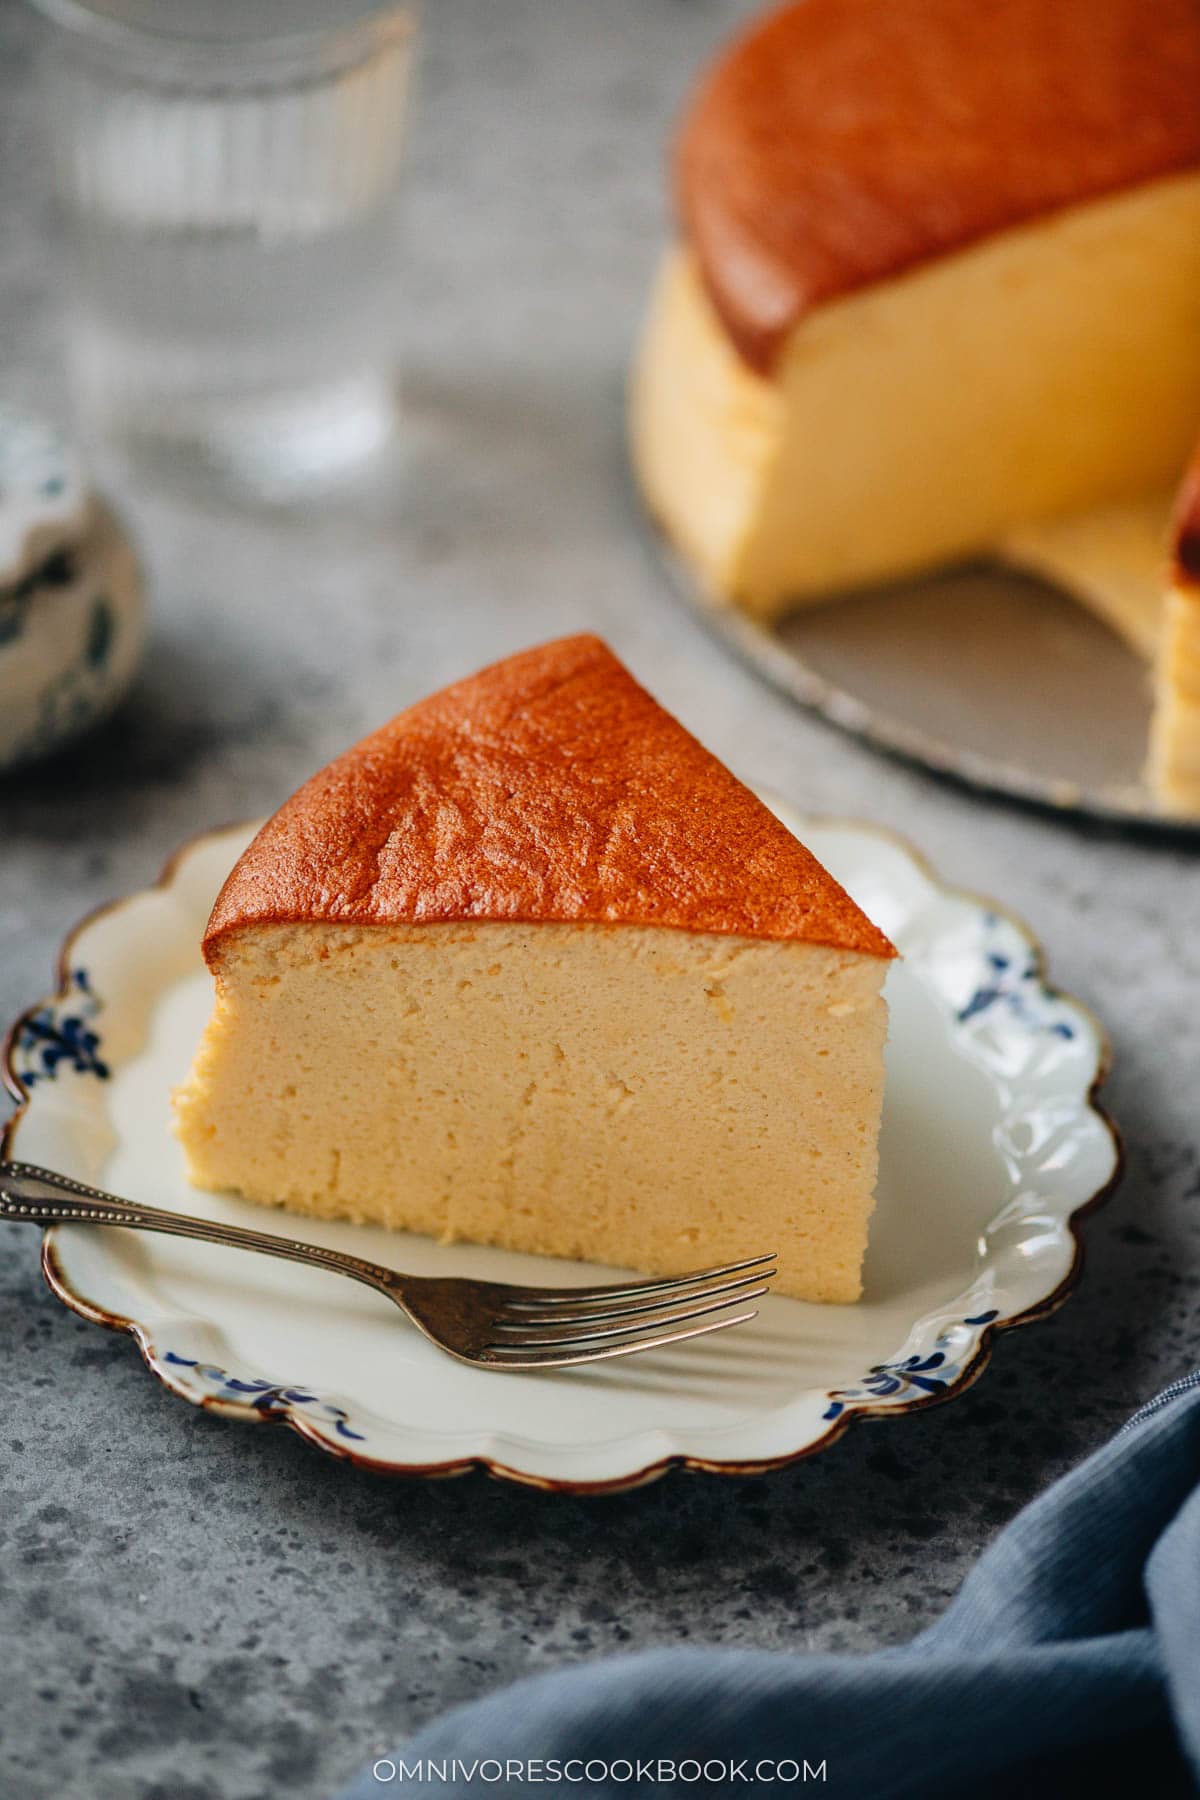
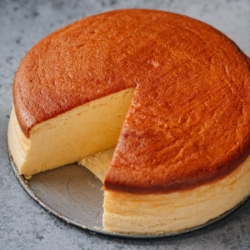
Japanese cheesecake, also known as soufflé cheesecake or cotton cheesecake, is a delightful twist on traditional cheesecakes. Unlike its denser New York-style counterpart, Japanese cheesecake is known for its airy, jiggly, and melt-in-your-mouth texture.
The secret to Japanese cheesecake’s fluffy texture lies in its preparation. It incorporates whipped egg whites, similar to a chiffon cake, which creates its signature airy structure. The batter is gently baked using a bain-marie (or water bath), ensuring even heat distribution and preventing cracks.
Why this recipe
To create the best tasting Japanese cheesecake that has an airy texture, it comes down to the ratio of the cream cheese, flour, and the whipped egg white. If you use too much cream cheese, the cake will come out denser but taste very cheesy. If you don’t use enough cream cheese, the cheesecake will end up more like a chiffon cake and not moist or cheesy enough.
This recipe uses more cream cheese than some of the other Japanese cheesecake recipes for a cheesier flavor and moist mouthfeel, yet it retains a very airy texture so the cake jiggles when shaken.
Ingredients
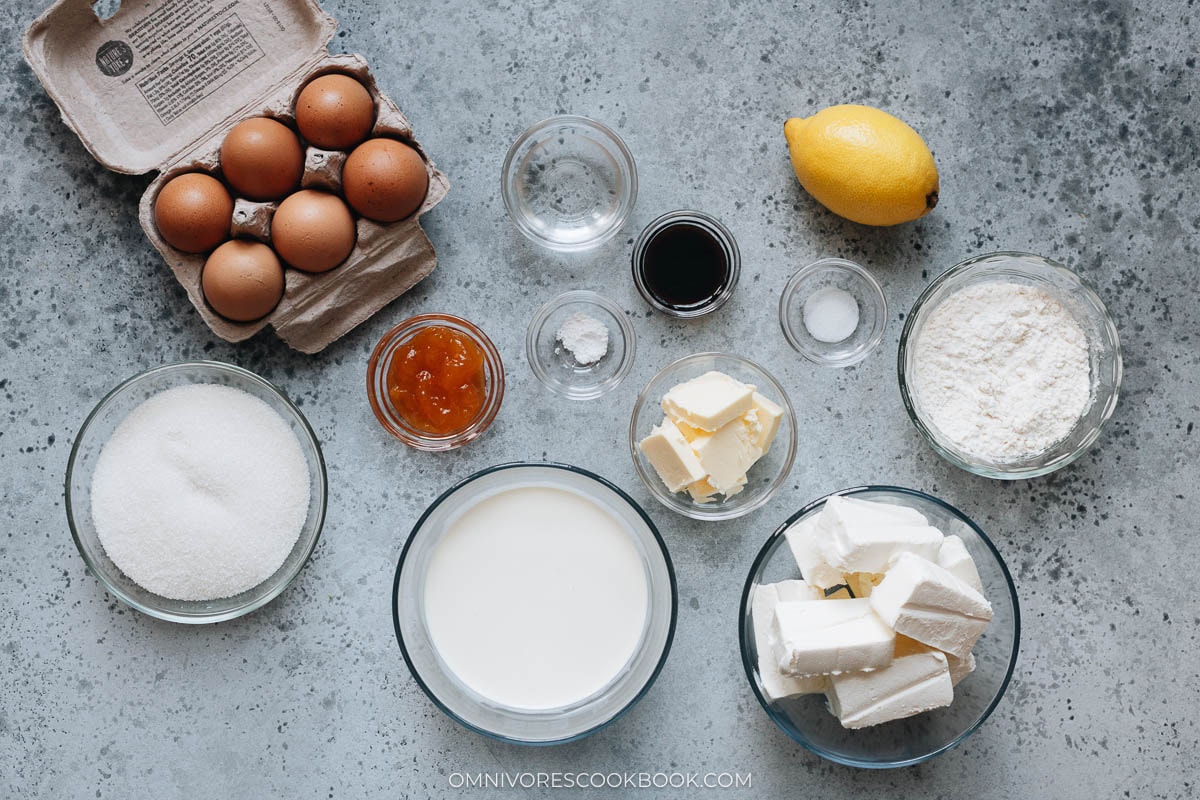
Japanese cheesecake uses very simple ingredients and you probably have most of them in your pantry.
- Cream cheese – The base of the cheesecake, providing richness and umami cheesiness.
- Eggs – Separated into yolks and whites, crucial for structure and fluffiness.
- Heavy cream
- Butter
- Cake flour – Keeps the cake tender and delicate. You can use all-purpose flour plus cornstarch to achieve the same result.
- Sugar – Sweetens the cheesecake and helps with the meringue (for the fluffy texture).
- Lemon juice & sea salt – Add a tangy taste.
- Vanilla bean paste – Enhances the flavor and adds little dots in the batter for appearance. You can use vanilla extract instead.
- Cream of tartar – To stabilize the batter for a better structure.
- Apricot jam – For glazing the cake. You can also skip this.
Tools you need
Springform pan
I recommend using a springform pan because it’s so much easier to release the cheesecake from it after baking. I used a 9” pan in my recipe. You can use an 8” springform pan as well, but you will need to bake the cheesecake a little longer.
It’s possible to use a regular cake pan as well. In this case, check out Just One Cookbook on how to properly line the pan.
Half sheet pan
A half sheet pan is used to make the water bath for baking. It’s crucial and can’t be skipped.
Digital scale
I always recommend using a digital scale for any baking recipes, because it is way more reliable and will help you create better results. For this recipe, it’s possible to get by without a digital scale, but I highly recommend using one. If you use too much flour (this happens more often when measuring the flour in cups instead of by weight), the cake would come out a little denser.
Mixer
A mixer is used in this recipe to whip the egg white and make the meringue, which creates the texture of the cake. I used a stand mixer, but you can use a handheld mixer as well.
How to make Japanese cheesecake
Prepare the springform pan
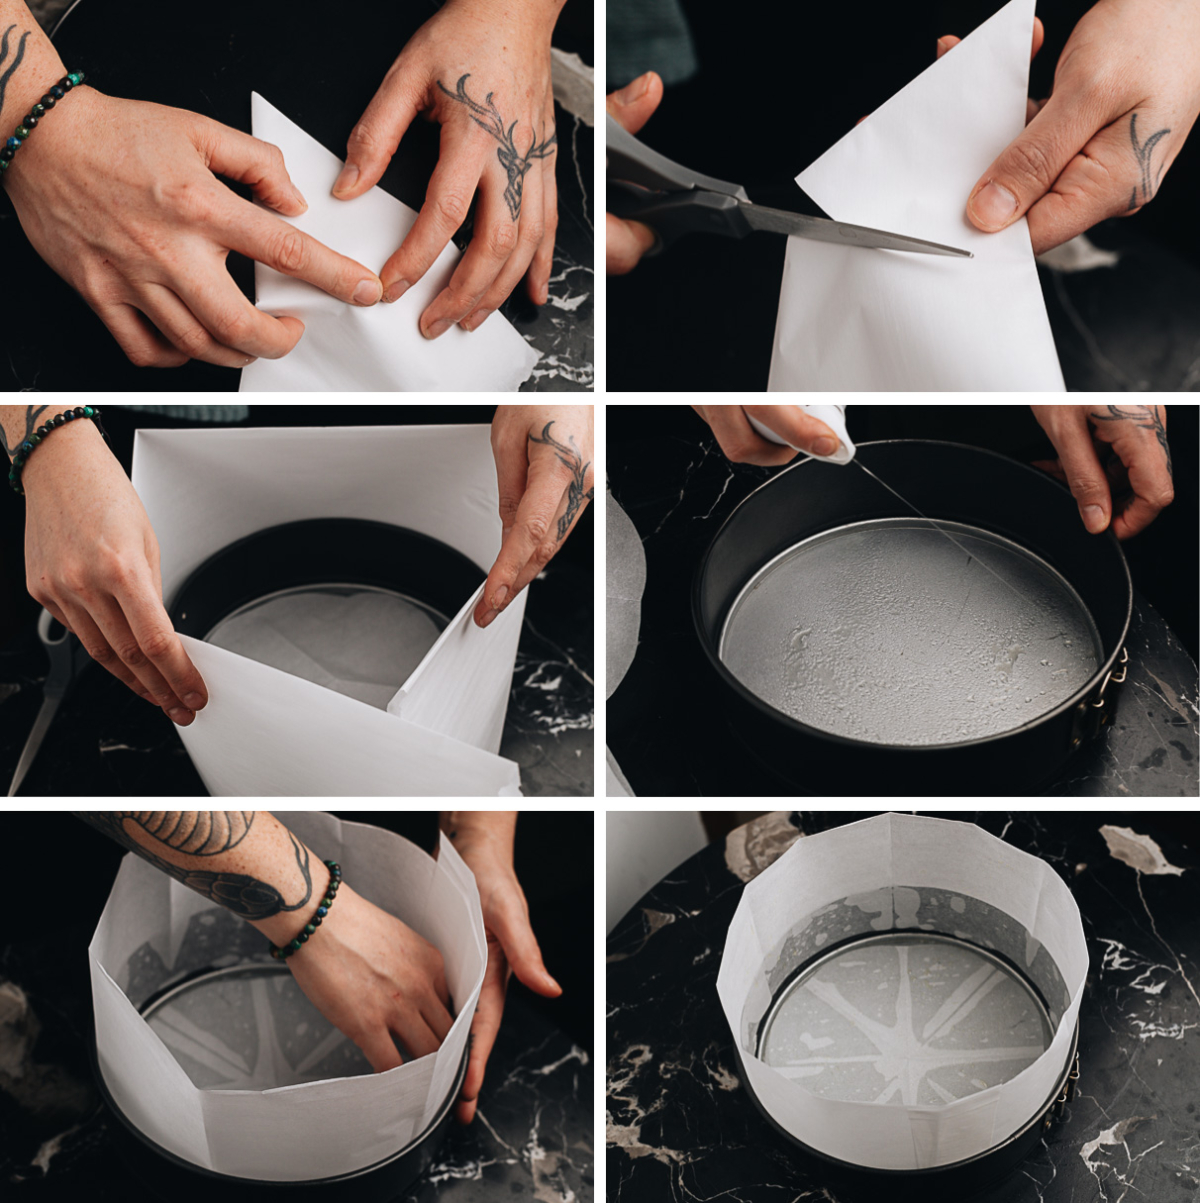
It’s important to prepare the pan properly, so it’s easy to release the cake and prevent the water from coming in during baking.
- Fold a large piece of parchment paper a few times. Hold it against the cake pan to form a crease that you can cut along to shape the paper to the bottom of the pan.
- Then cut the paper, creating a round circle to line the bottom of the pan (It doesn’t have to be perfect as long as it covers most of the area).
- Cut a second piece of parchment paper so it’s about 2 inches wider than the height of the springform pan, and long enough to wrap around the inside.
- Spray the inside of the pan with oil spray.
- Fit the bottom and the sides of the pan with the parchment paper you cut. Press the parchment against the pan so it sticks to the oil spray.
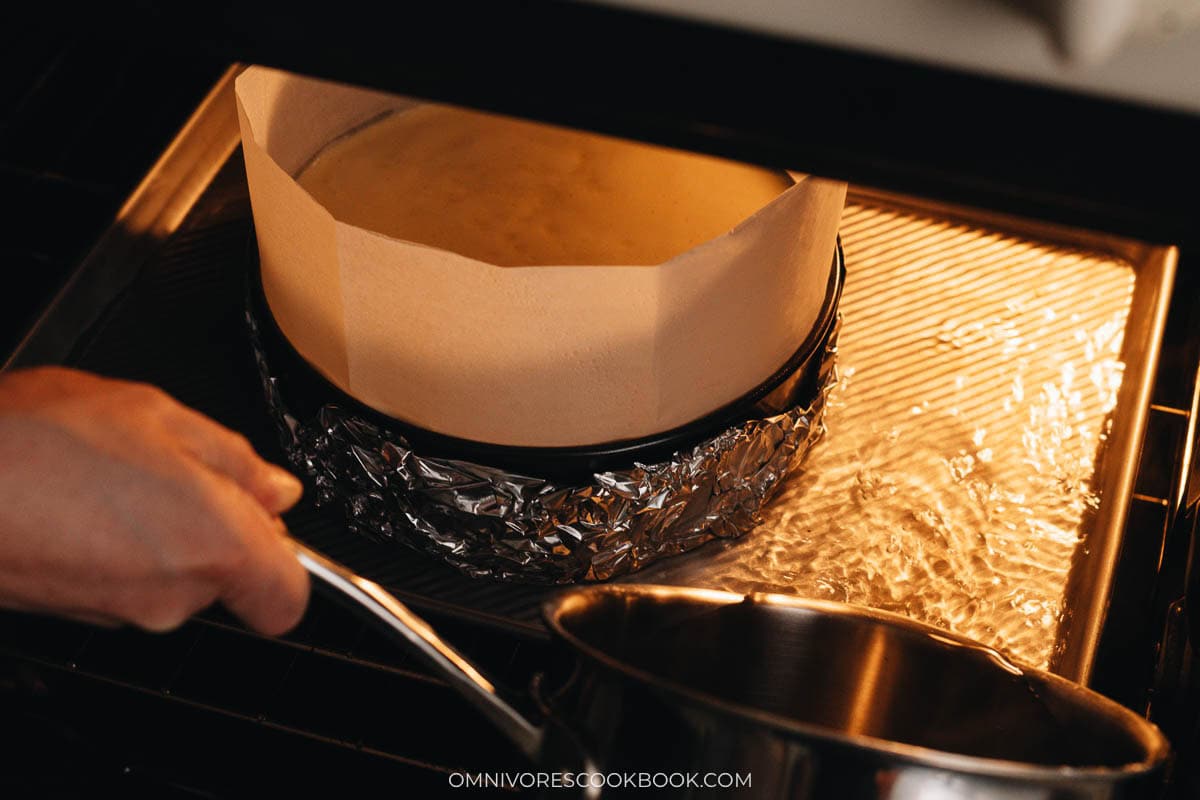
- Lightly spray the inside of the pan one more time. Wrap the outside of the pan in aluminum foil. This will prevent water from getting in while baking.
Make the cheese batter
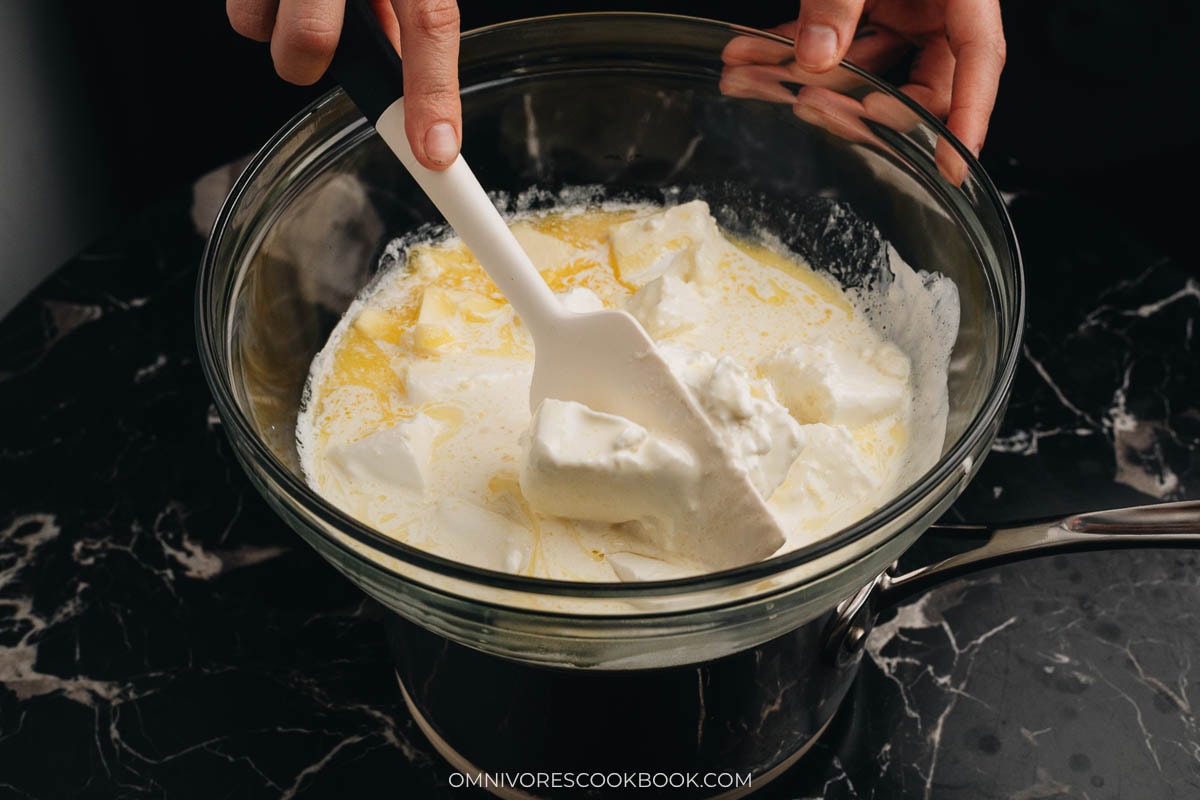
Place a large bowl over a small pot of boiling water to create a double boiler. Use it to melt and mix the cream cheese, sugar, butter and heavy cream. The double boiler helps to gently heat up the ingredients without overheating. And it’s much faster than waiting for all the ingredients to come to room temperature before mixing.
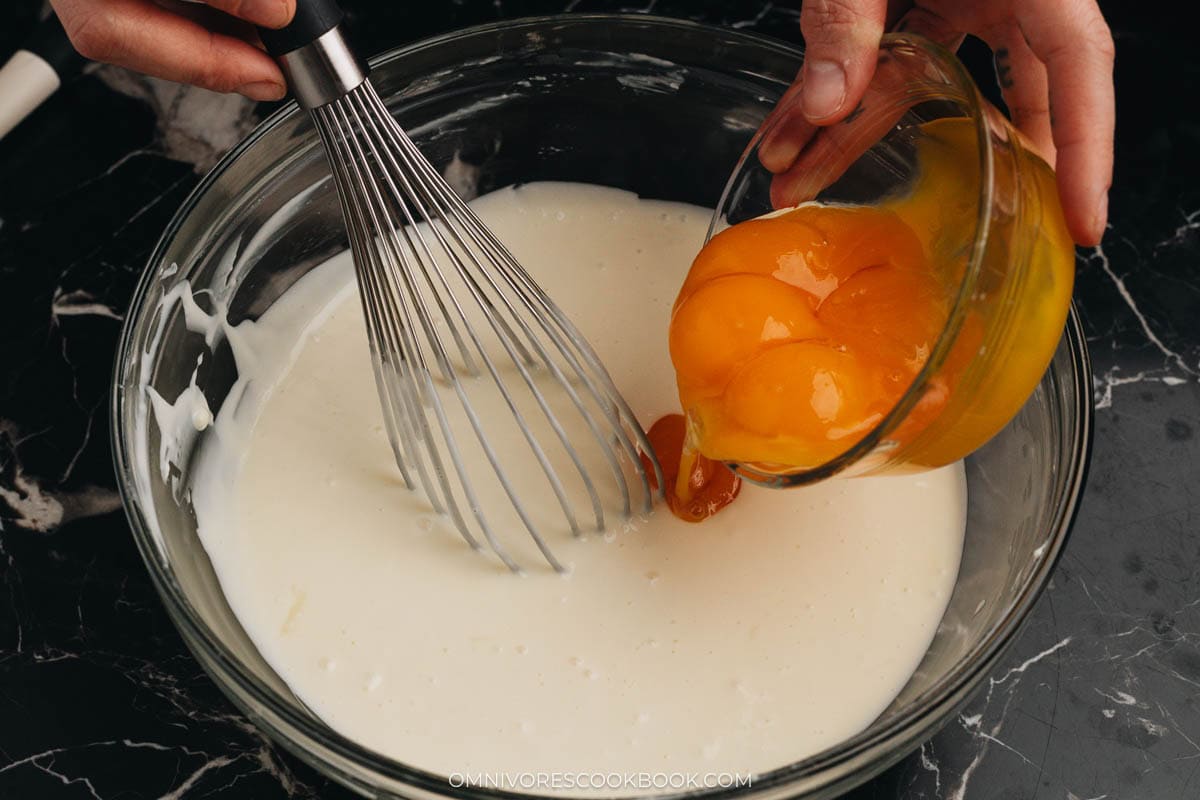
Whisk in the eggs one at a time.
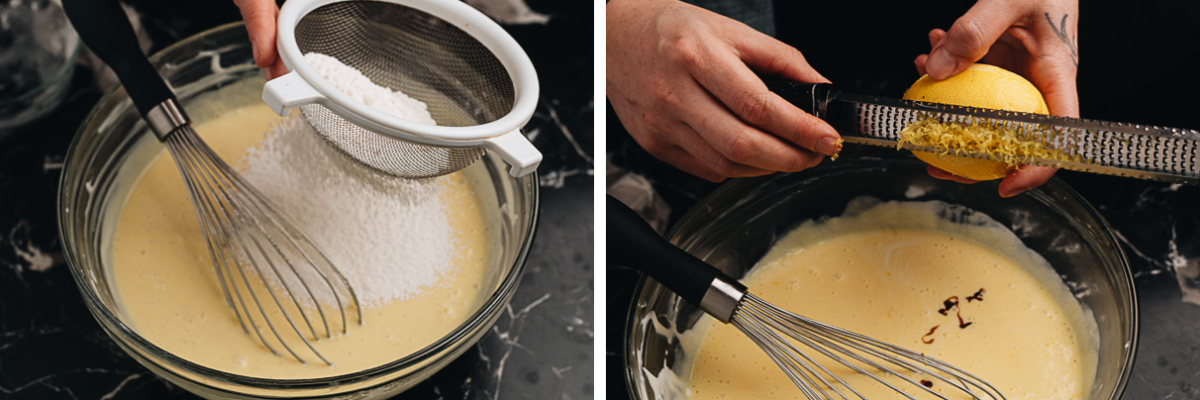
Then sift the cake flour in and mix it in. Finally, add the lemon zest, vanilla, and sea salt.
Make the meringue
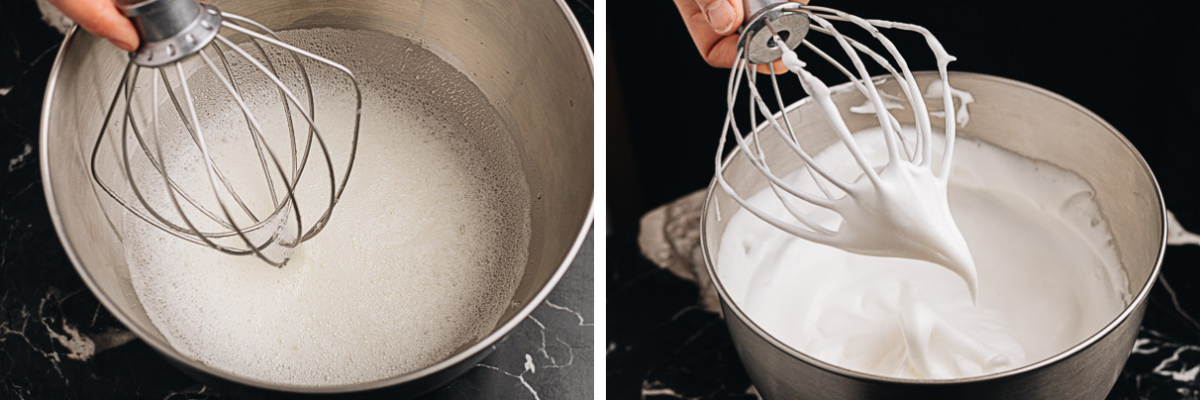
Whisk the egg whites and cream of tartar together until frothy. Then slowly stream in the sugar. Whip until medium-stiff peaks form.
Then you will need to incorporate the meringue into the batter – this is the most important step and the trickiest step in this recipe. This step creates the fluffy texture in the cake. If mixed too much, the egg whites will deflate, resulting in a denser cake. If not mixed enough, the egg whites will not be fully incorporated, resulting in an uneven texture.
To properly mix the meringue, thoroughly mix and stir in 1/3 of the meringue. Then add the rest of the meringue and fold it in very gently, until just combined.
TIP
In French baking, it is recommended to “sacrifice” some of the meringue. In doing this, we take a small amount of the meringue and stir it into the batter to lighten it. While we have lost the volume of that small portion of meringue by stirring and not folding, the remaining meringue will now be easier to fold in.
Bake the cheesecake
Finally, you will bake the cheesecake using a water bath.
To bake with a water bath, you will need to have a small pot of water boiling on the stove when you’re ready to bake. I preheat the oven at 350°F (176°C), a higher temperature than the baking temperature. Because the oven will lose some temperature when you open the door and pour in the water.
When you’re ready to bake, place the cake pan in the half sheet pan, and pour the boiling water into the half sheet pan as fast as you can, then close the oven door immediately. Bake at 320°F (160°C) for 45 to 50 minutes, until the top of the cake is golden brown and the inside is cooked through.
Glaze the cheesecake
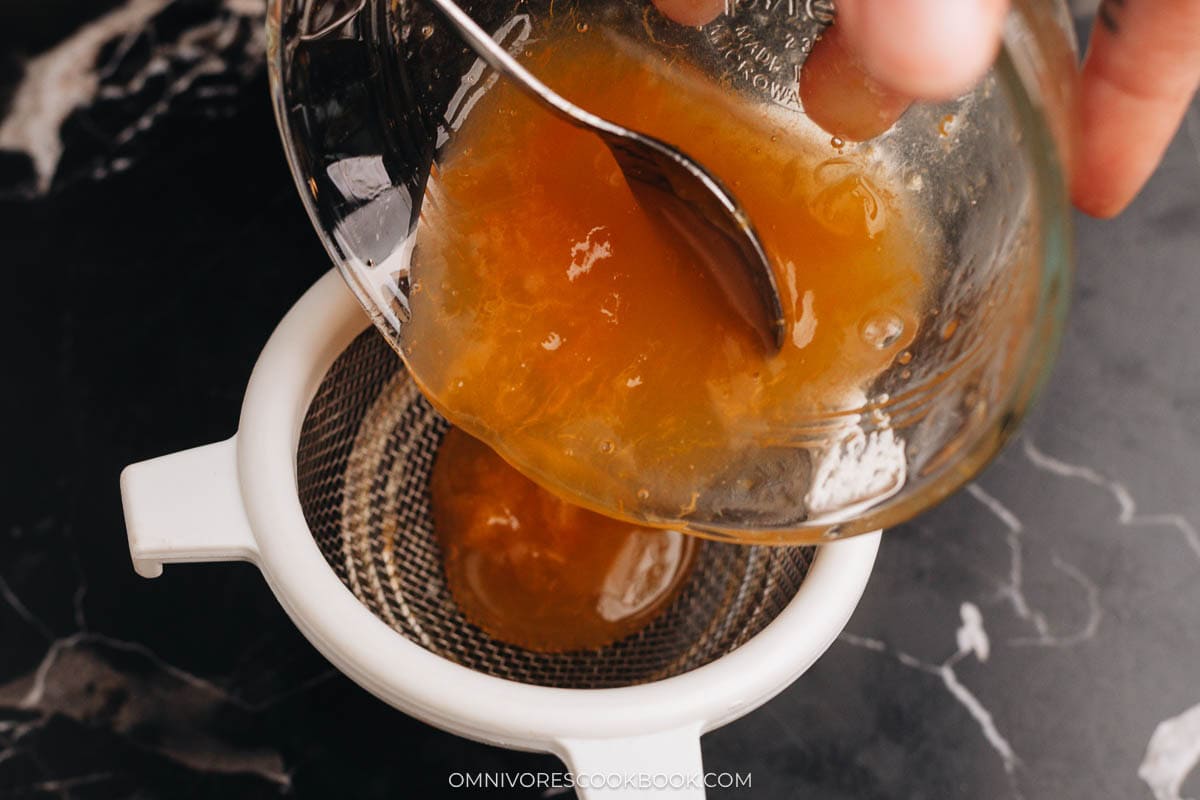
The cheesecake is ready to serve once it’s baked. But often it is glazed with a simple apricot syrup for a nice glossy appearance.
The glaze is extremely easy to make. All you need to do is mix some apricot jam with water, then strain it through a mesh strainer.
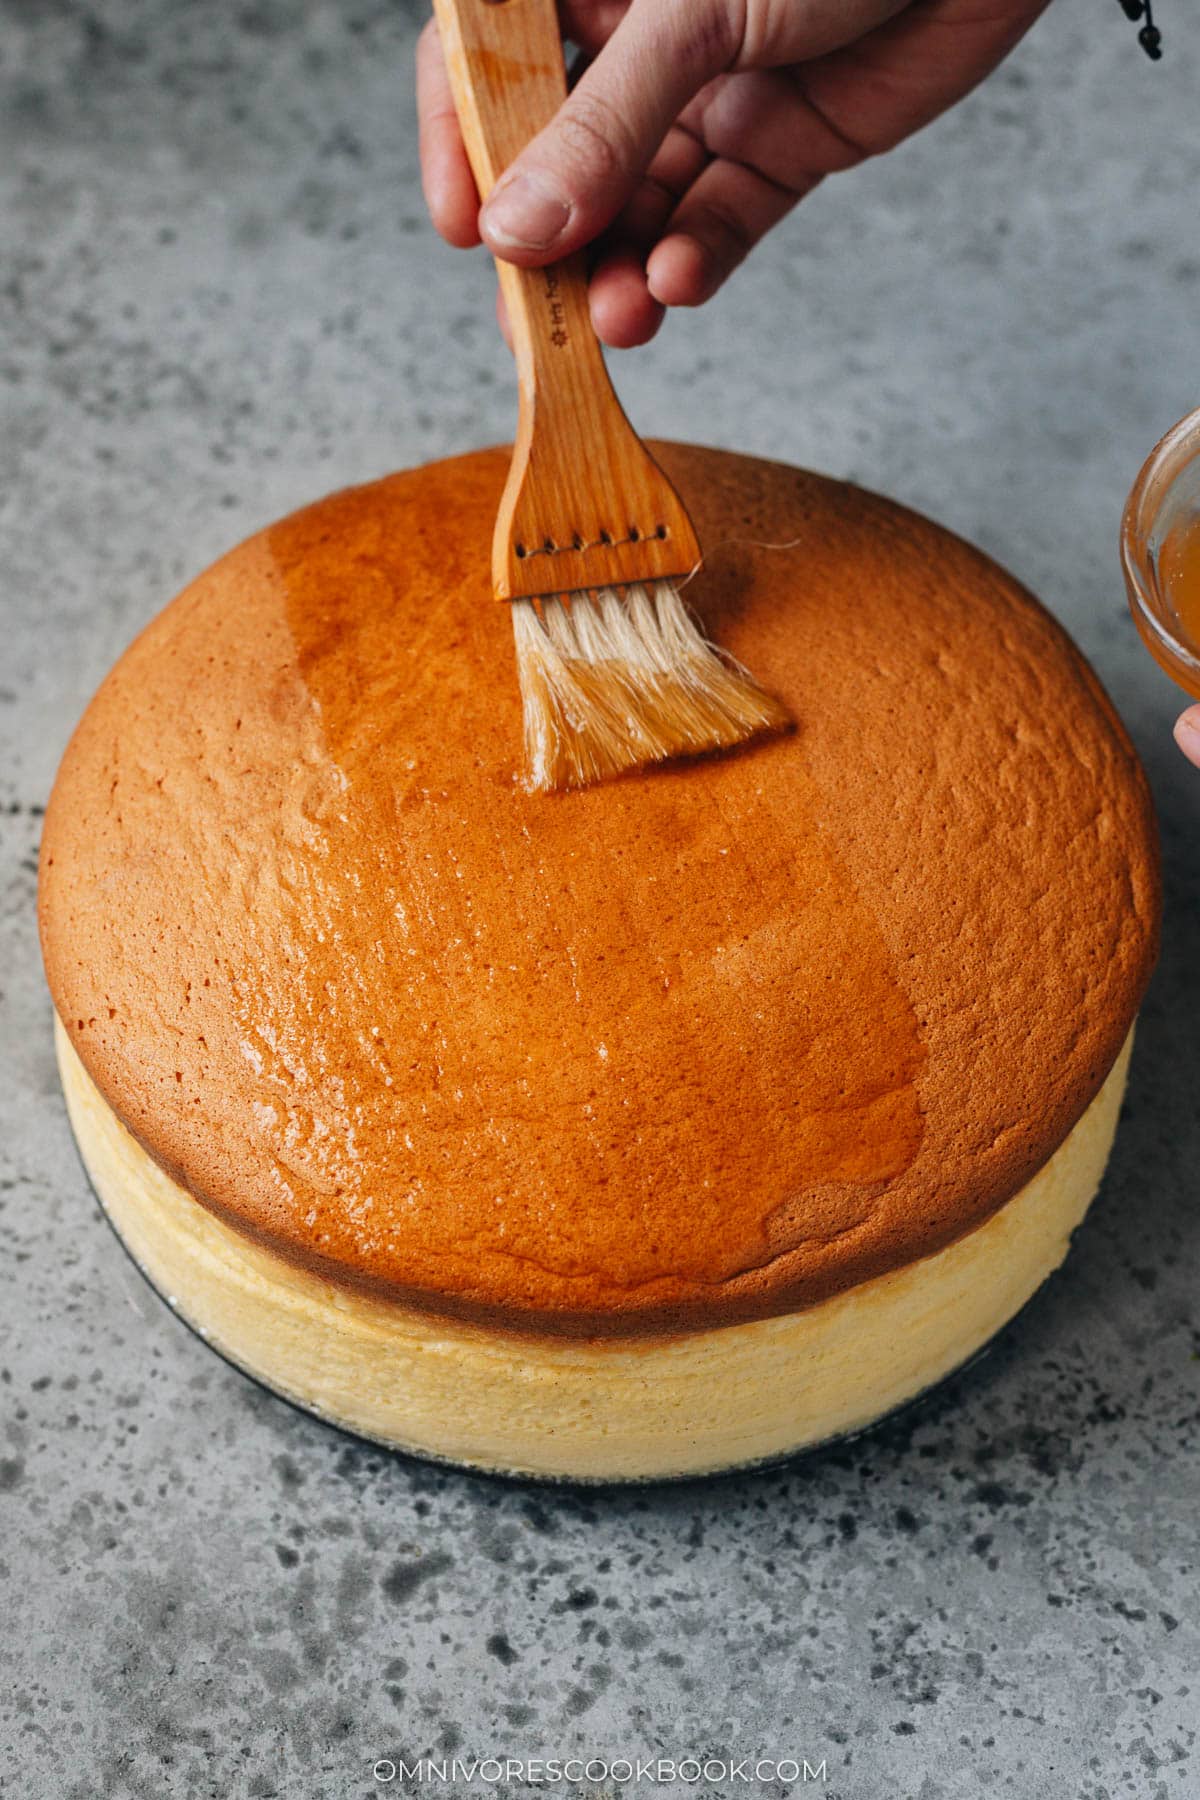
Once you release the cake from the pan, you can brush the glaze on with a pastry brush.
How to serve and store Japanese cheesecake
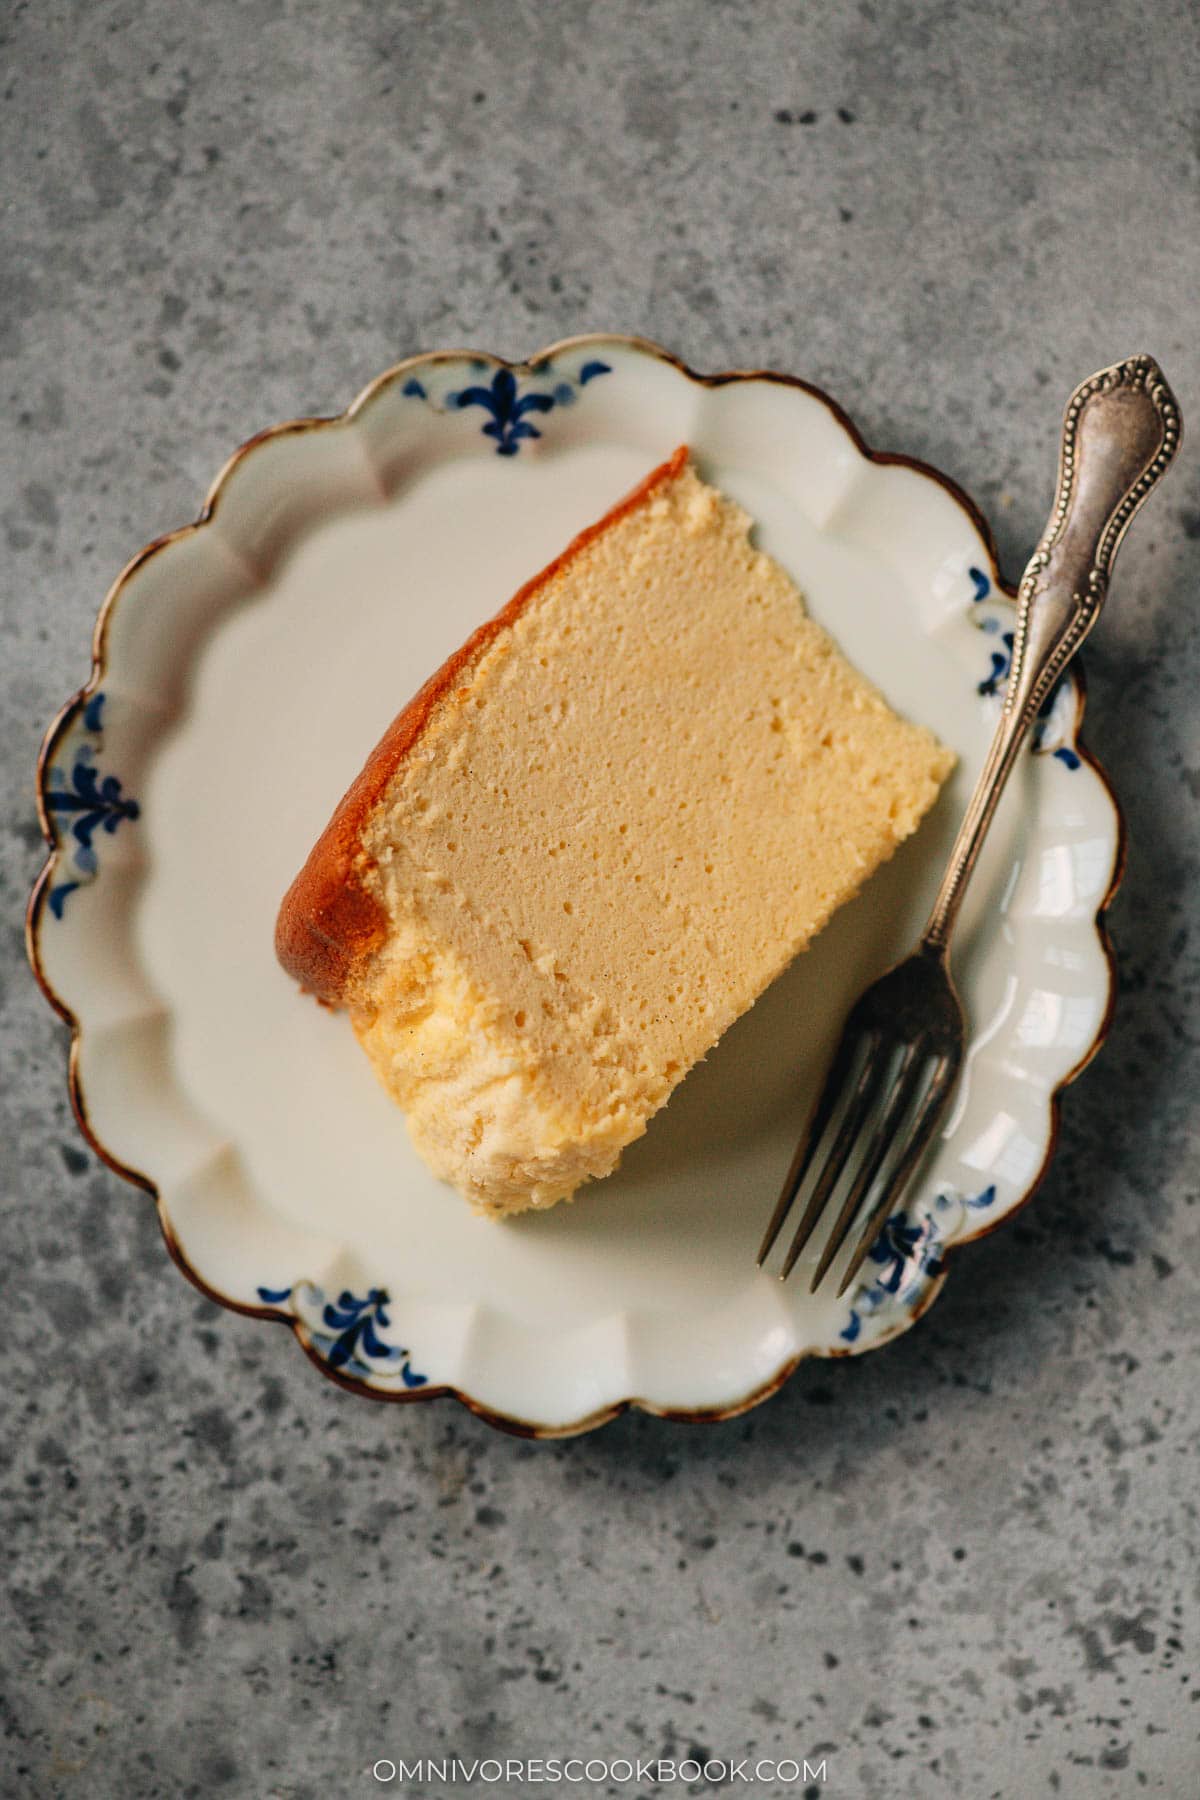
Let the cheesecake chill in the fridge for 30 minutes to 1 hour before serving. Once it’s cooled, you can slice it. If you jiggle the cake when it’s freshly baked, you can see the cake dancing on the plate and it’s super cool!
You can store the cheesecake in an airtight container in the fridge for up to 1 week. The cake texture will become a little denser and won’t jiggle anymore if you chill it overnight, but its texture will remain fluffy and moist.
Afterthoughts
I always give away my baked goods to neighbors because I always have so much and can’t finish them myself. But when I made this cheesecake, it was TOO GOOD so I kept it for myself. I stored it in the fridge for a week and shared it with my husband, a small piece a day. The cheesecake stored extremely well towards the end. If you make it at home, I’d be surprised if you have leftovers after a few days.
Japanese cheesecake is the perfect dessert for those who love light, fluffy, and creamy cakes that are not too sweet. Whether you’re making it for a special occasion or simply treating yourself, this recipe will help you achieve that signature jiggly texture while maintaining the cheesy taste of a cheesecake.
Give it a try and leave a comment below to let you know how your cake comes out!
Japanese Cheesecake (Jiggly and Extra Cheesy)
Ingredients
Cheesecake
- Oil spray
- 6 large eggs , separated
- 16 oz (454 g) cream cheese
- 4 tablespoons (60 g) unsalted butter
- 1 cup (200 g) sugar , divided in half
- 1 cup (200 g) heavy cream
- 2/3 cup (80 g) cake flour (*Footnote) (or)
- 1 lemon zest and juice
- 2 teaspoons vanilla bean paste (or vanilla extract)
- 1/8 teaspoon fine sea salt (or 1/4 teaspoon coarse kosher salt)
- 1/4 teaspoon cream of tartar
Glaze
- 2 tablespoons apricot jam
- 2 teaspoons hot water
Tools
- Digital scale
- 9 ” springform pan (*Footnote)
- Half sheet pan
- Mixer stand or handheld
Instructions
- Prepare the pan: Prepare a 9” springform pan. Cut a circle of parchment to fit the bottom of the cake pan. Cut a second piece of parchment paper so it’s about 2 inches wider than the height of the springform pan, and long enough to wrap around the inside. Spray inside of the pan with oil spray, making sure to coat the bottom and sides. Then fit the bottom and the sides of the pan with the parchment paper you cut. Press the parchment against the pan so it sticks to the oil spray. Smooth out any part not laying flat. Lightly spray the inside of the pan one more time. Wrap the outside of the pan in aluminum foil. This will prevent water from getting in while baking.
- Preheat the oven to 350°F (176°C), with the rack placed at the bottom third of the oven. Have a half sheet pan set aside and ready to use, as well as about 6 cups of hot or boiling water. Set aside.
- Create a double boiler: Fill a small saucepan with 1” (5 cm) water. Bring to a simmer. Place a large metal or heat resistant glass bowl (at least 2.5 qt) over the water, resting it directly on the rim of the saucepan. This will help gently and evenly warm the ingredients, without exposing them to direct heat.
- To make the cheesecake batter: To the bowl over the double boiler, add cream cheese, 1/2 cup of sugar, butter, and heavy cream. Break up cream cheese with a rubber spatula, and then use a whisk to stir ingredients until butter is melted and cream cheese is smooth, whisking more vigorously as cream cheese softens. When mixture is homogeneous and no visible pieces of cream cheese remain, remove from heat.
- One at a time, whisk in egg yolks, combining thoroughly between additions. Sift cake flour into batter, stir well, and pass the batter through a fine mesh strainer to make it smooth.
- Add in lemon juice and zest, salt, and vanilla paste. Stir to mix well.
- To make the Meringue: In the bowl of your stand mixer fitted with whisk attachment , add egg whites and cream of tartar (*Footnote 3). Mix on medium-high speed until frothy. Gradually stream in the remaining 1/2 cup of sugar, and raise speed to medium-high. Whisk until medium-stiff peaks are reached, and the mixture looks light and glossy.
- Scoop about 1/3 of egg white mixture into cheesecake batter, and stir together thoroughly with whisk (*Footnote 4). Add in remaining egg whites and fold VERY GENTLY from top to bottom while rotating the bowl to help evenly distribute. Continue until just combined, but it is okay if a few streaks of meringue remain (*Footnote 5).
- Pour batter into the lined springform pan and tap a few times on the counter, to remove any large air bubbles.
- To bake the cheesecake: Place springform pan onto the half sheet pan and place in the oven. Immediately pour hot water into the sheet pan, until the pan is very full. Close the oven, and reduce temperature to 320°F (160°C). (*Footnote 6)
- Bake for 45 to 50 minutes, or until the top of the cake is evenly golden brown, and a skewer inserted in the center comes out clean. If the cake is very slow to rise and the top has not turned darker after 45 minutes, turn the oven temperature up to 350°F (176°C). Continue to bake until the top has turned golden brown. (*Footnote 7)
- When the cheesecake is done baking, turn off the oven and leave the oven door slightly ajar (you can use a folded dishcloth to prop the door open). Rest the cheesecake in the oven for 15 minutes, to avoid a dramatic change in temperature, which can cause soufflé to collapse.
- Make the glaze: While the cake is resting, mix apricot jam with hot water in a small bowl. Then strain through a small mesh strainer to remove lumps. Use glaze warm, microwaving for 10 to 15 seconds before using if necessary.
- To glaze the cake: Remove cheesecake from the oven once rested. Brush the glaze with a pastry brush onto the warm cake.
- Rest the cake and serve: Rest the cake in the fridge for 1 hour before serving. (*Footnote 8)
Notes
- You can also use 70g all-purpose flour and 10g cornstarch to replace the cake flour.
- An 8” springform pan can also be used, but will require an additional 5 to 10 minutes of bake time.
- You can also use a hand mixer for this step.
- Mix as thoroughly as you can, even if it sacrifices a bit of the beaten egg white.
- This step is very important. You want the batter to be mixed as evenly as possible without deflating the egg white. Both under mixed and over mixed batter will create undesired results.
- Add the water and close the oven as fast as you can, as the oven temperature will drop too much if you leave the door open for too long.
- The cheesecake might rise slower than expected if your oven temperature runs low, or the oven temperature drops too much when you open it to add the hot water. The cheesecake will still turn out well with a prolonged baking time.
- How to store the cheesecake: store the cheesecake in an airtight container in the fridge for up to 1 week. The cheesecake will become a little denser once fully cooled in the fridge, after a few hours. If you have extra time, let the cheesecake return to room temperature before serving.